2024年Docker开启并配置远程安全访问_docker开启远程访问,从青铜到王者的路线
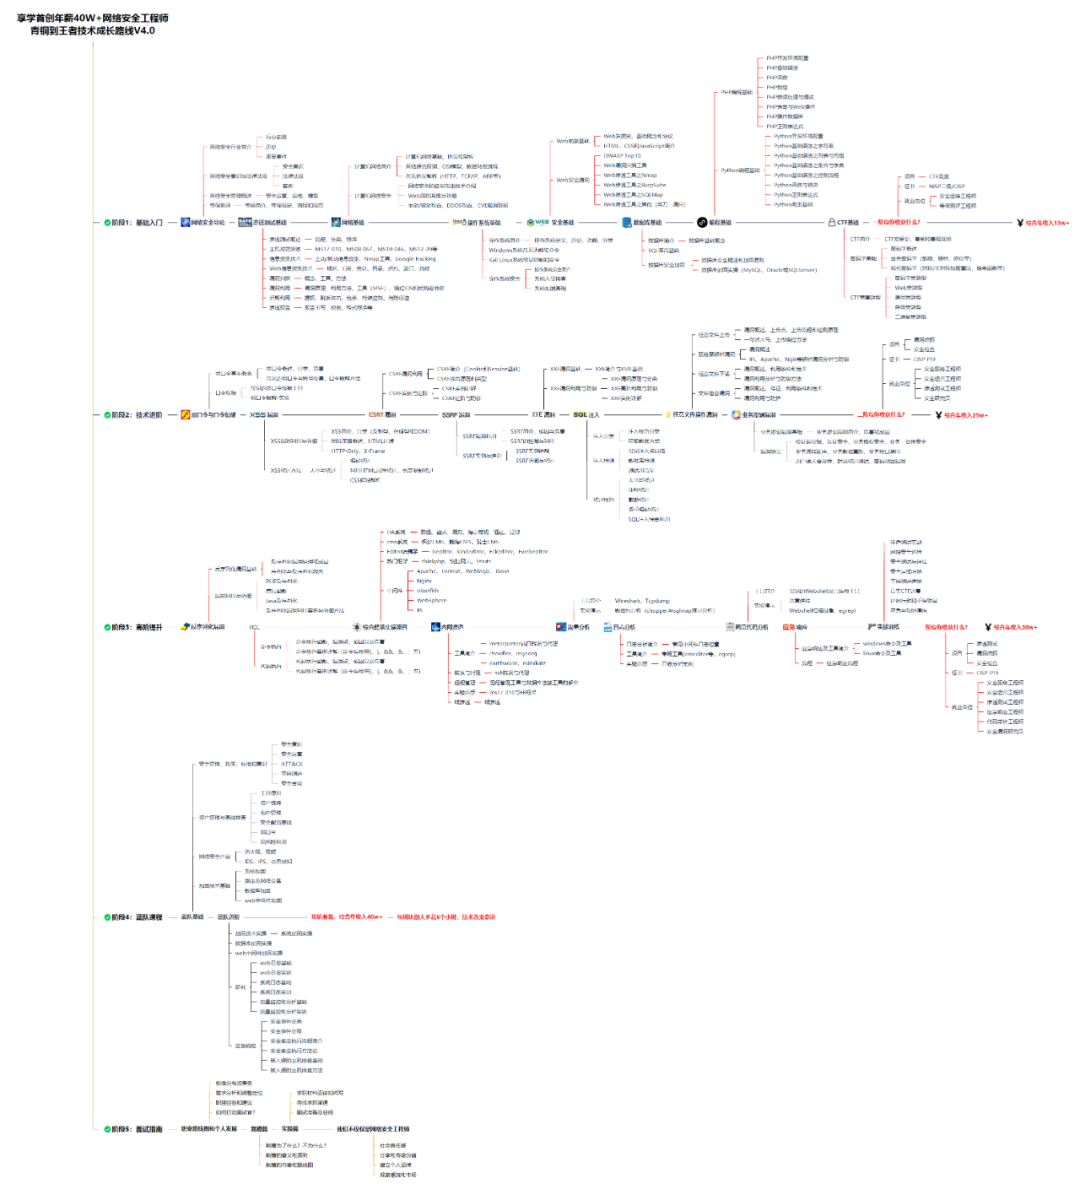
学习路线:
这个方向初期比较容易入门一些,掌握一些基本技术,拿起各种现成的工具就可以开黑了。不过,要想从脚本小子变成黑客大神,这个方向越往后,需要学习和掌握的东西就会越来越多以下是网络渗透需要学习的内容:

网上学习资料一大堆,但如果学到的知识不成体系,遇到问题时只是浅尝辄止,不再深入研究,那么很难做到真正的技术提升。
需要这份系统化资料的朋友,可以点击这里获取
一个人可以走的很快,但一群人才能走的更远!不论你是正从事IT行业的老鸟或是对IT行业感兴趣的新人,都欢迎加入我们的的圈子(技术交流、学习资源、职场吐槽、大厂内推、面试辅导),让我们一起学习成长!
[root@VM-12-4-centos server]# systemctl daemon-reload
[root@VM-12-4-centos server]# systemctl restart docker
[root@VM-12-4-centos server]# systemctl status docker
● docker.service - Docker Application Container Engine
   Loaded: loaded (/usr/lib/systemd/system/docker.service; enabled; vendor preset: disabled)
   Active: active (running) since Mon 2023-04-10 09:00:30 CST; 15s ago
     Docs: https://docs.docker.com
 Main PID: 6425 (dockerd)
    Tasks: 51
   Memory: 56.1M
   CGroup: /system.slice/docker.service
           ├─6425 /usr/bin/dockerd -H fd:// --containerd=/run/containerd/containerd.sock -H tcp://0.0.0.0:2375
           ├─6741 /usr/bin/docker-proxy -proto tcp -host-ip 0.0.0.0 -host-port 3303 -container-ip 172.18.1.30 -container-port 3306
           ├─6747 /usr/bin/docker-proxy -proto tcp -host-ip :: -host-port 3303 -container-ip 172.18.1.30 -container-port 3306
           ├─6855 /usr/bin/docker-proxy -proto tcp -host-ip 0.0.0.0 -host-port 9000 -container-ip 172.17.0.2 -container-port 9000
           ├─6861 /usr/bin/docker-proxy -proto tcp -host-ip :: -host-port 9000 -container-ip 172.17.0.2 -container-port 9000
           ├─6967 /usr/bin/docker-proxy -proto tcp -host-ip 0.0.0.0 -host-port 8848 -container-ip 172.18.1.48 -container-port 8848
           └─6983 /usr/bin/docker-proxy -proto tcp -host-ip :: -host-port 8848 -container-ip 172.18.1.48 -container-port 8848
安全访问配置流程
1,在指定文件夹新建一个存放CA密钥的文件夹,笔者这里再docker文件下存放。
[root@VM-12-4-centos server]# cd docker
[root@VM-12-4-centos docker]# ll
total 0
[root@VM-12-4-centos docker]# mkdir ca_key
[root@VM-12-4-centos docker]# ll
total 4
drwxr-xr-x 2 root root 4096 Apr 10 10:27 ca_key
[root@VM-12-4-centos docker]# cd ca_key
2,在Docker主机上通过命令生成CA私钥和公钥
执行命令:openssl genrsa -aes256 -out ca-key.pem 4096
[root@VM-12-4-centos ca_key]# openssl genrsa -aes256 -out ca-key.pem 4096
Generating RSA private key, 4096 bit long modulus
.....................................................................................................................................................................................................................................................++
................................................................................................++
e is 65537 (0x10001)
Enter pass phrase for ca-key.pem:
Verifying - Enter pass phrase for ca-key.pem:
Verify failure
User interface error
139698349328272:error:0906906F:PEM routines:PEM_ASN1_write_bio:read key:pem_lib.c:385:
[root@VM-12-4-centos ca_key]# openssl genrsa -aes256 -out ca-key.pem 4096
Generating RSA private key, 4096 bit long modulus
............++
.............................................................................................................................................................................................................................++
e is 65537 (0x10001)
Enter pass phrase for ca-key.pem:
Verifying - Enter pass phrase for ca-key.pem:
这里需要输入密码并确认,只要两次输入一致就行,否则会像重置密码数据两次新密码一样报验证错误。需要注意的是:Linux上并不会显示输入的密码信息,因此要格外注意别输错了。
如果成功,该文件下就有了pem证书文件生成:
[root@VM-12-4-centos ca_key]# ll
total 4
-rw-r--r-- 1 root root 3326 Apr 10 10:29 ca-key.pem
3,补全CA信息
执行命令:openssl req -new -x509 -days 365 -key ca-key.pem -sha256 -out ca.pem根据要求依次输入访问密码、国家、省、市、组织名称、单位名称、随便一个名字、邮箱等,需要这些信息作为证书申请。
[root@VM-12-4-centos ca_key]# openssl req -new -x509 -days 365 -key ca-key.pem -sha256 -out ca.pem
Enter pass phrase for ca-key.pem:
You are about to be asked to enter information that will be incorporated
into your certificate request.
What you are about to enter is what is called a Distinguished Name or a DN.
There are quite a few fields but you can leave some blank
For some fields there will be a default value,
If you enter '.', the field will be left blank.
-----
Country Name (2 letter code) [XX]:CN
State or Province Name (full name) []:HUBei
Locality Name (eg, city) [Default City]:WuHan
Organization Name (eg, company) [Default Company Ltd]:ZC
Organizational Unit Name (eg, section) []:QA
Common Name (eg, your name or your server's hostname) []:192.168.98.128(ip地址)
Email Address []:[email protected]
现在我们有了CA,就可以创建服务器密钥和证书签名请求(CSR)。
Tips:确保“Common Name”与用于连接Docker的主机名匹配,否则后续远程连接会失败!
4,生成service-key.pem
执行命令:openssl genrsa -out server-key.pem 4096
[root@VM-12-4-centos ca_key]# openssl genrsa -out server-key.pem 4096
Generating RSA private key, 4096 bit long modulus
...........................................................................................++
....++
e is 65537 (0x10001)
[root@VM-12-4-centos ca_key]# ll
total 12
-rw-r--r-- 1 root root 3326 Apr 10 10:29 ca-key.pem
-rw-r--r-- 1 root root 2082 Apr 10 10:56 ca.pem
-rw-r--r-- 1 root root 3247 Apr 10 11:45 server-key.pem
5,用CA签署公钥
由于TLS连接可以通过IP地址和DNS名称进行,因此在创建证书时需要指定IP地址或者域名。填写的IP或者域名,都是将来对外开放的地址,也就是用于连接的地址。例如,要允许使用127.0.0.1进行连接:
执行命令:openssl req -subj “/CN=$HOST” -sha256 -new -key server-key.pem -out server.csr
[root@VM-12-4-centos ca_key]# openssl req -subj "/CN=127.0.0.1" -sha256 -new -key server-key.pem -out server.csr
6,匹配白名单
设置允许哪些IP可以远程连接docker。
- 允许指定
IP可以远程连接docker。
echo subjectAltName = DNS:$HOST,IP:XX.XX.XX.XX,IP:XX.XX.XX.XX >> extfile.cnf
$HOST是你的IP或者域名,使用时将$HOST替换为自己的IP或者域名。
如:
# 127.0.0.1 服务器上的 docker,只允许ip地址为225.225.225.0的客户连接
echo subjectAltName = DNS:127.0.0.1,IP:225.225.225.0 >> extfile.cnf
# ideaopen.cn 服务器上的 docker,只允许ip地址为225.225.225.0的客户连接
echo subjectAltName = DNS:ideaopen.cn,IP:225.225.225.0 >> extfile.cnf
- 允许所有
IP连接
设置IP为0.0.0.0即可。
如:
echo subjectAltName = DNS:127.0.0.1,IP:0.0.0.0 >> extfile.cnf
注:只允许永久证书的才可以连接成功
然后需要将Docker守护进程密钥的扩展使用属性设置为仅用于服务器身份验证:
echo extendedKeyUsage = serverAuth >> extfile.cnf
7,生成已签名的证书(signed certificate)
这里执行命令后需要输入之前设置的密码
[root@VM-12-4-centos ca_key]# openssl x509 -req -days 365 -sha256 -in server.csr -CA ca.pem -CAkey ca-key.pem \
>   -CAcreateserial -out server-cert.pem -extfile extfile.cnf
Signature ok
subject=/CN=127.0.0.1
Getting CA Private Key
Enter pass phrase for ca-key.pem:
授权插件提供了更细粒度的控制,以补充来自双向TLS的身份验证。除了上述描述的其他信息外,在Docker守护进程上运行的授权插件还接收用于连接Docker客户端的证书信息。
如果第二次申请颁发证书,可能会出现ca.srl: No such file or directory的问题。
此时我们echo “01” > ca.srl 即可,这个文件影响到ca颁发的证书的序号,而证书序号应该是唯一的,所以这点需要控制好。
8,生成客户端key
对于客户端身份验证,我们还需要创建客户端密钥和证书签名请求:
注意:为了简化接下来的几个步骤,我们可以在Docker守护进程的主机上执行此步骤。
[root@VM-12-4-centos ca_key]# openssl genrsa -out key.pem 4096
Generating RSA private key, 4096 bit long modulus
......................................++
.................................++
e is 65537 (0x10001)
[root@VM-12-4-centos ca_key]# openssl req -subj '/CN=client' -new -key key.pem -out client.csr
此外为了使密钥适合客户端身份验证,还需要创建一个新的扩展配置文件:
[root@VM-12-4-centos ca_key]# echo extendedKeyUsage = clientAuth >> extfile.cnf
[root@VM-12-4-centos ca_key]# echo extendedKeyUsage = clientAuth > extfile-client.cnf
然后就可以生成已签名的客户端key了。
[root@VM-12-4-centos ca_key]# openssl x509 -req -days 365 -sha256 -in client.csr -CA ca.pem -CAkey ca-key.pem \
>   -CAcreateserial -out cert.pem -extfile extfile-client.cnf
Signature ok
subject=/CN=client
Getting CA Private Key
Enter pass phrase for ca-key.pem:
此时可以看到我们当初创建的ca_key文件里已经有很多文件了。
[root@VM-12-4-centos ca_key]# ll
total 44
-rw-r--r-- 1 root root 3326 Apr 10 10:29 ca-key.pem
-rw-r--r-- 1 root root 2082 Apr 10 10:56 ca.pem
-rw-r--r-- 1 root root   17 Apr 10 13:45 ca.srl
-rw-r--r-- 1 root root 1854 Apr 10 13:45 cert.pem
-rw-r--r-- 1 root root 1582 Apr 10 13:40 client.csr
-rw-r--r-- 1 root root   30 Apr 10 13:43 extfile-client.cnf
-rw-r--r-- 1 root root  102 Apr 10 13:42 extfile.cnf
-rw-r--r-- 1 root root 3243 Apr 10 13:40 key.pem
-rw-r--r-- 1 root root 1895 Apr 10 13:36 server-cert.pem
-rw-r--r-- 1 root root 1586 Apr 10 13:26 server.csr
-rw-r--r-- 1 root root 3247 Apr 10 11:45 server-key.pem
但是有很多多余的配置文件,生成cert.pem,server-cert.pem后,一些签名请求和扩展配置文件可以安全删除了。
#删除多余文件
[root@VM-12-4-centos ca_key]# rm -v client.csr server.csr extfile.cnf extfile-client.cnf
rm: remove regular file ‘client.csr’? y
removed ‘client.csr’
rm: remove regular file ‘server.csr’? y
removed ‘server.csr’
### 给大家的福利
**零基础入门**
对于从来没有接触过网络安全的同学,我们帮你准备了详细的学习成长路线图。可以说是最科学最系统的学习路线,大家跟着这个大的方向学习准没问题。

同时每个成长路线对应的板块都有配套的视频提供:

因篇幅有限,仅展示部分资料
**网上学习资料一大堆,但如果学到的知识不成体系,遇到问题时只是浅尝辄止,不再深入研究,那么很难做到真正的技术提升。**
**[需要这份系统化资料的朋友,可以点击这里获取](https://bbs.csdn.net/forums/4f45ff00ff254613a03fab5e56a57acb)**
**一个人可以走的很快,但一群人才能走的更远!不论你是正从事IT行业的老鸟或是对IT行业感兴趣的新人,都欢迎加入我们的的圈子(技术交流、学习资源、职场吐槽、大厂内推、面试辅导),让我们一起学习成长!**