iOS TableView,不带Storyboard的UITableView
Today we will implement iOS TableView UITableView class in our application without using Storyboard.
We have implemented a UITableView using Storyboards in Objective-C here. We’ll use Swift 3 in this tutorial.
今天,我们将在不使用Storyboard的情况下在我们的应用程序中实现iOS TableView UITableView类。
我们在这里使用Objective-C中的Storyboard实现了UITableView。 在本教程中,我们将使用Swift 3。
iOS TableView UITableView (iOS TableView UITableView)
There are lots of major code changes in Swift 3 over Swift 2.3. For starters, this is just another language that we’ll be using in all our future iOS Tutorials. But if you haven’t yet migrated over to Swift 3, I’ll be highlighting the significant changes along the length of this tutorial.
与Swift 2.3相比,Swift 3中有许多主要代码更改。 首先,这只是我们将来所有iOS教程中将使用的另一种语言。 但是,如果您尚未迁移到Swift 3,我将着重介绍本教程中的重大变化。
iOS TableView入门 (iOS TableView Getting Started)
First things first, create a New Project and choose the template as Single View Application for now. In the following screen enter the relevant Application and Bundle Identifier names. A sample is shown below.
首先,首先创建一个New Project,然后选择模板作为Single View Application。 在以下屏幕中,输入相关的应用程序和捆绑包标识符名称。 示例如下所示。
Once your project is ready, select the Main.storyboard file and delete it(Move to trash).
项目准备就绪后,选择Main.storyboard文件并将其删除(移至回收站)。
Having done that let’s run the empty project on the simulator to see if all’s good.
完成之后,让我们在模拟器上运行一个空项目,看看一切都很好。
Watching the logs in the bottom right sidebar would display an error as: Terminating app due to uncaught exception 'NSInvalidArgumentException', reason: 'Could not find a storyboard named 'Main' in bundle NSBundle.
观看右下角的日志将显示以下错误: Terminating app due to uncaught exception 'NSInvalidArgumentException', reason: 'Could not find a storyboard named 'Main' in bundle NSBundle 。
We need to remove the storyboard references from our Project Configuration.
我们需要从项目配置中删除情节提要参考。
For that go to Info.plist and set an empty value in the field Main storyboard file base name.
为此,请转到Info.plist然后在“ 主要情节提要文件基本名称 ”字段中设置一个空值。
We’re now ready to code our application without the need for Storyboards. Let’s select ViewController.swift and start coding.
现在,我们可以编写应用程序了,而无需情节提要。 让我们选择ViewController.swift并开始编码。
iOS UITableView示例代码 (iOS UITableView Example Code)
Now that we’ve deleted the Main.storyboard the ViewController.swift is unlinked. We need to find a way to make it the root view controller of the application without creating another storyboard.
现在我们已经删除了Main.storyboard,ViewController.swift已取消链接。 我们需要找到一种方法来使其成为应用程序的根视图控制器,而无需创建另一个故事板。
The AppDelegate.swift file comes to our rescue. The AppDelegate class ensures that your app interacts properly with the system and with other apps.
AppDelegate.swift文件可以帮助我们。 AppDelegate类可确保您的应用与系统和其他应用正确交互。
We’ve overridden the function application in the following way:
我们通过以下方式覆盖了函数application :
func application(_ application: UIApplication, didFinishLaunchingWithOptions launchOptions: [UIApplicationLaunchOptionsKey: Any]?) -> Bool {

        window = UIWindow(frame: UIScreen.main.bounds)
        window!.backgroundColor = UIColor.white
        window!.rootViewController = ViewController()
        window!.makeKeyAndVisible()
        // Override point for customization after application launch.
        return true
    }
This makes ViewController the root view controller and the first ViewController to be launched in our application. Let’s jump onto the ViewController.swift file where we would be displaying and customising a UITableView programmatically.
这使ViewController成为根视图控制器,并在我们的应用程序中启动第一个ViewController。 让我们跳到ViewController.swift文件,在该文件中将以编程方式显示和自定义UITableView。
Let’s begin by implementing the UITableViewDelegate, UITableViewDataSource protocols in our ViewController.swift class as shown below:
让我们首先在ViewController.swift类中实现UITableViewDelegate和UITableViewDataSource协议,如下所示:
import UIKit

class ViewController: UIViewController, UITableViewDelegate, UITableViewDataSource {

    override func viewDidLoad() {
        super.viewDidLoad()
        // Do any additional setup after loading the view, typically from a nib.
    }

    override func didReceiveMemoryWarning() {
        super.didReceiveMemoryWarning()
        // Dispose of any resources that can be recreated.
    }

    func tableView(_ tableView: UITableView, cellForRowAt indexPath: IndexPath) -> UITableViewCell {

    }

    func tableView(_ tableView: UITableView, numberOfRowsInSection section: Int) -> Int {

    }

}
The above three functions require a mandatory implementation else you’ll get a compile-time error.
以上三个函数需要强制执行,否则会出现编译时错误。
Swift 3 Note: The function parameters now consistently include labels for the first parameters. In essence, the last part of the function’s name has been moved to be the name of the first parameter.
Swift 3注意 :现在,函数参数始终包含第一个参数的标签。 本质上,函数名称的最后一部分已移动为第一个参数的名称。
For example:
例如:
//Swift 2.3
override func numberOfSectionsInTableView(tableView: UITableView) -> Int
//Swift 3
override func numberOfSections(in tableView: UITableView) -> Int
Besides Swift 3 omits the needless words from the functions since they are self evident.
除了Swift 3之外,由于它们是显而易见的,因此省略了函数中不必要的词。
Back to the code, we need to initialize and add the UITableView in our view.
回到代码,我们需要初始化并在视图中添加UITableView。
import UIKit

class ViewController: UIViewController, UITableViewDelegate, UITableViewDataSource {

    var tableView = UITableView()
    var tableData = ["Beach", "Clubs", "Chill", "Dance"]
    override func viewDidLoad() {
        super.viewDidLoad()
        // Do any additional setup after loading the view, typically from a nib.

        tableView = UITableView(frame: self.view.bounds, style: UITableViewStyle.plain)
        tableView.dataSource = self
        tableView.delegate = self
        tableView.backgroundColor = UIColor.white

        tableView.register(UITableViewCell.self, forCellReuseIdentifier: "my")
        view.addSubview(tableView)

    }

    override func didReceiveMemoryWarning() {
        super.didReceiveMemoryWarning()
        // Dispose of any resources that can be recreated.
    }

    func tableView(_ tableView: UITableView, cellForRowAt indexPath: IndexPath) -> UITableViewCell {
        let cell = tableView.dequeueReusableCell(withIdentifier: "my", for: indexPath)
        cell.textLabel?.text = "This is row \(tableData[indexPath.row])"

        return cell
    }

    func tableView(_ tableView: UITableView, numberOfRowsInSection section: Int) -> Int {
        return tableData.count
    }
}
The rows of the TableView are populated from the tableData array.
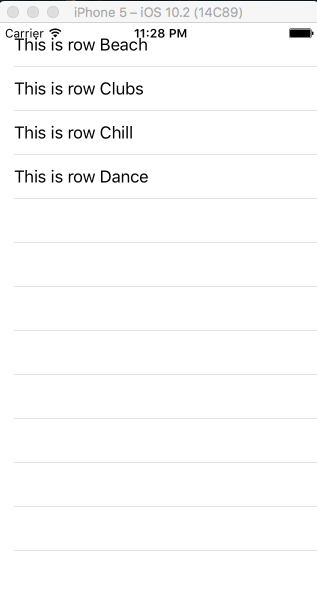
The TableView style can be also set as UITableViewStyle.grouped. The output when the above code is run is shown below.
TableView的行是从tableData数组填充的。
TableView样式也可以设置为UITableViewStyle.grouped 。 运行上述代码时的输出如下所示。
Few places of improvement:
We need to add a padding between the view and the status bar. Also we have to remove the unnecessary row dividers from the empty cells.
几个改进之处:
我们需要在视图和状态栏之间添加一个填充。 同样,我们必须从空单元格中删除不必要的行分隔符。
To add a padding add the following line in viewDidLoad method.
要添加填充,请在viewDidLoad方法中添加以下行。
tableView.contentInset.top = 20
tableView.contentInset.top = 20
To remove the empty cells and dividers we need to wrap the height of the TableView till the number of non-empty rows and add a footer at the bottom.
要删除空单元格和分隔线,我们需要包装TableView的高度,直到非空行数为止,并在底部添加页脚。
The ViewController.swift code after including the above two implementations is given below.
包括以上两个实现后的ViewController.swift代码如下。
import UIKit

class ViewController: UIViewController, UITableViewDelegate, UITableViewDataSource {

    var tableView = UITableView()
    var tableData = ["Beach", "Clubs", "Chill", "Dance"]
    override func viewDidLoad() {
        super.viewDidLoad()
        // Do any additional setup after loading the view, typically from a nib.

        tableView = UITableView(frame: self.view.bounds, style: UITableViewStyle.plain)
        tableView.dataSource = self
        tableView.delegate = self
        tableView.backgroundColor = UIColor.white

        tableView.register(UITableViewCell.self, forCellReuseIdentifier: "my")

        tableView.contentInset.top = 20
        let contentSize = self.tableView.contentSize
        let footer = UIView(frame: CGRect(x: self.tableView.frame.origin.x,
                                          y: self.tableView.frame.origin.y + contentSize.height,
                                          width: self.tableView.frame.size.width,
                                          height: self.tableView.frame.height - self.tableView.contentSize.height))

        self.tableView.tableFooterView = footer


        view.addSubview(tableView)

    }

    override func didReceiveMemoryWarning() {
        super.didReceiveMemoryWarning()
        // Dispose of any resources that can be recreated.
    }

    func tableView(_ tableView: UITableView, cellForRowAt indexPath: IndexPath) -> UITableViewCell {
        let cell = tableView.dequeueReusableCell(withIdentifier: "my", for: indexPath)
        cell.textLabel?.text = "This is row \(tableData[indexPath.row])"

        return cell
    }

    func tableView(_ tableView: UITableView, numberOfRowsInSection section: Int) -> Int {
        return tableData.count
    }
}
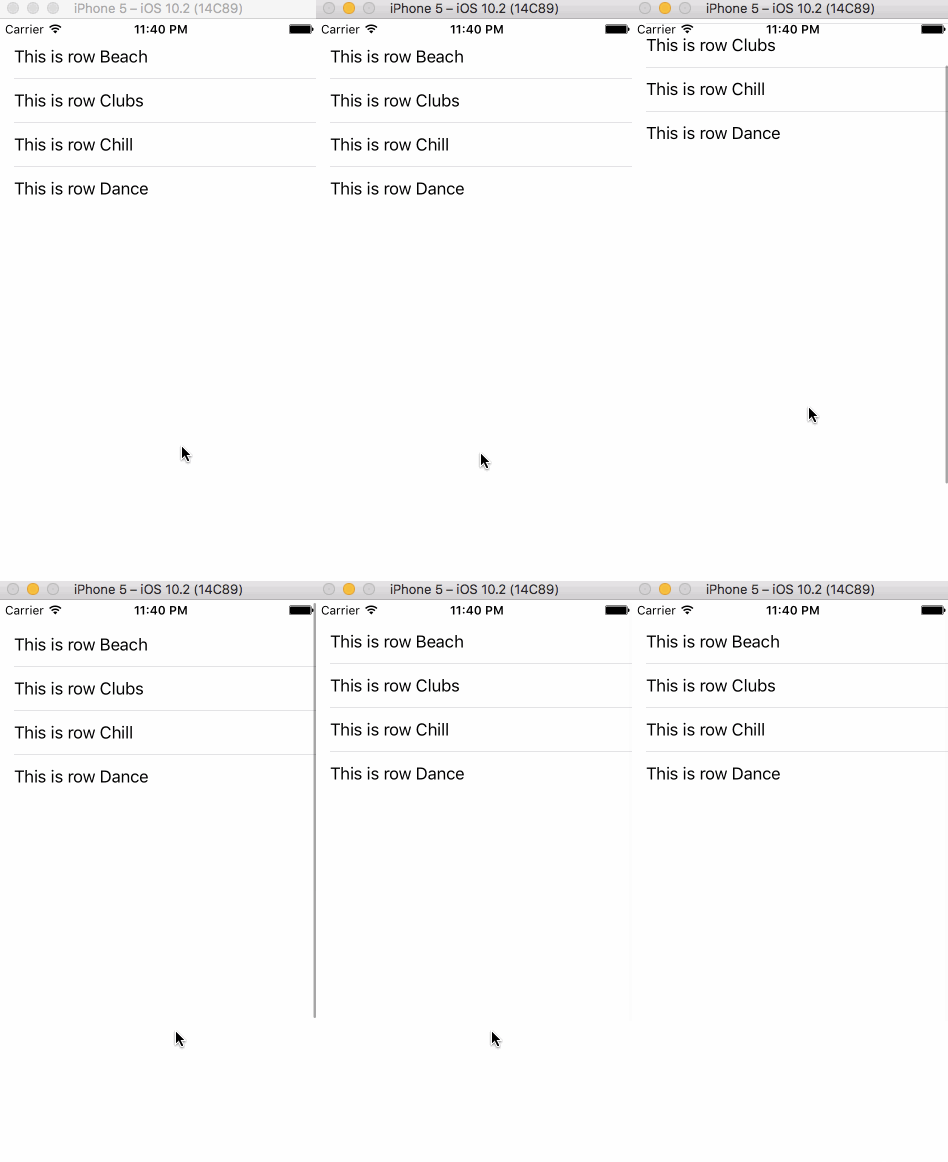
The output from the above ViewController implementation is given below.
上面的ViewController实现的输出如下。
There’s a scrolling issue in the above output. The TableView on scrolling overlaps with the status bar instead of going under it. Let’s fix this by setting bounds for the TableView as given below.
上面的输出中有一个滚动问题。 滚动时的TableView与状态栏重叠,而不是在其下方。 让我们通过如下设置TableView的边界来解决此问题。
let barHeight: CGFloat = UIApplication.shared.statusBarFrame.size.height
let displayWidth: CGFloat = self.view.frame.width
let displayHeight: CGFloat = self.view.frame.height
tableView.frame = CGRect(x: 0, y: barHeight, width: displayWidth, height: displayHeight - barHeight)
Adding this in the ViewController.swift file would produce the below code and it’s output.
将其添加到ViewController.swift文件中将产生以下代码,并将其输出。
import UIKit

class ViewController: UIViewController, UITableViewDelegate, UITableViewDataSource {

    var tableView = UITableView()
    var tableData = ["Beach", "Clubs", "Chill", "Dance"]
    override func viewDidLoad() {
        super.viewDidLoad()
        // Do any additional setup after loading the view, typically from a nib.

        tableView = UITableView(frame: self.view.bounds, style: UITableViewStyle.plain)
        tableView.dataSource = self
        tableView.delegate = self
        tableView.backgroundColor = UIColor.white

        tableView.register(UITableViewCell.self, forCellReuseIdentifier: "my")

        let barHeight: CGFloat = UIApplication.shared.statusBarFrame.size.height
        let displayWidth: CGFloat = self.view.frame.width
        let displayHeight: CGFloat = self.view.frame.height

        tableView.contentInset.top = 20
        tableView.frame = CGRect(x: 0, y: barHeight, width: displayWidth, height: displayHeight - barHeight)
        let contentSize = self.tableView.contentSize
        let footer = UIView(frame: CGRect(x: self.tableView.frame.origin.x,
                                          y: self.tableView.frame.origin.y + contentSize.height,
                                          width: self.tableView.frame.size.width,
                                          height: self.tableView.frame.height - self.tableView.contentSize.height))

        self.tableView.tableFooterView = footer


        view.addSubview(tableView)

    }

    override func didReceiveMemoryWarning() {
        super.didReceiveMemoryWarning()
        // Dispose of any resources that can be recreated.
    }

    func tableView(_ tableView: UITableView, cellForRowAt indexPath: IndexPath) -> UITableViewCell {
        let cell = tableView.dequeueReusableCell(withIdentifier: "my", for: indexPath)
        cell.textLabel?.text = "This is row \(tableData[indexPath.row])"

        return cell
    }

    func tableView(_ tableView: UITableView, numberOfRowsInSection section: Int) -> Int {
        return tableData.count
    }
}
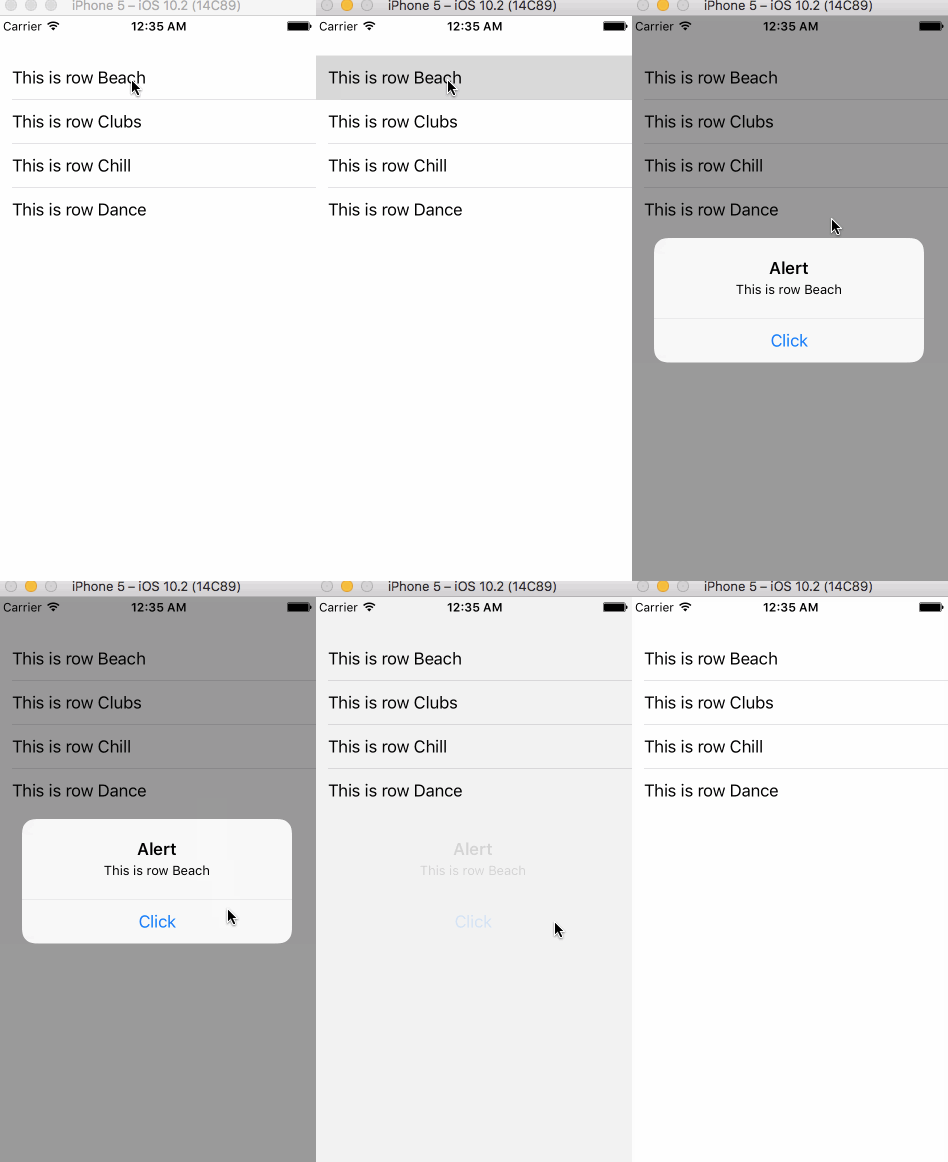
Let’s add a functionality such that selecting any row would show an alert dialog. We need to override the function didSelectRowAt to make each selectable.
让我们添加一个功能,以便选择任何行都会显示一个警报对话框。 我们需要重写功能didSelectRowAt以使每个选项都可以选择。
The code for ViewController.swift with the above implementation is given below.
下面给出了具有上述实现的ViewController.swift的代码。
import UIKit

class ViewController: UIViewController, UITableViewDelegate, UITableViewDataSource {

    var tableView = UITableView()
    var tableData = ["Beach", "Clubs", "Chill", "Dance"]
    override func viewDidLoad() {
        super.viewDidLoad()
        // Do any additional setup after loading the view, typically from a nib.

        tableView = UITableView(frame: self.view.bounds, style: UITableViewStyle.plain)
        tableView.dataSource = self
        tableView.delegate = self
        tableView.backgroundColor = UIColor.white

        tableView.register(UITableViewCell.self, forCellReuseIdentifier: "my")

        let barHeight: CGFloat = UIApplication.shared.statusBarFrame.size.height
        let displayWidth: CGFloat = self.view.frame.width
        let displayHeight: CGFloat = self.view.frame.height

        tableView.contentInset.top = 20
        tableView.frame = CGRect(x: 0, y: barHeight, width: displayWidth, height: displayHeight - barHeight)
        let contentSize = self.tableView.contentSize
        let footer = UIView(frame: CGRect(x: self.tableView.frame.origin.x,
                                          y: self.tableView.frame.origin.y + contentSize.height,
                                          width: self.tableView.frame.size.width,
                                          height: self.tableView.frame.height - self.tableView.contentSize.height))

        self.tableView.tableFooterView = footer


        view.addSubview(tableView)

    }

    override func didReceiveMemoryWarning() {
        super.didReceiveMemoryWarning()
        // Dispose of any resources that can be recreated.
    }

    func tableView(_ tableView: UITableView, cellForRowAt indexPath: IndexPath) -> UITableViewCell {
        let cell = tableView.dequeueReusableCell(withIdentifier: "my", for: indexPath)
        cell.textLabel?.text = "This is row \(tableData[indexPath.row])"

        return cell
    }

    func tableView(_ tableView: UITableView, numberOfRowsInSection section: Int) -> Int {
        return tableData.count
    }

    func tableView(_ tableView: UITableView, didSelectRowAt indexPath: IndexPath) {
        tableView.deselectRow(at: indexPath, animated: true)
        let currentCell = tableView.cellForRow(at: indexPath)! as UITableViewCell
        showDialog(text: (currentCell.textLabel?.text)!)
    }

    func showDialog(text : String)
    {
        let alert = UIAlertController(title: "Alert", message: text, preferredStyle: UIAlertControllerStyle.alert)
        alert.addAction(UIAlertAction(title: "Click", style: UIAlertActionStyle.default, handler: nil))
        self.present(alert, animated: true, completion: nil)
    }
}
tableView.deselectRow(at: indexPath, animated: true) is used to remove the highlight from the selected row when it’s no longer pressed.
tableView.deselectRow(at: indexPath, animated: true)用于在不再按下所选行时将其突出显示。
具有多个节的UITableView (UITableView With Multiple Sections)
Let’s customise the UITableView such that it would contain multiple sections.
We need to override two more functions shown below.
让我们自定义UITableView,使其包含多个部分。
我们需要重写下面显示的两个功能。
func numberOfSections(in tableView: UITableView) -> Int {

    }

    func tableView(_ tableView: UITableView, titleForHeaderInSection section: Int) -> String? {

    }
The ViewController.swift with multiple sections is given below.
下面给出了具有多个部分的ViewController.swift。
import UIKit

class ViewController: UIViewController, UITableViewDelegate, UITableViewDataSource {

    var tableView = UITableView()
    var tableData = ["Beach", "Clubs", "Chill", "Dance"]
    let data = [["0,0", "0,1", "0,2"], ["1,0", "1,1", "1,2"]]
    let headerTitles = ["Some Data 1", "Some Data 2"]
    override func viewDidLoad() {
        super.viewDidLoad()
        // Do any additional setup after loading the view, typically from a nib.

        tableView = UITableView(frame: self.view.bounds, style: UITableViewStyle.plain)
        tableView.dataSource = self
        tableView.delegate = self
        tableView.backgroundColor = UIColor.white

        tableView.register(UITableViewCell.self, forCellReuseIdentifier: "my")

        let barHeight: CGFloat = UIApplication.shared.statusBarFrame.size.height
        let displayWidth: CGFloat = self.view.frame.width
        let displayHeight: CGFloat = self.view.frame.height

        tableView.contentInset.top = 20
        tableView.frame = CGRect(x: 0, y: barHeight, width: displayWidth, height: displayHeight - barHeight)
        let contentSize = self.tableView.contentSize
        let footer = UIView(frame: CGRect(x: self.tableView.frame.origin.x,
                                          y: self.tableView.frame.origin.y + contentSize.height,
                                          width: self.tableView.frame.size.width,
                                          height: self.tableView.frame.height - self.tableView.contentSize.height))

        self.tableView.tableFooterView = footer


        view.addSubview(tableView)

    }

    override func didReceiveMemoryWarning() {
        super.didReceiveMemoryWarning()
        // Dispose of any resources that can be recreated.
    }

    func tableView(_ tableView: UITableView, cellForRowAt indexPath: IndexPath) -> UITableViewCell {
        let cell = tableView.dequeueReusableCell(withIdentifier: "my", for: indexPath)
        //cell.textLabel?.text = "This is row \(tableData[indexPath.row])"
        cell.textLabel?.text = "This is row \(data[indexPath.section][indexPath.row])"
        return cell
    }

    func tableView(_ tableView: UITableView, numberOfRowsInSection section: Int) -> Int {
        //return tableData.count
        return data[section].count
    }

    func numberOfSections(in tableView: UITableView) -> Int {
        return data.count
    }

    func tableView(_ tableView: UITableView, titleForHeaderInSection section: Int) -> String? {
        if section < headerTitles.count {
            return headerTitles[section]
        }

        return nil
    }

    func tableView(_ tableView: UITableView, didSelectRowAt indexPath: IndexPath) {
        tableView.deselectRow(at: indexPath, animated: true)
        let currentCell = tableView.cellForRow(at: indexPath)! as UITableViewCell
        showDialog(text: (currentCell.textLabel?.text)!)
    }

    func showDialog(text : String)
    {
        let alert = UIAlertController(title: "Alert", message: text, preferredStyle: UIAlertControllerStyle.alert)
        alert.addAction(UIAlertAction(title: "Click", style: UIAlertActionStyle.default, handler: nil))
        self.present(alert, animated: true, completion: nil)
    }
}
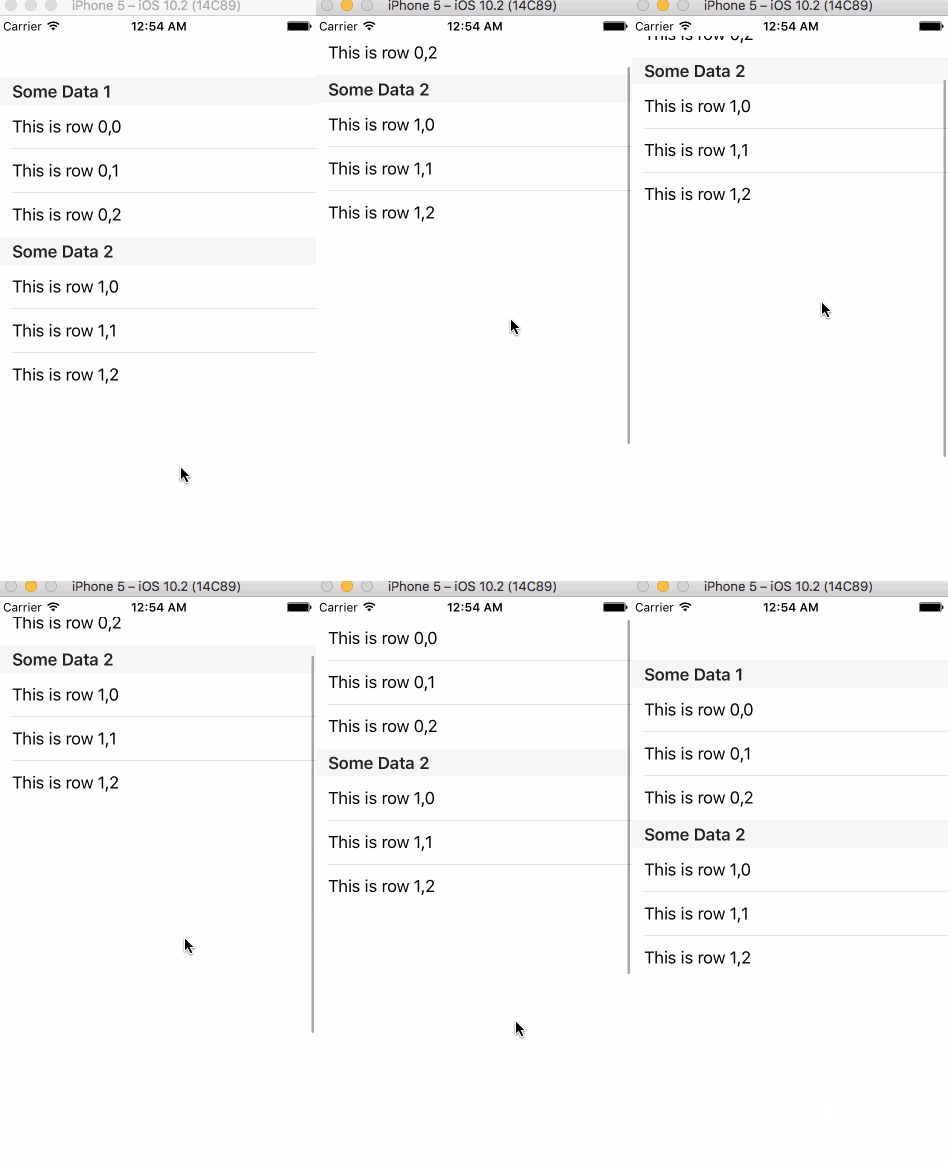
The output of the above code is given below.
上面代码的输出如下。
import UIKit

class ViewController: UIViewController, UITableViewDelegate, UITableViewDataSource {

    var tableView = UITableView()
    var tableData = ["Beach", "Clubs", "Chill", "Dance"]
    let data = [["0,0", "0,1", "0,2"], ["1,0", "1,1", "1,2"]]
    let headerTitles = ["Some Data 1", "Some Data 2"]
    override func viewDidLoad() {
        super.viewDidLoad()
        // Do any additional setup after loading the view, typically from a nib.

        tableView = UITableView(frame: self.view.bounds, style: UITableViewStyle.plain)
        tableView.dataSource = self
        tableView.delegate = self
        tableView.backgroundColor = UIColor.white

        tableView.register(UITableViewCell.self, forCellReuseIdentifier: "my")

        let barHeight: CGFloat = UIApplication.shared.statusBarFrame.size.height
        let displayWidth: CGFloat = self.view.frame.width
        let displayHeight: CGFloat = self.view.frame.height

        tableView.contentInset.top = 20
        tableView.frame = CGRect(x: 0, y: barHeight, width: displayWidth, height: displayHeight - barHeight)
        let contentSize = self.tableView.contentSize
        let footer = UIView(frame: CGRect(x: self.tableView.frame.origin.x,
                                          y: self.tableView.frame.origin.y + contentSize.height,
                                          width: self.tableView.frame.size.width,
                                          height: self.tableView.frame.height - self.tableView.contentSize.height))

        self.tableView.tableFooterView = footer


        view.addSubview(tableView)

    }

    override func didReceiveMemoryWarning() {
        super.didReceiveMemoryWarning()
        // Dispose of any resources that can be recreated.
    }

    func tableView(_ tableView: UITableView, cellForRowAt indexPath: IndexPath) -> UITableViewCell {
        let cell = tableView.dequeueReusableCell(withIdentifier: "my", for: indexPath)
        //cell.textLabel?.text = "This is row \(tableData[indexPath.row])"
        cell.textLabel?.text = "This is row \(data[indexPath.section][indexPath.row])"
        return cell
    }

    func tableView(_ tableView: UITableView, numberOfRowsInSection section: Int) -> Int {
        //return tableData.count
        return data[section].count
    }

    func numberOfSections(in tableView: UITableView) -> Int {
        return data.count
    }

    func tableView(_ tableView: UITableView, titleForHeaderInSection section: Int) -> String? {
        if section < headerTitles.count {
            return headerTitles[section]
        }

        return nil
    }

    func tableView(_ tableView: UITableView, didSelectRowAt indexPath: IndexPath) {
        tableView.deselectRow(at: indexPath, animated: true)
        let currentCell = tableView.cellForRow(at: indexPath)! as UITableViewCell
        showDialog(text: (currentCell.textLabel?.text)!)
    }

    func showDialog(text : String)
    {
        let alert = UIAlertController(title: "Alert", message: text, preferredStyle: UIAlertControllerStyle.alert)
        alert.addAction(UIAlertAction(title: "Click", style: UIAlertActionStyle.default, handler: nil))
        self.present(alert, animated: true, completion: nil)
    }


    func scrollViewDidScroll(_ scrollView: UIScrollView) {
        let sectionHeight: CGFloat = 80
        if scrollView.contentOffset.y = sectionHeight {
            scrollView.contentInset = UIEdgeInsetsMake(-sectionHeight, 0, 0, 0)
        }

    }

}
The output of the above application is given below.
上面的应用程序的输出如下。
This brings an end to iOS UITableView tutorial. You can download the iOS UITableViewNoStoryboard Project from the link below.
这结束了iOS UITableView教程。 您可以从下面的链接下载iOS UITableViewNoStoryboard项目。
Reference: Official Documentation
参考: 官方文档
翻译自: https://www.journaldev.com/14081/ios-tableview-uitableview-storyboard


