原创 服务器群集——源码编译安装LNMP(搭建基于LNMP架构的Discuz论坛)
这里写目录标题
- 一、LNMP架构解读
- MySQL安装配置
- PHP解析环境的安装
- 配置Nginx支持PHP环境
- 二、LNMP应用部署
- 1、安装nginx
- 2、安装MYSQL
- 3、安装php
- 4、让nginx支持PHP
- 5、创建数据库
- 6、更改测试页内容
- 7、安装论坛
一、LNMP架构解读
LNMP平台就是Linux. Ngnix. MySQL. PHP的组合架构,需要Lnux服务器、MySal 数据库、PHP解析坏境
Ngnix特长:高并发,低资源,处理静态网络访问请求非常强
Apache:静态处理和动态处理都可以做,更适合做动态处理
Nginx将动态资源请求交给PHP当中的fpm处理动态请求
PHP主配置文件:php.ini
Nginx将动态资源分配给FPM或Apache
MySQL安装配置
1、为了与Nginx、PHP环境保持- -致, 此处选择采用源代码编译的方式安装MySQL组件
2、MySQL部署的方法
- 编译安装MySQL
- 优化调整
- 初始化数据库
- 启动MySQL服务并设置root数据库账号的密码
PHP解析环境的安装
1、配置网页动静分离,解析PHP,有两种方法可以选择
- 使用PHP的FPM模块
- 将访问PHP页面的Web请求转交给Apache服务器去处理
2、较新版本的PHP已经自带FPM模块,对PHP解析实例进行管理、优化解析效率 - FastCGI将Http Server和动态脚本语言分离开
- Nginx专门处理静态请求,转发动态请求
- PHP-FPM专[门解析PHP动态请求
- 单服务器的LNMP架构通常使用FPM方式来解析PHP
配置Nginx支持PHP环境
1、调用本机的php-fpm进程配置方法
- 建立FPM配置文件php-fpm.conf,修改配置选项
- PID文件、运行用户、服务进程数等 - 启动php-fpm进程
2、配置Nginx支持PHP解析 - 在Nginx的配置文件的server{ }配置段中设置将PHP的网页请求转给FPM模块处理
3、PHP页面访问测试
二、LNMP应用部署
本案例在单台服务器上部署LNMP环境
案例架构
Linux+Nginx+MySQL+PHP
1、安装nginx
[root@localhost ~]# cd /opt/
[root@localhost opt]# mkdir LNMP
[root@localhost opt]# cd LNMP/
[root@localhost LNMP]# rz -E     //使用xshell直接压缩包到虚拟机
rz waiting to receive.
[root@localhost LNMP]# ls
Discuz_X3.4_SC_UTF8.zip  mysql-boost-5.7.20.tar.gz  ncurses-5.6.tar.gz  nginx-1.12.2.tar.gz  php-7.1.10.tar.bz2
1、安装环境依赖包
[root@localhost LNMP]# tar zxvf nginx-1.12.2.tar.gz -C /opt/
[root@localhost LNMP]# cd /opt/nginx-1.12.2/
[root@localhost nginx-1.12.2]# yum -y install gcc \
gcc-c++ \
zlib-devel \
pcre pcre-devel   //安装编译器和其他工具
2、创建运行用户、组
[root@localhost nginx-1.12.2]# useradd -M -s /sbin/nologin nginx   //创建nginx管理用户,不建立宿主目录,禁止登陆到shell环境
[root@localhost nginx-1.12.2]# id nginx
uid=1001(nginx) gid=1001(nginx) 组=1001(nginx)
3、编译安装nginx
[root@localhost nginx-1.12.2]# ./configure \
--prefix=/usr/local/nginx \
--user=nginx \
--group=nginx \
--with-http_stub_status_module     //安装路径,用户,组,统计模块功能
[root@localhost nginx-1.12.2]# make && make install
4、路径优化
[root@localhost nginx-1.12.2]# ln -s /usr/local/nginx/sbin/nginx /usr/local/sbin/  //创建软链接,便于管理员直接执行nginx命令来调用nginx主程序
[root@localhost nginx-1.12.2]# ls /usr/local/sbin/
nginx
5、检测语法
[root@localhost nginx-1.12.2]# nginx -t
nginx: the configuration file /usr/local/nginx/conf/nginx.conf syntax is ok
nginx: configuration file /usr/local/nginx/conf/nginx.conf test is successful
6、启动、停止nginx服务
[root@localhost nginx-1.12.2]# nginx
[root@localhost nginx-1.12.2]# netstat -antp | grep nginx
tcp        0      0 0.0.0.0:80              0.0.0.0:*               LISTEN      70833/nginx:
用宿主机win10去访问192.168.200.80,成功访问nginx网站
[root@localhost nginx-1.12.2]# netstat -antp | grep nginx
tcp        0      0 0.0.0.0:80              0.0.0.0:*               LISTEN      70833/nginx: master
[root@localhost nginx-1.12.2]# killall -s HUP nginx     //重载nginx命令
[root@localhost nginx-1.12.2]# netstat -antp | grep nginx
tcp        0      0 0.0.0.0:80              0.0.0.0:*               LISTEN      70833/nginx: master
[root@localhost nginx-1.12.2]# killall -s QUIT nginx    //关闭nginx命令
[root@localhost nginx-1.12.2]# netstat -antp | grep nginx
[root@localhost nginx-1.12.2]# nginx
[root@localhost nginx-1.12.2]# netstat -antp | grep nginx
tcp        0      0 0.0.0.0:80              0.0.0.0:*               LISTEN      70961/nginx: master
[root@localhost nginx-1.12.2]# kill -9 70961    //kill杀死进程但是服务杀不死
[root@localhost nginx-1.12.2]# netstat -antp | grep nginx
tcp        0      0 0.0.0.0:80              0.0.0.0:*               LISTEN      70962/nginx: worker
[root@localhost nginx-1.12.2]# pkill nginx        //pkill直接杀死进程树
[root@localhost nginx-1.12.2]# netstat -antp | grep nginx
7、添加nginx系统服务
[root@localhost nginx-1.12.2]# vim /lib/systemd/system/nginx.service    //添加nginx服务给systemctl管理
[Unit]
Description=nginx
After=network.target
[Service]
Type=forking              //默认进程模式
PIDFile=/usr/local/nginx/logs/nginx.pid     //进程文件
ExecStart=/usr/local/nginx/sbin/nginx         //安装目录
ExecReload=/usr/bin/kill -s HUP $MAINPID   //重载目录
ExecStop=/usr/bin/kill -s QUIT $MAINPID     //停止
PrivateTmp=ture
[Install]
WantedBy=multi-user.target      //多用户模式
[root@localhost nginx-1.12.2]# chmod 754 /lib/systemd/system/nginx.service   //配置权限
[root@localhost nginx-1.12.2]# systemctl start nginx
Warning: nginx.service changed on disk. Run 'systemctl daemon-reload' to reload units.      //出现警告
Job for nginx.service failed because the control process exited with error code. See "systemctl status nginx.service" and "journalctl -xe" for details.
[root@localhost nginx-1.12.2]# systemctl daemon-reload      //重新加载某个服务的配置文件,如果新安装了一个服务,归属于 systemctl 管理,要是新服务的服务程序配置文件生效,需重新加载。
[root@localhost nginx-1.12.2]# systemctl start nginx     //启动服务成功
[root@localhost nginx-1.12.2]# netstat -antp | grep nginx
tcp        0      0 0.0.0.0:80              0.0.0.0:*               LISTEN      71619/nginx: master
2、安装MYSQL
[root@localhost nginx-1.12.2]# cd /opt/LNMP/
[root@localhost LNMP]# ls
Discuz_X3.4_SC_UTF8.zip    ncurses-5.6.tar.gz   php-7.1.10.tar.bz2 mysql-boost-5.7.20.tar.gz  nginx-1.12.2.tar.gz
[root@localhost LNMP]# tar zxvf mysql-boost-5.7.20.tar.gz -C /opt/
[root@localhost LNMP]# cd /opt/
[root@localhost opt]# useradd -s /sbin/nologin mysql   //创建运行用户
[root@localhost opt]# yum -y install ncurses ncurses-devel bison cmake   //bison语法识别
[root@localhost opt]# cd /opt/mysql-5.7.20/
[root@localhost mysql-5.7.20]#
cmake \
-DCMAKE_INSTALL_PREFIX=/usr/local/mysql \
-DMYSQL_UNIX_ADDR=/usr/local/mysql/mysql.sock \
-DSYSCONFDIR=/etc \
-DSYSTEMD_PID_DIR=/usr/local/mysql \
-DDEFAULT_CHARSET=utf8 \
-DDEFAULT_COLLATION=utf8_general_ci \
-DWITH_INNOBASE_STORAGE_ENGINE=1 \        //存储引擎
-DWITH_ARCHIVE_STORAGE_ENGINE=1 \
-DWITH_BLACKHOLE_STORAGE_ENGINE=1 \
-DWITH_PERFSCHEMA_STORAGE_ENGINE=1 \
-DMYSQL_DATADIR=/usr/local/mysql/data \        //数据存储位置
-DWITH_BOOST=boost \                                        //c++库
-DWITH_SYSTEMD=1                                             //开启第二进程
[root@localhost mysql-5.7.20]# make
[root@localhost mysql-5.7.20]# make install
[root@localhost mysql-5.7.20]# cd /usr/local/
[root@localhost local]# ll
drwxr-xr-x. 11 root root 151 8月  11 09:57 nginx
[root@localhost local]# chown -R mysql:mysql /usr/local/mysql/       //更改属主属组为mysql
[root@localhost local]# ll
drwxr-xr-x. 11 mysql mysql 197 8月  11 12:18 mysql
[root@localhost local]# cd /etc/
[root@localhost etc]# vim my.cnf
[client]
port=3306
default-character-set=utf8
socket=/usr/local/mysql/mysql.sock
[mysql]
port=3306
default-character-set=utf8
socket=/usr/local/mysql/mysql.sock
[mysqld]
user=mysql
basedir=/usr/local/mysql
datadir=/usr/local/mysql/data
port=3306
character_set_server=utf8
pid-file=/usr/local/mysql/mysqld.pid
socket=/usr/local/mysql/mysql.sock
server-id=1
sql_mode=NO_ENGINE_SUBSTITUTION,STRICT_TRANS_TABLES,NO_AUTO_CREATE_USER,NO_AUTO_VALUE_ON_ZERO,NO_ZERO_IN_DATE,NO_ZERO_DATE,ERROR_FOR_DIVISION_BY_ZERO,PIPES_AS_CONCAT,ANSI_QUOTES

设置环境变量
[root@localhost etc]# vim /etc/profile
PATH=/usr/local/mysql/bin:/usr/local/mysql/lib:$PATH
export PATH   //声明为全局变量
[root@localhost etc]# source /etc/profile   //加载环境变量
初始化数据库
[root@localhost etc]# cd /usr/local/mysql/
[root@localhost mysql]# ls
bin      COPYING-test  include  man         README       share          usr
COPYING  docs          lib      mysql-test  README-test  support-files
[root@localhost mysql]# ls bin/
mysql_install_db
mysqld
[root@localhost mysql]# bin/mysqld --initialize-insecure \
--user=mysql \
--basedir=/usr/local/mysql \
--datadir=/usr/local/mysql/data         //初始化数据库
2020-08-11T11:41:37.791663Z 0 [Warning] TIMESTAMP with implicit DEFAULT value is deprecated. Please use --explicit_defaults_for_timestamp server option (see documentation for more details).
2020-08-11T11:41:38.155226Z 0 [Warning] InnoDB: New log files created, LSN=45790
2020-08-11T11:41:38.210661Z 0 [Warning] InnoDB: Creating foreign key constraint system tables.
2020-08-11T11:41:38.269282Z 0 [Warning] No existing UUID has been found, so we assume that this is the first time that this server has been started. Generating a new UUID: 9dec1b5f-dbc7-11ea-ab28-000c29cd9a36.
2020-08-11T11:41:38.269993Z 0 [Warning] Gtid table is not ready to be used. Table 'mysql.gtid_executed' cannot be opened.
2020-08-11T11:41:38.271838Z 1 [Warning] root@localhost is created with an empty password ! Please consider switching off the --initialize-insecure option.
[root@localhost mysql]# cp /usr/lib/systemd/system/mysqld.service /usr/lib/systemd/system
[root@localhost mysql]# systemctl start mysqld
[root@localhost mysql]# netstat -antp | grep mysqld
tcp6       0      0 :::3306                 :::*                    LISTEN      95058/mysqld
[root@localhost mysql]# systemctl enable mysqld     //设置开机自启
Created symlink from /etc/systemd/system/multi-user.target.wants/mysqld.service to /usr/lib/systemd/system/mysqld.service.
[root@localhost mysql]# mysqladmin -u root -p password "abc123"    //设置mysql密码
Enter password:                           //空密码所以按空格
mysqladmin: [Warning] Using a password on the command line interface can be insecure.
Warning: Since password will be sent to server in plain text, use ssl connection to ensure password safety.
[root@localhost mysql]# mysql -u root -p
Enter password:                           //输入刚刚设置的密码abc123
mysql> show databases;
+--------------------+
| Database           |
+--------------------+
| information_schema |
| mysql              |
| performance_schema |
| sys                |
+--------------------+
4 rows in set (0.00 sec)
mysql> quit
Bye
[root@localhost mysql]# netstat -antp | grep nginx
tcp        0      0 0.0.0.0:80              0.0.0.0:*               LISTEN      71619/nginx: master
[root@localhost mysql]# netstat -antp | grep mysqld
tcp6       0      0 :::3306                 :::*                    LISTEN      95058/mysqld
3、安装php
[root@localhost mysql]# yum -y install libjpeg libjpeg-devel libpng libpng-devel freetype freetype-devel libxml2 libxml2-devel zlib zlib-devel curl curl-devel openssl openssl-devel
[root@localhost mysql]# cd /opt/LNMP/
[root@localhost LNMP]# tar jxvf php-7.1.10.tar.bz2 -C /opt/
[root@localhost LNMP]# cd /opt/php-7.1.10/
[root@localhost php-7.1.10]# ./configure --prefix=/usr/local/php --with-mysql-sock=/usr/local/mysql/mysql.sock --with-mysqli --with-zlib --with-curl --with-gd --with-jpeg-dir --with-png-dir --with-freetype-dir --with-openssl --enable-fpm --enable-mbstring --enable-xml --enable-session --enable-ftp --enable-pdo --enable-tokenizer --enable-zip
[root@localhost php-7.1.10]# make && make install
[root@localhost php-7.1.10]# cp php.ini-development /usr/local/php/lib/php.ini //复制模板创建主配置文件
[root@localhost php-7.1.10]# vim /usr/local/php/lib/php.ini    //配置主配置文件
1170 mysqli.default_socket = /usr/local/mysql/mysql.sock
date.timezone = Asia/Shanghai
[root@localhost php-7.1.10]# /usr/local/php/bin/php -m     //查看所有模块
[PHP Modules]
Core
ctype
curl
date
dom
fileinfo
filter
ftp
gd
hash
iconv
json
libxml
mbstring
mysqli
mysqlnd
openssl
pcre
PDO
pdo_sqlite
Phar
posix
Reflection
session
SimpleXML
SPL
sqlite3
standard
tokenizer
xml
xmlreader
xmlwriter
zip
zlib

[Zend Modules]
[root@localhost php-7.1.10]# cd /usr/local/php/etc/
 [root@localhost etc]# ls
pear.conf  php-fpm.conf.default  php-fpm.d     //fpm模板
[root@localhost etc]# cp php-fpm.conf.default php-fpm.conf
[root@localhost etc]# ls
pear.conf  php-fpm.conf  php-fpm.conf.default  php-fpm.d
[root@localhost etc]# vim php-fpm.conf
pid = run/php-fpm.pid
[root@localhost etc]# cd /usr/local/php/etc/
[root@localhost etc]# ls
pear.conf  php-fpm.conf  php-fpm.conf.default  php-fpm.d
[root@localhost etc]# cd php-fpm.d/
[root@localhost php-fpm.d]# ls
www.conf.default
[root@localhost php-fpm.d]# cp www.conf.default www.conf
[root@localhost php-fpm.d]# ls
www.conf  www.conf.default
[root@localhost php-fpm.d]# /usr/local/php/sbin/php-fpm -c /usr/local/php/lib/php.ini
[root@localhost php-fpm.d]# netstat -antp | grep 9000
tcp        0      0 127.0.0.1:9000          0.0.0.0:*               LISTEN      105806/php-fpm: mas
[root@localhost php-fpm.d]# ln -s /usr/local/php/bin/* /usr/local/bin/     //设置软链接使得PHP的命令会被系统识别
[root@localhost php-fpm.d]# ps aux | grep -c "php-fpm"
4
4、让nginx支持PHP
[root@localhost php-fpm.d]# vim /usr/local/nginx/conf/nginx.conf
location ~ \.php$ {
root html;
fastcgi_pass 127.0.0.1:9000;
fastcgi_index index.php;
fastcgi_param SCRIPT_FILENAME /usr/local/nginx/html$fastcgi_script_name;
include fastcgi_params;
}
[root@localhost php-fpm.d]# systemctl stop nginx
[root@localhost php-fpm.d]# systemctl start nginx
[root@localhost php-fpm.d]# netstat -antp | grep nginx
tcp 0 0 0.0.0.0:80 0.0.0.0:* LISTEN 106079/nginx: maste
[root@localhost php-fpm.d]# cd /usr/local/nginx/
[root@localhost nginx]# ls
client_body_temp conf fastcgi_temp html logs proxy_temp sbin scgi_temp uwsgi_temp
[root@localhost nginx]# cd html/
[root@localhost html]# ls
50x.html index.html
[root@localhost html]# mv index.html index.html.bak
[root@localhost html]# ls
50x.html index.html.bak
[root@localhost html]# vim index.php
()
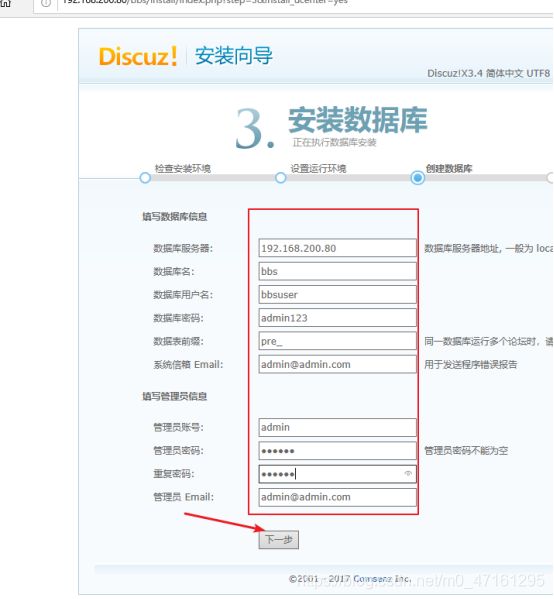
?>5、创建数据库
[root@localhost html]# mysql -u root -p
Enter password: abc123
mysql> CREATE DATABASE bbs;
Query OK, 1 row affected (0.00 sec)
mysql> GRANT all ON bbs.* TO 'bbsuser'@'%' IDENTIFIED BY 'admin123';
Query OK, 0 rows affected, 1 warning (0.01 sec)
mysql> GRANT all ON bbs.* TO 'bbsuser'@'localhost' IDENTIFIED BY 'admin123';
Query OK, 0 rows affected, 1 warning (0.00 sec)
mysql> flush privileges;
Query OK, 0 rows affected (0.01 sec)
mysql> quit
Bye
6、更改测试页内容
[root@localhost html]# vim index.php
$link=mysqli_connect('192.168.200.80','bbsuser','admin123');
if($link) echo "Success!!
";
else echo "Fail!!";
?>
[root@localhost html]# systemctl restart nginx
用win10浏览器登录192.168.200.80/index.php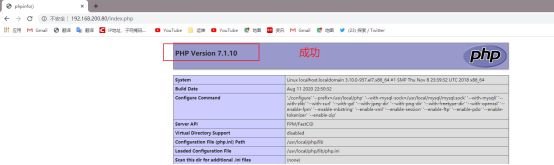
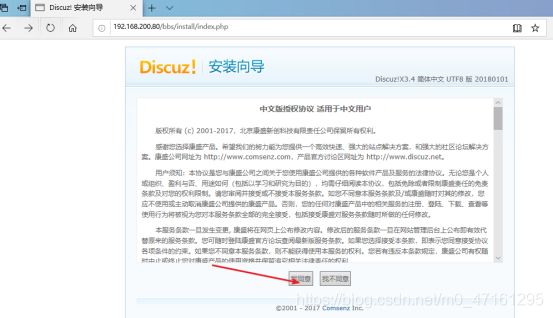
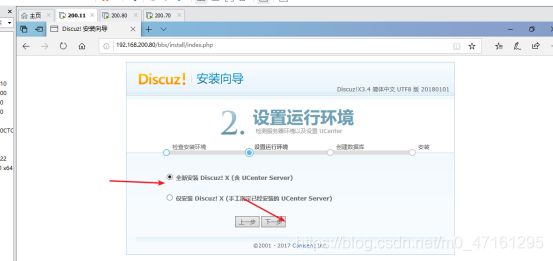
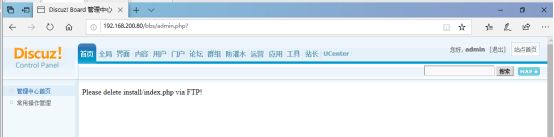
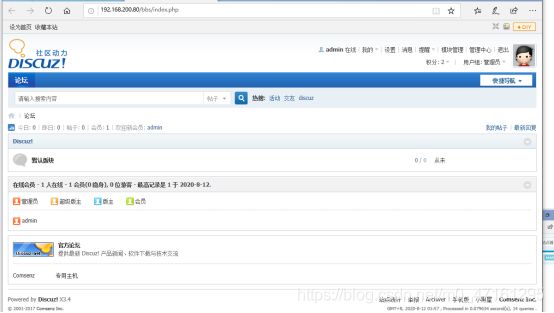
7、安装论坛
[root@localhost html]# cd /opt/LNMP
[root@localhost LNMP]# unzip Discuz_X3.4_SC_UTF8.zip
[root@localhost LNMP]# mv dir_SC_UTF8/ /opt/
[root@localhost LNMP]# cd /opt/dir_SC_UTF8/
[root@localhost dir_SC_UTF8]# ls
readme  upload  utility
[root@localhost dir_SC_UTF8]# cp -r upload/ /usr/local/nginx/html/bbs
[root@localhost nginx]# cd /usr/local/nginx/html/bbs/
[root@localhost bbs]# ls
admin.php  config           favicon.ico  index.php   misc.php    search.php  uc_client
api        connect.php      forum.php    install     plugin.php  source      uc_server
api.php    crossdomain.xml  group.php    m           portal.php  static
archiver   data             home.php     member.php  robots.txt  template

[root@localhost bbs]# chown -R root:nginx ./config/
[root@localhost bbs]# chown -R root:nginx ./data/
[root@localhost bbs]# chown -R root:nginx ./uc_client/
[root@localhost bbs]# chown -R root:nginx ./uc_server/
[root@localhost bbs]# chmod -R 777 ./config/
[root@localhost bbs]# chmod -R 777 ./data/
[root@localhost bbs]# chmod -R 777 ./uc_client/
[root@localhost bbs]# chmod -R 777 ./uc_server/
打开win10 浏览器输入如下地址安装论坛
http://192.168.200.80/bbs/install/index.php