SSM集成和vue-admin-master模块
1、ssm集成
常用开发框架整合:
sss – springmvc+spring+springjdbc (项目一)
sssdj – springmvc+spring+springdatajpa(项目二) 中小型的项目
ssm – springmvc+spring+mybatis(项目三/项目四) 中型项目/大型项目
ssm框架整合步骤
(1)创建项目
web项目 (maven/普通web)
(2)导入三个框架的jar包
(3)配置文件
applicationContext.xml
(配置spring+mybatis)
<beans xmlns="http://www.springframework.org/schema/beans"
       xmlns:xsi="http://www.w3.org/2001/XMLSchema-instance"
       xmlns:context="http://www.springframework.org/schema/context"
       xmlns:tx="http://www.springframework.org/schema/tx"
       xsi:schemaLocation="
       http://www.springframework.org/schema/beans http://www.springframework.org/schema/beans/spring-beans.xsd
       http://www.springframework.org/schema/context http://www.springframework.org/schema/context/spring-context.xsd
       http://www.springframework.org/schema/tx http://www.springframework.org/schema/tx/spring-tx.xsd
">

    <context:component-scan base-package="cn.itsource.ssm.service">context:component-scan>


    <context:property-placeholder location="classpath:db.properties"/>


    <bean id="dataSource" class="org.apache.commons.dbcp.BasicDataSource" destroy-method="close">
        <property name="driverClassName" value="${jdbc.driverClassName}"/>
        <property name="url" value="${jdbc.url}" />
        <property name="username" value="${jdbc.username}"/>
        <property name="password" value="${jdbc.password}"/>
    bean>


    <bean id="sqlSessionFactory" class="org.mybatis.spring.SqlSessionFactoryBean">
        <property name="dataSource" ref="dataSource">property>
        <property name="mapperLocations" value="classpath:cn/itsource/ssm/domain/*Mapper.xml">property>
        <property name="typeAliasesPackage">
            <value>
                cn.itsource.ssm.domain
            value>
        property>
    bean>


    <bean class="org.mybatis.spring.mapper.MapperScannerConfigurer">
        <property name="basePackage" value="cn.itsource.ssm.mapper">property>
    bean>


    <bean id="transactionManager" class="org.springframework.jdbc.datasource.DataSourceTransactionManager">
        <property name="dataSource" ref="dataSource" />
    bean>

    <tx:annotation-driven transaction-manager="transactionManager" />

beans>
applicationCotnext-mvc.xml
(配置springmvc)
<beans xmlns="http://www.springframework.org/schema/beans" xmlns:xsi="http://www.w3.org/2001/XMLSchema-instance"
       xmlns:context="http://www.springframework.org/schema/context"
       xmlns:mvc="http://www.springframework.org/schema/mvc"
       xsi:schemaLocation="http://www.springframework.org/schema/beans
       http://www.springframework.org/schema/beans/spring-beans.xsd
       http://www.springframework.org/schema/context
       http://www.springframework.org/schema/context/spring-context.xsd
       http://www.springframework.org/schema/mvc
       http://www.springframework.org/schema/mvc/spring-mvc.xsd">

    <context:component-scan base-package="cn.itsource.ssm.web.controller" />

    <mvc:default-servlet-handler />

    <mvc:annotation-driven />

    <bean class="org.springframework.web.servlet.view.InternalResourceViewResolver">
        <property name="prefix" value="/WEB-INF/views/" />
        <property name="suffix" value=".jsp" />
    bean>
beans>
web.xml
<web-app xmlns="http://xmlns.jcp.org/xml/ns/javaee"
         xmlns:xsi="http://www.w3.org/2001/XMLSchema-instance"
         xsi:schemaLocation="http://xmlns.jcp.org/xml/ns/javaee http://xmlns.jcp.org/xml/ns/javaee/web-app_3_1.xsd"
         version="3.1">

    <context-param>
        <param-name>contextConfigLocationparam-name>
        <param-value>classpath:applicationContext.xmlparam-value>
    context-param>

    <listener>
        <listener-class>org.springframework.web.context.ContextLoaderListenerlistener-class>
    listener>

    <servlet>
        <servlet-name>dispatchServletservlet-name>
        <servlet-class>org.springframework.web.servlet.DispatcherServletservlet-class>
        <init-param>
            <param-name>contextConfigLocationparam-name>
            <param-value>classpath:applicationContext-mvc.xmlparam-value>
        init-param>
        <load-on-startup>1load-on-startup>
    servlet>
    <servlet-mapping>
        <servlet-name>dispatchServletservlet-name>
        <url-pattern>/url-pattern>
    servlet-mapping>

    <filter>
        <filter-name>characterEncodingFilterfilter-name>
        <filter-class>org.springframework.web.filter.CharacterEncodingFilterfilter-class>
        <init-param>
            <param-name>encodingparam-name>
            <param-value>utf-8param-value>
        init-param>
    filter>
    <filter-mapping>
        <filter-name>characterEncodingFilterfilter-name>
        <url-pattern>/*url-pattern>
    filter-mapping>
web-app>
db.properties
(配置数据库连接信息)
jdbc.driverClassName=com.mysql.jdbc.Driver
jdbc.url=jdbc:mysql:///mybatis
jdbc.username=test
jdbc.password=123
log4j.properties
(配置日志信息)
log4j.rootLogger=ERROR, stdout
#log4j.rootLogger=NONE
log4j.logger.cn.itsource=TRACE

log4j.appender.stdout=org.apache.log4j.ConsoleAppender
log4j.appender.stdout.layout=org.apache.log4j.PatternLayout
log4j.appender.stdout.layout.ConversionPattern=%d %p [%c] - %m%n
2、maven多模块搭建
为什么要搭建多模块?
1、方便维护
2、公共内容,BaseDomain、BaseService等可以在多个项目重复使用
3、部分代码,不希望随意更改,如Util,AjaxResult等,可以单独抽取出来
4、拆分项目可以在业务不断增加的同时保持精简的结构
5、大型项目适合多模块开发
搭建多模块
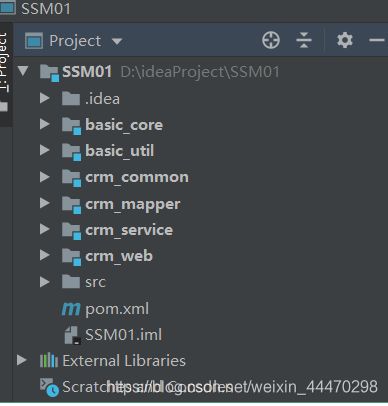
代码放的位置:
basic_core: basedomain baseService baseMapper baseServiceImpl
basic_util: ajaxResult pageList
crm_comomon: department departmentQuery
crm_mapper: DepartmentMapper.java
crm_service:IDepartmentService DepartmentServiceImpl
crm_web: DepartmentController
引用关系:
crm_web -->crm_service
crm_service–>crm_mapper
crm_mapper–>crm_common
crm_common–>basic_core
basic_core->basic_util
注意:不要也不能循环引用
配置文件
web.xml -->crm_web
applicationContext-mvc.xml–>crm_web
applicationContext.xml -->crm_service
db.properties–>crm_service/crm_mapper
导入jar包关系
crm_parent: 公共的spring的包
crm_web: spring-web spring-webmvc
crm_service: 引用crm_mapper
crm_mapper: mybatis dbcp 等
代码尽量的满足以下要求
(1) 开闭原则:
对扩展开发
对修改关闭 – 一些公共的内容
(2) 低耦合 高内聚
低耦合: 模块和模块直接,类和类之间 耦合度要低
高内聚: 指的类里面的方法,它应该达到高内聚的效率
save -->保存的使用 代码30-40行
3、restfull风格
(1)为什么restfull风格
请求方式:
get/post, 新增:delete/put/options
优点
不会暴露资源
delete(动作) (/product/1 资源) -->动作+资源
前后端分离的项目
采用restful的风格来交互,使用json来传递数据
(2)什么叫restfull风格
restful风格它是http协议扩展,是以资源为核心,通过url定位资源,通过不同请求方式表示操作.(PUT-add,POST-update,DELET-del,GET-获取或查询,PATCH,HEAD,OPTION)
put – 新增 (修改)
post --修改(新增)
get --查询
delete --删除
patch --查询
head --头信息
(3)使用restfull写法
@Controller
@RequestMapping("/department")
public class DepartmentController {


    @Autowired
    private IDepartmentService departmentService;

    @RequestMapping(value="/list",method= RequestMethod.PATCH)
    @ResponseBody
    public List<Department> list(){

        return departmentService.findAll();
    }

    //新增
    // {name:xxx}
    @RequestMapping(value="/save",method = RequestMethod.PUT)
    @ResponseBody
    public AjaxResult save(@RequestBody  Department department){

        System.out.println("新增数据");
        System.out.println(department);
        return new AjaxResult();
    }

    @RequestMapping(value="/update",method = RequestMethod.POST)
    @ResponseBody
    public AjaxResult update(@RequestBody  Department department){

        System.out.println("修改数据");
        System.out.println(department);
        return new AjaxResult();
    }

    // /department/delete/1
    @RequestMapping(value="/delete/{id}",method = RequestMethod.DELETE)
    @ResponseBody
    public AjaxResult delete(@PathVariable("id") Long id){

        System.out.println("删除数据");
        System.out.println("删除的id:"+id);
        return new AjaxResult();
    }

    // /department/delete/1
    @RequestMapping(value="/query/{id}",method = RequestMethod.GET)
    @ResponseBody
    public AjaxResult queryOne(@PathVariable("id") Long id){

        System.out.println("查询数据");
        System.out.println("查询的id:"+id);
        return new AjaxResult();
    }


}
4 swagger用法
swagger:可以根据controller生成接口文档
(1) 导入jar包
        <dependency>
            <groupId>io.springfoxgroupId>
            <artifactId>springfox-swagger2artifactId>
            <version>${springfox.version}version>
        dependency>
        <dependency>
            <groupId>io.springfoxgroupId>
            <artifactId>springfox-swagger-uiartifactId>
            <version>${springfox.version}version>
        dependency>
(2)写一个配置类
扫描controller 生成文档
@Configuration //相当于写了spring配置 applicationContext.xml
@EnableWebMvc //开启webmvc
@EnableSwagger2 //开启swagger
//扫描个包下面controller来生成接口描述
@ComponentScan(basePackages="cn.itsource.crm.web.controller")
public class SwaggerConfig {
//(3)扫描的配置
<context:component-scan base-package="cn.itsource.crm.web.config"/>
(4)启动测试
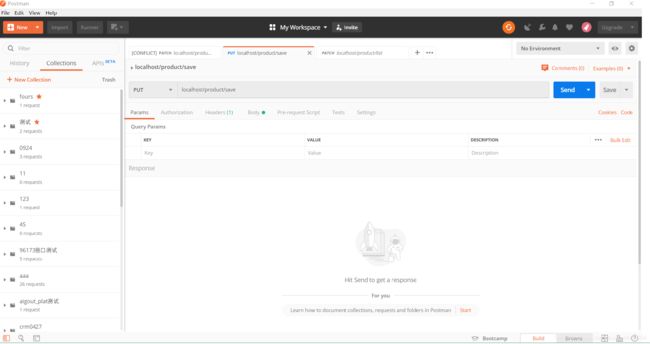
通过postman来测试
5 postman
6 vue-admin-master模块
(1)下载 安装
npm install
(2)运行
npm run dev