ansible playbooks的基本应用
1.设置Tab键的空格数
因为playbooks中默认需要缩进两个空格,所以设置Tab键为两个空格最好用
[devops@server1 ~]$ vim .vimrc
  1 autocmd filetype yaml setlocal ai ts=2 sw=2 et
2.建立playbook.yml文件,发布剧本
1.编辑playbook.yml文件
[devops@server1 ansible]$ vim playbook.yml
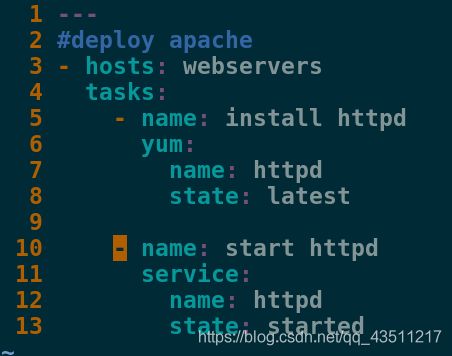
  1 ---
  2 #deploy apache
  3 - hosts: webservers		##主机包括哪些
  4   tasks:			##任务
  5     - name: install httpd		##下载httpd
  6       yum:
  7         name: httpd
  8         state: latest
  9
 10     - name: start httpd		##启动httpd
 11       service:
 12         name: httpd
 13         state: started
[devops@server1 ansible]$ ansible-playbook playbook.yml --list-hosts
[devops@server1 ansible]$ ansible-playbook playbook.yml --list-tasks
2.发布剧本文件
[devops@server1 ansible]$ ansible-playbook playbook.yml --syntax-check 		##对编写的剧本进行语法检测
[devops@server1 ansible]$ ansible-playbook playbook.yml		##执行编写的剧本
3.测试
修改剧本,使默认发布页访问到"www.redhat.com”
[devops@server1 ansible]$ vim playbook.yml
  1 ---
  2 #deploy apache
  3 - hosts: webservers
  4   tasks:
  5     - name: install httpd
  6       yum:
  7         name: httpd
  8         state: latest
  9
 10     - name: create index.html
 11       copy:
 12         content: "www.redhat.com\n"
 13         dest: /var/www/html/index.html
 14
 15     - name: start httpd
 16       service:
 17         name: httpd
 18         state: started
发布剧本
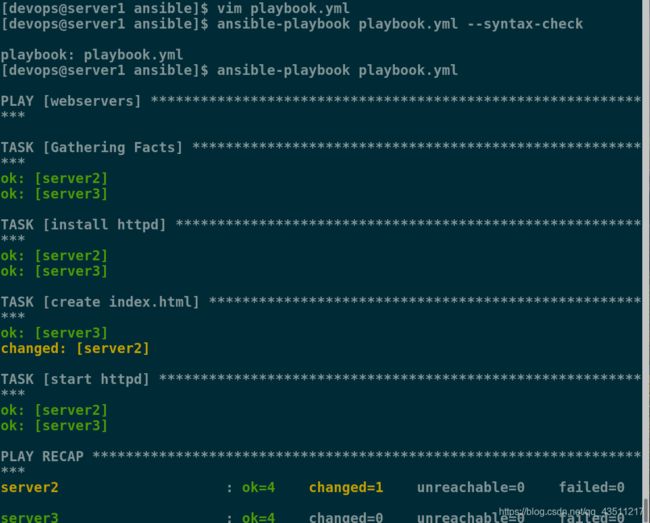
[devops@server1 ansible]$ ansible-playbook playbook.yml --syntax-check  	##测试

playbook: playbook.yml
[devops@server1 ansible]$ ansible-playbook playbook.yml
3.添加任务
1.编写playbook.yml文件
[devops@server1 ansible]$ vim playbook.yml
  1 ---
  2 #deploy apache
  3 - hosts: webservers
  4   tasks:
  5     - name: install httpd
  6       yum:
  7         name: httpd
  8         state: latest
  9
 10     - name: create index.html
 11       copy:
 12         content: "www.redhat.com\n"
 13         dest: /var/www/html/index.html
 14
 15     - name: configure httpd		#将当前目录下的files目录中的httpd.conf文件拷贝到目标主机的指定目录中
 16       copy:
 17         src: files/httpd.conf
 18         dest: /etc/httpd/conf/httpd.conf
 19         owner: root
 20         group: root
 21         mode: 644
 22
 23     - name: start httpd
 24       service:
 25         name: httpd
 26         state: started
2.建立files目录及相关文件
[devops@server1 ansible]$ mkdir files
[devops@server1 ansible]$ cd files/
[devops@server1 files]$ scp server3:/etc/httpd/conf/httpd.conf .
httpd.conf                                 100%   11KB  11.5KB/s   00:00
[devops@server1 files]$ ls
httpd.conf
3.检测语法并发布
[devops@server1 ansible]$ ansible-playbook playbook.yml --syntax-check

playbook: playbook.yml
[devops@server1 ansible]$ ansible-playbook playbook.yml
[devops@server1 ansible]$ md5sum files/httpd.conf
f5e7449c0f17bc856e86011cb5d152ba  files/httpd.conf
[root@server2 ~]# md5sum /etc/httpd/conf/httpd.conf
f5e7449c0f17bc856e86011cb5d152ba  /etc/httpd/conf/httpd.conf
[root@server3 ~]# md5sum /etc/httpd/conf/httpd.conf
f5e7449c0f17bc856e86011cb5d152ba  /etc/httpd/conf/httpd.conf
可以看出确实是同一份文件
设定开机自启动
  1 ---
  2 #deploy apache
  3 - hosts: webservers
  4   tasks:
  5     - name: install httpd
  6       yum:
  7         name: httpd
  8         state: latest
  9
 10     - name: create index.html
 11       copy:
 12         content: "www.redhat.com\n"
 13         dest: /var/www/html/index.html
 14
 15     - name: configure httpd
 16       copy:
 17         src: files/httpd.conf
 18         dest: /etc/httpd/conf/httpd.conf
 19         owner: root
 20         group: root
 21         mode: 644
 22
 23     - name: start httpd
 24       service:
 25         name: httpd
 26         state: started
 27         enabled: true			##开机自启
[devops@server1 ansible]$ ansible-playbook playbook.yml --syntax-check

playbook: playbook.yml
[devops@server1 ansible]$ ansible-playbook playbook.yml
4.编写触发器,实现文件更改则重启服务,不更改则不做操作
1.编写playbook.yml文件
[devops@server1 ansible]$ vim playbook.yml
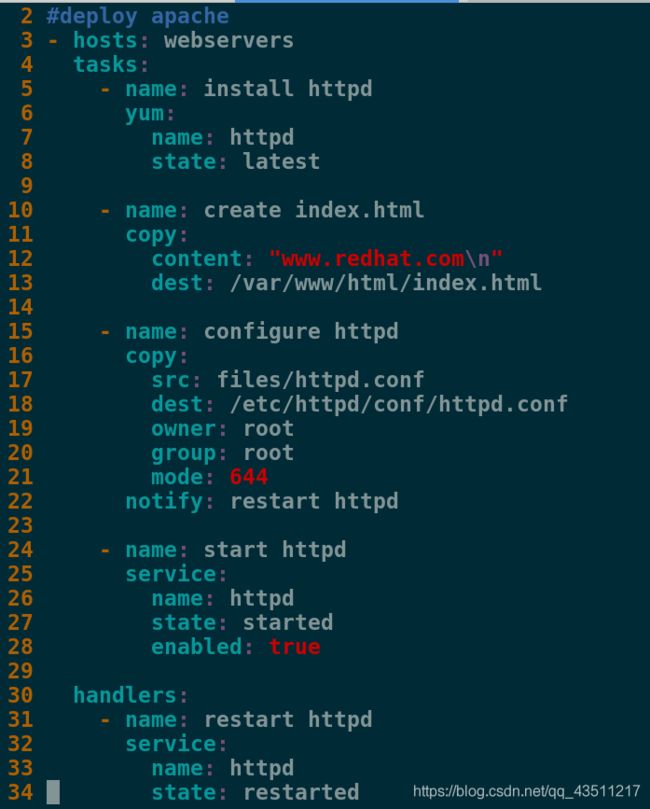
  1 ---
  2 #deploy apache
  3 - hosts: webservers
  4   tasks:
  5     - name: install httpd
  6       yum:
  7         name: httpd
  8         state: latest
  9
 10     - name: create index.html
 11       copy:
 12         content: "www.redhat.com\n"
 13         dest: /var/www/html/index.html
 14
 15     - name: configure httpd
 16       copy:
 17         src: files/httpd.conf
 18         dest: /etc/httpd/conf/httpd.conf
 19         owner: root
 20         group: root
 21         mode: 644
 22       notify: restart httpd
 23
 24     - name: start httpd
 25       service:
 26         name: httpd
 27         state: started
 28         enabled: true
 29
 30   handlers:
 31     - name: restart httpd
 32       service:
 33         name: httpd
 34         state: restarted
2.更改files目录下的httpd.conf文件
[devops@server1 ansible]$ vim files/httpd.conf
 41 #Listen 12.34.56.78:80
 42 Listen 8080
3.测试发布playbooks文件,查看更改是否生效
[devops@server1 ansible]$ ansible-playbook playbook.yml --syntax-check

playbook: playbook.yml
[devops@server1 ansible]$ ansible-playbook playbook.yml
5.实现防火墙配置
1.编写playbook文件
  1 ---
  2 #deploy apache
  3 - hosts: webservers
  4   tasks:
  5     - name: install httpd
  6       yum:
  7         name: httpd
  8         state: latest
  9
 10     - name: create index.html
 11       copy:
 12         content: "www.redhat.com\n"
 13         dest: /var/www/html/index.html
 14
 15     - name: configure httpd
 16       copy:
 17         src: files/httpd.conf
 18         dest: /etc/httpd/conf/httpd.conf
 19         owner: root
 20         group: root
 21         mode: 644
 22       notify: restart httpd
 23
 24     - name: start httpd
 25       service:
 26         name: httpd
 27         state: started
 28         enabled: true
 29
 30     - name: start firewalld
 31       service:
 32         name: firewalld
 33         state: started
 34         enabled: true
 35
 36     - name: configure firewalld
 37       firewalld:
 38         service: http
 39         state: enabled
 40         permanent: yes
 41         immediate: yes
 42
 43   handlers:
 44     - name: restart httpd
 45       service:
 46         name: httpd
 47         state: restarted
2.检测并推送
[devops@server1 ansible]$ ansible-playbook playbook.yml --syntax-check

playbook: playbook.yml
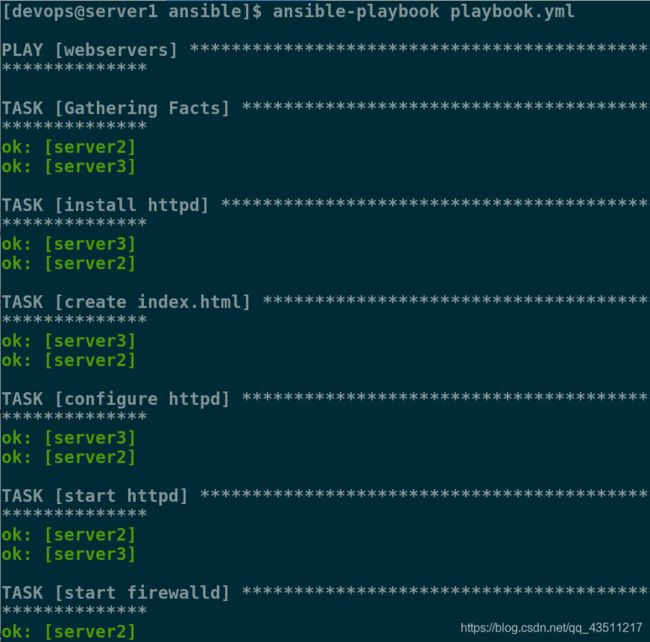
[devops@server1 ansible]$ ansible-playbook playbook.yml
2.查看server2是否防火墙开启
[root@server2 ~]# systemctl status firewalld
● firewalld.service - firewalld - dynamic firewall daemon
   Loaded: loaded (/usr/lib/systemd/system/firewalld.service; enabled; vendor preset: enabled)
   Active: active (running) since Fri 2019-06-21 21:40:20 CST; 3min 25s ago
     Docs: man:firewalld(1)
 Main PID: 16786 (firewalld)
   CGroup: /system.slice/firewalld.service
           └─16786 /usr/bin/python -Es /usr/sbin/firewalld --nofork --nopid

Jun 21 21:40:19 server2 systemd[1]: Starting firewalld - dynamic firewall daemon...
Jun 21 21:40:20 server2 systemd[1]: Started firewalld - dynamic firewall daemon.
6.使用变量完成动态http服务部署
1.系统变量的两种表示方法
[devops@server1 ansible]$ vim playbook.yml
 10     - name: create index.html
 11       copy:
 12         content: "{{ ansible_facts['hostname'] }}\n"			##也可以写成content: "{{ ansible_facts.hostname }}\n"
 13         dest: /var/www/html/index.html
[devops@server1 ansible]$ ansible-playbook playbook.yml
测试:
[devops@server1 ansible]$ curl server2
server2
[devops@server1 ansible]$ curl server3
server3
ansible test -m setup|less
[devops@server1 ansible]$ ansible test -m setup|less		##查询系统变量,结果如下:
        "ansible_eth0": {
            "active": true,
            "device": "eth0",
            "features": {
                "busy_poll": "off [fixed]",
... ...
            "hw_timestamp_filters": [],
            "ipv4": {
                "address": "172.25.80.2",
                "broadcast": "172.25.80.255",
                "netmask": "255.255.255.0",
                "network": "172.25.80.0"
            },
所以在编写playbook.yml时应该按照层次
[devops@server1 ansible]$ vim playbook.yml
 10     - name: create index.html
 11       copy:
 12         content: "{{ ansible_facts.hostname }} {{ ansible_fact    s.eth0.ipv4.address }}\n"
 13         dest: /var/www/html/index.html
[devops@server1 ansible]$ ansible-playbook playbook.yml
2. 单独发布模板中的一个任务
模板中可以添加tags参数,发布时只要-t加上参数就可以单独发布
[devops@server1 ansible]$ vim playbook.yml
 10     - name: create index.html
 11       copy:
 12         content: "{{ ansible_facts.hostname }} {{ ansible_fact    s.eth0.ipv4.address }}\n"
 13         dest: /var/www/html/index.html
 14       tags: one
 [devops@server1 ansible]$ ansible-playbook playbook.yml -t one
3.使用template模块,编写带有变量的http配置文件
[devops@server1 ansible]$ vim playbook.yml
  1 ---
  2 #deploy apache
  3 - hosts: webservers
  4   vars:
  5     http_port: 80
  6   tasks:
  7     - name: install httpd
  8       yum:
  9         name: httpd
 10         state: latest
 11
 12     - name: create index.html
 13       copy:
 14         content: "{{ ansible_facts.hostname }} {{ ansible_fact    s.eth0.ipv4.address }}\n"
 15         dest: /var/www/html/index.html
 16       tags: one
 17
 18     - name: configure httpd
 19       template:
 20         src: files/httpd.conf.j2
 21         dest: /etc/httpd/conf/httpd.conf
 22         owner: root
 23         group: root
 24         mode: 644
 25       notify: restart httpd
 26
 27     - name: start httpd
 28       service:
 29         name: httpd
 30         state: started
 31         enabled: true
 32
 33     - name: start firewalld
 34       service:
 35         name: firewalld
 36         state: started
 37         enabled: true
 38
 39     - name: configure firewalld
 40       firewalld:
 41         service: http
 42         state: enabled
 43         permanent: yes
 44         immediate: yes
 45
 46   handlers:
 47     - name: restart httpd
 48       service:
 49         name: httpd
 50         state: restarted
将子目录下files/httpd.conf重命名为httpd.conf.j2
[devops@server1 ansible]$ mv files/httpd.conf files/httpd.conf.j2
修改httpd.conf.j2文件
[devops@server1 ansible]$ vim files/httpd.conf.j2
 41 #Listen 12.34.56.78:80
 42 Listen {{ http_port }}
推送:
[devops@server1 ansible]$ ansible-playbook playbook.yml
4.编写yml文件,实现读取并存储系统信息
[devops@server1 ansible]$ mkdir templates
[devops@server1 ansible]$ vim hostinfo.yml
  1 ---
  2 - hosts: all
  3   tasks:
  4     - name: create infofile
  5       template:
  6         src: templates/info.j2
  7         dest: /mnt/hostinfo
[devops@server1 ansible]$ cd templates/
[devops@server1 templates]$ vim info.j2
  1 主机名: {{ ansible_facts['hostname'] }}
  2 主机IP地址: {{ ansible_facts.eth0.ipv4.address }}
  3 根分区大小: {{ ansible_facts['devices']['dm-0']['size'] }}
  4 系统内核: {{ ansible_facts['distribution_version'] }}
[devops@server1 ansible]$ ansible-playbook hostinfo.yml --syntax-check
[devops@server1 ansible]$ ansible-playbook hostinfo.yml
ansible server2 -a 'cat /mnt/hostinfo'
ansible server3 -a 'cat /mnt/hostinfo'
5.我们也可以实现通过各种变量,配置不同的主机配置不同的服务
[devops@server1 ansible]$ vim install.yml
[devops@server1 ansible]$ ansible-playbook install.yml --syntax-check

playbook: install.yml
[devops@server1 ansible]$ ansible-playbook install.yml
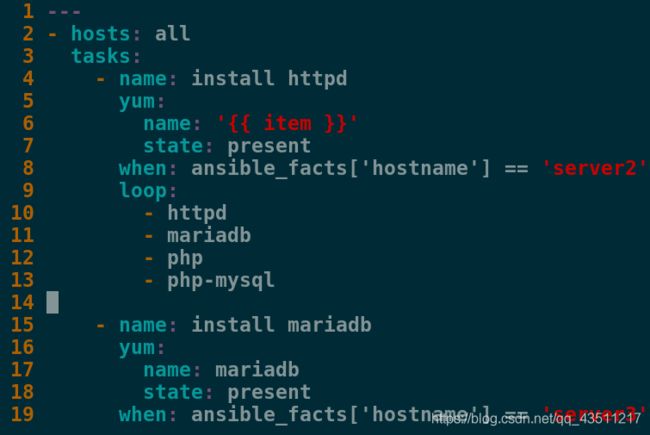
[devops@server1 ansible]$ vim install.yml
  1 ---
  2 - hosts: all
  3   tasks:
  4     - name: install httpd
  5       yum:
  6         name: '{{ item }}'
  7         state: present
  8       when: ansible_facts['hostname'] == 'server2'
  9       loop:
 10         - httpd
 11         - mariadb
 12         - php
 13         - php-mysql
 14
 15     - name: install mariadb
 16       yum:
 17         name: mariadb
 18         state: present
 19       when: ansible_facts['hostname'] == 'server3'
[devops@server1 ansible]$ ansible-playbook install.yml
6.使用ansible快速布置每一台主机的解析
[devops@server1 ansible]$ vim hostinfo.yml
  1 ---
  2 - hosts: all
  3   tasks:
  4     - name: create infofile
  5       template:
  6         src: templates/info.j2
  7         dest: /mnt/hostinfo
  8
  9     - name: create hosts
 10       template:
 11         src: templates/host.j2
 12         dest: /etc/hosts
 13         owner: root
 14         group: root
 15         mode: 644
 [devops@server1 ansible]$ vim inventory
  1 [test]
  2 server2
  3 server1
  4
  5 [db]
  6 server3
  7
  8 [webservers:children]
  9 test
 10 db
[root@server1 ansible]# visudo
## Allow root to run any commands anywhere
root    ALL=(ALL)       ALL
devops        ALL=(ALL)       NOPASSWD: ALL
[devops@server1 ansible]$ ansible-playbook  hostinfo.yml
7.批量添加用户
[devops@server1 ansible]$  vim adduser.yml
  1 ---
  2 - hosts:  all
  3   tasks:
  4     - name: create users
  5       user:
  6         name: "{{ item }}"
  7         state: present
  8         password: redhat
  9       loop:
 10         - user1
 11         - user2
 12         - user3
 13         - user4
[devops@server1 ansible]$ ansible-playbook adduser.yml
[devops@server1 ansible]$ cat /etc/passwd

可以看到这样添加的用户密码是可见的,很不安全
建立目录,创建userlist.yml文件
[devops@server1 ansible]$ mkdir vars
[devops@server1 ansible]$ cd vars/
[devops@server1 vars]$ vim userlist.yml		##用来保存用户名及密码
---
userlist:
  - user: user1
    pass: redhat
  - user: user2
    pass: redhat
  - user: user3
    pass: redhat
  - user: user4
    pass: redhat
修改adduser.yml 文件,使用userlist.yml 来建立用户
[devops@server1 vars]$ cd ..
[devops@server1 ansible]$ vim adduser.yml
  1 ---
  2 - hosts:  all
  3   vars_files:
  4     - vars/userlist.yml
  5   tasks:
  6     - name: create users
  7       user:
  8         name: "{{ item.user }}"
  9         state: present
 10         password: "{{ item.pass }}"
 11       loop: "{{ userlist }}"
对 vars/userlist.yml文件进行加密,加密后必须输入密码才能看到文件内容。
[devops@server1 ansible]$ ansible-vault encrypt vars/userlist.yml
New Vault password:
Confirm New Vault password:
Encryption successful
[devops@server1 ansible]$ cat vars/userlist.yml
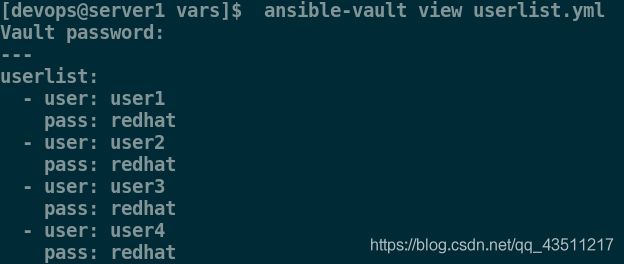
[devops@server1 vars]$  ansible-vault view userlist.yml
Vault password:
---
userlist:
  - user: user1
    pass: redhat
  - user: user2
    pass: redhat
  - user: user3
    pass: redhat
  - user: user4
    pass: redhat
`[devops@server1 ansible]$ ansible-playbook adduser.yml --ask-vault-pass
[root@server2 ~]# cat /etc/shadow
user1:redhat:18071:0:99999:7:::
user2:redhat:18071:0:99999:7:::
user3:redhat:18071:0:99999:7:::
user4:redhat:18071:0:99999:7:::
修改adduser.yml
[devops@server1 ansible]$ vim adduser.yml
  1 ---
  2 - hosts:  all
  3   vars_files:
  4     - vars/userlist.yml
  5   tasks:
  6     - name: create users
  7       user:
  8         name: "{{ item.user }}"
  9         state: present
 10         password: "{{ item.pass | password_hash('sha512','mysecretsalt') }}"
 11       loop: "{{ userlist }}"
再次推送
[devops@server1 ansible]$ ansible-playbook adduser.yml --ask-vault-pass
[root@server2 ~]# cat /etc/shadow
user1:$6$mysecretsalt$GcajIATSXc4CUJ.uOMrH.oB7A7dch4KSuaNfL12kfmhFZz7hH9gcttplfRfmk4rQ.sQnZieSBxqi6xPDFBGRC0:18071:0:99999:7:::
user2:$6$mysecretsalt$GcajIATSXc4CUJ.uOMrH.oB7A7dch4KSuaNfL12kfmhFZz7hH9gcttplfRfmk4rQ.sQnZieSBxqi6xPDFBGRC0:18071:0:99999:7:::
user3:$6$mysecretsalt$GcajIATSXc4CUJ.uOMrH.oB7A7dch4KSuaNfL12kfmhFZz7hH9gcttplfRfmk4rQ.sQnZieSBxqi6xPDFBGRC0:18071:0:99999:7:::
user4:$6$mysecretsalt$GcajIATSXc4CUJ.uOMrH.oB7A7dch4KSuaNfL12kfmhFZz7hH9gcttplfRfmk4rQ.sQnZieSBxqi6xPDFBGRC0:18071:0:99999:7:::

