java 知识点 20(springboot、bootschool网站、yaml配置文件、codota插件、thymeleaf模板语法、xmlns命名空间)
文章目录
-
- 1、bootschool
- 2、Spring boot 项目创建及解析
-
- 2.1、创建boot项目
- 2.2、创建项目、下载依赖 慢?
- 2.3、把项目跑起来
- 2.4、一些配置
-
- 2.4.1、全局配置文件格式
- 2.4.2、改端口
- 2.4.3、加载指定的配置文件
- 2.4.4、启动时显示的图片字符
- 2.4.5、全局配置文件所在位置
- 2.4.6、多环境配置
- 2.5、解析
-
- 2.5.1、pom.xml解析
- 2.5.2、MybootApplication 解析
- 3、Spring boot 代码上手
-
- 3.1、静态资源
-
- 3.1.1、包内添加 jQuery
-
- 3.1.2、资源读取优先级
- 3.1.3、写一个首页
- 3.1.4、添加图标favicon.ico
- 3.2、thymeleaf
-
- 3.2.1、thymeleaf模板引擎
- 3.2.2、thymeleaf模板语法
- 3.3、国际化
- 4、IDEA插件codota
- 5、xml里的xmlns
1、bootschool
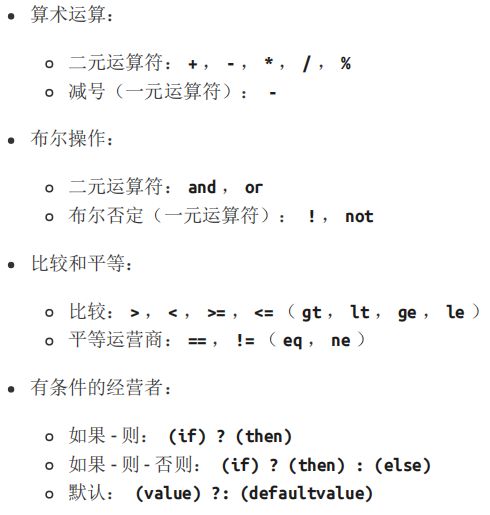
bootschool是一个神奇的网站
https://www.bootschool.net/ascii-art/search
里面最好用的功能就是生成图片字符串
                                 _
                              _ooOoo_
                             o8888888o
                             88" . "88
                             (| -_- |)
                             O\  =  /O
                          ____/`---'\____
                        .'  \\|     |//  `.
                       /  \\|||  :  |||//  \
                      /  _||||| -:- |||||_  \
                      |   | \\\  -  /'| |   |
                      | \_|  `\`---'//  |_/ |
                      \  .-\__ `-. -'__/-.  /
                    ___`. .'  /--.--\  `. .'___
                 ."" '<  `.___\_<|>_/___.' _> \"".
                | | :  `- \`. ;`. _/; .'/ /  .' ; |
                \  \ `-.   \_\_`. _.'_/_/  -' _.' /
  ================-.`___`-.__\ \___  /__.-'_.'_.-'================
                              `=--=-'
2、Spring boot 项目创建及解析
官网地址:https://spring.io/projects/spring-boot
从最根本上来讲,Spring Boot就是一些库的集合,用于快速搭建web应用。
2.1、创建boot项目
系统环境:windows
使用工具:idea
1、新建springboot项目

2、选择web项目

点击完成之后,idea右下角会下载一些东西,需要等它下载完成再开始操作
除了可以使用idea新建项目外,还可以去spring官网新建项目下载下来用idea打开
2.2、创建项目、下载依赖 慢?
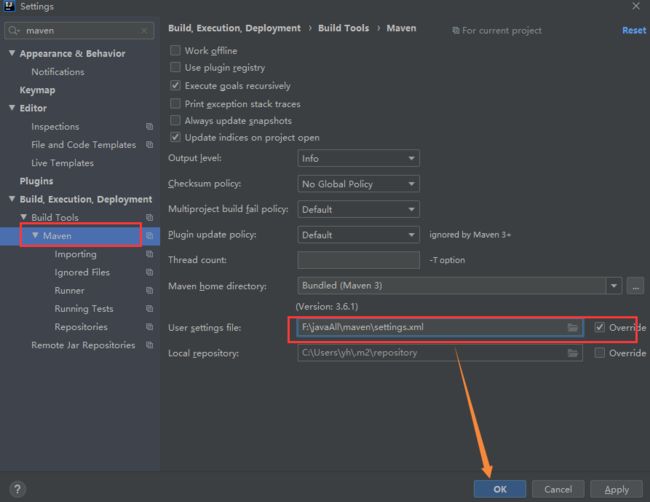
如果下载特别慢,可以给maven配置阿里云镜像
这里我没有单独下载maven,仅新建了个settings.xml,里面配置了阿里云镜像
settings.xml
<settings xmlns="http://maven.apache.org/SETTINGS/1.0.0"
    xmlns:xsi="http://www.w3.org/2001/XMLSchema-instance" xsi:schemaLocation="http://maven.apache.org/SETTINGS/1.0.0 http://maven.apache.org/xsd/settings-1.0.0.xsd">

    <pluginGroups/>
    <proxies/>


    <mirrors>
        <mirror>
            <id>alimavenid>
            <name>aliyun mavenname>

            <url>http://maven.aliyun.com/nexus/content/groups/public/url>
            <mirrorOf>centralmirrorOf>
        mirror>
    mirrors>
  <profiles>

        <profile>
            <id>aliid>
            <repositories>
                <repository>
                    <id>alimavenid>
                    <name>aliyun mavenname>
                    <url>http://maven.aliyun.com/nexus/content/groups/public/url>
                    <releases>
                        <enabled>trueenabled>
                    releases>
                    <snapshots>
                        <enabled>trueenabled>
                    snapshots>
                repository>
            repositories>
            <pluginRepositories>
                <pluginRepository>
                    <id>alimavenid>
                    <name>aliyun mavenname>
                    <url>http://maven.aliyun.com/nexus/content/groups/public/url>
                pluginRepository>
            pluginRepositories>
        profile>

    profiles>

settings>
2.3、把项目跑起来
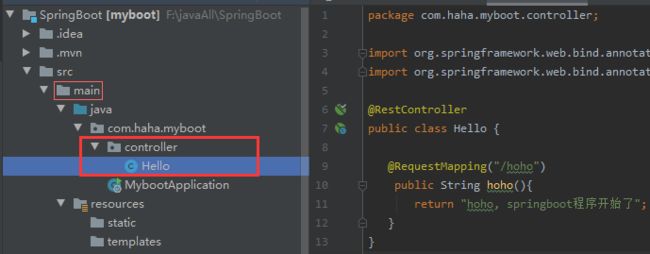
写一个简单的实例controller/Hello.java
package com.haha.myboot.controller;

import org.springframework.web.bind.annotation.RequestMapping;
import org.springframework.web.bind.annotation.RestController;

@RestController
public class Hello {


   @RequestMapping("/hoho")
    public String hoho(){

       return "hoho, springboot程序开始了";
   }
}
2.4、一些配置
2.4.1、全局配置文件格式
springboot可以有两种格式(选其一)
application.properties :里面的内容是 key = value 格式
application.yaml :里面的内容是 key : value 格式

yaml可以写成yml
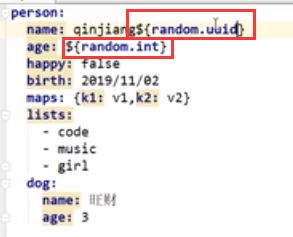
yaml文件内容的几种数据写法:它对空格的要求比较高

yaml可以给实体类的属性直接赋值

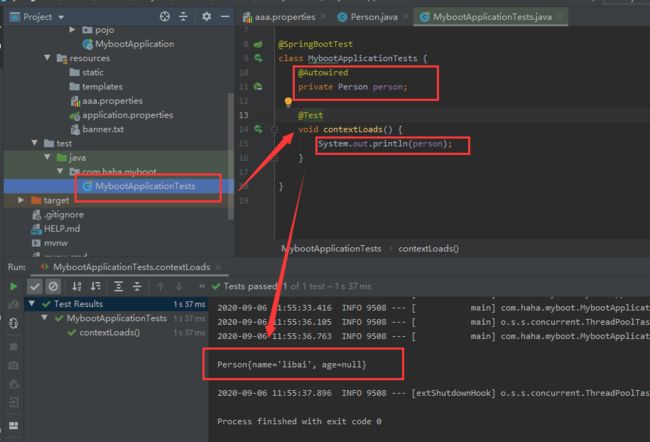
测试输出键值对

yml里面还可以写随机生成值
yaml更多语法规则参考:https://www.runoob.com/w3cnote/yaml-intro.html
2.4.2、改端口
更改端口号为8011
server.port=8011
2.4.3、加载指定的配置文件
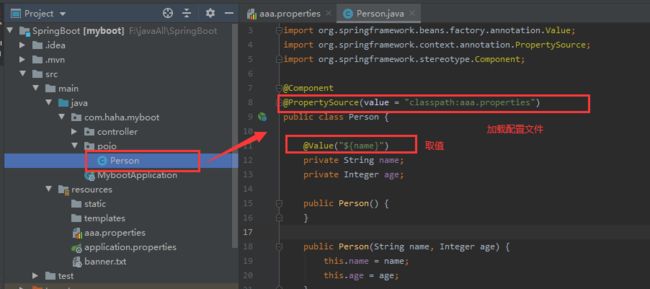
先在resource下新建一个配置文件aaa.properties

在实体类里面添加注解
@PropertySource(value = "classpath:aaa.properties")
2.4.4、启动时显示的图片字符
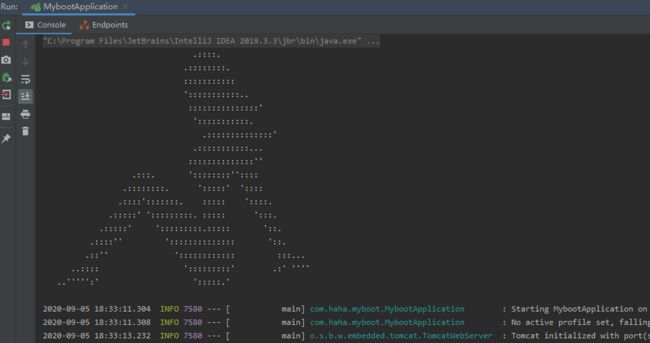
更改启动时spring图片字符

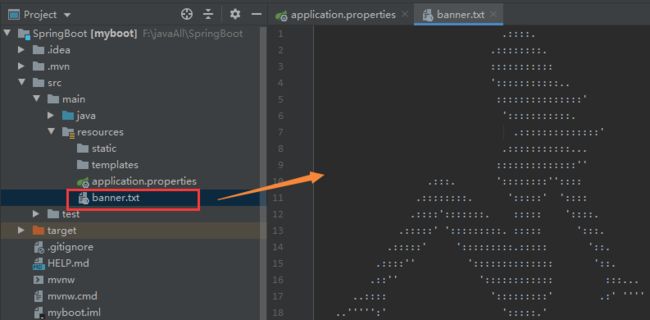
在resources文件夹下新建banner.txt,找一串图片字符复制进去
生成图片字符: https://www.bootschool.net/ascii-art/search
2.4.5、全局配置文件所在位置
application.properties可以在这几个位置:
1、在项目根目录下
2、项目根目录/config下
3、classpath:/config下
4、classpath:/下
如上排序也是配置文件的优先级排序
2.4.6、多环境配置
1、用properties配置多环境
通过spring.profiles.active这个值配置
//开发环境 spring.profiles.active=dev
//测试环境 spring.profiles.active=test
//生产环境 spring.profiles.active=prod

2、用yaml配置多环境
yaml文件里可以用—来区分成多文件

2.5、解析
了解项目中各个文件的内容和作用
2.5.1、pom.xml解析
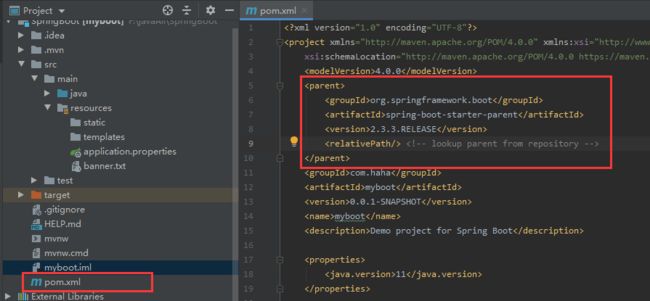
1、父标签:
也就是我们所创建的项目其实是spring的一个子项目
核心依赖在父项目中,里面定义了很多构建项目的jar版本等。
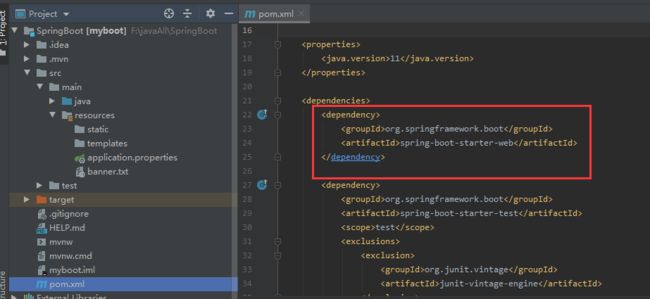
2、启动器
spring-boot-starter-web这个启动器会自动帮我们导入web的环境依赖
spring官网还有很多其他的启动器
spring-boot-maven-plugin是maven打包插件
能够将Spring Boot应用打包为可执行的jar或war文件
2.5.2、MybootApplication 解析
3、Spring boot 代码上手
3.1、静态资源
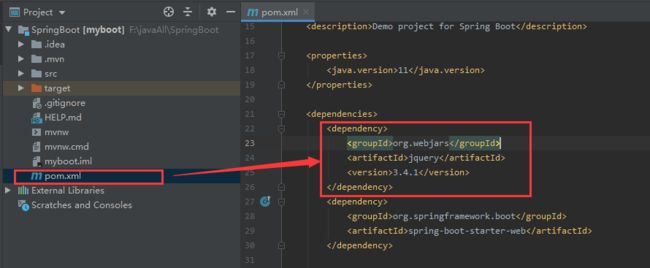
3.1.1、包内添加 jQuery
<dependency>
    <groupId>org.webjarsgroupId>
    <artifactId>jqueryartifactId>
    <version>3.41version>
dependency>
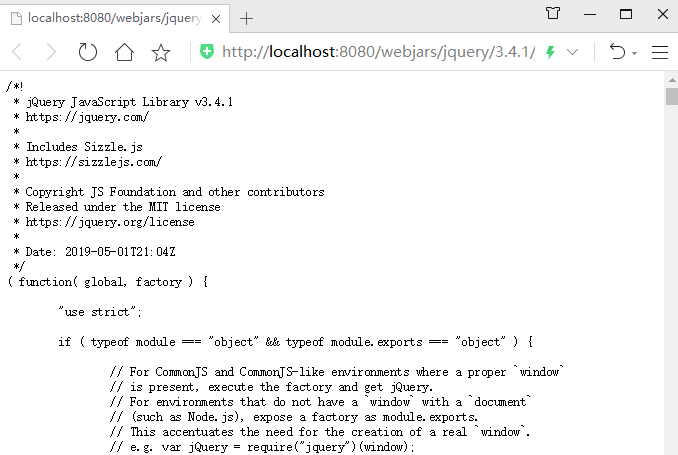
http://localhost:8080/webjars/jquery/3.4.1/jquery.js
3.1.2、资源读取优先级
先在资源各目录下新建几个1.js
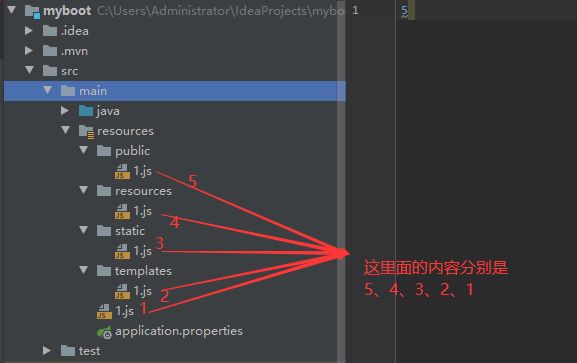
运行后,访问查看读取的数字几

经过几次测试我们发现
读取js文件顺序分别为
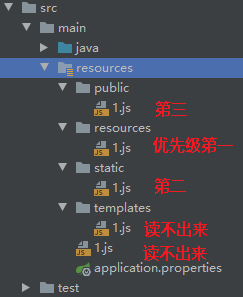
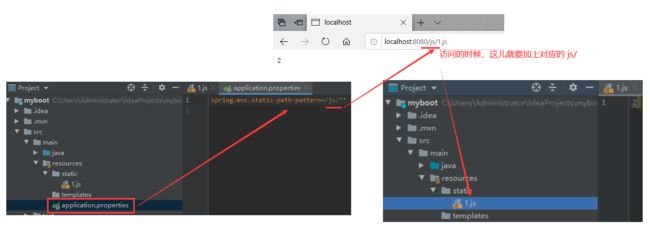
如果我们在application.properties里面自定义了资源访问路径,那么默认的就会失效
只能读自定义路径下的。
一般不会做这个配置,知道就好
如下例
spring.mvc.static-path-pattern=/js/**
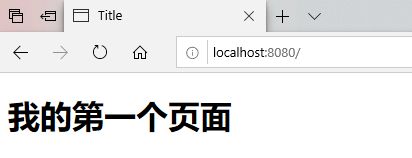
3.1.3、写一个首页
在static下新建一个index.html

运行访问:http://localhost:8080/
3.1.4、添加图标favicon.ico
阿里矢量图库:https://www.iconfont.cn/
在线制作小图标:https://tool.lu/favicon/
对于springboot 2.2.x版本之前和之后,添加favicon.ico图标的方式是不一样的。
springboot 2.2.x版本之前的参考:https://www.cnblogs.com/nosouln/p/12624192.html
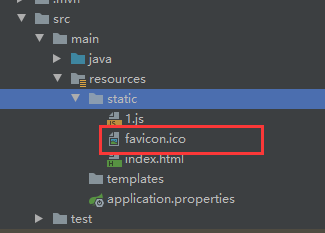
先在static下添加一张名为favicon.ico的图片
<html lang="en" xmlns:th="http://www.w3.org/1999/xhtml">
<head>
    <meta charset="UTF-8">
    <title>Titletitle>
    <link rel="icon" th:href="@{/static/favicon.ico}" type="image/x-icon"/>
    <link rel="bookmark" th:href="@{/public/favicon.ico}" type="image/x-icon"/>
head>
<body>
<h1>我的第一个页面h1>
body>
html>
win10自带的edg浏览器是不支持的,谷歌浏览器可以。
3.2、thymeleaf
jsp就是一种模板引擎,springboot推荐使用另一种模板引擎:thymeleaf
前后段分离设计的程序一般不需要模板引擎
3.2.1、thymeleaf模板引擎
thymeleaf官网:https://www.thymeleaf.org/
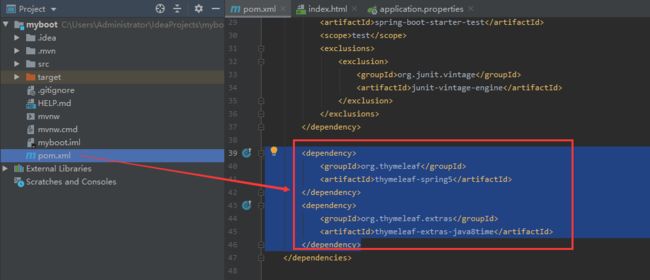
导入依赖
        <dependency>
            <groupId>org.thymeleafgroupId>
            <artifactId>thymeleaf-spring5artifactId>
        dependency>
        <dependency>
            <groupId>org.thymeleaf.extrasgroupId>
            <artifactId>thymeleaf-extras-java8timeartifactId>
        dependency>
也有可能以前点过自动下载,就不出现这个提示框默认下载了
3.2.2、thymeleaf模板语法
Thymeleaf3.0中文文档:链接:http://pan.baidu.com/s/1eROFKhO 密码:us8v
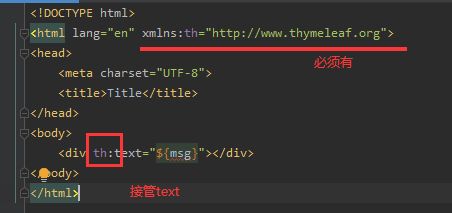
1、th :可以接管所有的html标签
<html lang="en" xmlns:th="http://www.thymeleaf.org">
<head>
    <meta charset="UTF-8">
    <title>Titletitle>
head>
<body>
    <div th:text="${msg}">div>
body>
html>
package com.haha.myboot;

import org.springframework.stereotype.Controller;
import org.springframework.ui.Model;
import org.springframework.web.bind.annotation.GetMapping;

@Controller
public class Newboot {

    @GetMapping(value = "/newboot")
    public String list(Model model){

        model.addAttribute("msg","hhhhhhhhhh");
        return "one";
    }
}
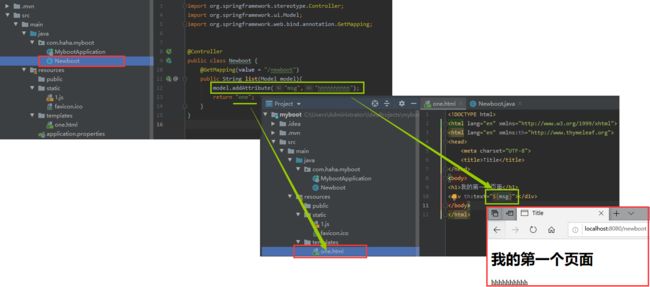
使用@Controller调用的html必须在templates目录下
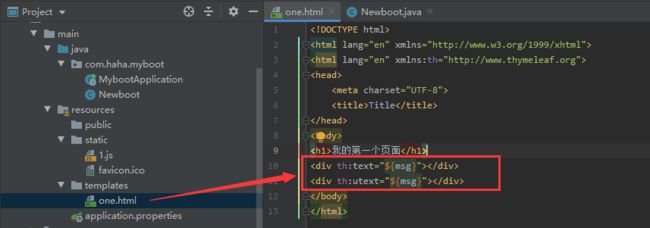
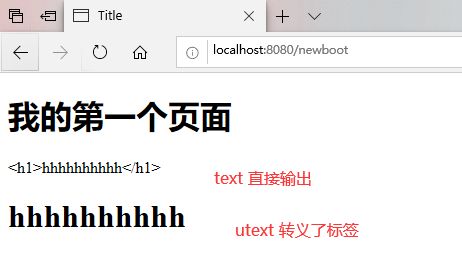
3、text和utext
把数据改成标签

html
访问
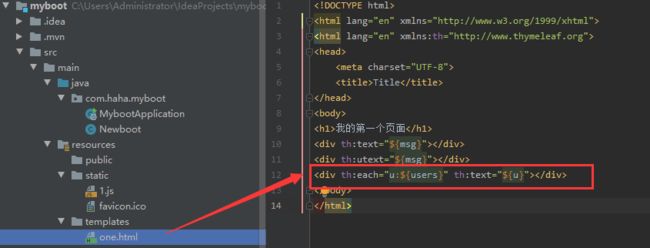
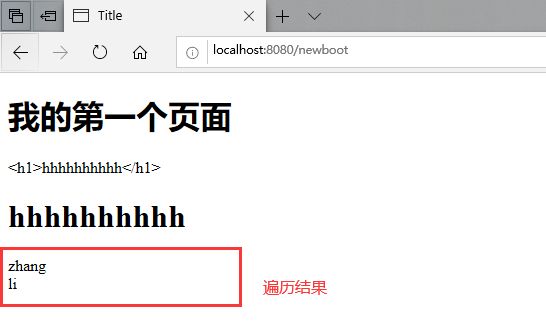
4、th:each=" " 遍历
java

model.addAttribute("users", Arrays.asList("zhang","li"));
<div th:each="u:${users}" th:text="${u}"></div>
除了上面这种写法,也可以下面这样写
<h2 th:each="u:${users}">[[ ${
     u} ]]</h2>
3.3、国际化
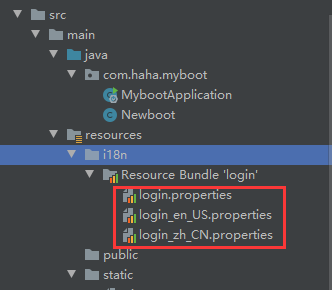
首先在resources资源文件下新建一个i18n文件夹
在i18n文件夹下新建login.properties、login_zh_CN.properties等,
会被自动识别下列到一个文件夹里面
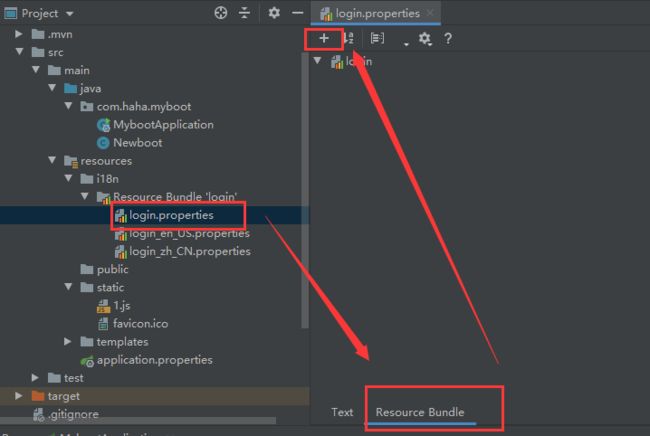
自动识别后,可以右击新建

接下来写入多国语言
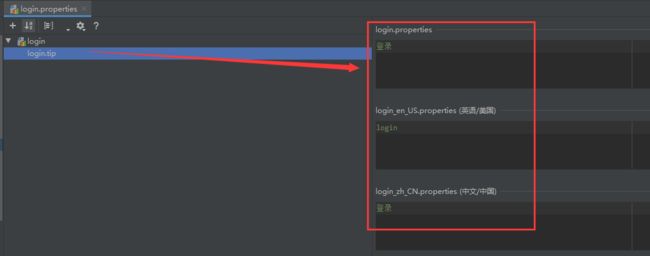
点击加号后输入login.tip,点确定,然后输入多国语言
4、IDEA插件codota
安装:IDEA—Settings—Plugins,输入codota
codota可以自动生成一些常用的代码
1、自动补齐

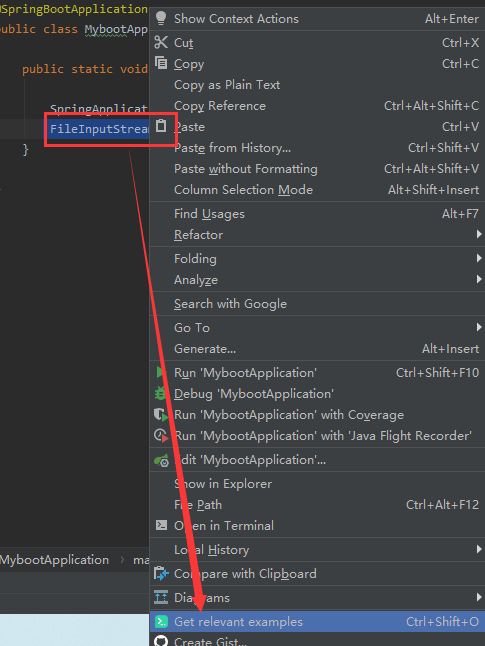
2、函数用法示例(快捷键Ctrl + Shift + O)
复制一个类名右击,会出现用法示例
3、搜索(快捷键ctrl+shift+Y)

另外:在很多软件上都可以使用codota例如eclipse、vs
5、xml里的xmlns
xmlns就是 XML namespace (XML命名空间)
在xhtml中,允许你使用各个不同的DTD文件,
有可能不同的DTD文件中包含了相同的标签,
那如何区分这两个标签?
例如
这样就能轻易区分出来了
