mybatis源码(一)配置文件解析,mapper解析SqlSessionFactory生成
文章目录
-
- 官方网站
- 简单使用mybatis
- 简单分析
- 新建SqlSessionFactory
-
- 先看XMLConfigBuilder解析配置文件生成Configuration
- 主要讲一下mapper扫描
- XMLMapperBuilder.parse()
-
- configurationElement
- bindMapperForNamespace
- parsePendingResultMaps,parsePendingCacheRefs,parsePendingStatements
- 生成SqlSessionFactory
官方网站
mybatis3官网
mybatis配置文件
简单使用mybatis
先写个简单的测试:当然环境的话都是比较简单的,新建个表,就这三个字段进行测试,mapper跟xml可以使用插件生成,比较简单,就不多说了;

新建简单配置文件mybatis2.xml:配置文件具体信息官网都写的很详细,具体使用可以直接看官网的;
<?xml version="1.0" encoding="UTF-8"?>
<!DOCTYPE configuration
        PUBLIC "-//mybatis.org//DTD Config 3.0//EN"
        "http://mybatis.org/dtd/mybatis-3-config.dtd">
<configuration>

    <properties>
        <property name="driver" value="com.mysql.jdbc.Driver"/>
        <property name="url" value="jdbc:mysql://127.0.0.1:3306/test"/>
        <property name="username" value="root"/>
        <property name="password" value="root"/>
        <property name="org.apache.ibatis.parsing.PropertyParser.enable-default-value" value="true"/>
    </properties>

    <!--这是非常重要的设置  会改变mybatis的行为-->
    <settings>
        <!--全局地开启或关闭配置文件中的所有映射器已经配置的任何缓存。 默认为true-->
        <setting name="cacheEnabled" value="true"></setting>
    </settings>

    <!--entity 别名  在使用type或者resultType可以直接用这个-->
    <typeAliases>
        <package name="com.study.springbootplus.domain.entity" ></package>
    </typeAliases>

    <!--类型处理器  注意如果查询用这个  则必须使用resultMap-->
    <typeHandlers>
        <!--<typeHandler handler=""></typeHandler>-->
    </typeHandlers>

    <!--即mybatis-->
 <!--   <objectFactory type="com.code.analysis.mybatis.config.MyObjectFactory">
        <property name="dilg" value="100"/>
    </objectFactory>-->
    <!--插件配置-->
 <!--   <plugins>
        <plugin interceptor="com.code.analysis.mybatis.plugin.ExecutorPlugin"></plugin>
    </plugins>-->

    <!--环境选择  可以配置多个环境   用的也不多,可以通过springboot来通过指定环境加载指定配置文件就好了-->
    <environments default="development">
        <environment id="development">
            <transactionManager type="JDBC"/>
            <dataSource type="POOLED">
                <property name="driver" value="com.mysql.jdbc.Driver"/>
                <property name="url" value="jdbc:mysql://127.0.0.1:3306/test"/>
                <property name="username" value="root"/>
                <property name="password" value="root"/>
            </dataSource>
        </environment>

        <environment id="prod">
            <!--如果使用了spring集成  那么spring会覆盖掉这儿的事物-->
            <transactionManager type="JDBC"/>
            <dataSource type="POOLED">
                <property name="driver" value="${driver}"/>
                <property name="url" value="${url}"/>
                <property name="username" value="${username}"/>
                <property name="password" value="${password:123456}"/>
            </dataSource>
        </environment>
    </environments>

    <!--sql.xml文件扫描-->
    <mappers>
        <mapper resource="mapper/UserMapper.xml"/>
    </mappers>


</configuration>
写个简单的main方法进行测试:
public static void main(String[] args) throws IOException {

    InputStream resourceAsStream = Resources.getResourceAsStream("mybatis2.xml");
    SqlSessionFactory sqlsessionFactory = new SqlSessionFactoryBuilder().build(resourceAsStream, "development");
    SqlSession session = sqlsessionFactory.openSession();
    UserMapper mapper = session.getMapper(UserMapper.class);
    User user = mapper.selectByPrimaryKey(1);
    System.out.println(JSON.toJSONString(user));
    session.close();
  }
简单分析
通过读取指定的mybatis配置文件,生成SqlSessionFactory,然后通过SqlSessionFactory可以获取SqlSession,SqlSession有个方法getMapper,可以获取到对应的mapper接口,然后就可以执行mapper内部方法了;
SqlSession获取mapper比较复杂,下期将,我们这篇主要讲通过配置文件生成对应的SqlSessionFactory;
新建SqlSessionFactory
首先看SqlSessionFactoryBuilder的两个方,builder类就是用来创建对象的,源码的名字都取得超级规范,很多时候我们通过取得名字就知道这个类的作用:
 public SqlSessionFactory build(InputStream inputStream, String environment, Properties properties) {

    try {

      //创建XMLConfigBuilder,通过XMLConfigBuilder的parse方法生成Configuration类
      XMLConfigBuilder parser = new XMLConfigBuilder(inputStream, environment, properties);
      //build方法就是新建一个默认的SqlSessionFactory,
      // DefaultSqlSessionFactory内部维护了Configuration,具体的执行方法都是通过Configuration对象去做的
      return build(parser.parse());
    } catch (Exception e) {

      throw ExceptionFactory.wrapException("Error building SqlSession.", e);
    } finally {

      ErrorContext.instance().reset();
      try {

        inputStream.close();
      } catch (IOException e) {

        // Intentionally ignore. Prefer previous error.
      }
    }
  }

  public SqlSessionFactory build(Configuration config) {

    return new DefaultSqlSessionFactory(config);
  }
先看XMLConfigBuilder解析配置文件生成Configuration
首先看XMLConfigBuilder的初始化,新建了个Configuration,其他解析xml生成xpath解析器,就不说了,

 public Configuration parse() {

    //防止重复加载
    if (parsed) {

      throw new BuilderException("Each XMLConfigBuilder can only be used once.");
    }
    parsed = true;
    //解析节点的主要方法,前面将配置文件解析为XPathParser解析器就不看了,应该就是将xml解析为dom树;
    parseConfiguration(parser.evalNode("/configuration"));
    return configuration;
  }

 //主要方法,针对xml的配置文件里面的东西分方法进行解析;
  //更多详细看官网配置详解,一定要看
  private void parseConfiguration(XNode root) {

    try {

      //issue #117 read properties first
      //拿到properties节点,设置configuration的Properties variables属性;
      propertiesElement(root.evalNode("properties"));
      //拿到settings节点,生成Properties settings对象;
      Properties settings = settingsAsProperties(root.evalNode("settings"));
      //根据对应的setting配置设置configuration的vfs
      loadCustomVfs(settings);
      //日志配置
      loadCustomLogImpl(settings);
      //别名配置
      typeAliasesElement(root.evalNode("typeAliases"));
      //插件设置,一般用来做拦截
      pluginElement(root.evalNode("plugins"));
      //configuration的对象工厂设置
      objectFactoryElement(root.evalNode("objectFactory"));
      //设置configuration的对象包装工厂
      objectWrapperFactoryElement(root.evalNode("objectWrapperFactory"));
      //反射工厂
      reflectorFactoryElement(root.evalNode("reflectorFactory"));
      //将其他settings设置;
      settingsElement(settings);
      // read it after objectFactory and objectWrapperFactory issue #631
      //环境
      environmentsElement(root.evalNode("environments"));
      //设置configuration的数据库id
      databaseIdProviderElement(root.evalNode("databaseIdProvider"));
      //设置configuration的类型处理器
      typeHandlerElement(root.evalNode("typeHandlers"));
      //设置configuration的mapper扫描规则并添加mapper
      mapperElement(root.evalNode("mappers"));
    } catch (Exception e) {

      throw new BuilderException("Error parsing SQL Mapper Configuration. Cause: " + e, e);
    }
  }
主要讲一下mapper扫描
 //mappper配置解析
  private void mapperElement(XNode parent) throws Exception {

    if (parent != null) {

      //单独的mapper节点
      for (XNode child : parent.getChildren()) {

        //package标签 , 映射文件跟mapper接口必须在同一个包,且名字对应
        if ("package".equals(child.getName())) {

          String mapperPackage = child.getStringAttribute("name");
          configuration.addMappers(mapperPackage);
        } else {

          //resource标签,可以配置,url,resource,class
          String resource = child.getStringAttribute("resource");
          String url = child.getStringAttribute("url");
          String mapperClass = child.getStringAttribute("class");

          if (resource != null && url == null && mapperClass == null) {

            //resource类型
            ErrorContext.instance().resource(resource);
            //获取mapper流
            InputStream inputStream = Resources.getResourceAsStream(resource);
            //初始化mapper解析器,并解析
            XMLMapperBuilder mapperParser = new XMLMapperBuilder(inputStream, configuration, resource, configuration.getSqlFragments());
            mapperParser.parse();
          } else if (resource == null && url != null && mapperClass == null) {

            //url类型
            ErrorContext.instance().resource(url);
            // 获取mapper流
            // 初始化mapper解析器,并解析
            InputStream inputStream = Resources.getUrlAsStream(url);
            XMLMapperBuilder mapperParser = new XMLMapperBuilder(inputStream, configuration, url, configuration.getSqlFragments());
            mapperParser.parse();
          } else if (resource == null && url == null && mapperClass != null) {

            // class类型
            Class<?> mapperInterface = Resources.classForName(mapperClass);
            //通过configuration自己的addMapper去添加
            configuration.addMapper(mapperInterface);
          } else {

            //只能有一种节点
            throw new BuilderException("A mapper element may only specify a url, resource or class, but not more than one.");
          }
        }
      }
    }
  }
XMLMapperBuilder.parse()
通过class类型的跟通过xml解析的差不多,我们看一下通过xml进行加载的例子,也就是XMLMapperBuilder类的解,我们看parse方法:
  public void parse() {

    // 判断是否加载过
    if (!configuration.isResourceLoaded(resource)) {

      //拿到mapper下节点进行加载
      configurationElement(parser.evalNode("/mapper"));
      //加入到resource中
      configuration.addLoadedResource(resource);
      //将mapper跟namespace绑定
      bindMapperForNamespace();
    }
    //进行resultmap的加载
    parsePendingResultMaps();
    //缓存加载
    parsePendingCacheRefs();
    //sql语句加载
    parsePendingStatements();
  }
configurationElement
 private void configurationElement(XNode context) {

    try {

      //获取namespace,就是接口地址
      String namespace = context.getStringAttribute("namespace");
      if (namespace == null || namespace.equals("")) {

        throw new BuilderException("Mapper's namespace cannot be empty");
      }
      //设置namespace
      builderAssistant.setCurrentNamespace(namespace);
      //缓存引用
      cacheRefElement(context.evalNode("cache-ref"));
      //设置缓存
      cacheElement(context.evalNode("cache"));
      //设置参数的parameterMap
      parameterMapElement(context.evalNodes("/mapper/parameterMap"));
      //设置返回的resultMap
      resultMapElements(context.evalNodes("/mapper/resultMap"));
      //设置sql
      sqlElement(context.evalNodes("/mapper/sql"));
      //设置sql的执行类型,就是增删改查
      buildStatementFromContext(context.evalNodes("select|insert|update|delete"));
    } catch (Exception e) {

      throw new BuilderException("Error parsing Mapper XML. The XML location is '" + resource + "'. Cause: " + e, e);
    }
  }
bindMapperForNamespace
将mapper跟namespace进行绑定
private void bindMapperForNamespace() {

    //获取namespace
    String namespace = builderAssistant.getCurrentNamespace();
    if (namespace != null) {

      Class<?> boundType = null;
      try {

        //反射获取接口
        boundType = Resources.classForName(namespace);
      } catch (ClassNotFoundException e) {

        //ignore, bound type is not required
      }
      if (boundType != null) {

        if (!configuration.hasMapper(boundType)) {

          //第一次加载指定类型mapper
          // Spring may not know the real resource name so we set a flag
          // to prevent loading again this resource from the mapper interface
          // look at MapperAnnotationBuilder#loadXmlResource
          //添加namespace
          configuration.addLoadedResource("namespace:" + namespace);
          //将当前通过反射获取的类型通过接口类型添加,后台通过configuration可以获取指定mapper
          configuration.addMapper(boundType);
        }
      }
    }
  }
addMapper走的是configuration类内部的MapperRegistry属性的方法,而MapperRegistry就是存储mapper接口的地方,后面根据sqlsession获取mapper的时候回用的MapperRegistry内部存储的mapper接口类:

addMapper里面的方法,直接点到最终实现地方:
public <T> void addMapper(Class<T> type) {

    if (type.isInterface()) {

      if (hasMapper(type)) {

        throw new BindingException("Type " + type + " is already known to the MapperRegistry.");
      }
      boolean loadCompleted = false;
      try {

        //新建mapper代理工厂,跟类型进行对应
        knownMappers.put(type, new MapperProxyFactory<>(type));
        // It's important that the type is added before the parser is run
        // otherwise the binding may automatically be attempted by the
        // mapper parser. If the type is already known, it won't try.
        //创建对应的注解代理在进行加载一遍
        MapperAnnotationBuilder parser = new MapperAnnotationBuilder(config, type);
        parser.parse();
        loadCompleted = true;
      } finally {

        if (!loadCompleted) {

          knownMappers.remove(type);
        }
      }
    }
  }
parsePendingResultMaps,parsePendingCacheRefs,parsePendingStatements
这三个加载几乎一样,就只看看cacheref的解析,前面将节点的信息都保存进configuration中,这三个方法都是将对应的节点信息取出来进行处理:

使用cache就是通过namespace将存储的cache对象取出来设置为MapperBuilderAssistant的cache引用吧.

生成SqlSessionFactory
前面将mybatis.xml解析,mappper的解析都讲完了这时候就生成了Configuration对象,简单的说Configuration对象就是存储了mybatis几乎所有的配置.然后就直接通过Configuration对象生成SqlSessionFactory对象了:

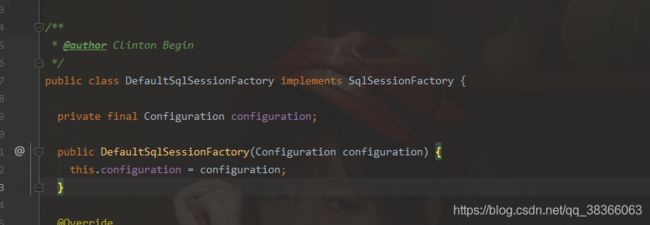
DefaultSqlSessionFactory就是内部维护了Configuration对象,具体的执行都需要考Configuration对象来完成:


