php+mysql+html+css实现简单的登录注册功能
本文目录
-
- 准备工作
- 正题
- 总结
前言:
暑假作业留到现在,emmm,最后那段时间是懒了很多。开学事情比较烦,各种麻烦。这个作业进行总结一下。
准备工作
利用phpstudy集成环境进行实现,看下效果


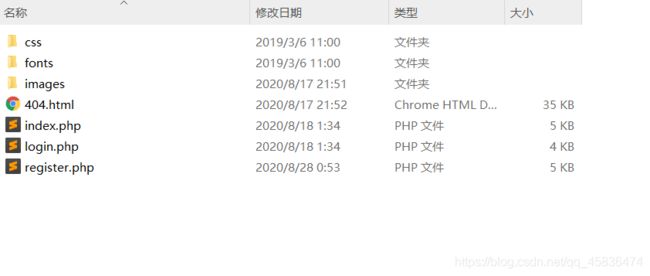
将CSS写在一个文件夹中,进行调用比较方便。
另外我之前收藏过这样的一个404界面的源码,觉得还不错,就加上了。我将它替换那个忘记密码的功能,因为界面简单,(我也没去学习这个模块,复杂,懒的去看了)所以直接替换了。

正题
注册功能的页面,注册时,需要进行的是连接数据库,然后执行SQL语句,插入数据到指定的表中。
header('content-type:text/html;charset=utf-8');

$conn = mysqli_connect('localhost', 'root', 'root', "m0re");

if (mysqli_connect_errno($conn)) {

    echo mysqli_connect_error($conn);
}
if(isset($_POST['submit'])){

	$sql = "insert into m0re(username,password,register_time) values('{
       $_POST['username']}',md5('{
       $_POST['password']}'),now())";
	$query=$conn->query($sql);
	if($query){

	//echo "success";
}
else{

	echo $conn->error;
}
}
mysqli_close($conn);
?>
我写的时候,那个限制功能都在HTML中,所以PHP没有太多的设置。不过还是写一下PHP的代码(我的代码里面是没有这些的,因为写进去会出错,因为我的HTML代码的原因,自己写的简单的登录狂就可以使用)
if(empty($_POST['username'])){

	skip('register.php', '', '用户名不得为空!');
}
if(mb_strlen($_POST['username'])>32){

	skip('register.php', '', '用户名长度不要超过32个字符!');
}
if(mb_strlen($_POST['password'])<6){

	skip('register.php', '','密码不得少于6位!');
}
if($_POST['password']!=$_POST['confirm_pw']){

	skip('register.php', '','两次密码输入不一致!');
}
if(strtolower($_POST['vcode'])!=strtolower($_SESSION['vcode'])){

	skip('register.php', '','验证码输入错误!');
}
$_POST=escape($link,$_POST);
$query="select * from member where username='{
       $_POST['username']}'";
$result=execute($link, $query);
if(mysqli_num_rows($result)){

	skip('register.php', '', '这个用户名已经注册过了,请直接登录');
}
?>
验证码:我没加上去,因为操作不好,但是我写一个验证码的代码,可以自行添加
#验证码--m0re--

header('Content-type:image/jpeg');
$width=120;
$height=40;
$string='';
$element=array('a','b','c','d','e','f','g','h','i','j','k','l','m','n','o','p','q','r','s','t','u','v','w','x','y','z');
for ($i=0; $i <5 ; $i++) {

	$string.=$element[rand(0,count($element)-1)];
}
$img=imagecreatetruecolor($width, $height);
$color_bg=imagecolorallocate($img, rand(200,255), rand(200,255), rand(200,255));
$color_border=imagecolorallocate($img, rand(200,255), rand(200,255), rand(200,255));
$color_string=imagecolorallocate($img, rand(10,100), rand(10,100), rand(10,100));
imagefill($img, 0, 0, $color_bg);
imagerectangle($img, 0, 0, $width-1, $height-1, $color_border);
for ($i=0; $i <100 ; $i++) {

	imagesetpixel($img, rand(0,$width-1), rand(0,$height-1), imagecolorallocate($img, rand(10,100), rand(10,100), rand(10,100)));
}
for ($i=0; $i <3 ; $i++) {

	imageline($img, rand(0,$width/2), rand(0,$height), rand($width/2,$width), rand(0,$height), imagecolorallocate($img, rand(10,100), rand(10,100), rand(10,100)));
}
imagettftext($img, 25, rand(-5,5), rand(5,15), rand(30,35), $color_string, 'font/HARLOWSI.TTF', $string);
imagejpeg($img);
imagedestroy($img);
?>
注册输入内容后点击注册(submit),在phpmyadmin中可以看到插入的数据

还有注册时间。
登录
基于cookie的登录,登录将生成一个cookie,
header('Content-type:text/html;charset=utf-8');
if (isset($_POST['submit'])){

    if (isset($_POST['username']) && isset($_POST['password']) && $_POST['username']===$username && $_POST['password']==='123456'){

        if (setcookie('username',$_POST['username'],time()+3600)){

            header('Location:404.html');//跳转到指定网页
        }
        else{

            echo 'cookie设置失败!';
        }
    }else{

        echo '对不起,登录失败,请检查您的用户名或者密码是否正确,注意密码安全。';
    }
}
?>
一些部分不是很完善,之前还想着加上过滤,预防SQL注入和xss之类的简单注入。但是,没有扔掉这个HTML,所以就比较繁琐了,还是自己写的HTML可以,但是太简陋了,最终没有换。不过需要用到的知识差不多也都实现了。至于登录成功后,就可以加一些自己的东西了。
总结
验证码是之前就写过的,这都是之前让学习PHP的时候前60节中的内容,所以总体来说不是很难,就是对我们这些小白,可能出现最多的就是连接出错。无法插入等问题。多尝试几次就可以了,报错就一个一个查。
最后贴一下我同学——奇点写的博客地址,我们有较多讨论,可以对比一下。我们写的格式不一样,有些细节我可能没写到。
https://blog.csdn.net/qq_45869039/article/details/108380902