Zxing二维码自定义修改关键代码
官方源码地址:http://code.google.com/p/zxing/downloads/list;
将下载的ZXing-X.X.zip解压出来,我们只需要用到android目录中的示例项目,如图:
将android项目导入eclipse,同时别忘了将相应的jar导入libs,此时该示例项目应该可以运行了,不过该项目很多功能我们不需要,并且其扫描界面为横向的,因此需对其修改。
接下去我们来将该示例项目简化:
第一步:拷贝必要的包和类
导入完成后会有很多红叉,大都和包的访问权限有关,因为示例代码中很多类是final型的,我们将其public就行;
此外还需要res下一些关联的文件(values下的color.xml、ids.xml、strings.xml,raw下的beep.ogg)。
初步调整后包结构如下:
第二步:PreferencesActivity和CaptureActivity修改
示例项目用到了大量的配置,因此很多地方都用到了PreferencesActivity这个类,其实留着它也无所谓,但别忘了将示例项目中res下一些关联文件拷贝过来(preferences.xml、arrays.xml);
不过PreferencesActivity完全是多余的,看着也碍眼,因此我将其去掉,需要将用到PreferencesActivity的类都修改,就是剩余那些报红叉的类,我们需要将一些配置固定化,多余的设置判断去掉,此处就不贴代码了;
同样CaptureActivity中也有很多方法是我们不需要的,大都是关于解码成功后的处理,如果要保留的话则需要额外拷贝很多类,因此将其去掉。
第三部:修改为竖屏
经过上面两步,我们自己的项目应该可以运行了(别忘了加权限),当然此时是横屏的,因此我们需要修改几处地方将其修改为竖屏:
1.CameraConfigurationManager类的initFromCameraParameters()方法中将以下代码注释掉:
if(width < height) {
Log.i(TAG,"Display reports portrait orientation; assuming this is incorrect");
int temp = width;
width = height;
height = temp;

}2.CameraConfigurationManager类的setDesiredCameraParameters()方法中在camera.setParameters(parameters)之前加入以下代码:
camera.setDisplayOrientation(90);3.CameraManager类的getFramingRectInPreview()方法中将以下代码替换:
rect.left = rect.left * cameraResolution.x / screenResolution.x;
rect.right = rect.right * cameraResolution.x / screenResolution.x;
rect.top = rect.top * cameraResolution.y / screenResolution.y;
rect.bottom = rect.bottom * cameraResolution.y / screenResolution.y;
替换为
rect.left = rect.left * cameraResolution.y / screenResolution.x;
rect.right = rect.right * cameraResolution.y / screenResolution.x;
rect.top = rect.top * cameraResolution.x / screenResolution.y;
rect.bottom = rect.bottom * cameraResolution.x / screenResolution.y;4.DecodeHandler类的decode方法中在activity.getCameraManager().buildLuminanceSource()之前添加以下代码:
byte[] rotatedData = new byte[data.length];

for(int y = 0;y < height; y++) {
   for(int x = 0; x < width; x++)
    rotatedData[x * height + height - y - 1] = data[x + y * width];
    }

 int tmp = width;
 width = height;
 height = tmp;
 data = rotatedData;
5.关键的一步,解决竖屏后图像拉伸问题。CameraConfigurationManager类的initFromCameraParameters()方法中:
在Log.i(TAG, "Screen resolution: " + screenResolution);之后添加以下代码:
Point screenResolutionForCamera = new Point();
screenResolutionForCamera.x = screenResolution.x;
screenResolutionForCamera.y = screenResolution.y;

if(screenResolution.x < screenResolution.y) {
screenResolutionForCamera.x = screenResolution.y;
screenResolutionForCamera.y = screenResolution.x;
}
同时修改下一句为cameraResolution = findBestPreviewSizeValue(parameters,screenResolutionForCamera);
此外manifest中别忘了设置android:screenOrientation="portrait",至此竖屏修改完毕。
第四步:扫描框位置和大小修改
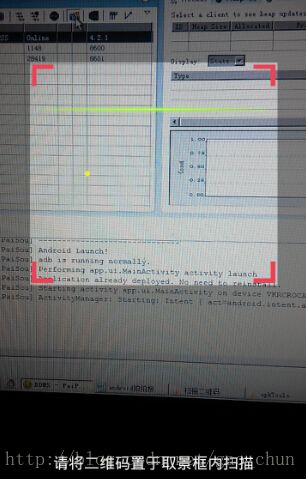
此时的扫描框是竖直拉伸的矩形,很难看,我们可以将其修改为正方形或扁平型的。
CameraManager类的getFramingRect() 方法中替换以下代码:
int width = findDesiredDimensionInRange(screenResolution.x, MIN_FRAME_WIDTH, MAX_FRAME_WIDTH);
int height = findDesiredDimensionInRange(screenResolution.y,MIN_FRAME_HEIGHT, MAX_FRAME_HEIGHT);
替换为
DisplayMetrics metrics = context.getResources().getDisplayMetrics();
int width = (int)(metrics.widthPixels * 0.6);
int height = (int) (width * 0.9);
此处我们根据屏幕分辨率来定扫描框大小更灵活一点,同时将偏移量topOffset修改为(screenResolution.y - height)/4
第五步:扫描框四个角和扫描线条修改
示例代码中的线条是居中且不动的,我们可以将其修改为上下移动的扫描线,且可以改变线条的样式。
在自定义扫描布局ViewfinderView类中的onDraw()方法中绘制四个角,关键代码如下:
//画出四个角
paint.setColor(getResources().getColor(R.color.green));

//左上角
canvas.drawRect(frame.left,frame.top, frame.left + 15,frame.top+ 5,paint);
canvas.drawRect(frame.left,frame.top, frame.left + 5,frame.top + 15,paint);

//右上角
canvas.drawRect(frame.right- 15,frame.top, frame.right,frame.top + 5,paint);
canvas.drawRect(frame.right- 5,frame.top, frame.right,frame.top + 15,paint);

//左下角
canvas.drawRect(frame.left,frame.bottom - 5,frame.left + 15,frame.bottom,paint);
canvas.drawRect(frame.left,frame.bottom - 15,frame.left + 5,frame.bottom,paint);

//右下角
canvas.drawRect(frame.right- 15,frame.bottom - 5,frame.right,frame.bottom, paint);
canvas.drawRect(frame.right- 5,frame.bottom - 15,frame.right,frame.bottom, paint);此外将扫描线条修改为上下扫描的线,关键代码如下:
if((i += 5)< frame.bottom - frame.top) {
  /* 以下为用渐变线条作为扫描线 */
//渐变图为矩形
//mDrawable.setShape(GradientDrawable.RECTANGLE);

//渐变图为线型
//mDrawable.setGradientType(GradientDrawable.LINEAR_GRADIENT);

//线型矩形的四个圆角半径
mDrawable.setCornerRadii(new float[] { 8, 8, 8, 8, 8, 8, 8, 8 });

//位置边界
//mRect.set(frame.left + 10, frame.top + i, frame.right - 10,
// frame.top + 1 + i);

//设置渐变图填充边界
//mDrawable.setBounds(mRect);
//画出渐变线条
//mDrawable.draw(canvas);

 /*以下为图片作为扫描线 */

mRect.set(frame.left- 6,frame.top + i - 6,frame.right + 6,frame.top+ 6+ i);
lineDrawable.setBounds(mRect);
lineDrawable.draw(canvas);
//刷新
invalidate();
}else{
   i= 0;
 }
示例源码工程
简化后源码.rar
