Learn OpenCV Deep Learning based Text Detection Using OpenCV (C++/Python)
There is a common saying, “A picture is worth a thousand words“. In this post, we are going to take that literally and try to find the words in a picture! In an earlier post about Text Recognition, we discussed how Tesseract works and how it can be used along with OpenCV for text detection as well as recognition. This time, we are going to have a look at robust approach for detecting text, based on a recent paper : EAST: An Efficient and Accurate Scene Text Detector.
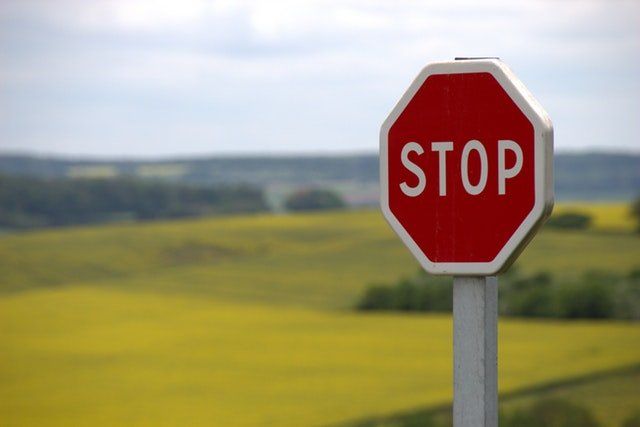
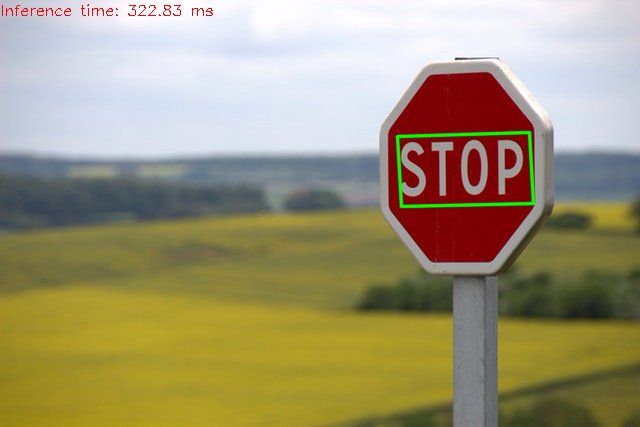
It should be noted that text detection is different from text recognition. In text detection we only detect the bounding boxes around the text. But, in text recognition, we actually find what is written in the box. For example, in the image given below, text detection will give you the bounding box around the word and text recognition will tell you that the box contains the word STOP.
Text Recognition engines such as Tesseract require the bounding box around the text for better performance. Thus, this detector can be used to detect the bounding boxes before doing Text Recognition.
A tensorflow re-implementation of the paper reported the following speed on 720p (resolution of 1280×720) images (source):
- Graphic Card: GTX 1080 Ti
- Network fprop: ~50 ms
- NMS (C++): ~6 ms
- Overall: ~16 fps
The tensorflow model has been ported to be used with OpenCV and they have also provided sample code. We will discuss how it works step by step. You will need OpenCV >= 3.4.3 to run the code. Let’s detect some text in images!
The steps involved are as follows:
- Download the EAST Model
- Load the Model into memory
- Prepare the input image
- Forward pass the blob through the network
- Process the output
Download Code To easily follow along this tutorial, please download code by clicking on the button below. It's FREE!
DOWNLOAD CODE
Step 1: Download EAST Model
The EAST Model can be downloaded from this dropbox link : https://www.dropbox.com/s/r2ingd0l3zt8hxs/frozen_east_text_detection.tar.gz?dl=1.
Once the file has been downloaded (~85 MB), unzip it using
| 1 |
|
You can also extract the contents using the File viewer of your OS.
After unzipping, copy the .pb model file to the working directory.
Step 2: Load the network
We will use the cv::dnn::readnet or cv2.dnn.ReadNet() function for loading the network into memory. It automatically detects configuration and framework based on file name specified. In our case, it is a pb file and thus, it will assume that a Tensorflow Network is to be loaded.
C++
| 1 |
|
Python
| 1 |
|
Step 3 : Prepare input image
We need to create a 4-D input blob for feeding the image to the network. This is done using the blobFromImage function.
C++
| 1 |
|
Python
| 1 |
|
There are a few parameters we need to specify to this function. They are as follows :
- The first argument is the image itself
- The second argument specifies the scaling of each pixel value. In this case, it is not required. Thus we keep it as 1.
- The default input to the network is 320×320. So, we need to specify this while creating the blob. You can experiment with any other input dimension also.
- We also specify the mean that should be subtracted from each image since this was used while training the model. The mean used is (123.68, 116.78, 103.94).
- The next argument is whether we want to swap the R and B channels. This is required since OpenCV uses BGR format and Tensorflow uses RGB format.
- The last argument is whether we want to crop the image and take the center crop. We specify False in this case.
Step 4 : Forward Pass
Now that we have prepared the input, we will pass it through the network. There are two outputs of the network. One specifies the geometry of the Text-box and the other specifies the confidence score of the detected box. These are given by the layers :
- feature_fusion/concat_3
- feature_fusion/Conv_7/Sigmoid
This is specified in code as follows:
C++
| 1 2 3 |
|
Python
| 1 2 3 |
|
Next, we get the output by passing the input image through the network. As discussed earlier, the output consists of two parts : scores and geometry.
C++
| 1 2 3 4 5 6 |
|
Python
| 1 2 3 4 5 |
|
Step 5 : Process the output
As discussed earlier, we will use the outputs from both the layers ( i.e. geometry and scores ) and decode the positions of the text boxes along with their orientation. We might get many candidates for a text box. Thus, we need to filter out the best looking text-boxes from the lot. This is done using Non-Maximum Suppression.
Decode
C++
| 1 2 3 |
|
Python
| 1 |
|
Non-Maximum Suppression
We use the OpenCV function NMSBoxes ( C++ ) or NMSBoxesRotated ( Python ) for filtering out the false positives and get the final predictions.
C++
| 1 2 |
|
Python
| 1 |
|
Results
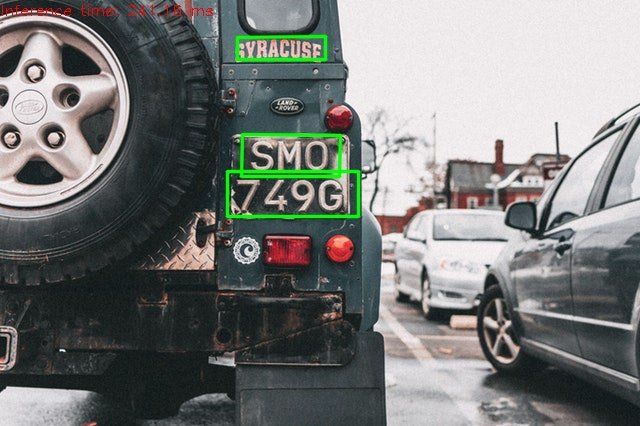
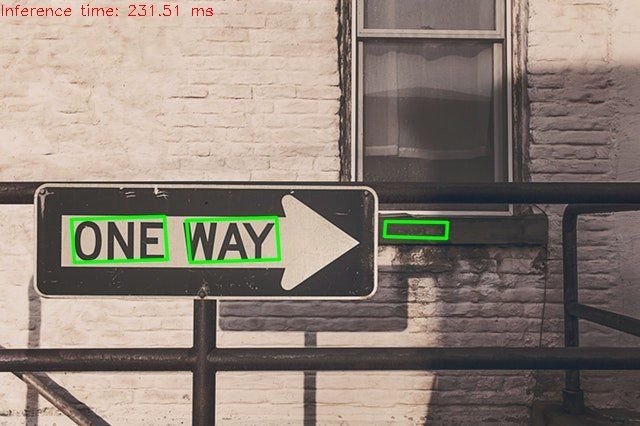
Given below are a few results.
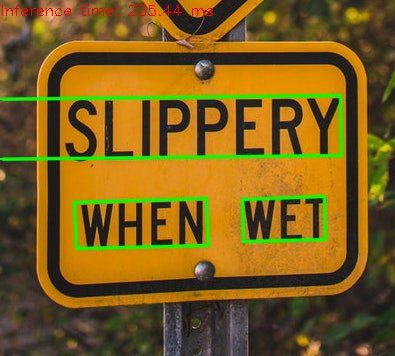
As you can see, it is able to detect texts with varying Backgrounds, Fonts, Orientation, Size, Color. In the last one, it worked pretty well even for deformed Text. There are however, some mis-detections but we can say, overall it performs very well.
As the examples suggest, it can be used in a wide variety of applications such as Number plate Detection, Traffic Sign Detection, detection of text on ID Cards etc.
Become an expert in Computer Vision, Machine Learning, and AIin 12-weeks! Check out our course
COMPUTER VISION COURSE
References
- EAST: An Efficient and Accurate Scene Text Detector
- Tensorflow Implementation
- OpenCV Samples [C++], [Python]
Subscribe & Download Code
If you liked this article and would like to download code (C++ and Python) and example images used in this post, please subscribe to our newsletter. You will also receive a free Computer Vision ResourceGuide. In our newsletter, we share OpenCV tutorials and examples written in C++/Python, and Computer Vision and Machine Learning algorithms and news.
