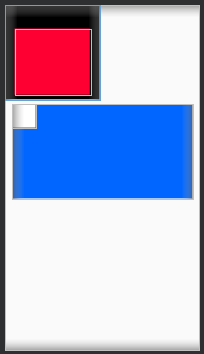
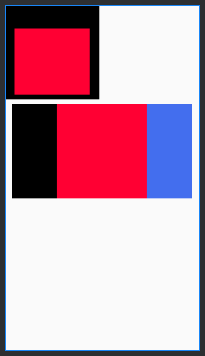
Android studio教程学习笔记2——线性布局LinearLayout
第二章 UI组件
2-1 布局管理器
一个页面的元素有很多,会有很多不同的组件摆放在同一个页面上,而确定这些元素的摆放位置,管理元素间的联系,就是通过布局管理器来实现的
这里主要讲两个常用布局:
- 线性布局(LinearLayout)
- 相对布局(RelativeLayout)
LinearLayout
最常用属性
- android:id:设定标识,可以通过id来找到这个控件(这个布局本身也是一个控件)
- android:layout_width:宽
- android:layout_height:高
- android:background:背景,可以是颜色、图片,也可以是通过.xml来画一个背景
- android:layout_margin:外边距,该控件与外部元素的距离
- android:layout_padding:内边距,该控件与内部元素的距离
- android:orientation:方向
示例:
注释:
android:id="@+id/ll_1" //创建一个id,@+id就是加一个id的意思;ll是LinearLayout的缩写
android:layout_width="match_parent" //warp_content是包含内容,即内容有多少宽度就有多少;match_parent是匹配父控件,即上一节控件是多少自己的宽度就是多少。
android:layout_height="match_parent"
android:orientation="vertical" //垂直方向
android:background="#000000" //黑色背景
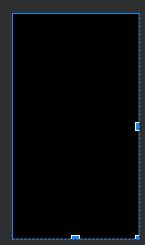
此时预览里黑色占满全屏,因为高度和宽度都是匹配父控件,他的父控件如下:

更改尺寸:
android:layout_width="200dp" //在安卓里的单位用dp,字体用sp
android:layout_height="200dp"
预览:
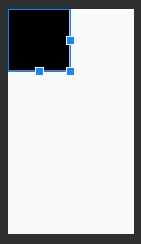
写一个
  <View
            android:layout_width="match_parent"
            android:layout_height="match_parent"
            android:background="#FF0033"/>
View的父控件是LinearLayout,因为LinearLayout的高度和宽度是200dp,View是match_parent,所以View的高度宽度也是200dp
预览:

加一个padding //内边距:
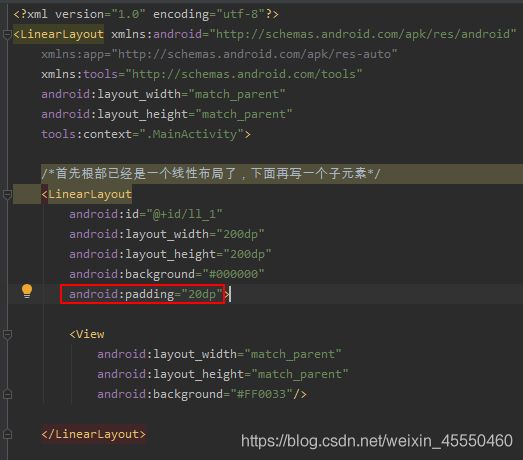
预览:

给LinearLayout(最外面的布局)设了一个内边距20个单位,里面的内容就要距离最外面的边框20个单位。
padding指上下左右都是距离这么多,也可以设为:
		android:paddingLeft="20dp"
        android:paddingRight="20dp"
        android:paddingTop="50dp"
        android:paddingBottom="10dp"
	<LinearLayout
        android:layout_width="match_parent"
        android:layout_height="200dp"
        android:orientation="horizontal"
        android:background="#0066FF">

    </LinearLayout>
他的父控件是整个代码的第一个LinearLayout(现在这个里面有两个子元素LinearLayout和一个子元素View)

宽度匹配父控件,前面的LinearLayout已经占了一半了,剩下的都是这个LinearLayout的
LinearLayout的默认排列方式是水平排列,可以手动改成垂直:


设置距离上面一个LinearLayout 20dp:


也可以不给蓝色的这个设置,给上面黑色的这个设置,删掉刚刚加的句子,然后给黑色的那个LinearLayout加:
android:layout_marginBottom="20dp"
一样的效果
在这最后一个LinearLayout里加一个View
 <View
            android:layout_width="50dp"
            android:layout_height="50dp"
            android:background="#ffffff"/>
如果要居中,使用 android:gravity (内部元素对齐方式)


使两个子元素平分,使用weight(权重)(先把前面gravity的删了):
		<View
            android:layout_width="0dp"
            android:layout_height="match_parent"
            android:background="#000000"
            android:layout_weight="1"/>
        <View
            android:layout_width="0dp"
            android:layout_height="match_parent"
            android:background="#FF0033"
            android:layout_weight="1"/>

如果第一个View的android:layout_width改成50dp:

整个父控件先减去50dp,剩下的再按权重平分,所以黑色的除了平分到的还多之前的50
(所以weight是按权重平分剩下来的内容)
由此,如果再多写一个View,大家的android:layout_width都是0,weight都是1,那就是三等分。如果有一个的权重是2,另两个是1,那就是1/2、1/4、1/4
最后的代码:
<?xml version="1.0" encoding="utf-8"?>
<LinearLayout xmlns:android="http://schemas.android.com/apk/res/android"
    xmlns:app="http://schemas.android.com/apk/res-auto"
    xmlns:tools="http://schemas.android.com/tools"
    android:layout_width="match_parent"
    android:layout_height="match_parent"
    android:orientation="vertical"
    tools:context=".MainActivity">

    /*首先根部已经是一个线性布局了,下面再写一个子元素*/
    <LinearLayout
        android:id="@+id/ll_1"
        android:layout_width="200dp"
        android:layout_height="200dp"
        android:background="#000000"
        android:paddingLeft="20dp"
        android:paddingRight="20dp"
        android:paddingTop="50dp"
        android:paddingBottom="10dp"
        android:layout_marginBottom="10dp"
        >

        <View
            android:layout_width="match_parent"
            android:layout_height="match_parent"
            android:background="#FF0033"/>

    </LinearLayout>

    <LinearLayout
        android:layout_width="match_parent"
        android:layout_height="200dp"
        android:orientation="horizontal"
        android:background="#0066FF"
        android:layout_marginLeft="15dp"
        android:layout_marginRight="15dp"
        >

        <View
            android:layout_width="0dp"
            android:layout_height="match_parent"
            android:background="#000000"
            android:layout_weight="1"/>
        <View
            android:layout_width="0dp"
            android:layout_height="match_parent"
            android:background="#FF0033"
            android:layout_weight="2"/>

        <View
            android:layout_width="0dp"
            android:layout_height="match_parent"
            android:background="#436EEE"
            android:layout_weight="1"/>
    </LinearLayout>


</LinearLayout>

