CentOS7.6阿里云ECS上搭建gitlab服务器
CentOS7.6阿里云ECS上搭建gitlab服务器
gitlab
- 大多数的企业都在用gitlab作为公司项目托管的仓库,本文内容主要是记录自己当时搭建gitlab服务器的过程,以及遇到的一些问题点。
- 本文转载于:https://blog.csdn.net/rz_0212/article/details/105133232
- 另外根据个人操作有所增删修改
软硬件要求
- 主要可以参考gitlab安装要求
- 本人的云服务器配置
- Centos 7.6
- 4核4G以及20GiB高效云盘
安装过程
- 参照官方安装说明:cestos7安装说明
- 跟着教程第一步执行以下命令:
sudo yum install -y curl policycoreutils-python openssh-server
sudo systemctl enable sshd
sudo systemctl start sshd
sudo firewall-cmd --permanent --add-service=http
sudo firewall-cmd --permanent --add-service=https
sudo systemctl reload firewalld
这里 执行到firewall-cmd --permanent --add-service=http报错,提示FirewallD is not running, 根据提示指的是你的防火墙服务没有运行,这里我们通过命令开启防火墙
systemctl start firewalld
接着继续执行刚刚未完成的指令,执行完毕后,接着根据文档继续执行, 下一步安装postfix,用来发送邮件。
sudo yum install postfix
sudo systemctl enable postfix
sudo systemctl start postfix
执行到上面第二条命令,报了这样一条信息:Job for postfix.service failed because the control process exited with error code. See “systemctl status postfix.service” and “journalctl -xe” for details.
解决方法:修改 /etc/postfix/main.cf的配置并保存
inet_interfaces = all
inet_protocols = ipv4
以上都是为gitlab的下载和安装提供环境支持的, 接着开始下载,官网提示可以通过该命令来下载安装包curl https://packages.gitlab.com/install/repositories/gitlab/gitlab-ee/script.rpm.sh | sudo bash
这里我没有使用以上命令下载,而是打开官网安装包地址, 手动下载的,选择了12.8.5这个版本,注意Distro/Version 选择el/7, 大约2分钟左右就下载好了,通过scp命令上传到阿里云服务上。
这个地方一定注意了,我试了好几种都不行,查了下要在yum里面加个什么配置,生怕加了又会影响什么其他的问题,所以放弃了,如果哪位大侠知道咋回事麻烦这里指点一下!!!!!!
wget https://packages.gitlab.com/gitlab/gitlab-ce/packages/ol/7/gitlab-ce-12.8.5-ce.0.el7.x86_64.rpm
yum gitlab-ce-12.8.5-ce.0.el7.x86_64.rpm
报错如下:
Loaded plugins: fastestmirror Loading mirror
speeds from cached hostfile
No package git-ce-12.8.5-ce.0.e17.x86_64 available
Error: Nothing to do
反正不管了,你就用scp从Windows传到Linux反正就是可以,哈哈
scp [盘符]:/Users/[username]/Downloads/gitlab-ce-12.8.5-ce.0.el7.x86_64.rpm root@[remote_ip]:/usr/local/
注意:这里的[]里面的替换成你自己的相应的参数
上传成功后执行
yum install /usr/local/gitlab-ce-12.8.5-ce.0.el7.x86_64.rpm
安装成功以后,需要对*/etc/gitlab/gitlab.rb*配置文件做一些修改,这里最好是提前将配置文件作一个备份。
执行vi /etc/gitlab/gitlab.rb, 将external_url 修改为服务器的公网ip地址,可以不加端口,默认端口号是80。
还有我看的是黑马程序员的Jenkins相关的课程的视频,是需要配置一个nginx相关的配置的。需配置nginx的监听端口。
external_url 'http://[remote_ip]:[port]'
nginx['listen_port'] = [port]
修改完毕后,执行gitlab-ctl reconfigure命令,使配置生效
执行这个命令, 每次执行到这里
ruby_block[authorize Grafana with GitLab] action run
都会卡很长时间,然后就报错了
There was an error running gitlab-ctl reconfigure: ruby_block[authorize Grafana with GitLab] (gitlab::grafana line 92) had an error: Mixlib::ShellOut::CommandTimeout: Command timed out after 600s
找不到原因,这里我又重新打开gitlab.rb文件,将其中grafana的配置做了修改
grafana['enable'] = false
不启用grafana,重新执行gitlab-ctl reconfigure命令,大约1分钟左右,提示gitlab Reconfigured!
心里想这下总算是安装成功了,然后打开浏览器,输入ip地址和端口,我这里端口指定是7664, 结果提示超时, 找了很久都没有找到原因,猜想会不会是防火墙拦截了, 于是开放82端口
firewall-cmd --permanent --zone=public --add-port=82/tcp
firewall-cmd --reload
执行以后,打开浏览器,执行还是提示超时,接着又修改阿里云的安全组,入方向开放82端口, 修改保存后,打开浏览器,还是超时。
| 授权策略 | 优先级 | 协议类型 | 端口范围 | 授权对象 | 描述 | 创建时间 | 操作 |
|---|---|---|---|---|---|---|---|
| 允许 | 100 | 自定义 TCP | 目的:82/82 | 源:0.0.0.0/0 | GitLab | 2020年6月9日 13:14:19 |
这个时候执行top,查看一下,发现git消耗cpu内存接近100%了, 查看当前是内存和swap空间,发现swap不存在。这里简介下swap的作用,swap是linux中的虚拟内存,它的作用是在物理内存使用完之后,将磁盘空间(也就是SWAP分区)虚拟成内存来使用。既然阿里云默认没有swap交换空间,就手动加一个,一般swap的是大小设置为当前系统内存的1被或2倍,我这里设置的4G的swap内存。
使用dd命令创建一个swap交换文件
dd if=/dev/zero of=/mnt/swap bs=1024 count=4096000
制作为swap格式文件
mkswap /mnt/swap
用swapon命令将该文件挂载swap分区
swapon /mnt/swap
为了防止重启后,swap分区变成0, 需要修改/etc/fstab文件
vi /etc/fstab
在文件最后一行加上
/mnt/swap swap swap default 0 0
设置好后,执行free -m可以看到swap分区已经有了。
接着打开浏览器,输入ip地址以及端口,终于出现了传说中的登录页面
![]()
管理员用户名默认是root,密码呢,怎么没有修改密码的页面,这里有点懵,好在可以继续根据官方文档来重新设置密码。
gitlab-rails console -e production
user = User.where(id: 1).first
user.password = 'secret_pass'
user.password_confirmation = 'secret_pass'
user.save!
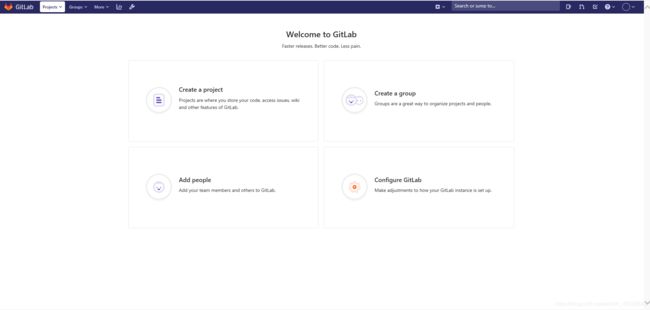
改完了,终于总算是登录上GitLab了。
看到这个页面真感觉有一把辛酸泪,弄了好几天总算出来了!!!!!
