原生js从零实现图片裁切
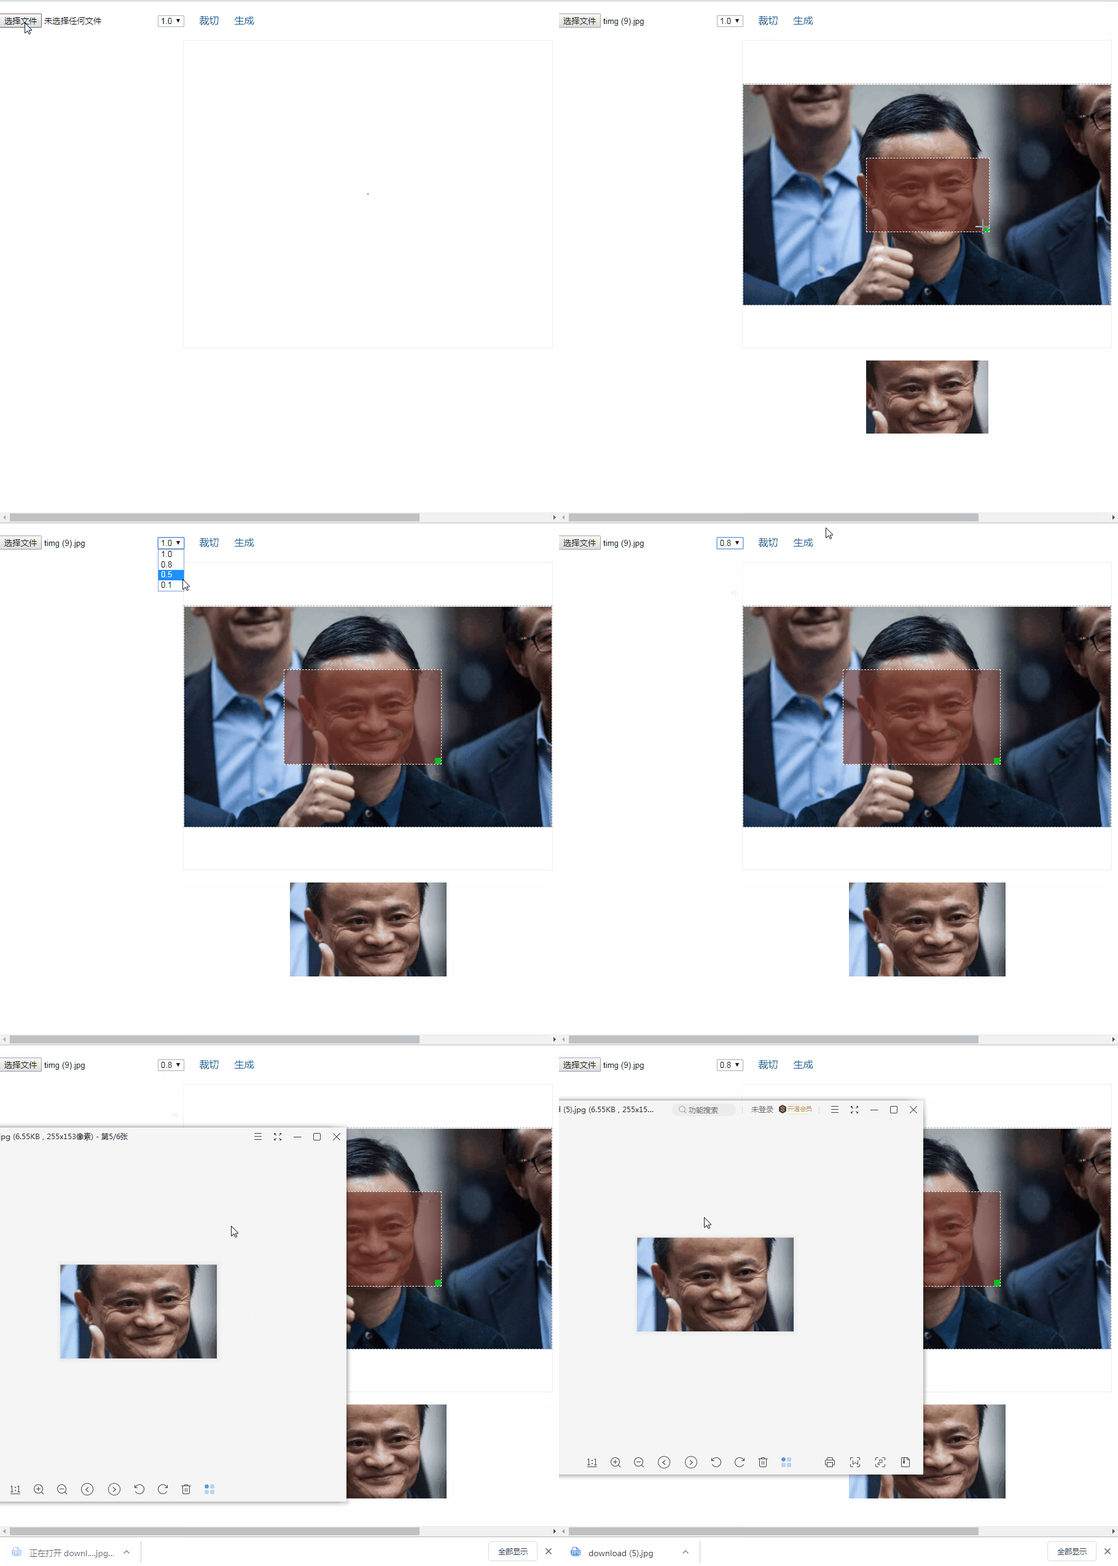
效果图
在我的上一篇文章已经介绍过如何实现图片压缩,本篇文章主要讲解在此基础上单独实现的图片裁剪功能.
点击选择文件上传一张图片,点击裁切时会出现裁剪框,移动或拉伸裁剪框会在下方生成裁剪后的图片.点击下拉框选择裁剪图的压缩比例.最终点击生成就可以将裁剪压缩后的图片下载到本地.
githup完整代码地址
HTML结构
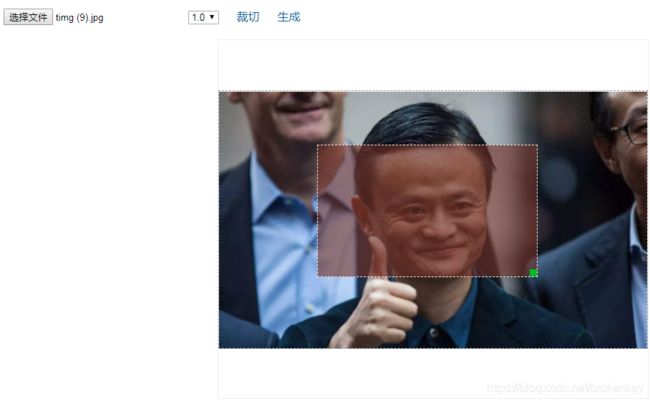
对应页面图
裁剪功能
思路分析
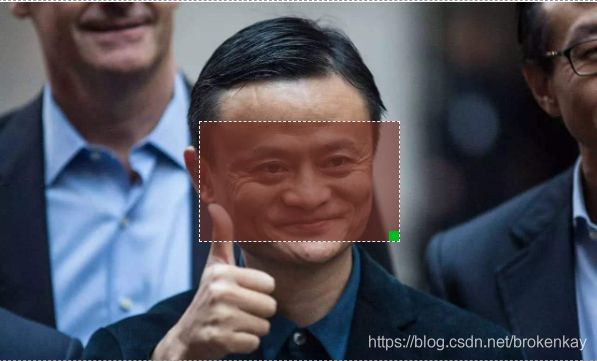
用户点击选择文件后将图片转换成base64编码在页面上预览,裁剪功能的核心就是实现中间那块虚线的裁剪框.
- 裁剪框的第一个基本功能是当用户鼠标在框上按下后可以拖动框,按键松起后就不能再拖动
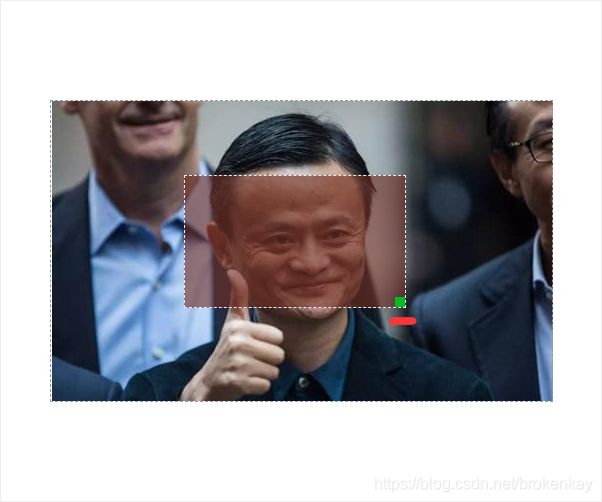
- 裁剪框的右下角的黄色小方块单击后拖动可以等比例拉伸改变框的大小
以上两个功能是实现裁剪的重点,最终的目的是通过裁剪获取比例数据就算完成任务,即裁剪框距离左边界的left,距离上边界的top,还有裁剪框自身的width和height.裁剪的使命就是为了获取left,top,width和height这四条数据,随后我们再通过其他的手段通过这四条数据生成裁剪后的图片.
移动裁剪框
先来实现裁剪框的第一个核心功能,鼠标在框上按下后可以拖动框,按键松起后就不能再拖动.
首先定义一个构造函数cropImg,用它生成的对象实现裁剪.目前只需要关注构造函数里的this.target,它是一个div元素,和图片一样大小,图片以背景图的形式完全充满了该div,正是上图中图片外延的虚线框.this.target相当于原始图片.为了便于叙述,我们就将this.target称为图片框.
function cropImg(options) {
  this.target = document.getElementById(options.target) || document;
  this.width = 0;
  this.height = 0;
  this.container_width = 0;
  this.container_height = 0;
  this.mouse_index = 0;
  this.callback = options.callback || function () {};
  this.fun_list = []; //所有绑定的事件存储起来,插件销毁时解绑
  this.init();
}
在this.init()函数里会执行下面渲染裁剪框的逻辑.
在做移动功能之前需要先把裁剪框在页面上渲染出来,否则框都没有就谈不上如何移动.裁剪框也是一个div,将它渲染到图片框的内部.
- 事先设定裁剪框的宽高比和图片框的宽高比保持一致,裁剪框相对于图片框做绝对定位
- 初始渲染裁剪框的宽和高设置为图片框的1/3(比例数据可以自由设定)
- 初始渲染裁剪框的位置处于图片框的正中央
下面的代码就是为了做上面三件事情,创建一个div元素container作为裁剪框对象,通过算出图片框的宽高从而得到裁剪框的宽高,并设置好它的left和top让它处于图片框的正中央位置.
cropImg.prototype.renderBox = function () {
  const width = (this.container_width = parseInt( //算出图片框的宽
    getComputedStyle(this.target).width
  ));
  const height = (this.container_height = parseInt( //算出图片框的高
    getComputedStyle(this.target).height
  ));
  this.radio = width / height; //算出宽高比例
  this.width = parseInt(width / 3); //得到裁剪框的宽
  this.height = parseInt(height / 3); //得到裁剪框的高
  const container = document.createElement('DIV'); //创建裁剪框
  container.style.width = `${this.width}px`;
  container.style.height = `${this.height}px`;
  container.style.left = `${this.container_width/2 - this.width/2}px`; //初次加载裁剪框放到正中间的位置
  container.style.top = `${this.container_height/2 - this.height/2}px`;
};
现在只需要把裁剪框container塞到图片框this.target里面就可以在页面看到它了.在此之前,现将裁剪框的移动功能做好.如何去开发移动功能?无非是对裁剪框这个div做事件绑定.
- 对裁剪框绑定鼠标按下的事件(mousedown),在这个事件中要定义一个状态来表示鼠标是否已经按下了.因为只有在鼠标按下时才能拖动裁剪框.通过事件函数的事件对象event记录下当前鼠标按下的起始位置start_x,start_y
- 对裁剪框绑定鼠标移动的事件(mousemove),每次触发该事件时要验证鼠标是否还处于按下状态,否则的话拒绝移动.事件触发时通过获取事件对象event可以得到当前鼠标的位置pageX,pageY.让pageX-start_x得到鼠标横向移动的距离,让pageY - start_y得到鼠标纵向的距离.将鼠标横向和纵向移动的距离赋予裁剪框的left和top上便可实现鼠标移动多少裁剪框也会按照相应的方向移动多少距离.每次移动完毕后需要将start_x和start_y更新为当前的鼠标位置pageX和pageY,为下一次再触发移动事件做准备.
- 按照习惯来讲还应该给裁剪框绑定鼠标弹起的事件(mousedown),它的作用是更改为鼠标弹起状态.只要鼠标弹起了,移动事件就不能再触发,除非再一次重新按下鼠标移动.但在实际开发当中发现一个现象,如果给一个div绑定一个mouseup事件,只有当鼠标在div内部松开时才会触发mouseup,鼠标一旦移动到div的外面松开,mouseup事件将彻底失效.为了让裁剪框移动起来更加的顺畅,最后决定将鼠标弹起的事件绑定在全局document上.
实现移动功能的关键便是上述三个鼠标事件mousedown,mousemove和mouseup的编写.在当前的项目中不仅裁剪框需要绑定这三个事件,裁剪框右下角的小方块也要绑定鼠标事件,以对裁剪框进行拉伸,如下图:
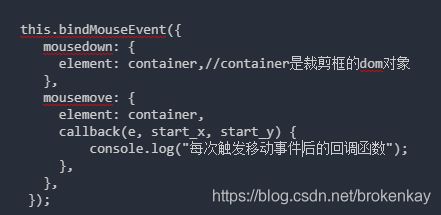
既然拉伸和移动都需要绑定鼠标事件,我们可以将绑定事件的逻辑单独抽离出来供其他函数来调用.现在需要对裁剪框绑定mousedown,mousemove和mouseup事件,那该如何调用呢?
 this.bindMouseEvent({
    mousedown: {
      element: container,//container是裁剪框的dom对象
    },
    mousemove: {
      element: container,
      callback(e, start_x, start_y) {
          console.log("每次触发移动事件后的回调函数");
      },
    },
  });
bindMouseEvent函数里面需要传递一个参数对象,key为具体要绑定的事件名,element是需要绑定事件的dom元素,callback是每次触发完该事件后的回调函数.
如上所述,裁剪框准备绑定两个事件mousedown和mousemove,并且mousemove还定义了一个回调函数callback.那bindMouseEvent的逻辑又是如何编写的呢?
下面这段代码便是实现裁剪功能的核心了.mouseUpHandler等下再看,直接关注for循环里面实现的逻辑.params就是上面传递过来的参数对象 {mousedown: {element: container},mousemove: {element: container,callback() {}}}.直接对params作for in循环,获取每个对象的element和callback,目的就是对element调用addEventListener(key,fn),key就是事件类型,这个容易得到.而fn是具体需要绑定的函数,fn是通过调用this.strategyEvent函数获取.
/**
 * 对dom元素绑定鼠标点击弹起和移动事件
 */
cropImg.prototype.bindMouseEvent = function (params) {
  this.mouseUpHandler(); //处理mouseup事件

  this.mouse_index++; //每当需要绑定一次鼠标事件,mouse_index自增1,作为唯一的id标识

  for (let key in params) {
    const value = params[key]; // 得到key和value
    let { element, callback } = value;
    const defaultFn = this.strategyEvent(key, this.mouse_index); //获取默认运行函数
    if (!defaultFn) {
      //如果发现params的参数配置里面的key没有和在策略函数里定义的默认函数匹配上,那么判定当前对应的key-value是无效的
      continue;
    }
    element = Array.isArray(element) ? element : [element]; //不是数组也转化成数组
    element.forEach((ele) => {
      const fn = (e) => {
        //开始绑定事件
        defaultFn.call(this, e, callback); //某些默认策略函数需要callback参数,所以params.callback也作为参数传入
      };
      ele.addEventListener(key, fn);
    });
  }
};
为什么事件绑定函数fn要通过this.strategyEvent函数获取呢?不这样做也可以,那就需要写很多的if else代码,如下所示.这样写起来的代码不优雅,而我们上面通过调用this.strategyEvent根据key可以直接获取要绑定的函数defaultFn.this.strategyEvent就相当于一个函数工厂,你传给它一个key它就返回你一个处理函数.这里采用了策略模式优化了if else结构.
if(key === "mouseup"){

 ele.addEventListener(key, function(){

 });

}else if(key === "mousemove"){

 ele.addEventListener(key, function(){

 });

}else if(key === "mousedown"){

 ele.addEventListener(key, function(){

 });

}
bindMouseEvent做的事情很纯粹,它就是通过调用addEventListener给不同的element元素绑定不同的事件函数,而事件函数具体内容在哪里呢?this.strategyEvent里面定义不同事件函数的逻辑.
下面strategyEvent函数中中key是传入的事件类型,比如"mousedown"或者"mousemove".idx是全局唯一的id标识,每调用一次bindMouseEvent函数idx就自增1.按照前面所述目前裁剪框和拉伸块都需要绑定鼠标事件,那么裁剪框绑定事件时对应的idx就等于1,拉伸块对应的idx是2.
- mousedown做的事件只有两件,第一是定义一个状态体现鼠标是按下了还是弹起了.第二就是记录下按下时鼠标的位置
- mousemove事件它通过if (!this[`mouse_${idx}`])的值检测鼠标有没有按下,如果已经弹起了就不做任何的操作.随后定义一个定时器做一下节流(节流主要是为了性能考虑,不做不影响功能实现),在定时器的里面开始调用callback函数,这个callback函数正是调用时传入的参数,如下图,在调用callback时传入起始位置start_x,start_y和时间对象e.执行完callback后重新更新start_x和start_y的位置.
/**
 * 定义一些策略函数
 */
cropImg.prototype.strategyEvent = function (key, idx) {
  function mousedown(e) {
    //鼠标按下时的默认操作
    e.stopPropagation();
    this[`mouse_${idx}`] = true; //检测鼠标是否处于按下的状态
    this[`start_x${idx}`] = e.pageX;
    this[`start_y${idx}`] = e.pageY;
  }

  function mousemove(e, callback) {
    //鼠标移动时的默认操作
    e.stopPropagation();
    e.preventDefault();
    if (!this[`mouse_${idx}`]) {
      return false;
    }
    if (this[`timer${idx}`]) {
      return false;
    }
    this[`timer${idx}`] = setTimeout(() => {
      callback.call(this, e, this[`start_x${idx}`], this[`start_y${idx}`]);
      this[`start_x${idx}`] = e.pageX;
      this[`start_y${idx}`] = e.pageY;
      clearTimeout(this[`timer${idx}`]);
      this[`timer${idx}`] = null;
    }, 20);
  }

  const funList = { mousedown, mousemove };

  return funList[key];
};
每次触发mousemove函数后都会调用callback函数,calback函数里接收到了事件对象e以及初始坐标位置start_x和start_y.事件对象e可以获取到当前的鼠标位置e.pageX和e.pageY.让e.pageX-start_x就能得到鼠标横向移动的距离,e.pageY-start_y得到鼠标纵向移动的距离.既然能得到鼠标移动的距离,我们就可以在callback里面让裁剪框动起来.
在调用的时候将callback的逻辑补齐,每一次裁剪框的mousemove事件触发后就会调用下面的callback函数.x是鼠标横向移动的距离,y是鼠标纵向移动的距离.x和y加上裁剪框的left和top并重新赋给裁剪框,如此裁剪框的位置便随着鼠标移动而滑动了.
 this.bindMouseEvent({
    mousedown: {
      element: container,
    },
    mousemove: {
      element: container,
      callback(e, start_x, start_y) {
        const x = e.pageX - start_x;
        const y = e.pageY - start_y;
        let top = parseInt(getComputedStyle(container).top);
        let left = parseInt(getComputedStyle(container).left);
        top += y;
        left += x;
        container.style.top = `${top}px`;
        container.style.left = `${left}px`;
      },
    },
  });
上面只编写了mousemove和mousedown事件,而mouseup事件另外单独处理了,它的逻辑很简单,全局监听鼠标弹起,一旦触发就改变鼠标的状态。
/**
 * mouseup处理函数
 */
cropImg.prototype.mouseUpHandler= function(){
 if (this.mouse_index > 0) {  //已经绑定过mouseup事件了,mouseup事件绑定一次即可
    return false;
  }
  document.addEventListener('mouseup', ()=>{
     Array.from(Array(this.mouse_index)).forEach((value, idx) => {
       this[`mouse_${idx + 1}`] = false;
     });
  });
}
拉伸裁剪框
上图中红线标注的小方块点击拉伸后可以改变裁剪框的大小.它的实现思路仍然是先渲染小方块,随后对小方块绑定mousedown事件,但不要对小方块绑定mousemove事件,因为小方块面积太小了,鼠标很容易滑出影响拉伸效果.所以最好同时对裁剪框和图片框绑定mousemove事件,函数触发时等比例拉伸裁剪框.
代码如下.创建一个div元素symbol作为小方块的dom对象,随后对该dom对象做鼠标事件绑定
- 对小方块绑定mousedown事件,this.mask就是裁剪框的dom对象.
- 给图片框和裁剪框绑定mousemove事件,每次事件触发后调用callback.calback函数里通过e.pageX-start_x算出鼠标横向移动的距离x. 裁剪框的宽度+x 等于裁剪框拉伸后的宽度width,因为需要等比例拉伸,所以利用width和裁剪框的宽高比this.radio可以计算出拉伸后的高度height.将width和height重新赋值给裁剪框,dom元素的大小就改变了.
- 将小方块symbol放到裁剪框this.mask的元素内,在页面上渲染出来.
/**
 * 渲染右下角的拉升框
 */
cropImg.prototype.renderSymbol = function () {
  const symbol = document.createElement('DIV');
  symbol.setAttribute('class', 'symbol');
  this.bindMouseEvent({
    mousedown: {
      element: symbol,
    },
    mousemove: {
      element: [this.target, this.mask],
      callback(e, start_x) {
        const x = e.pageX - start_x;
        const width = parseInt(getComputedStyle(this.mask).width) + x;
        const height = parseInt((width * 1) / this.radio);
        this.mask.style.width = `${width}px`;
        this.mask.style.height = `${height}px`;
        this.width = width;
        this.height = height;
      },
    },
  });
  this.symbol = symbol;
  this.mask.appendChild(symbol);
};
外部调用裁剪插件
现在在外部调用刚才开发好的裁剪插件cropImg,"box"是图片框的id,也就是插件内定义的this.target.我们期待回调函数callback能返回当前裁剪框的比例数据,即裁剪框的宽高以及距离左边界的left和距离上边界的top.而container_height和container_width是图片框的宽高.
new cropImg({
      target: 'box',
      callback({left,top,width,height,container_height,container_width,}) {

      },
    });
在构造函数中加入this.callback属性供外部调用
function cropImg(options) {
  this.target = document.getElementById(options.target) || document;
  this.width = 0;
  this.height = 0;
  this.container_width = 0;
  this.container_height = 0;
  this.mouse_index = 0;
  this.callback = options.callback || function () {};
  this.init();
}
目前插件还没有返回比例数据的功能,我们可以把this.callback放到mouseup当中去执行.每次鼠标一弹出,就执行this.callback函数并返回相关的比例数据.
/**
 * mouseup处理函数
 */
cropImg.prototype.mouseUpHandler= function(){

 if (this.mouse_index > 0) {  //已经绑定过mouseup事件了
    return false;
  }

  document.addEventListener('mouseup', ()=>{

     Array.from(Array(this.mouse_index)).forEach((value, idx) => {
       this[`mouse_${idx + 1}`] = false;
     });

      const { top, left } = this.mask.style; //this.mask是裁剪框的dom对象

      this.callback({ //将相关比例数据返回
       width: this.width, //裁剪框的宽
       height: this.height, //裁剪框的高
       top: parseInt(top),
       left: parseInt(left),
       container_height: this.container_height,//图片框的高
       container_width: this.container_width, //图片框的宽
    });

  });
}
现在鼠标每次拖拽或者拉伸完就会执行callback函数,并给出了此时裁剪框的比例数据.接下来我们要根据这些比例数据生成裁剪后的图片.
- 在内存中新建一个副本canvas为canvas_bak,img为上传预览的原图,将img按照图片框的宽高渲染到副本canvas上.
- 再重新创建一个新canvas,让其宽高等于callback返回的width和height(就是裁剪框的宽高).随后最关键的一步代码 ctx.drawImage(canvas_bak,left,top,width,height,0,0,width,height) 即可实现裁剪.
- ctx.drawImage传入了9个参数.它的含义是在副本canvas上,取距离左侧left为起点x的值,取距离上侧top为起点y的值.以x,y为起点坐标截取一块宽为width高为height的矩形.这便是前5个参数的作用.将截取后的矩形绘制在新canvas上,以0,0为起点坐标完全充满新canvas.新canvas上展现的就是截取后的图片了
- 最后将新canvas压缩转换成base64编码再在页面上展现出来,这便是裁剪并压缩后的图片了
new cropImg({
      target: 'box',
      callback({left,top,width,height,container_height,container_width,}) {

        const canvas_bak = document.createElement('CANVAS');
        const ctx_bak = canvas_bak.getContext('2d');
        canvas_bak.width = container_width;
        canvas_bak.height = container_height;
        ctx_bak.drawImage(img, 0, 0, container_width, container_height);

        const canvas = document.createElement('CANVAS');
        canvas.width = width;
        canvas.height = height;
        const ctx = canvas.getContext('2d');
        ctx.fillStyle = '#fff';
        ctx.fillRect(0, 0, width, height);
        ctx.drawImage(canvas_bak,left,top,width,height,
        0,0,width,height
        );

        const value = Number(document.getElementById('sel').value);
        const code = canvas.toDataURL('image/jpeg', value);
        const image = new Image();
        image.src = code;

        image.onload = () => {
          const des = document.getElementById('production');
          des.innerHTML = '';
          des.appendChild(image);
          compress_img = image;
        };
      },
    });
生成图片
compress_img为裁切压缩后的图片对象,当用户点击生成时,generate函数会触发.它先创建一个A标签,给href属性赋值上压缩图片的base64编码,以及给download属性加一个值,该值对应的是图片下载后的名称.最后执行A标签的单击将图片下载到本地.
  /**
   * 下载图片
   * @param {*}
   */
  function generate() {
    if (!compress_img) {
      return false;
    }
    const a = document.createElement('A');
    a.href = compress_img.src;
    a.download = 'download';
    a.click();
  }
