Spring:Bean的装配方式记录
Bean的装配相当于依赖关系的注入,Bean的装配方式即Bean依赖注入的方式。一切即Bean,Bean即一切。
Spring容器支持多种形式的装配方式,如基于XML的装配、基于注解(Annotation)的装配和自动装配等(其中最常用的是基于注解的装配)。
一、基于XML的装配
(1)设值注入(Setter Injection)
在Spring实例化Bean的过程中,Spring首先会调用Bean的默认构造方法来实例化Bean对象,然后通过反射的方式调用setter方法来注入属性值。因此,设值注入要求一个Bean必须满足以下两点要求:
①Bean类必须提供一个默认的无参构造方法。
②Bean类必须为需要注入的属性提供对应的setter方法。
在使用设值注入时,Spring配置文件中需要使用
【示例】:
public class User {
    private String username;
    private Integer password;
    private List list;

    // 使用设值注入
    // 1.提供默认无参构造方法
    // 2.为所有属性提供setter方法

    public User() {
        super();
    }

    public void setUsername(String username) {
        this.username = username;
    }

    public void setPassword(Integer password) {
        this.password = password;
    }

    public void setList(List list) {
        this.list = list;
    }

    @Override
    public String toString() {
        return "User [username=" + username + ", password=" + password +
                ", list=" + list + "]";
    }
}
创建装配文件beans1.xml,在配置文件中通过设值注入的方式装配User类的实例,如下所示:
                "setlistvalue1"
                "setlistvalue2"
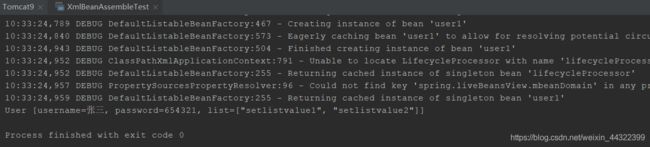
创建测试类XmlBeanAssembleTest,在类中获取并输出user1实例:
public class XmlBeanAssembleTest {
    public static void main(String[] args) {
        String xmlPath = "beans1.xml";
        ApplicationContext applicationContext = new ClassPathXmlApplicationContext(xmlPath);

        System.out.println(applicationContext.getBean("user1"));

    }
}
输出结果:
(2)构造注入
【示例】:
public class User {
    private String username;
    private Integer password;
    private List list;

    //构造注入
    //提供带所有参数的有参构造方法

    public User(String username,Integer password, List list) {
        super();
        this.username = username;
        this.password = password;
        this.list = list;
    }


    @Override
    public String toString() {
        return "User [username=" + username + ", password=" + password +
                ", list=" + list + "]";
    }
}
在使用构造注入时,在配置文件中需要使用
                "constructorvalue1"
                "constructorvalue2"
修改XmlBeanAssembleTest类:
public class XmlBeanAssembleTest {
    public static void main(String[] args) {
        String xmlPath = "beans2.xml";
        ApplicationContext applicationContext = new ClassPathXmlApplicationContext(xmlPath);

        System.out.println(applicationContext.getBean("user2"));

    }
}
输出结果:

二、基于Annotation的装配
在应用中Bean较多时,使用XML配置文件实现Bean的装配工作可能会造成XML配置文件过于臃肿,给后续的维护和升级工作会带来一定的困难。Spring提供了对Annotation(注解)技术的全面支持。
Spring中定义了一系列的注解,常用注解如下:
- @Component
可以使用此注解描述Spring中的Bean,但它是一个泛化的概念,仅仅表示一个组件(Bean),并且可以作用在任何层次。使用时只需将该注解标注在相应的类上即可。
- @Repository
用于数据访问层(DAO层)的类标识为Spring中的Bean,其功能与@Component相同。
- @Service
通常作用在业务层(Service层),用于将业务层的类标识为Spring中的Bean,其功能与@Component相同。
- @Controller
通常作用在控制层(如SpringMVC的Controller),用于将控制层的类标识为Spring中的Bean,其功能与@Component相同。
- @Autowired
用于对Bean的属性变量、属性的setter方法及构造方法进行标注,配合对应的注解处理器完成Bean的自动配置工作。默认按照Bean的类型进行装配。
- @Resource
其作用与Autowired一样。其区别在于@Autowired默认按照Bean类型装配,而@Resource默认按照Bean实例名称进行装配。@Resource中有两个重要属性:name和type。Spring将name属性解析为Bean实例名称,type属性解析为Bean实例类型。如果指定name属性,则按实例名称进行装配;如果指定type属性,则按Bean类型进行装配;如果都不指定,则先按Bean实例名称装配,如果不能匹配,再按照Bean类型进行装配;如果都无法匹配,则抛出NoSuchBeanDefinitionException异常。
- @Qualifier
与@Autowired注解配合使用,会将默认的按Bean类型装配修改为按Bean的实例名称装配,Bean的实例名称由@Qualifier注解的参数指定。
上述注解中的@Repository、@Service与@Controller功能与@Component注解的功能相同,但为了使注解类本身用途更加清晰,建议在实际开发中使用@Repository、@Service与@Controller分别对实现类进行标注。
【示例】:
步骤一:创建接口UserDao,并在接口中定义一个save()方法
public interface UserDao {
    void save();
}
步骤二:创建UserDao接口的实现类UserDaoImpl,该类需要实现接口中的save()方法
@Repository("userDao")
public class UserDaoImp implements UserDao {
    public void save() {
        System.out.println("userdao...save...");
    }
}
使用@Repository注解将UserDaoImpl类标识为Spring中的Bean,相当于在配置文件中编写如下语句:
步骤三:创建接口UserService,在接口中同样定义一个save()方法
public interface UserService {
    void save();
}
步骤四:创建UserService接口的实现类UserServiceImpl,该类需要实现接口中的save()方法
@Service("userService")
public class UserServiceImpl implements UserService {

    @Resource(name="userDao")
    private UserDao userDao;

    @Override
    public void save() {
        this.userDao.save();
        System.out.println("userservice...save...");
    }
}
使用@Service注解将UserServiceImp类 标识为Spring中的Bean,相当于在配置文件中编写如下语句:
然后使用@Resource注解标注在属性userDao上,相当于在配置文件中编写如下语句:
步骤五:创建控制器类UserController
@Controller("userController")
public class UserController {

    @Resource(name="userService")
    private UserService userService;

    public void save() {
        this.userService.save();
        System.out.println("userController...save...");
    }
}
使用@Controller注解标注UserController类,相当于配置文件编写如下语句:
然后使用@Resource注解标注在userService属性上,相当于配置文件编写如下语句:
步骤六:创建配置文件beans3.xml,在配置文件中编写基于Annotation装配的代码
与XML装配方式不同的是,这里不需要再配置子元素
***上述的Spring配置文件即可改写为如下形式***
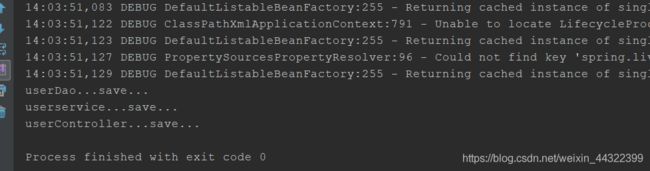
步骤七:创建测试类AnnotationAssembleTest,在类中编写测试方法并定义配置文件的路径,通过Spring容器加载配置文件并获取UserController实例,最后调用实例中的save()方法。
public class AnnotationAssembleTest {

    public static void main(String[] args) {
        String xmlPath = "beans3.xml";
        ApplicationContext applicationContext = new ClassPathXmlApplicationContext(xmlPath);
        UserController userController = (UserController) applicationContext.getBean("userController");
        userController.save();
    }
}
输出结果:
三、自动装配
所谓自动装配,就是将一个Bean自动地注入到其他Bean的property中。Spring的
autowire属性有如下5个值:
- default(默认值)
由
- byName
根据属性的名称自动装配。容器将根据名称查找与属性完全一致的Bean,并将其属性自动装配
- byType
根据属性的数据类型(Type)自动装配,如果一个Bean的数据类型,兼容另一个Bean中属性的数据类型,则自动装配
- constructor
根据构造函数参数的数据类型,进行byType模式的自动装配
- no
在默认情况下,不使用自动装配,Bean依赖必须通过ref元素定义
【示例】:
步骤一:先修改上节中编写的UserServiceImpl和UserController类,分别增加类属性的setter方法。
步骤二:修改beans3.xml成自动装配形式
步骤三:执行程序,控制台输出结果
