win10+Hexo+Nodejs+git快速部署github.io个人博客
win10+Hexo+Nodejs+git快速部署github.io个人博客
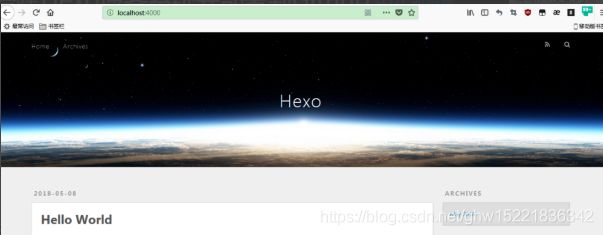
效果图:个人博客
你是不是想快速入门搭建一个github.io,无论是当个人博客,还是用作简历上的主页展示,github.io个人博客都是极其便捷的,这篇博客将带你入门如何利用Hexo搭建github.io个人博客。
Hexo是一款基于Node.js的静态博客框架,可以方便的生成静态网页托管在GitHub上。相较于jekyll/octopress博客框架来说,Hexo的编译速度更快,搭建步骤也更加简单。
官网:https://hexo.io/zh-tw/
安装需求:
- Nodejs
- Git
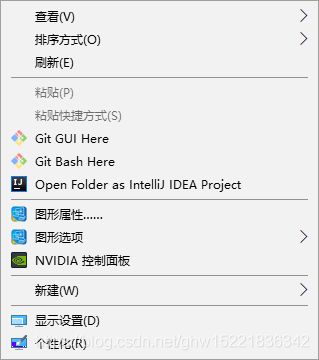
安装完Nodejs和Git之后,在桌面鼠标右键Gitbash
//输入以下命令,出现对应版本号即安装成功
node -v
npm -v
配置Git用户信息
1、配置git用户信息
//邮箱和用户名不要求是github上的用户名和邮箱账号
git config --global user.name "用户名"

git config --global user.email "邮箱"


2、生成ssh密钥文件
ssh-keygen -t rsa -C "邮箱"
//返回的信息中说明了公钥id_rsa.pub的文件位置
前往github创建个人repo,名称必须时:username.github.io
将生成的公钥id_rsa.pub添加到github中:
添加公钥之后,在gitbash中输入 ssh [email protected]测试,出现Hi chrispolo! You've successfully authenticated, but GitHub does not provide shell access.Connection to github.com closed.即完成配置
安装Hexo
1、安装hexo本地环境
npm install -g hexo
2、输入hexo查看能否运行hexo命令
hexo
1、创建博客的文件夹
mkdir Myblog
cd MyBlog
2、初始化博客工程
hexo init
3、编译博客系统
hexo g
4、启动本地服务器进行预览
hexo s
输入http://localhost:4000/就能看到博客的初始模样
修改默认主题
可以去官网https://hexo.io/themes/去选择主题,直接在gitbash中git clone [url] themes/xxx 将主题克隆到本地;
我是选择了一个https://github.com/fi3ework/hexo-theme-archer的主题:
1、在Myblog目录的gitbash中执行
npm i hexo-generator-json-content --save && npm i --save hexo-wordcount && git clone https://github.com/fi3ework/hexo-theme-archer.git themes/archer --depth=1
2、修改Myblog目录下的——config.yml的theme字段为archer
theme: archer3、添加sidebar启用支持:
在Myblog目录下的_config.yml中添加以下字段
jsonContent:
  meta: true
  pages: false
  posts:
    title: true
    date: true
    path: true
    text: false
    raw: false
    content: false
    slug: false
    updated: false
    comments: false
    link: false
    permalink: true
    excerpt: false
    categories: true
    tags: true
4、在正式部署前需要安装Hexo的部署插件
npm install hexo-deployer-git --save5、修改Myblog目录下的配置文件_config.yml
//注意冒号后面一定要有空格,不然执行后面的hexo d命令会无效,你也会奇怪到底哪出现了问题
deploy:
  repository: [email protected]:username/username.github.io.git
  type: git
  branch: master
6、重新编译、部署
hexo g
hexo d
成功之后,登录 用户名.github.io去查看自己生成的博客,博客中的配置信息可以去Mybolg目录中的theme文件夹中找到自己的主题,进去修改相关的信息。
新建博客
在gitbash中Myblog/source目录下
hexo n "博客名字"
/会在source/_posts文件夹下生成同名的markdown文件
回到Myblog目录下:
//安装hexo-admin插件
npm install hexo-admin --save

//运行本地服务器
hexo -s

//浏览器打开以下地址,编辑博客内容发布
http://localhost:4000/admin
或者就是自己选择markdown编辑器,将生成的.md文件移到source/_posts文件夹中;
Bug解决
上述安装过程中如果报以下错误:
npm WARN [email protected] requires a peer of ajv@^6.9.1 but none is install
npm install ajv@^6.9.1 //具体ajv的版本号以报错信息为准npm WARN [email protected] requires a peer of eslint@>= 4.12.1 but none is install
npm install [email protected] --save-dev //eslint版本号依然以报错信息为准
输入hexo d 或者hexo deploy没有反应
//注意冒号后面一定要有空格,不然执行后面的hexo d命令会无效,你也会奇怪到底哪出现了问题
deploy:
  repository: [email protected]:username/username.github.io.git
  type: git
  branch: master


