一、jumpserver介绍
是一款由python编写开源的跳板机(堡垒机)系统,实现了跳板机应有的功能。基于ssh协议来管理,客户端无需安装agent。 特点: 完全开源,GPL授权 Python编写,容易再次开发 实现了跳板机基本功能,认证、授权、审计 集成了Ansible
官方资料:
https://github.com/jumpserver/jumpserver
https://github.com/ibuler/jumpserver/tree/master/docs
二、jumpserver安装部署
1、环境
[root@jumpserver ~]# cat /etc/redhat-release
CentOS release 6.9 (Final)
[root@jumpserver ~]# uname -r
2.6.32-696.el6.x86_64
[root@jumpserver ~]# /etc/init.d/iptables status
iptables: Firewall is not running.
[root@jumpserver ~]# getenforce
Disabled
[root@jumpserver ~]# hostname -I
172.19.5.110 172.16.1.110
2、快速安装
①安装git
yum -y install git
②安装依赖包
yum -y install epel-release #添加yum源
yum -y install git python-pip mysql-devel gcc automake autoconf python-devel vim sshpass lrzsz readline-devel
③下载jumpserver
git clone https://github.com/jumpserver/jumpserver.git
git clone https://github.com/ibuler/jumpserver.git
④执行快速安装脚本
cd /server/tools/jumpserver/install/
pip install -r requirements.txt #安装python的依赖库
⑤查看安装了哪些依赖包
[root@jumpserver install]# cat requirements.txt
#sphinx-me==0.3
django==1.6
pycrypto==2.6.1
paramiko==1.16.0
ecdsa==0.13
MySQL-python==1.2.5
#django-uuidfield==0.5.0
psutil==3.3.0
xlsxwriter==0.7.7
xlrd==0.9.4
django-bootstrap-form==3.2
tornado==4.3
ansible==1.9.4
pyinotify==0.9.6
passlib==1.6.5
argparse==1.4.0
django_crontab==0.6.0
注:根据提示输入相关信息,完成安装后,请访问web172.19.5.110,如果启动失败,请返回上级目录,手动执行./service.sh restart启动,默认账号admin,密码5Lov@wife
⑥执行python的安装脚本
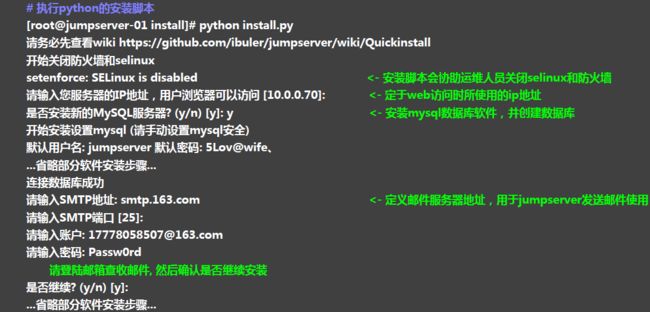
[root@jumpserver install]# python install.py
安装报错
是否继续? (y/n) [y]: y 开始写入配置文件 Traceback (most recent call last): File "/server/tools/jumpserver/install/next.py", line 19, infrom juser.user_api import db_add_user, get_object, User File "/server/tools/jumpserver/juser/user_api.py", line 3, in from Crypto.PublicKey import RSA File "/usr/lib64/python2.6/site-packages/Crypto/PublicKey/RSA.py", line 75, in from Crypto.Util.number import getRandomRange, bytes_to_long, long_to_bytes File "/usr/lib64/python2.6/site-packages/Crypto/Util/number.py", line 56, in if _fastmath is not None and not _fastmath.HAVE_DECL_MPZ_POWM_SEC: AttributeError: 'module' object has no attribute 'HAVE_DECL_MPZ_POWM_SEC'
解决报错
pip uninstall pycrypto
rm -fr /usr/lib64/python2.6/site-packages/Crypto/
pip install pycrypto==2.4.1
⑦检查jumpserver服务
jumpserver服务启动停止脚本
[root@jumpserver jumpserver]# /server/tools/jumpserver/service.sh
Usage: /server/tools/jumpserver/service.sh {start|stop|restart}
[root@jumpserver jumpserver]# ps -ef|grep jumpserver
root      5022     1  0 15:24 pts/0    00:00:00 sh /server/tools/jumpserver/service.sh start
root      5026  5022  0 15:24 pts/0    00:00:00 /bin/bash -c ulimit -S -c 0 >/dev/null 2>&1 ; python /server/tools/jumpserver/run_websocket.py
root      5028  5026  0 15:24 pts/0    00:00:00 python /server/tools/jumpserver/run_websocket.py
root      5038  5028  0 15:24 pts/0    00:00:00 python /server/tools/jumpserver/run_websocket.py
root      5039  5028  0 15:24 pts/0    00:00:00 python /server/tools/jumpserver/run_websocket.py
root      5040  5028  0 15:24 pts/0    00:00:00 python /server/tools/jumpserver/run_websocket.py
root      5041  5028  0 15:24 pts/0    00:00:00 python /server/tools/jumpserver/run_websocket.py
root      5042  5028  0 15:24 pts/0    00:00:00 python /server/tools/jumpserver/run_websocket.py
三、jumpserver软件web页面操作
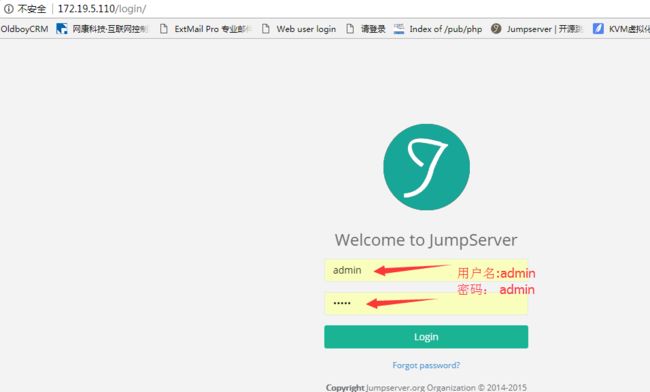
1、浏览器登录
2、添加用户
①用户添加完成后,根据提示记住用户名和密码,换个浏览器登录下载Key,ssh登录jumpserver测试
②创建普通员工用户
③登录邮箱查看jumpserver发送的信息
3、添加资产
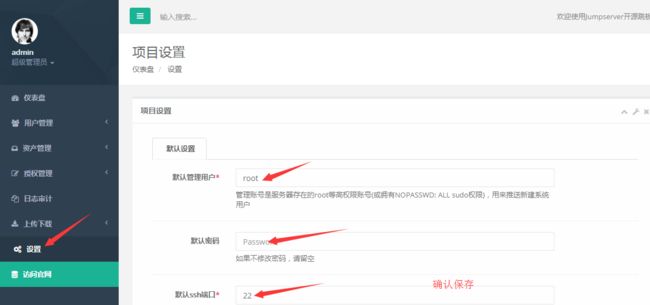
①设置默认用户管理
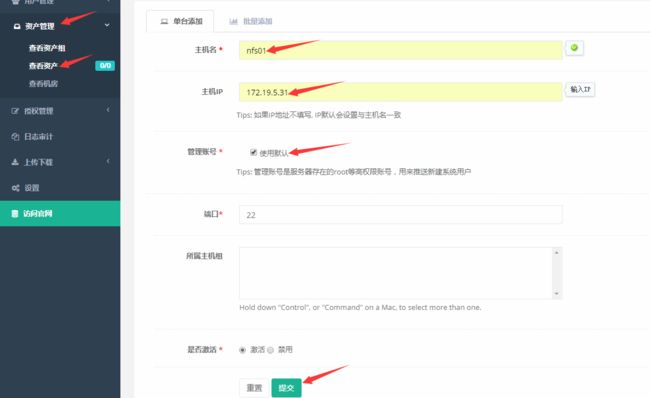
②添加资产
4、sudo授权管理
①默认跳板机创建的用户都是普通用户,所以需要依赖sudo命令别名功能,使普通用户具有相应的权限,操作管理用户的命令
②添加系统用户并关联sudo授权
用户权限说明
③推送系统用户
推送前登录nfs01服务器查看sa系统用户信息
[root@nfs01 ~]# id sa
id: sa: No such user
推送后再次查看
[root@nfs01 ~]# id sa
uid=500(sa) gid=500(sa) groups=500(sa)
④添加授权规则
连接测试
⑤通过资产可以抓取到服务器硬件信息:查看资产点击更新即可
点击执行命令选项可以查看有权限管理的服务器
四、jumpserver命令行界面操作
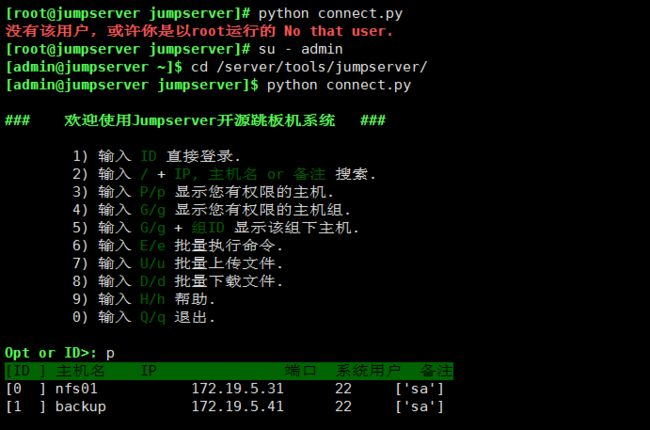
1、要用admin用户进行命令操作管理
2、使用普通用户进行管理
①到邮箱下载Key秘钥文件
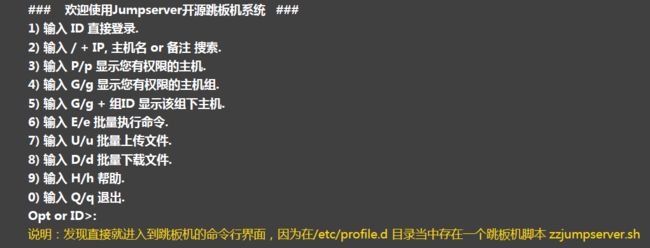
②利用xshell秘钥登录方式,导入Key秘钥,即可登录到跳板机命令行界面
