Linux--https超文本传输安全协议
一.超文本传输协议的作用与缺陷
1.作用
超文本传输协议经常被用于Web浏览器与各大网站服务器之间传输信息。是以明文的方式进行内容发送,不会提供任何的加密形式。
2.缺陷
如果黑客截取了Web浏览器和网站服务器之间的传输报文,就可以直接读懂其中的信息,因此HTTP协议不适合传输一些敏感信息,比如信用卡号、密码等
3.措施
为了解决HTTP协议的明文缺陷,需要使用另一种协议:安全套接字层超文本传输协议HTTPS。为了数据传输的安全,HTTPS在HTTP的基础上加入了SSL协议,SSL依靠证书来验证服务器的身份,并为浏览器和服务器之间的通信加密。
二.安全证书的生成
1.ssl模块的安装
[root@localhost ~]# yum install mod_ssl -y
Loaded plugins: langpacks, product-id, search-disabled-repos, subscription-
              : manager
This system is not registered to Red Hat Subscription Management. You can use subscription-manager to register.
Resolving Dependencies
--> Running transaction check
---> Package mod_ssl.x86_64 1:2.4.6-45.el7 will be installed
--> Finished Dependency Resolution

Dependencies Resolved

================================================================================
 Package          Arch            Version                 Repository       Size
================================================================================
Installing:
 mod_ssl          x86_64          1:2.4.6-45.el7          westos          105 k

Transaction Summary
================================================================================
Install  1 Package

Total download size: 105 k
Installed size: 224 k
Downloading packages:
Running transaction check
Running transaction test
Transaction test succeeded
Running transaction
  Installing : 1:mod_ssl-2.4.6-45.el7.x86_64                                1/1
  Verifying  : 1:mod_ssl-2.4.6-45.el7.x86_64                                1/1

Installed:
  mod_ssl.x86_64 1:2.4.6-45.el7

Complete!
[root@localhost ~]# cd /etc/httpd/conf.d
[root@localhost conf.d]# ls  ##生成ssl.conf配置文件
autoindex.conf  README    userdir.conf  welcome.conf
php.conf        ssl.conf  vhost.conf
[root@localhost conf.d]# systemctl restart httpd
[root@localhost conf.d]# netstat -antlupe | grep httpd  ##查看端口为443
tcp6       0      0 :::80                   :::*                    LISTEN      0          35745      3637/httpd
tcp6       0      0 :::443                  :::*                    LISTEN      0          35753      3637/httpd
[root@localhost conf.d]# firewall-cmd --permanent --add-port=443/tcp  ##添加允许通过端口443
success
[root@localhost conf.d]# firewall-cmd --reload
success
[root@localhost conf.d]# firewall-cmd --list-all
public (active)
  target: default
  icmp-block-inversion: no
  interfaces: ens3
  sources:
  services: dhcpv6-client ftp http ssh
  ports: 443/tcp  ##添加成功
  protocols:
  masquerade: no
  forward-ports:
  sourceports:
  icmp-blocks:
  rich rules:
2.下载加密工具crypto-utils
[root@localhost conf.d]# yum install crypto-utils.x86_64 -y
Loaded plugins: langpacks, product-id, search-disabled-repos, subscription-
              : manager
This system is not registered to Red Hat Subscription Management. You can use subscription-manager to register.
Resolving Dependencies
--> Running transaction check
---> Package crypto-utils.x86_64 0:2.4.1-42.el7 will be installed
--> Finished Dependency Resolution

Dependencies Resolved

================================================================================
 Package              Arch           Version               Repository      Size
================================================================================
Installing:
 crypto-utils         x86_64         2.4.1-42.el7          westos          78 k

Transaction Summary
================================================================================
Install  1 Package

Total download size: 78 k
Installed size: 179 k
Downloading packages:
Running transaction check
Running transaction test
Transaction test succeeded
Running transaction
  Installing : crypto-utils-2.4.1-42.el7.x86_64                             1/1
  Verifying  : crypto-utils-2.4.1-42.el7.x86_64                             1/1

Installed:
  crypto-utils.x86_64 0:2.4.1-42.el7

Complete!
[root@localhost conf.d]# rpm -ql crypto-utils-2.4.1-42.el7.x86_64  ##查看加密路径
/etc/cron.daily/certwatch
/usr/bin/certwatch
/usr/bin/genkey  ##加密路径
/usr/bin/keyrand
/usr/bin/keyutil
/usr/lib64/perl5/vendor_perl/Crypt
/usr/lib64/perl5/vendor_perl/Crypt/Makerand.pm
/usr/lib64/perl5/vendor_perl/auto/Crypt
/usr/lib64/perl5/vendor_perl/auto/Crypt/Makerand
/usr/lib64/perl5/vendor_perl/auto/Crypt/Makerand/Makerand.so
/usr/lib64/perl5/vendor_perl/auto/Crypt/Makerand/autosplit.ix
/usr/share/doc/crypto-utils-2.4.1
/usr/share/doc/crypto-utils-2.4.1/COPYING
/usr/share/doc/crypto-utils-2.4.1/LICENSE.librand
/usr/share/man/man1/certwatch.1.gz
/usr/share/man/man1/genkey.1.gz
/usr/share/man/man1/keyrand.1.gz
/usr/share/man/man3/Crypt::Makerand.3pm.gz
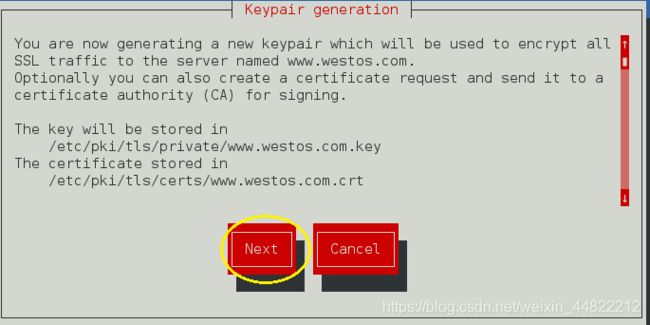
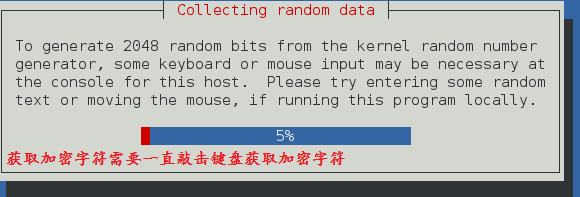
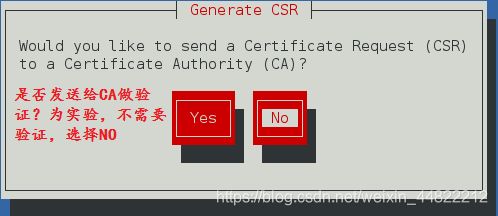
3.证书的生成
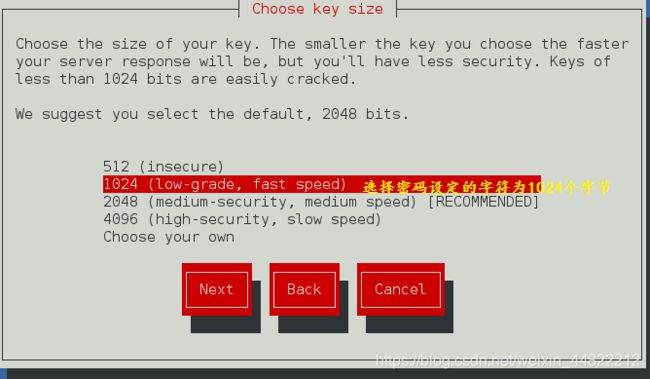
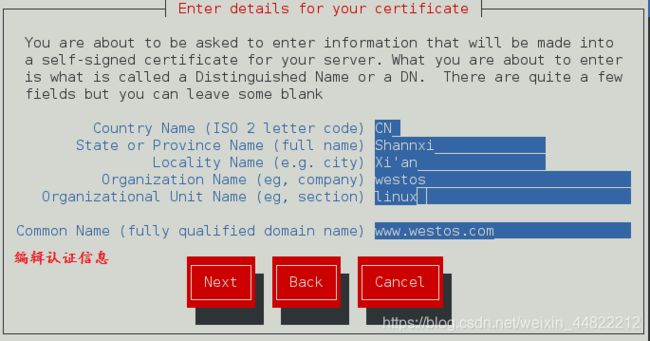
[root@localhost conf.d]# genkey www.westos.com
/usr/bin/keyutil -c makecert -g 1024 -s "CN=www.westos.com, OU=linux, O=westos, L=Xi'an, ST=Shannxi, C=CN" -v 1 -a -z /etc/pki/tls/.rand.4479 -o /etc/pki/tls/certs/www.westos.com.crt -k /etc/pki/tls/private/www.westos.com.key
cmdstr: makecert
cmd_CreateNewCert
command: makecert
keysize = 1024 bits
subject = CN=www.westos.com, OU=linux, O=westos, L=Xi'an, ST=Shannxi, C=CN
valid for 1 months
random seed from /etc/pki/tls/.rand.4479
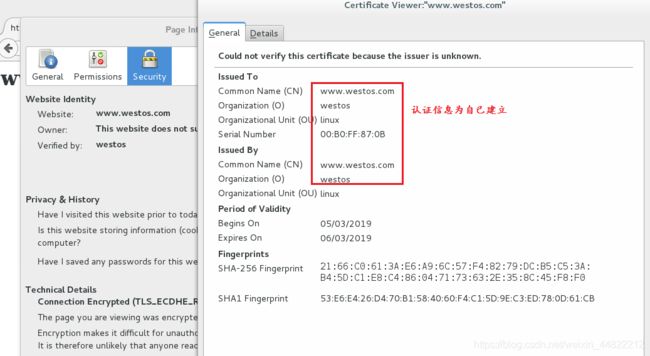
output will be written to /etc/pki/tls/certs/www.westos.com.crt ##生成的认证文件
output key written to /etc/pki/tls/private/www.westos.com.key ##生成的认证密钥
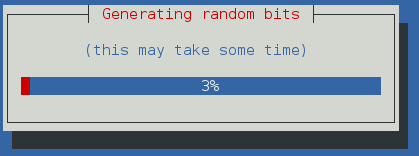
Generating key. This may take a few moments...
Made a key
Opened tmprequest for writing
/usr/bin/keyutil Copying the cert pointer
Created a certificate
Wrote 882 bytes of encoded data to /etc/pki/tls/private/www.westos.com.key
Wrote the key to:
/etc/pki/tls/private/www.westos.com.key

[root@localhost conf.d]# cd /etc/httpd/conf.d
[root@localhost conf.d]# ls
autoindex.conf  README    tmprequest    vhost.conf
php.conf        ssl.conf  userdir.conf  welcome.conf
[root@localhost conf.d]# vim ssl.conf  ##对子配置文件进行更改
[root@localhost conf.d]# systemctl restart httpd

测试:浏览器输入www.westos.com查看认证文件

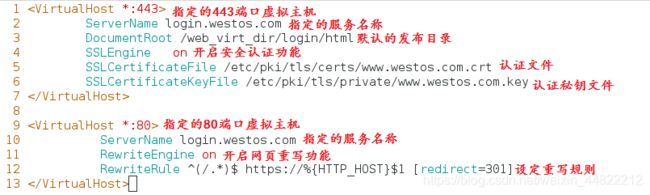
三.https虚拟机的设定及网页的重写
1.创建虚拟主机的发布目录及发布文件
[root@localhost ~]# ls /web_virt_dir
music news
[root@localhost ~]# cd /web_virt_dir
[root@localhost web_virt_dir]# mkdir login/html -p
[root@localhost web_virt_dir]# vim login/html/index.html
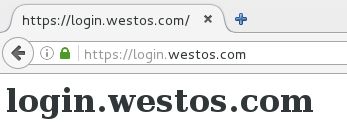
[root@localhost web_virt_dir]# cat login/html/index.html
login.westos.com
2.在副配置文件中编写配置文件
[root@localhost web_virt_dir]# vim /etc/httpd/conf.d/login.conf
[root@localhost web_virt_dir]#systemctl restart httpd
^(/.)$:客户在浏览器端输入的所有字符
https://:强制客户加密访问
%{HTTP_HOST}:客户请求的主机
$1:1表示(/.)的所有值
[redirect=301] #永久转换301;临时重写 302
 在测试端测试:login.westos.com
在浏览器以login.westos.com访问时,会自动重写为https://login.westos.com/
在第一次访问时需要添加证书,否则会产生无法读取发布文件的情况