wxWidgets-3.1.3 在 vs2019 | Win10 下的详细入门配置方法(官方版)
wxWidgets最新版下载链接:Latest Development Release
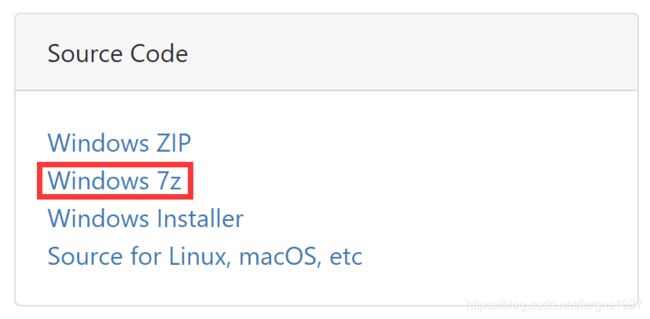
我下载的是下图所示的源码压缩包版本
本文的配置方法参照官方文档,在如标题所述的软件版本和环境下测试成功
官方文档链接:Installing wxWidgets for Windows
接下来是官网介绍的配置方法
-
编译源码
解压源码包,定位到 wxWidgets-3.1.3\build\msw ,打开与vs2019版本对应的工程文件,这里是wx_vc16.sln
官方文档中列出的 VC 与 MSVS 对应关系:
VC++ 7, 8, 9, 10, 11, 12, 14, 15 and 16 ( MSVS 2003, 2005, 2008, 2010, 2012, 2013, 2015, 2017 and 2019)
选择 Release、X64 和 静态库 配置,然后用vs的【生成解决方案】编译所有24个子工程,完成后目录 wxWidgets-3.1.3\lib 中会生成 vc_x64_lib 静态库文件夹
-
配置环境变量
添加系统变量:名【WXWIN】,值【wxWidgets-3.1.3根目录绝对路径】
在Path系统变量中添加 %WXWIN%\lib\vc_x64_lib
-
以空项目为例介绍工程属性的配置
创建一个空项目,编辑工程属性,须在【项目属性页】做如下修改:
1、配置属性 - C/C++ - 常规 - 附加包含目录:添加 $(WXWIN)\include\msvc 和 $(WXWIN)\include
2、配置属性 - C/C++ - 预处理器 - 预处理器定义:添加 __WXMSW__ 、_UNICODE、NDEBUG,这里若不加_UNICODE,则需要在 配置属性 - 高级 - 高级属性 - 字符集 选择【使用 Unicode 字符集】
3、配置属性 - 链接器 - 常规 - 附加库目录:添加 $(WXWIN)\lib\vc_x64_lib
4、配置属性 - 链接器 - 系统 - 子系统:选择【窗口】(默认为【控制台】)
新建一个源文件,拷入如下官方 hello world 源码进行测试
#include "wx\wxprec.h"
#include "wx\wx.h"
#include
#include

using namespace std;

#ifndef WX_PRECOMP
#include "include\wx\wx.h"
#endif

class MyApp : public wxApp
{
public: virtual bool OnInit();
};

class MyFrame : public wxFrame {
public:
	MyFrame(const wxString& title, const wxPoint& pos, const wxSize& size);

private:
	void OnHello(wxCommandEvent& event);
	void OnExit(wxCommandEvent& event);
	void OnAbout(wxCommandEvent& event);
	wxDECLARE_EVENT_TABLE();
};

enum {
	ID_Hello = 1
};

wxBEGIN_EVENT_TABLE(MyFrame, wxFrame)
EVT_MENU(ID_Hello, MyFrame::OnHello)
EVT_MENU(wxID_EXIT, MyFrame::OnExit)
EVT_MENU(wxID_ABOUT, MyFrame::OnAbout)
wxEND_EVENT_TABLE()
wxIMPLEMENT_APP(MyApp);
// main function this macro is the main function
// create an application instance and starts the program


bool MyApp::OnInit()
{
	MyFrame* frame = new MyFrame("Hello World", wxPoint(50, 50), wxSize(450, 340));
	frame->Show(true);
	return true;
}
MyFrame::MyFrame(const wxString& title, const wxPoint& pos, const wxSize& size)
	: wxFrame(NULL, wxID_ANY, title, pos, size)
{
	wxMenu* menuFile = new wxMenu;
	menuFile->Append(ID_Hello, "&Hello...\tCtrl-H",
		"Hello string show in status bar for this menu item");
	menuFile->AppendSeparator();
	menuFile->Append(wxID_EXIT);

	wxMenu* menuHelp = new wxMenu;
	menuHelp->Append(wxID_ABOUT);

	wxMenuBar* menuBar = new wxMenuBar;
	menuBar->Append(menuFile, "&File");
	menuBar->Append(menuHelp, "&Help");

	SetMenuBar(menuBar);

	CreateStatusBar();
	SetStatusText("Welcome to wxWidgets!");
}

void MyFrame::OnExit(wxCommandEvent& event)
{
	Close(true);
}

void MyFrame::OnAbout(wxCommandEvent& event)
{
	wxMessageBox("This is a wxWidgets' Hello World sample", "About Hello World", wxOK | wxICON_INFORMATION);
}

void MyFrame::OnHello(wxCommandEvent& event)
{
	wxLogMessage("Hello world from wxWidgets!");
}
运行后将弹出如下窗口

