夜光:Java成神之路(十四)擅长的语言
夜光序言:
一瓢凄冷江湖惹一世岁月浮萍;
一抹祸水朱砂叹一世浮生飘零;

正文:
以道御术 / 以术识道
1. 多线程的创建方式
(1)、继承 Thread 类:但 Thread 本质上也是实现了 Runnable 接口的一个实例,它代表一个线程的实例,并且,启动线程的唯一方法就是通过 Thread 类的 start()实例方法。
start()方法是一个 native 方法,它将启动一个新线
程,并执行 run()方法。
这种方式实现多线程很简单,通过自己的类直接 extend Thread,并复写 run()方法,就可以启动新线程并执行自己定义的 run()方法。
例如:继承 Thread 类实现多线程,并在合适的地方启动线程
    public class MyThread extends Thread {
      public void run() {
         System.out.println("MyThread.run()");
      }


    }
MyThread myThread1 = new MyThread();
MyThread myThread2 = new MyThread();
myThread1.start();
myThread2.start();(2)、实现 Runnable 接口的方式实现多线程,并且实例化 Thread,传入自己的 Thread 实例,调用 run( )方法
 public class MyThread implements Runnable {
    public void run() {
       System.out.println("MyThread.run()");
    }
 }


 MyThread myThread = new MyThread();
 Thread thread = new Thread(myThread);
 thread.start();
(3)、
使用 ExecutorService、Callable、Future 实现有返回结果的多线程:ExecutorService、Callable、Future
这 个 对 象 实 际 上 都 是 属 于 Executor 框 架 中 的 功 能 类 。
想 要 详 细 了 解 Executor 框 架 的 可 以 访 问 http://www.javaeye.com/topic/366591 ,这里面对该框架做了很详细的解释。
返回结果的线程是在 JDK1.5 中引入的新特征,确实很实用,有了这种特征我就不需要再为了得到返回值而大费周折了,而且即便实现了也可能漏洞百出。
可返回值的任务必须实现 Callable 接口,
类似的,无返回值的任务必须 Runnable 接口。
执行 Callable 任务后,可以获取一个 Future 的对象,在该对象上调用 get 就可以获取到 Callable 任务返回的 Object 了,再结合线程池接口 ExecutorService 就可以实现传说中有返回结果的多线程了。
下面提供了一个完整的有返回结果的多线程测试例子,在 JDK1.5 下验证过没问题可以直接使用。代码如下:
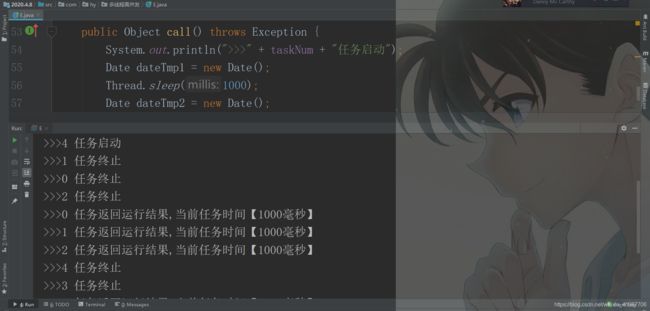
package com.hy.多线程高并发;
import java.util.ArrayList;
import java.util.Date;
import java.util.List;
import java.util.concurrent.*;
/**
* 有返回值的线程
*/
@SuppressWarnings("unchecked")
public class E {
public static void main(String[] args) throws ExecutionException,
InterruptedException {
System.out.println("----程序开始运行----");
Date date1 = new Date();
int taskSize = 5;
// 创建一个线程池
ExecutorService pool = Executors.newFixedThreadPool(taskSize);
// 创建多个有返回值的任务
List list = new ArrayList();
for (int i = 0; i < taskSize; i++) {
Callable c = new MyCallable(i + " ");
// 执行任务并获取 Future 对象
Future f = pool.submit(c);
// System.out.println(">>>" + f.get().toString());
list.add(f);
}
// 关闭线程池
pool.shutdown();
// 获取所有并发任务的运行结果
for (Future f : list) {
// 从 Future 对象上获取任务的返回值,并输出到控制台
System.out.println(">>>" + f.get().toString());
}
Date date2 = new Date();
System.out.println("----程序结束运行----,程序运行时间【"
+ (date2.getTime() - date1.getTime()) + "毫秒】");
}
}
class MyCallable implements Callable 2. 在 java 中 wait 和 sleep 方法的不同?
最大的不同是在等待时 wait 会释放锁,而 sleep 一直持有锁。wait 通常被用于线程间交互,sleep 通常被用于暂停执行
3. synchronized 和 volatile 关键字的作用
一旦一个共享变量(类的成员变量、类的静态成员变量)被 volatile 修饰之后,那么就具备了两层语义:
1)保证了不同线程对这个变量进行操作时的可见性,即一个线程修改了某个变量的值,这新值对其他线程来说是立即可见的。
2)禁止进行指令重排序。
volatile 本质是在告诉 jvm 当前变量在寄存器(工作内存)中的值是不确定的,需要从主存中读取;
synchronized 则是锁定当前变量,只有当前线程可以访问该变量,其他线程被阻塞住。
1.volatile 仅能使用在变量级别;
synchronized 则可以使用在变量、方法、和类级别的
2.volatile 仅能实现变量的修改可见性,并不能保证原子性;
synchronized 则可以保证变量的修改可见性和原子性
3.volatile 不会造成线程的阻塞;
synchronized 可能会造成线程的阻塞。
4.volatile 标记的变量不会被编译器优化;
synchronized 标记的变量可以被编译器优化
4. 分析线程并发访问代码解释原因


package com.hy.多线程高并发;

public class Counter {

    private volatile int count = 0;

    public void inc() {
        try {
            Thread.sleep(3);
        } catch (InterruptedException e) {
            e.printStackTrace();
        }
        count++;
    }

    @Override
    public String toString() {
        return "[count=" + count + "]";
    }
}
package com.hy.多线程高并发;

public class VolatileTest {
    public static void main(String[] args) {
        final Counter counter = new Counter();
        for (int i = 0; i < 1000; i++) {
            new Thread(new Runnable() {
                @Override
                public void run() {
                    counter.inc();
                }
            }).start();
        }
        System.out.println(counter);
    }
}
答案是不一定,或者不等于 1000。这是为什么呢?
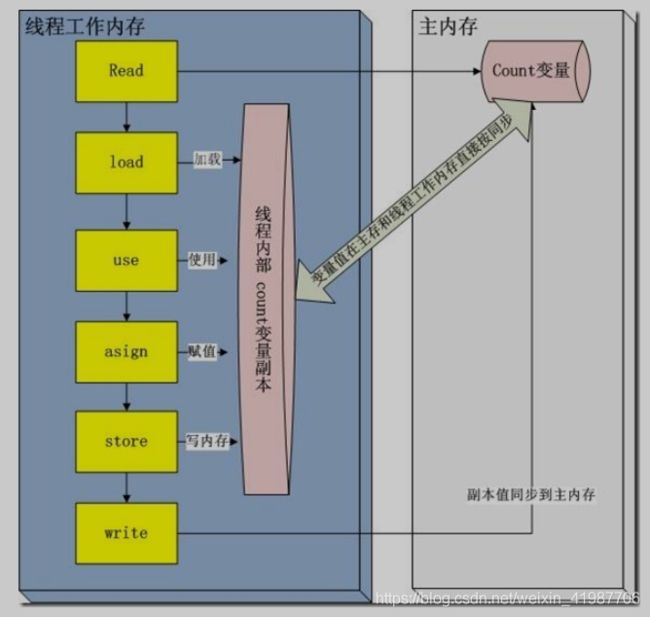
在 java 的内存模型中每一个线程运行时都有一个线程栈,线程栈保存了线程运行时候变量值信息。
当线程访问某一个对象时候值的时候,首先通过对象的引用找到对应在堆内存的变量的值,然后把堆内存变量的具体值 load 到线程
本地内存中,建立一个变量副本,之后线程就不再和对象在堆内存变量值有任何关系,而是直接修改副本变量的值,在修改完之后的某一个时刻(线程退出之前),自动把线程变量副本的值回写到对象在堆中变量。
这样在堆中的对象的值就产生变化了。
也就是说上面主函数中开启了 1000 个子线程,每个线程都有一个变量副本,每个线程修改变量只是临时修改了自己的副本,当线程结束时再将修改的值写入在主内存中,这样就出现了线程安全问题。
因此结果就不可能等于 1000 了,一般都会小于 1000。
上面的解释用一张图表示如下:
(图片来自网络,非本人所绘)
5. 什么是线程池,如何使用?
线程池就是事先将多个线程对象放到一个容器中,当使用的时候就不用 new 线程而是直接去池中拿线程即可,节省了开辟子线程的时间,提高的代码执行效率。
在 JDK 的 java.util.concurrent.Executors 中提供了生成多种线程池的静态方法。
  ExecutorService newCachedThreadPool = Executors.newCachedThreadPool();
  ExecutorService newFixedThreadPool = Executors.newFixedThreadPool(4);
  ScheduledExecutorService newScheduledThreadPool = Executors.newScheduledThreadPool(4);
  ExecutorService newSingleThreadExecutor = Executors.newSingleThreadExecutor();
然后调用他们的 execute 方法即可。
6. 常用的线程池有哪些?
newSingleThreadExecutor:创建一个单线程的线程池,此线程池保证所有任务的执行顺序按照任务的提交顺序执行。
newFixedThreadPool:创建固定大小的线程池,每次提交一个任务就创建一个线程,直到线程达到线程池的最大大小。
newCachedThreadPool:创建一个可缓存的线程池,此线程池不会对线程池大小做限制,线程池大小完全依赖于操作系统(或者说 JVM)能够创建的最大线程大小。
newScheduledThreadPool:创建一个大小无限的线程池,此线程池支持定时以及周期性执行任务的需求。
newSingleThreadExecutor:创建一个单线程的线程池。此线程池支持定时以及周期性执行任务的需求。
7. 请叙述一下您对线程池的理解?
(如果问到了这样的问题,可以展开的说一下线程池如何用、线程池的好处、线程池的启动策略)
合理利用线程池能够带来三个好处。
第一:降低资源消耗。通过重复利用已创建的线程降低线程创建和销毁造成的消耗。
第二:提高响应速度。当任务到达时,任务可以不需要等到线程创建就能立即执行。
第三:提高线程的可管理性。线程是稀缺资源,如果无限制的创建,不仅会消耗系统资源,还会降低系统的稳定性,使用线程池可以进行统一的分配,调优和监控。
8. 线程池的启动策略?
官方对线程池的执行过程描述如下:
/*
* Proceed in 3 steps:
*
* 1. If fewer than corePoolSize threads are running, try to
* start a new thread with the given command as its first
* task. The call to addWorker atomically checks runState and
* workerCount, and so prevents false alarms that would add
* threads when it shouldn't, by returning false.
*
* 2. If a task can be successfully queued, then we still need
* to double-check whether we should have added a thread
* (because existing ones died since last checking) or that
* the pool shut down since entry into this method. So we
* recheck state and if necessary roll back the enqueuing if
* stopped, or start a new thread if there are none.
*
* 3. If we cannot queue task, then we try to add a new
* thread. If it fails, we know we are shut down or saturated
* and so reject the task.
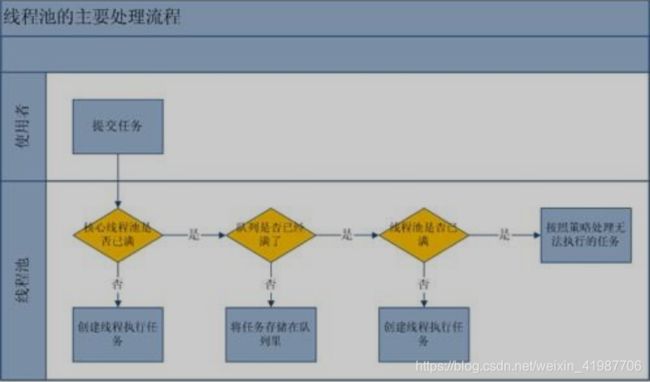
*/1、线程池刚创建时,里面没有一个线程。任务队列是作为参数传进来的。
不过,就算队列里面有任务,线程池也不会马上执行它们。
2、当调用 execute() 方法添加一个任务时,线程池会做如下判断:
a. 如果正在运行的线程数量小于 corePoolSize,那么马上创建线程运行这个任务;
b. 如果正在运行的线程数量大于或等于 corePoolSize,那么将这个任务放入队列。
c. 如果这时候队列满了,而且正在运行的线程数量小于 maximumPoolSize,那么还是要创建线程运行这个任务;
d. 如果队列满了,而且正在运行的线程数量大于或等于 maximumPoolSize,那么线程池会抛出异常,告诉调用者“我不能再接受任务了”。
3、当一个线程完成任务时,它会从队列中取下一个任务来执行。
4、当一个线程无事可做,超过一定的时间(keepAliveTime)时,线程池会判断,如果当前运行的线程数大于corePoolSize,那么这个线程就被停掉。
所以线程池的所有任务完成后,它最终会收缩到 corePoolSize 的大小。
9. 如何控制某个方法允许并发访问线程的个数?

package com.hy.多线程高并发;

import java.util.concurrent.Semaphore;

public class SemaphoreTest {

    /*
 * permits the initial number of permits available. This value may be negative,
in which case releases must occur before any acquires will be granted.
 fair true if this semaphore will guarantee first-in first-out granting of
permits under contention, else false
*/
    static Semaphore semaphore = new Semaphore(5, true);

    public static void main(String[] args) {
        for (int i = 0; i < 100; i++) {
            new Thread(new Runnable() {

                @Override
                public void run() {
                    test();
                }
            }).start();
        }

    }

    public static void test() {
        try {
            //申请一个请求
            semaphore.acquire();
        } catch (InterruptedException e1) {
            e1.printStackTrace();
        }
        System.out.println(Thread.currentThread().getName() + "进来了");
        try {
            Thread.sleep(1000);
        } catch (InterruptedException e) {
            e.printStackTrace();
        }
        System.out.println(Thread.currentThread().getName() + "走了");
        //释放一个请求
        semaphore.release();
    }

}
可以使用 Semaphore 控制,第 16 行的构造函数创建了一个 Semaphore 对象,并且初始化了 5 个信号。
这样的效果是控件 test 方法最多只能有 5 个线程并发访问,对于 5 个线程时就排队等待,走一个来一下。第 33 行,请求一个信号(消费一个信号),如果信号被用完了则等待,第 45 行释放一个信号,释放的信号新的线程就可以使用了。
10. 三个线程 a、b、c 并发运行,b,c 需要 a 线程的数据怎么实现
根据问题的描述,我将问题用以下代码演示,ThreadA、ThreadB、ThreadC,ThreadA 用于初始化数据 num,只有当 num 初始化完成之后再让 ThreadB 和 ThreadC 获取到初始化后的变量 num。
分析过程如下:
考虑到多线程的不确定性,因此我们不能确保 ThreadA 就一定先于 ThreadB 和 ThreadC 前执行,就算 ThreadA 先执行了,我们也无法保证 ThreadA 什么时候才能将变量 num 给初始化完成。
因此我们必须让 ThreadB 和 ThreadC 去等待 ThreadA 完成任何后发出的消息。
现在需要解决两个难题,一是让 ThreadB 和 ThreadC 等待 ThreadA 先执行完,二是 ThreadA 执行完之后给ThreadB 和 ThreadC 发送消息。
解决上面的难题我能想到的两种方案
一是使用纯 Java API 的 Semaphore 类来控制线程的等待和释放
二是使用 Android 提供的 Handler 消息机制。
package com.hy.多线程高并发;
import java.util.concurrent.Semaphore;
public class ThreadCommunication {
private static int num;
/**
* * 定义一个信号量,该类内部维持了多个线程锁,可以阻塞多个线程,释放多个线程,
* 线程的阻塞和释放是通过 permit 概念来实现的
* * 线程通过 semaphore.acquire()方法获取 permit,如果当前 semaphore 有 permit 则分配给该线程,
* 如果没有则阻塞该线程直到 semaphore
* * 调用 release()方法释放 permit。
* * 构造函数中参数:permit(允许) 个数,
*
*/
private static Semaphore semaphore = new Semaphore(0);
public static void main(String[] args) {
Thread threadA = new Thread(new Runnable() {
@Override
public void run() {
try {
//模拟耗时操作之后初始化变量 num
Thread.sleep(1000);
num = 1;
//初始化完参数后释放两个 permit
semaphore.release(2);
} catch (InterruptedException e) {
e.printStackTrace();
}
}
});
Thread threadB = new Thread(new Runnable() {
@Override
public void run() {
try {
//获取 permit,如果 semaphore 没有可用的 permit 则等待,如果有则消耗一个
semaphore.acquire();
} catch (InterruptedException e) {
e.printStackTrace();
}
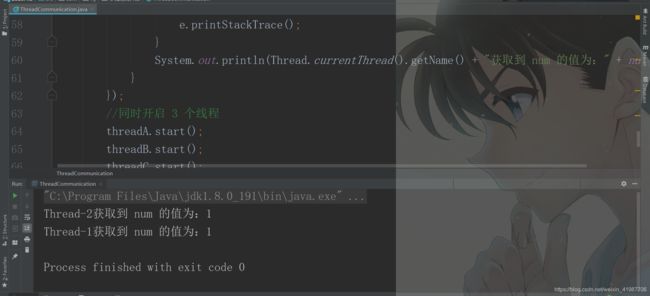
System.out.println(Thread.currentThread().getName() + "获取到 num 的值为:" + num);
}
});
Thread threadC = new Thread(new Runnable() {
@Override
public void run() {
try {
//获取 permit,如果 semaphore 没有可用的 permit 则等待,如果有则消耗一个
semaphore.acquire();
} catch (InterruptedException e) {
e.printStackTrace();
}
System.out.println(Thread.currentThread().getName() + "获取到 num 的值为:" + num);
}
});
//同时开启 3 个线程
threadA.start();
threadB.start();
threadC.start();
}
}
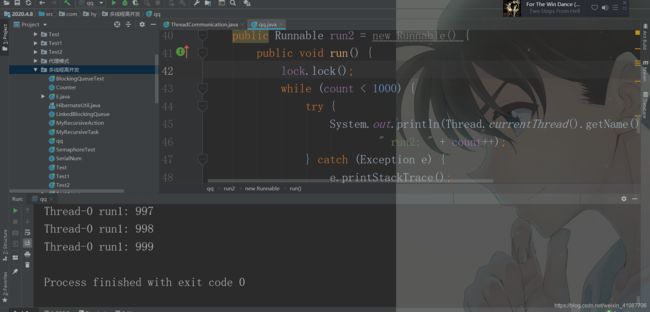
11. 同一个类中的 2 个方法都加了同步锁,多个线程能同时访问同一个类中的这两个方法吗?
这个问题需要考虑到Lock与synchronized 两种实现锁的不同情形。因为这种情况下使用Lock 和synchronized 会有截然不同的结果。
Lock 可以让等待锁的线程响应中断,Lock 获取锁,之后需要释放锁。
如下代码,多个线程不可访问同一个类中的 2 个加了 Lock 锁的方法。
package com.hy.多线程高并发;

import java.util.concurrent.locks.Lock;
import java.util.concurrent.locks.ReentrantLock;

/**
* @Description:
 * 同一个类中的 2 个方法都加了同步锁,多个线程能同时访问同一个类中的这两个方法吗?
这个问题需要考虑到Lock与synchronized 两种实现锁的不同情形。因为这种情况下使用Lock 和synchronized
会有截然不同的结果。Lock 可以让等待锁的线程响应中断,Lock 获取锁,之后需要释放锁。如下代码,多个线程不可
访问同一个类中的 2 个加了 Lock 锁的方法

* @return:
* @Author: Hy
* @Date: 2020
*/
public class qq {

    private int count = 0;  //初始化一个变量
    private Lock lock = new ReentrantLock();//设置 lock 锁

    //方法 1
    public Runnable run1 = new Runnable() {
        public void run() {
            lock.lock(); //加锁
            while (count < 1000) {
                try {
                    //打印是否执行该方法
                    System.out.println(Thread.currentThread().getName() +
                            " run1: " + count++);
                } catch (Exception e) {
                    e.printStackTrace();
                }
            }
            lock.unlock();  //解锁
        }
    };


    //方法 2
    public Runnable run2 = new Runnable() {
        public void run() {
            lock.lock();  //上锁
            while (count < 1000) {
                try {
                    System.out.println(Thread.currentThread().getName() +
                            " run2: " + count++);
                } catch (Exception e) {
                    e.printStackTrace();
                }
            }
            lock.unlock();  //解锁
        }
    };


    public static void main(String[] args) {
        qq t = new qq(); //创建一个对象
        new Thread(t.run1).start();//获取该对象的方法 1

        new Thread(t.run2).start();//获取该对象的方法 2
    }


}
而 synchronized 却不行,使用 synchronized 时,当我们访问同一个类对象的时候,是同一把锁,所以可以访问该对象的其他 synchronized 方法。代码如下:

package com.hy.多线程高并发;

import java.util.concurrent.locks.Lock;
import java.util.concurrent.locks.ReentrantLock;

/**
* @Description:
 * 而 synchronized 却不行,使用 synchronized 时
 * 当我们访问同一个类对象的时候,是同一把锁,所以可以访问
 * 该对象的其他 synchronized 方法。代码如下:
* @Param:
* @return:
* @Author: Hy
* @Date: 2020
*/


public class qq1 {

    private int count = 0;  //初始化一个变量
    private Lock lock = new ReentrantLock();//设置 lock 锁

    //方法 1
    public Runnable run1 = new Runnable() {
        public void run() {
            //我们上锁下
            synchronized (this){  //设置关键字 synchronized,以当前类为锁
                while (count < 1000) {
                    try {
                        //打印是否执行该方法
                        System.out.println(Thread.currentThread().getName() +
                                " run1: " + count++);
                    } catch (Exception e) {
                        e.printStackTrace();
                    }
                }
            }

        }
    };


    //方法 2
    public Runnable run2 = new Runnable() {
        public void run() {
            synchronized (this){  //设置关键字 synchronized,以当前类为锁
                while (count < 1000) {
                    try {
                        System.out.println(Thread.currentThread().getName() +
                                " run2: " + count++);
                    } catch (Exception e) {
                        e.printStackTrace();
                    }
                }
            }

        }
    };


    public static void main(String[] args) {
        qq1 t = new qq1(); //创建一个对象
        new Thread(t.run1).start();//获取该对象的方法 1

        new Thread(t.run2).start();//获取该对象的方法 2
    }


}
12. 什么情况下导致线程死锁,遇到线程死锁该怎么解决?
11.1 死锁的定义:所谓死锁是指多个线程因竞争资源而造成的一种僵局(互相等待),若无外力作用,这些进程都将无法向前推进。
11.2 死锁产生的必要条件:
互斥条件:线程要求对所分配的资源(如打印机)进行排他性控制,即在一段时间内某 资源仅为一个线程所占有。此时若有其他线程请求该资源,则请求线程只能等待。
不剥夺条件:线程所获得的资源在未使用完毕之前,不能被其他线程强行夺走,即只能由获得该资源的线程自己来释放(只能是主动释放)。
请求和保持条件:线程已经保持了至少一个资源,但又提出了新的资源请求,而该资源已被其他线程占有,此时请求进程被阻塞,但对自己已获得的资源保持不放。
循环等待条件:存在一种线程资源的循环等待链,链中每一个线程已获得的资源同时被链中下一个线程所请求。
即存在一个处于等待状态的线程集合{Pl, P2, ..., pn},其中 Pi 等待的资源被 P(i+1)占有(i=0, 1, ..., n-1),
Pn 等待的资源被 P0 占有,如图 2-15 所示

11.3 产生死锁的一个例子

package com.hy.多线程高并发.产生死锁的例子;

/**
 * @Description: /**
 * 一个简单的死锁类
 * 当 DeadLock 类的对象 flag==1 时(td1),先锁定 o1,睡眠 500 毫秒
 * 而 td1 在睡眠的时候另一个 flag==0 的对象(td2)线程启动,先锁定 o2,睡眠 500 毫秒
 * td1 睡眠结束后需要锁定 o2 才能继续执行,而此时 o2 已被 td2 锁定;
 * td2 睡眠结束后需要锁定 o1 才能继续执行,而此时 o1 已被 td1 锁定;
 * td1、td2 相互等待,都需要得到对方锁定的资源才能继续执行,从而死锁。
 * @return:
 * @Author: Hy
 * @Date: 2020
 */
public class DeadLock implements Runnable {

    public int flag = 1;
    //静态对象是类的所有对象共享的
    private static Object o1 = new Object(), o2 = new Object();

    public void run() {
        System.out.println("flag=" + flag);
        if (flag == 1) {
            synchronized (o1) {
                try {
                    Thread.sleep(500);
                } catch (Exception e) {
                    e.printStackTrace();
                }
                synchronized (o2) {
                    System.out.println("1");
                }
            }
        }
        if (flag == 0) {
            synchronized (o2) {
                try {
                    Thread.sleep(500);
                } catch (Exception e) {
                    e.printStackTrace();
                }
                synchronized (o1) {
                    System.out.println("0");
                }
            }
        }
    }

    public static void main(String[] args) {
        DeadLock td1 = new DeadLock();
        DeadLock td2 = new DeadLock();
        td1.flag = 1;
        td2.flag = 0;
        //td1,td2 都处于可执行状态,但 JVM 线程调度先执行哪个线程是不确定的。
        //td2 的 run()可能在 td1 的 run()之前运行
        new Thread(td1).start();
        new Thread(td2).start();
    }
}
11.4 如何避免死锁
在有些情况下死锁是可以避免的。两种用于避免死锁的技术:
1)加锁顺序(线程按照一定的顺序加锁)
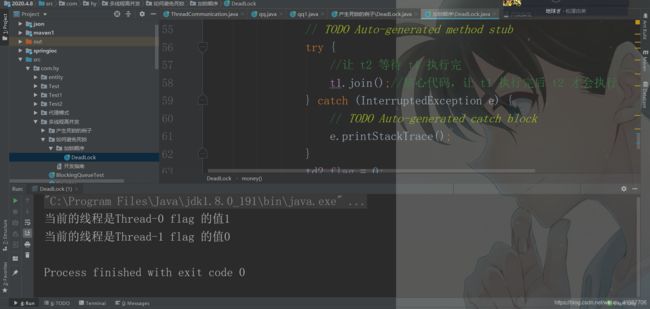
package com.hy.多线程高并发.如何避免死锁.加锁顺序;

public class DeadLock {

    public int flag = 1;
    //静态对象是类的所有对象共享的
    private static Object o1 = new Object(), o2 = new Object();

    public void money(int flag) {
        this.flag = flag;
        if (flag == 1) {
            synchronized (o1) {
                try {
                    Thread.sleep(500);
                } catch (Exception e) {
                    e.printStackTrace();
                }
                synchronized (o2) {
                    System.out.println("当前的线程是" +
                            Thread.currentThread().getName() + " " + "flag 的值" + "1");
                }
            }
        }
        if (flag == 0) {
            synchronized (o2) {
                try {
                    Thread.sleep(500);
                } catch (Exception e) {
                    e.printStackTrace();
                }
                synchronized (o1) {
                    System.out.println("当前的线程是" +
                            Thread.currentThread().getName() + " " + "flag 的值" + "0");
                }
            }
        }
    }

    public static void main(String[] args) {
        final DeadLock td1 = new DeadLock();
        final DeadLock td2 = new DeadLock();
        td1.flag = 1;
        td2.flag = 0;
        //td1,td2 都处于可执行状态,但 JVM 线程调度先执行哪个线程是不确定的。
        //td2 的 run()可能在 td1 的 run()之前运行
        final Thread t1 = new Thread(new Runnable() {
            public void run() {
                td1.flag = 1;
                td1.money(1);
            }
        });
        t1.start();
        Thread t2 = new Thread(new Runnable() {
            public void run() {
                // TODO Auto-generated method stub
                try {
                    //让 t2 等待 t1 执行完
                    t1.join();//核心代码,让 t1 执行完后 t2 才会执行
                } catch (InterruptedException e) {
                    // TODO Auto-generated catch block
                    e.printStackTrace();
                }
                td2.flag = 0;
                td1.money(0);
            }
        });
        t2.start();
    }
}
2)加锁时限(线程尝试获取锁的时候加上一定的时限,超过时限则放弃对该锁的请求,并释放自己占有的锁)

package com.hy.多线程高并发.如何避免死锁.加锁时限;

import java.util.concurrent.TimeUnit;
import java.util.concurrent.locks.Lock;
import java.util.concurrent.locks.ReentrantLock;


public class DeadLock {


    public int flag = 1;
    //静态对象是类的所有对象共享的
    private static Object o1 = new Object(), o2 = new Object();

    public void money(int flag) throws InterruptedException {
        this.flag = flag;
        if (flag == 1) {
            synchronized (o1) {
                Thread.sleep(500);
                synchronized (o2) {
                    System.out.println("当前的线程是" +
                            Thread.currentThread().getName() + " " + "flag 的值" + "1");
                }
            }
        }
        if (flag == 0) {
            synchronized (o2) {
                Thread.sleep(500);
                synchronized (o1) {
                    System.out.println("当前的线程是" +
                            Thread.currentThread().getName() + " " + "flag 的值" + "0");
                }
            }
        }
    }

    public static void main(String[] args) {
        final Lock lock = new ReentrantLock();
        final DeadLock td1 = new DeadLock();
        final DeadLock td2 = new DeadLock();
        td1.flag = 1;
        td2.flag = 0;
        //td1,td2 都处于可执行状态,但 JVM 线程调度先执行哪个线程是不确定的。
        //td2 的 run()可能在 td1 的 run()之前运行

        final Thread t1 = new Thread(new Runnable() {
            public void run() {
                // TODO Auto-generated method stub
                String tName = Thread.currentThread().getName();

                td1.flag = 1;
                try {
                    //获取不到锁,就等 5 秒,如果 5 秒后还是获取不到就返回 false
                    if (lock.tryLock(5000, TimeUnit.MILLISECONDS)) {
                        System.out.println(tName + "获取到锁!");
                    } else {
                        System.out.println(tName + "获取不到锁!");
                        return;
                    }
                } catch (Exception e) {
                    e.printStackTrace();
                }

                try {
                    td1.money(1);
                } catch (Exception e) {
                    System.out.println(tName + "出错了!!!");
                } finally {
                    System.out.println("当前的线程是" + Thread.currentThread().getName() + "释放锁!!");
                    lock.unlock();
                }
            }
        });
        t1.start();


        Thread t2 = new Thread(new Runnable() {
            public void run() {
                String tName = Thread.currentThread().getName();
                // TODO Auto-generated method stub
                td1.flag = 1;
                try {
                    //获取不到锁,就等 5 秒,如果 5 秒后还是获取不到就返回 false
                    if (lock.tryLock(5000, TimeUnit.MILLISECONDS)) {
                        System.out.println(tName + "获取到锁!");
                    } else {
                        System.out.println(tName + "获取不到锁!");
                        return;
                    }
                } catch (Exception e) {
                    e.printStackTrace();
                }
                try {
                    td2.money(0);
                } catch (Exception e) {
                    System.out.println(tName + "出错了!!!");
                } finally {
                    System.out.println("当前的线程是" + Thread.currentThread().getName() + "释放锁!!");
                    lock.unlock();
                }
            }
        });
        t2.start();
    }
}
13. Java 中多线程间的通信怎么实现?
线程通信的方式:
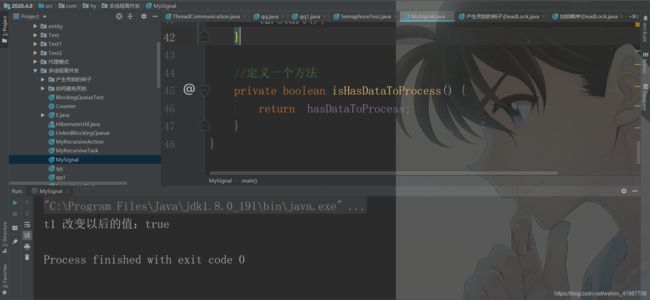
1.共享变量
线程间通信可以通过发送信号,发送信号的一个简单方式是在共享对象的变量里设置信号值。
线程 A 在一个同步块里设置 boolean 型成员变量 hasDataToProcess 为 true,线程 B 也在同步块里读取 hasDataToProcess 这个成员变量。
这个简单的例子使用了一个持有信号的对象,并提供了 set 和 get 方法:
package com.hy.多线程高并发;

public class MySignal {

    //共享的变量
    private boolean hasDataToProcess = false;

    //取值
    public boolean getHasDataToProcess() {
        return hasDataToProcess;
    }

    //存值
    public void setHasDataToProcess(boolean hasDataToProcess) {
        this.hasDataToProcess = hasDataToProcess;
    }

    public static void main(String[] args) {
        //同一个对象
        final MySignal my = new MySignal();
        //线程 1 设置 hasDataToProcess 值为 true
        final Thread t1 = new Thread(new Runnable() {
            public void run() {
                my.setHasDataToProcess(true);
            }
        });
        t1.start();
        //线程 2 取这个值 hasDataToProcess
        Thread t2 = new Thread(new Runnable() {
            public void run() {
                try {
                    //等待线程 1 完成然后取值
                    t1.join();
                } catch (InterruptedException e) {
                    e.printStackTrace();
                }
                my.getHasDataToProcess();
                System.out.println("t1 改变以后的值:" + my.isHasDataToProcess());
            }
        });
        t2.start();
    }

    //定义一个方法
    private boolean isHasDataToProcess() {
        return  hasDataToProcess;
    }
}
2.wait/notify 机制
以资源为例,生产者生产一个资源,通知消费者就消费掉一个资源,生产者继续生产资源,消费者消费资源,以此循环。
代码如下:

package com.hy.多线程高并发;

//资源类
class Resource {

    private String name;
    private int count = 1;
    private boolean flag = false;

    public synchronized void set(String name) {
        //生产资源
        while (flag) {
            try {
                //线程等待。消费者消费资源
                wait();
            } catch (Exception e) {
            }
        }
        this.name = name + "---" + count++;
        System.out.println(Thread.currentThread().getName() + "...生产者..." + this.name);
        flag = true;
        //唤醒等待中的消费者
        this.notifyAll();
    }

    public synchronized void out() {
        //消费资源
        while (!flag) {
            //线程等待,生产者生产资源
            try {
                wait();
            } catch (Exception e) {
            }
        }
        System.out.println(Thread.currentThread().getName() + "...消费者..." + this.name);
        flag = false;
        //唤醒生产者,生产资源
        this.notifyAll();
    }
}

//生产者
class Producer implements Runnable {
    private Resource res;

    Producer(Resource res) {
        this.res = res;
    }

    //生产者生产资源
    public void run() {
        while (true) {
            res.set("商品");
        }
    }
}

//消费者消费资源
class Consumer implements Runnable {
    private Resource res;

    Consumer(Resource res) {
        this.res = res;
    }

    public void run() {
        while (true) {
            res.out();
        }
    }
}

public class ProducerConsumerDemo {
    public static void main(String[] args) {
        Resource r = new Resource();
        Producer pro = new Producer(r);
        Consumer con = new Consumer(r);
        Thread t1 = new Thread(pro);
        Thread t2 = new Thread(con);
        t1.start();
        t2.start();
    }
}
14. 线程和进程的区别
进程:具有一定独立功能的程序关于某个数据集合上的一次运行活动,是操作系统进行资源分配和调度的一个独立单位。
线程:是进程的一个实体,是 cpu 调度和分派的基本单位,是比进程更小的可以独立运行的基本单位。
特点:线程的划分尺度小于进程,这使多线程程序拥有高并发性,进程在运行时各自内存单元相互独立,线程之间内存共享,这使多线程编程可以拥有更好的性能和用户体验
注意:多线程编程对于其它程序是不友好的,占据大量 cpu 资源。
15. 请说出同步线程及线程调度相关的方法?
wait():使一个线程处于等待(阻塞)状态,并且释放所持有的对象的锁;
sleep():使一个正在运行的线程处于睡眠状态,是一个静态方法,调用此方法要处理 InterruptedException 异常;
notify():唤醒一个处于等待状态的线程,当然在调用此方法的时候,并不能确切的唤醒某一个等待状态的线程,
而是由 JVM 确定唤醒哪个线程,而且与优先级无关;
notityAll():唤醒所有处于等待状态的线程,该方法并不是将对象的锁给所有线程,而是让它们竞争,只有获得锁的线程才能进入就绪状态;
注意
:java 5 通过 Lock 接口提供了显示的锁机制,Lock 接口中定义了加锁(lock()方法)和解锁(unLock()方法),增强了多线程编程的灵活性及对线程的协调
16. 启动一个线程是调用 run()方法还是 start()方法?
启动一个线程是调用 start()方法,使线程所代表的虚拟处理机处于可运行状态,这意味着它可以由 JVM 调度并执行,这并不意味着线程就会立即运行。
run()方法是线程启动后要进行回调(callback)的方法。
十、Java 内部类
1. 静态嵌套类 (Static Nested Class) 和内部类(Inner Class)的不同?
静态嵌套类
:Static Nested Class 是被声明为静态(static)的内部类,它可以不依赖于外部类实例被实例化。
内部类:需要在外部类实例化后才能实例化,其语法看起来挺诡异的。
2. 下面的代码哪些地方会产生编译错误?
class Outer {
class Inner {}
public static void foo() {
   new Inner();
}
public void bar() {
   new Inner();
}

public static void main(String[] args) {
   new Inner();
}
}注意:Java 中非静态内部类对象的创建要依赖其外部类对象
上面的试题中 foo 和 main 方法都是静态方法
静态方法中没有 this,也就是说没有所谓的外部类对象,因此无法创建内部类对象,如果要在静态方法中创建内部类对象,可以这样做
new Outer().new Inner();
JavaSE 高级
一、Java 中的反射
1. 说说你对 Java 中反射的理解
Java 中 的 反 射 首 先 是 能 够 获 取 到 Java 中 要 反 射 类 的 字 节 码 , 获 取 字 节 码 有 三 种 方 法
1.Class.forName(className)
2.类名.class
3.this.getClass()。
然后将字节码中的方法,变量,构造函数等映射成相应的 Method、Filed、Constructor 等类,这些类提供了丰富的方法可以被我们所使用。
二、Java 中的动态代理
1. 写一个 ArrayList 的动态代理类
final List list = new ArrayList();

List proxyInstance =
(List)Proxy.newProxyInstance(list.getClass().getClassLoader(),
list.getClass().getInterfaces(),
 new InvocationHandler() {

 @Override
 public Object invoke(Object proxy, Method method, Object[] args) throws Throwable {
 return method.invoke(list, args);
 }
});
proxyInstance.add("你好");
System.out.println(list); 
package javase高级.反射;

import java.lang.reflect.InvocationHandler;
import java.lang.reflect.Method;
import java.lang.reflect.Proxy;
import java.util.ArrayList;
import java.util.List;

public class Test1 {

    public static void main(String[] args) {
        ArrayList list = new ArrayList<>();

        List proxyInstance = (List) Proxy.newProxyInstance(list.getClass().getClassLoader(),
                list.getClass().getInterfaces(),
                new InvocationHandler() {
                    @Override
                    public Object invoke(Object proxy, Method method, Object[] args) throws Throwable {
                        return method.invoke(list,args);
                    }
                });
        proxyInstance.add("周元");
        System.out.println(list);

    }

}
2. 动静态代理的区别,什么场景使用?
静态代理通常只代理一个类,动态代理是代理一个接口下的多个实现类。
静态代理事先知道要代理的是什么,而动态代理不知道要代理什么东西,只有在运行时才知道。
动态代理是实现 JDK 里的 InvocationHandler 接口的 invoke 方法,但注意的是代理的是接口,也就是你的
业务类必须要实现接口,通过 Proxy 里的 newProxyInstance 得到代理对象。
还有一种动态代理 CGLIB,代理的是类,不需要业务类继承接口,通过派生的子类来实现代理。通过在运行时,动态修改字节码达到修改类的目的。
AOP 编程就是基于动态代理实现的,比如著名的 Spring 框架、Hibernate 框架等等都是动态代理的使用例子。
三、Java 中的设计模式&回收机制
1. 你所知道的设计模式有哪些
Java 中一般认为有 23 种设计模式,我们不需要所有的都会,但是其中常用的几种设计模式应该去掌握。
下面列出了所有的设计模式。需要掌握的设计模式我单独列出来了,当然能掌握的越多越好。
总体来说设计模式分为三大类: 【我好像有一个栏目,专门写了二十三种模式的实际案例】
创建型模式,共五种:
工厂方法模式
、
抽象工厂模式
、
单例模式
、
建造者模式
、原型模式。
结构型模式,共七种:
适配器模式
、装饰器模式、
代理模式
、外观模式、桥接模式、组合模式、
享元模式
。
行为型模式,共十一种:
策略模式
、模板方法模式、
观察者模式
、迭代子模式、责任链模式、命令模式、备忘录模式、状态模式、访问者模式、中介者模式、解释器模式。
2. 单例设计模式
最好理解的一种设计模式,分为懒汉式和饿汉式。
饿汉式:

package javase高级.设计模式.单例模式;
//饿汉式
public class Singleton {

    //直接创建对象
    private static Singleton instance = new Singleton();

    //私有化构造函数
    private Singleton(){

    }

    //返回对象实例
    public static Singleton getInstance(){
        return instance;
    }


}
懒汉式

package javase高级.设计模式.单例模式;

//懒汉式
public class Singleton1 {

    //声明变量
    private static volatile Singleton1 singleton1 = null;

    //私有构造函数
    private Singleton1(){

    }

    //提供对外的方法,这种更加装逼。。
    public static Singleton1 getInstance(){
        if (singleton1 == null){
            synchronized (Singleton1.class){
                if (singleton1 == null){
                    singleton1 = new Singleton1();
                }
            }
        }
        return singleton1;
    }


}
3. 工厂设计模式
工厂模式分为工厂方法模式和抽象工厂模式。
工厂方法模式
工厂方法模式分为三种:普通工厂模式,就是建立一个工厂类,对实现了同一接口的一些类进行实例的创建。
多个工厂方法模式,是对普通工厂方法模式的改进,在普通工厂方法模式中,如果传递的字符串出错,则不能正确创建对象,而多个工厂方法模式是提供多个工厂方法,分别创建对象。
静态工厂方法模式,将上面的多个工厂方法模式里的方法置为静态的,不需要创建实例,直接调用即可。
普通工厂模式
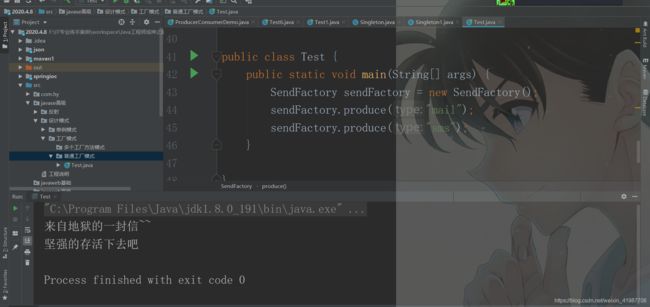
package javase高级.设计模式.工厂模式.普通工厂模式;

interface Sender{
    public Sender Send();
}

class MailSender implements Sender{


    @Override
    public Sender Send() {
        System.out.println("来自地狱的一封信~~");
        return null;
    }
}

class SMSender implements Sender{

    @Override
    public Sender Send() {
        System.out.println("坚强的存活下去吧");
        return null;
    }
}

//我们建一个工厂
class SendFactory{
    public Sender produce(String type){
        if ("mail".equals(type)){
            return new MailSender().Send();
        }else if ("sms".equals(type)){
            return new SMSender().Send();
        }else {
            System.out.println("请输入正确类型");
            return null;
        }
    }
}


public class Test {
    public static void main(String[] args) {
        SendFactory sendFactory = new SendFactory();
        sendFactory.produce("mail");
        sendFactory.produce("sms");
    }

}
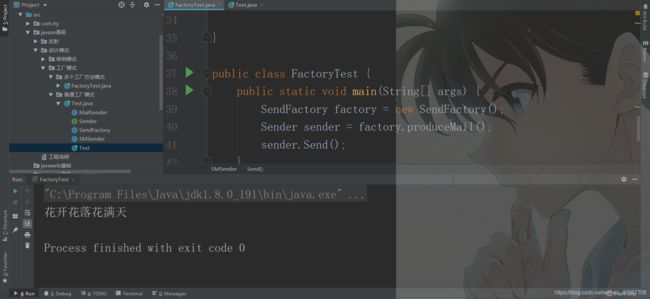
多个工厂方法模式
该模式是对普通工厂方法模式的改进,在普通工厂方法模式中
如果传递的字符串出错,则不能正确创建对象,而多个工厂方法模式是提供多个工厂方法,分别创建对象。
package javase高级.设计模式.工厂模式.多个工厂方法模式;
interface Sender{
    public Sender Send();
}

class MailSender implements Sender{

    @Override
    public Sender Send() {
        System.out.println("花开花落花满天");
        return null;
    }
}

class SMSender implements Sender{

    @Override
    public Sender Send() {
        System.out.println("落花无情");
        return null;
    }
}


class SendFactory{
    public Sender produceMail(){
        return new MailSender();
    }

    public Sender produceSms(){
        return new SMSender();
    }

}

public class FactoryTest {
    public static void main(String[] args) {
        SendFactory factory = new SendFactory();
        Sender sender = factory.produceMail();
        sender.Send();
    }
}
静态工厂方法模式,将上面的多个工厂方法模式里的方法置为静态的,不需要创建实例,直接调用即可

package javase高级.设计模式.工厂模式.静态工厂方法模式;
interface Sender{
    public Sender Send();
}

class MailSender implements Sender {

    @Override
    public Sender Send() {
        System.out.println("花开花落花满天");
        return null;
    }
}

class SMSender implements Sender {

    @Override
    public Sender Send() {
        System.out.println("落花无情");
        return null;
    }
}


class SendFactory{
    //静态方法
    public static Sender produceMail(){
        return new MailSender();
    }
    //静态方法
    public static Sender produceSms(){
        return new SMSender();
    }

}

public class FactoryTest {
    public static void main(String[] args) {
        Sender sender = SendFactory.produceMail(); //不需要new,直接调用即可
        sender.Send();
    }
}
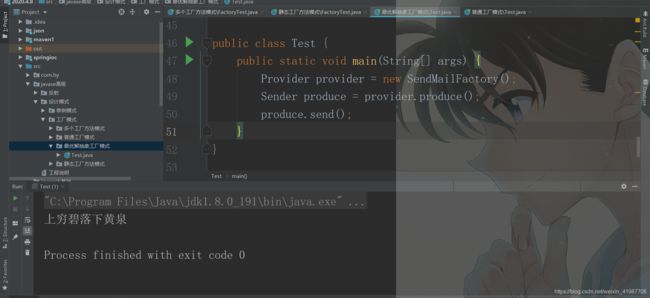
抽象工厂模式
工厂方法模式有一个问题就是,类的创建依赖工厂类,也就是说,如果想要拓展程序,必须对工厂类进行修改,这违背了闭包原则,所以,从设计角度考虑,有一定的问题,如何解决?
就用到抽象工厂模式,创建多个工厂类,这样一旦需要增加新的功能,直接增加新的工厂类就可以了,不需要修改之前的代码。
package javase高级.设计模式.工厂模式.最优解抽象工厂模式;

interface Sender{
    public void send();
}

interface Provider{
    public Sender produce();
}

class MailSender implements Sender{

    @Override
    public void send() {
        System.out.println("上穷碧落下黄泉");
    }
}

class SmsSender implements Sender{

    @Override
    public void send() {
        System.out.println("可悲之人,用情之深足以惊天地泣鬼神");
    }
}

//工厂一
class SendSmsFactory implements Provider{

    @Override
    public Sender produce() { //返回一个对象
        return new SmsSender();
    }
}

//工厂二
class SendMailFactory implements Provider{

    @Override
    public Sender produce() {  //返回一个对象
        return new MailSender();
    }
}


public class Test {
    public static void main(String[] args) {
        Provider provider = new SendMailFactory();
        Sender produce = provider.produce();
        produce.send();
    }
}
4. 建造者模式(Builder)
工厂类模式提供的是创建单个类的模式,而建造者模式则是将各种产品集中起来进行管理,用来创建复合对象,
所谓复合对象就是指某个类具有不同的属性,其实建造者模式就是前面抽象工厂模式和最后的 Test 结合起来得到的
package javase高级.设计模式.建造者模式;


import java.util.ArrayList;
import java.util.List;

interface Sender{
    public void send();
}

interface Provider{
    public Sender produce();
}

class MailSender implements Sender{

    @Override
    public void send() {
        System.out.println("上穷碧落下黄泉");
    }
}

class SmsSender implements Sender{

    @Override
    public void send() {
        System.out.println("可悲之人,用情之深足以惊天地泣鬼神");
    }
}

//其实建造者模式就是前面抽象工厂模式和最后的 Test 结合起来得到的。
class Builder{
   private List list = new ArrayList();

   public void produceMailSender(int count){
       for (int i = 0;i < count;i++){
           list.add(new MailSender());
       }
   }

    public void produceSmsSender(int count){
        for (int i = 0;i < count;i++){
            list.add(new SmsSender());
        }
    }

}

public class TestBuilder {

    public static void main(String[] args) {
        Builder builder = new Builder();
        builder.produceSmsSender(3);
    }

}
5. 适配器设计模式
适配器模式将某个类的接口转换成客户端期望的另一个接口表示,目的是消除由于接口不匹配所造成的类的兼容
性问题。主要分为三类:类的适配器模式、对象的适配器模式、接口的适配器模式。
类的适配器模式

package javase高级.设计模式.适配器设计模式.类的适配器模式;

class Source{
    public void method1(){
        System.out.println("这是原始的方法~~");
    }
}

interface Targetable{
    //与原来类中的方法相同
    public void method1();

    public void method2();
}


class Adapter extends Source implements Targetable{

    @Override
    public void method2() {
        System.out.println("这是目标方法~~");
    }
}


public class AdapterTest {
    public static void main(String[] args) {
        Adapter adapter = new Adapter();
        adapter.method1();
        adapter.method2();

    }
}
对象的适配器模式
基本思路和类的适配器模式相同,只是将 Adapter 类作修改
这次不继承 Source 类,而是持有 Source 类的实例,以达到解决兼容性的问题。

package javase高级.设计模式.适配器设计模式.对象的适配器模式;

import com.sun.xml.internal.bind.v2.model.core.Adapter;

/**
* @Description:
 * 基本思路和类的适配器模式相同
 * 只是将 Adapter 类作修改,这次不继承 Source 类
 * 而是持有 Source 类的实例,以达到解决兼容性的问题。
* @Param:
* @return:
* @Author: Hy
* @Date: 2020
*/

class Source{
    public void method1(){
        System.out.println("这是原始的方法~~");
    }
}

interface Targetable{
    //与原来类中的方法相同
    public void method1();

    public void method2();
}


class Wrapper implements Targetable{

    private Source source;

    public Wrapper(Source source) {
        super();
        this.source = source;
    }

    @Override
    public void method1() {
        source.method1();
    }

    @Override
    public void method2() {
        System.out.println("这是目标方法~~");
    }
}


public class AdapterTest {
    public static void main(String[] args) {
        Source source = new Source();
        Wrapper adapter = new Wrapper(source);
        adapter.method1();
        adapter.method2();

    }
}
接口的适配器模式
接口的适配器是这样的:
有时我们写的一个接口中有多个抽象方法,当我们写该接口的实现类时,必须实现该接口的所有方法,这明显有时比较浪费,因为并不是所有的方法都是我们需要的
有时只需要某一些,此处为了解决这个问题,我们引入了接口的适配器模式,借助于一个抽象类
该抽象类实现了该接口,实现了所有的方法,而我们不和原始的接口打交道,只和该抽象类取得联系,所以我们写一个类,继承该抽象类,重写我们需要的方法就行。
6. 装饰模式(Decorator)
顾名思义,装饰模式就是给一个对象增加一些新的功能,而且是动态的,要求装饰对象和被装饰对象实现同一个接口,装饰对象持有被装饰对象的实例。

package javase高级.设计模式.装饰模式;

interface Sourceable{
    public void method();
}

class Source implements Sourceable{

    @Override
    public void method() {
        System.out.println("原始方法~~");
    }
}

//再写一个类
class Decorator implements Sourceable{

    private Sourceable sourceable;

    public Decorator(Sourceable sourceable) {
        this.sourceable = sourceable;
    }

    @Override
    public void method() {
        System.out.println("装饰之前~~");
        sourceable.method();
        System.out.println("装饰之后~~");

    }
}


public class DecoratorTest {
    public static void main(String[] args) {
        Sourceable sourceable = new Source();
        Decorator decorator = new Decorator(sourceable);
        decorator.method();

    }
}
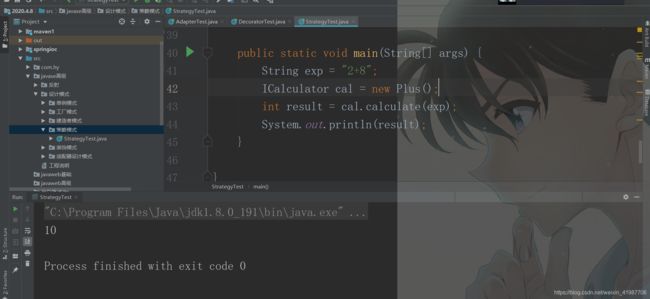
7. 策略模式(strategy)
策略模式定义了一系列算法,并将每个算法封装起来,使他们可以相互替换,且算法的变化不会影响到使用算法的客户。
需要设计一个接口,为一系列实现类提供统一的方法,多个实现类实现该接口,设计一个抽象类(可有可无, 属于辅助类),提供辅助函数。
策略模式的决定权在用户,系统本身提供不同算法的实现,新增或者删除算法,对各种算法做封装。
因此,策略模式多用在算法决策系统中,外部用户只需要决定用哪个算法即可。
package javase高级.设计模式.策略模式;

interface ICalculator{
    public int calculate(String exp);
}

class AbstractCalculator{
    public int[] split(String exp,String opt){
        String array[] = exp.split(opt);
        int arrayInt[] = new int[2];
        arrayInt[0] = Integer.parseInt(array[0]);
        arrayInt[1] = Integer.parseInt(array[1]);
        return arrayInt;
    }
}

//定义一个减法
class Minus extends AbstractCalculator implements ICalculator{

    @Override
    public int calculate(String exp) {
        int arrayInt[] = split(exp,"-");
        return arrayInt[0] - arrayInt[1];
    }
}

//定义一个加法
class Plus extends AbstractCalculator implements ICalculator{

    @Override
    public int calculate(String exp) {
        int arrayInt[] = split(exp,"\\+");
        return arrayInt[0] + arrayInt[1];
    }
}


public class StrategyTest {

    public static void main(String[] args) {
        String exp = "2+8";
        ICalculator cal = new Plus();
        int result = cal.calculate(exp);
        System.out.println(result);
    }

}
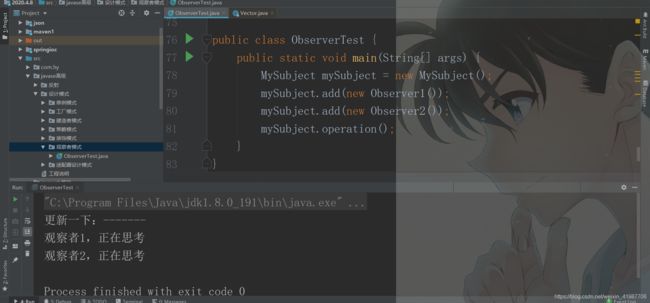
8. 观察者模式(Observer)
观察者模式很好理解,类似于邮件订阅和 RSS 订阅,当我们浏览一些博客或 wiki 时,经常会看到 RSS 图标,就这的意思是,当你订阅了该文章,如果后续有更新,会及时通知你。
其实,简单来讲就一句话:当一个对象变化时,其它依赖该对象的对象都会收到通知,并且随着变化
对象之间是一种一对多的关系。
package javase高级.设计模式.观察者模式;

import java.util.Enumeration;
import java.util.Vector;

interface Observer{
    public void update();
}

class Observer1 implements Observer{

    @Override
    public void update() {
        System.out.println("观察者1,正在思考");
    }
}

class Observer2 implements Observer{

    @Override
    public void update() {
        System.out.println("观察者2,正在思考");
    }
}

interface Subject{

    //增加观察者
    public void add(Observer observer);
    //删除观察者
    public void del(Observer observer);
    //通知所有观察者
    public void notifyObservers();
    //自身的操作
    public void operation();

}

//我们重写一下几个方法
abstract class AbstractSubject implements Subject{

    //这里我们使用线程安全的一个集合,存放一下
    private Vector vector = new Vector();

    @Override
    public void add(Observer observer) {
        vector.add(observer);
    }

    @Override
    public void del(Observer observer) {
        vector.remove(observer);

    }

    @Override
    public void notifyObservers() {
        Enumeration enumo = vector.elements();
        while (enumo.hasMoreElements()){
            enumo.nextElement().update();
        }
    }
}

class MySubject extends AbstractSubject{

    @Override
    public void operation() {
        System.out.println("更新一下" +
                ":-------");
        notifyObservers();
    }
}


public class ObserverTest {
    public static void main(String[] args) {
        MySubject mySubject = new MySubject();
        mySubject.add(new Observer1());
        mySubject.add(new Observer2());
        mySubject.operation();
    }
}
9. JVM 垃圾回收机制和常见算法
理论上来讲 Sun 公司只定义了垃圾回收机制规则而不局限于其实现算法,因此不同厂商生产的虚拟机采用的算法也不尽相同。
GC(Garbage Collector)在回收对象前首先必须发现那些无用的对象,如何去发现定位这些无用的对象?
常用的搜索算法如下:
1)引用计数器算法(废弃)
引用计数器算法是给每个对象设置一个计数器,当有地方引用这个对象的时候,计数器+1,当引用失效的时候,计数器-1,当计数器为 0 的时候,JVM 就认为对象不再被使用,是“垃圾”了。
引用计数器实现简单,效率高;
但是不能解决循环引用问问题(A 对象引用 B 对象,B 对象又引用 A 对象,但是A,B 对象已不被任何其他对象引用),同时每次计数器的增加和减少都带来了很多额外的开销,所以在 JDK1.1 之后,这个算法已经不再使用了。
2)根搜索算法(使用)
根搜索算法是通过一些“GC Roots”对象作为起点,从这些节点开始往下搜索,搜索通过的路径成为引用链 (Reference Chain),当一个对象没有被 GC Roots 的引用链连接的时候,说明这个对象是不可用的。
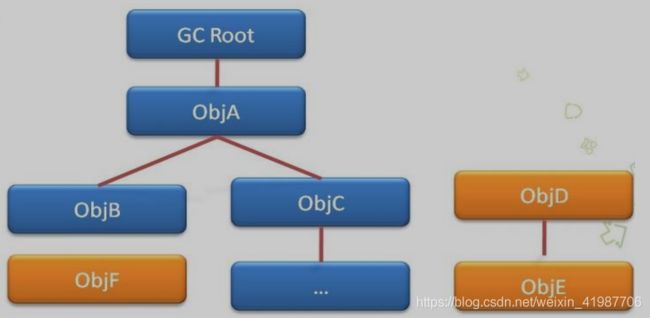
GC Roots 对象包括:
a) 虚拟机栈(栈帧中的本地变量表)中的引用的对象。
b) 方法区域中的类静态属性引用的对象。
c) 方法区域中常量引用的对象。
d) 本地方法栈中 JNI(Native 方法)的引用的对象。
通过上面的算法搜索到无用对象之后,就是回收过程,回收算法如下:
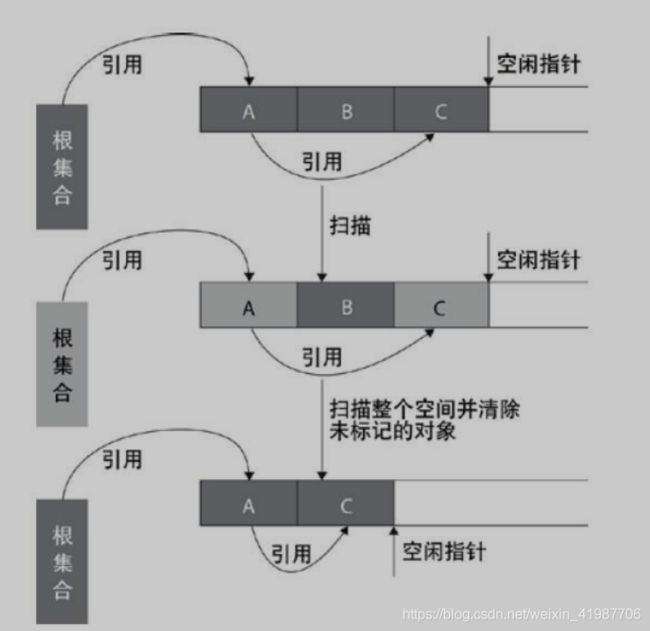
1)标记—清除算法(Mark-Sweep)(DVM 使用的算法)
标记—清除算法包括两个阶段:“标记”和“清除”。在标记阶段,确定所有要回收的对象,并做标记。
清除阶段紧随标记阶段,将标记阶段确定不可用的对象清除。
标记—清除算法是基础的收集算法,标记和清除阶段的效率不高,
而且清除后回产生大量的不连续空间,这样当程序需要分配大内存对象时,可能无法找到足够的连续空间

2)复制算法(Copying)
复制算法是把内存分成大小相等的两块,每次使用其中一块
当垃圾回收的时候,把存活的对象复制到另一块上,然后把这块内存整个清理掉。
复制算法实现简单,运行效率高,但是由于每次只能使用其中的一半,造成内存的利用率不高。
现在的 JVM 用复制方法收集新生代,由于新生代中大部分对象(98%)都是朝生夕死的,所以两块内存的比例不是 1:1(大概是 8:1)。

3)标记—整理算法(Mark-Compact)
标记—整理算法和标记—清除算法一样,但是标记—整理算法不是把存活对象复制到另一块内存,而是把存活对象往内存的一端移动,然后直接回收边界以外的内存。
标记—整理算法提高了内存的利用率,并且它适合在收集对象存活时间较长的老年代。
4)分代收集(Generational Collection)
分代收集是根据对象的存活时间把内存分为新生代和老年代,根据各个代对象的存活特点,每个代采用不同的垃圾回收算法。
新生代采用复制算法,老年代采用标记—整理算法。
垃圾算法的实现涉及大量的程序细节,而且不同的虚拟机平台实现的方法也各不相同。
10. 谈谈 JVM 的内存结构和内存分配
a) Java 内存模型
Java 虚拟机将其管辖的内存大致分三个逻辑部分:方法区(Method Area)、Java 栈和 Java 堆。
1、方法区是静态分配的,编译器将变量绑定在某个存储位置上,而且这些绑定不会在运行时改变。
常数池,源代码中的命名常量、String 常量和 static 变量保存在方法区。
2、Java Stack 是一个逻辑概念,特点是后进先出。一个栈的空间可能是连续的,也可能是不连续的。
最典型的 Stack 应用是方法的调用,Java 虚拟机每调用一次方法就创建一个方法帧(frame),退出该
方法则对应的 方法帧被弹出(pop)。栈中存储的数据也是运行时确定的。
3、Java 堆分配(heap allocation)意味着以随意的顺序,在运行时进行存储空间分配和收回的内存管理模型。
堆中存储的数据常常是大小、数量和生命期在编译时无法确定的。Java 对象的内存总是在 heap 中分配。
我们每天都在写代码,每天都在使用 JVM 的内存。
b) java 内存分配
1、基础数据类型直接在栈空间分配;
2、方法的形式参数,直接在栈空间分配,当方法调用完成后从栈空间回收;
3、引用数据类型,需要用 new 来创建,既在栈空间分配一个地址空间,又在堆空间分配对象的类变量;
4、方法的引用参数,在栈空间分配一个地址空间,并指向堆空间的对象区,当方法调用完后从栈空间回收;
5、局部变量 new 出来时,在栈空间和堆空间中分配空间,当局部变量生命周期结束后,栈空间立刻被回收,堆空间区域等待 GC 回收;
6、方法调用时传入的实际参数,先在栈空间分配,在方法调用完成后从栈空间释放;
7、字符串常量在 DATA 区域分配 ,this 在堆空间分配;
8、数组既在栈空间分配数组名称, 又在堆空间分配数组实际的大小