5分钟掌握 SpringBoot整合Redis缓存
注:本篇博客SpringBoot版本为2.0.7.RELEASE
一、SpringBoot 配置Redis
1.1 引入依赖
在parent项目中引入依赖,因为多个项目都要用到redis缓存。pom.xml文件如下
<dependency>
    <groupId>org.springframework.bootgroupId>
    <artifactId>spring-boot-starter-data-redisartifactId>
dependency>

<dependency>
    <groupId>org.apache.commonsgroupId>
    <artifactId>commons-pool2artifactId>
    <version>2.6.0version>
dependency>
1.2 在properties配置文件配置redis信息
默认连接本地6379端口的redis服务,一般需要修改配置,例如:
# Redis数据库索引(默认为0)
spring.redis.database=0
# Redis服务器地址
spring.redis.host=127.0.0.1
# Redis服务器连接端口
spring.redis.port=6379
# Redis服务器连接密码(默认为空)
spring.redis.password=
# 连接池最大连接数(使用负值表示没有限制)
spring.redis.jedis.pool.max-active=20
# 连接池最大阻塞等待时间(使用负值表示没有限制)
spring.redis.jedis.pool.max-wait=-1
# 连接池中的最大空闲连接
spring.redis.jedis.pool.max-idle=10
# 连接池中的最小空闲连接
spring.redis.jedis.pool.min-idle=0
# 连接超时时间(毫秒)
spring.redis.timeout=1000
二、RedisTemplate类的配置
Spring 封装了RedisTemplate对象来操作redis。
2.1 Spring对RedisTemplate类的默认配置(了解即可)
Spring在 org.springframework.boot.autoconfigure.data.redis.RedisAutoConfiguration类下配置的两个RedisTemplate的Bean。
(1) RedisTemplate
这个Bean使用JdkSerializationRedisSerializer进行序列化,即key, value需要实现Serializable接口,redis数据格式比较难懂,例如

(2) StringRedisTemplate,即RedisTemplate
key和value都是String。当需要存储实体类时,需要先转为String,再存入Redis。一般转为Json格式的字符串,所以使用StringRedisTemplate,需要手动将实体类转为Json格式。如
ValueOperations<String, String> valueTemplate = stringTemplate.opsForValue();
Gson gson = new Gson();

valueTemplate.set("StringKey1", "hello spring boot redis, String Redis");
String value = valueTemplate.get("StringKey1");
System.out.println(value);

valueTemplate.set("StringKey2", gson.toJson(new Person("theName", 11)));
Person person = gson.fromJson(valueTemplate.get("StringKey2"), Person.class);
System.out.println(person);
2.2 配置一个RedisTemplate的Bean
Spring配置的两个RedisTemplate都不太方便使用,所以可以配置一个RedisTemplate
package com.yxzx.common;

import com.fasterxml.jackson.annotation.JsonAutoDetect;
import com.fasterxml.jackson.annotation.PropertyAccessor;
import com.fasterxml.jackson.databind.ObjectMapper;
import org.springframework.cache.CacheManager;
import org.springframework.cache.annotation.CachingConfigurerSupport;
import org.springframework.cache.annotation.EnableCaching;
import org.springframework.context.annotation.Bean;
import org.springframework.context.annotation.Configuration;
import org.springframework.data.redis.cache.RedisCacheConfiguration;
import org.springframework.data.redis.cache.RedisCacheManager;
import org.springframework.data.redis.connection.RedisConnectionFactory;
import org.springframework.data.redis.core.RedisTemplate;
import org.springframework.data.redis.serializer.Jackson2JsonRedisSerializer;
import org.springframework.data.redis.serializer.RedisSerializationContext;
import org.springframework.data.redis.serializer.StringRedisSerializer;

import java.time.Duration;

/**
 * Copyright (C), 2018-2020
 * FileName: RedisConfig
 * Author:   kongfanyu
 * Date:     2020/9/13 19:38
 */
@EnableCaching
@Configuration
public class RedisConfig extends CachingConfigurerSupport {

    @Bean(name = "template")
    public RedisTemplate<String, Object> template(RedisConnectionFactory factory) {

        // 创建RedisTemplate对象
        RedisTemplate<String, Object> template = new RedisTemplate<>();
        // 配置连接工厂
        template.setConnectionFactory(factory);
        // 定义Jackson2JsonRedisSerializer序列化对象
        Jackson2JsonRedisSerializer<Object> jacksonSeial = new Jackson2JsonRedisSerializer<>(Object.class);
        ObjectMapper om = new ObjectMapper();
        // 指定要序列化的域,field,get和set,以及修饰符范围,ANY是都有包括private和public
        om.setVisibility(PropertyAccessor.ALL, JsonAutoDetect.Visibility.ANY);
        // 指定序列化输入的类型,类必须是非final修饰的,final修饰的类,比如String,Integer等会报异常
        om.enableDefaultTyping(ObjectMapper.DefaultTyping.NON_FINAL);
        jacksonSeial.setObjectMapper(om);
        StringRedisSerializer stringSerial = new StringRedisSerializer();
        // redis key 序列化方式使用stringSerial
        template.setKeySerializer(stringSerial);
        // redis value 序列化方式使用jackson
        template.setValueSerializer(jacksonSeial);
        // redis hash key 序列化方式使用stringSerial
        template.setHashKeySerializer(stringSerial);
        // redis hash value 序列化方式使用jackson
        template.setHashValueSerializer(jacksonSeial);
        template.afterPropertiesSet();
        return template;
    }

    /**
     * SpringBoot配置redis作为默认缓存工具
     * SpringBoot 2.0 以上版本的配置
     */
    @Bean
    public CacheManager cacheManager(RedisTemplate<String, Object> template) {

        RedisCacheConfiguration defaultCacheConfiguration =
                RedisCacheConfiguration
                        .defaultCacheConfig()
                        // 设置key为String
                        .serializeKeysWith(RedisSerializationContext.SerializationPair.fromSerializer(template.getStringSerializer()))
                        // 设置value 为自动转Json的Object
                        .serializeValuesWith(RedisSerializationContext.SerializationPair.fromSerializer(template.getValueSerializer()))
                        // 不缓存null
                        .disableCachingNullValues()
                        // 缓存数据保存1小时
                        .entryTtl(Duration.ofHours(1));
        RedisCacheManager redisCacheManager =
                RedisCacheManager.RedisCacheManagerBuilder
                        // Redis 连接工厂
                        .fromConnectionFactory(template.getConnectionFactory())
                        // 缓存配置
                        .cacheDefaults(defaultCacheConfiguration)
                        // 配置同步修改或删除 put/evict
                        .transactionAware()
                        .build();
        return redisCacheManager;
    }

}
所以可以这样使用:
@Autowired
private RedisTemplate<String, Object> template;
public void test002() {

   ValueOperations<String, Object> redisString = template.opsForValue();
   // SET key value: 设置指定 key 的值
   redisString.set("strKey1", "hello spring boot redis");
   // GET key: 获取指定 key 的值
   String value = (String) redisString.get("strKey1");
   System.out.println(value);

   redisString.set("strKey2", new User("ID10086", "theName", 11));
   User user = (User) redisString.get("strKey2");
   System.out.println(user);
}
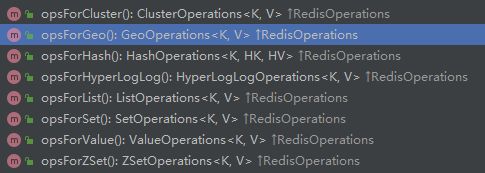
2.3 配置Redis operations 的Bean
RedisTemplate

/**
     * redis string
     */
    @Bean
    public ValueOperations<String, Object> valueOperations(RedisTemplate<String, Object> redisTemplate) {

        return redisTemplate.opsForValue();
    }

    /**
     * redis hash
     */
    @Bean
    public HashOperations<String, String, Object> hashOperations(RedisTemplate<String, Object> redisTemplate) {

        return redisTemplate.opsForHash();
    }

    /**
     * redis list
     */
    @Bean
    public ListOperations<String, Object> listOperations(RedisTemplate<String, Object> redisTemplate) {

        return redisTemplate.opsForList();
    }

    /**
     * redis set
     */
    @Bean
    public SetOperations<String, Object> setOperations(RedisTemplate<String, Object> redisTemplate) {

        return redisTemplate.opsForSet();
    }

    /**
     * redis zset
     */
    @Bean
    public ZSetOperations<String, Object> zSetOperations(RedisTemplate<String, Object> redisTemplate) {

        return redisTemplate.opsForZSet();
    }
三、RedisTemplate类的API使用
RedisTemplate是Spring封装的类,它的API基本上对应了Redis的命令,下面列举了一小部分的使用,更多的请查看Javadoc。
@Autowired
private HashOperations<String, String, Object> redisHash;// Redis Hash

@Test
public void test003() {

    Map<String, Object> map = new HashMap<>();
    map.put("id", "10010");
    map.put("name", "redis_name");
    map.put("amount", 12.34D);
    map.put("age", 11);
    redisHash.putAll("hashKey", map);
    // HGET key field 获取存储在哈希表中指定字段的值
    String name = (String) redisHash.get("hashKey", "name");
    System.out.println(name);
    // HGET key field
    Double amount = (Double) redisHash.get("hashKey", "amount");
    System.out.println(amount);
    // HGETALL key 获取在哈希表中指定 key 的所有字段和值
    Map<String, Object> map2 = redisHash.entries("hashKey");
    System.out.println(map2);
    // HKEYS key 获取在哈希表中指定 key 的所有字段
    Set<String> keySet = redisHash.keys("hashKey");
    System.out.println(keySet);
    // HVALS key 获取在哈希表中指定 key 的所有值
    List<Object> valueList = redisHash.values("hashKey");
    System.out.println(valueList);
}
四、使用Redis缓存数据库数据
Redis有很多使用场景,一个demo就是缓存数据库的数据。Redis作为一个内存数据库,存取数据的速度比传统的数据库快得多。使用Redis缓存数据库数据,可以减轻系统对数据库的访问压力,及加快查询效率等好处。下面讲解如何使用 SpringBoot + Redis来缓存数据库数据(这里数据库使用MySql)。
4.1 配置Redis作为Spring的缓存管理
Spring支持多种缓存技术:RedisCacheManager、EhCacheCacheManager、GuavaCacheManager等,使用之前需要配置一个CacheManager的Bean。配置好之后使用三个注解来缓存数据:@Cacheable,@CachePut 和 @CacheEvict。这三个注解可以加Service层或Dao层的类名上或方法上(建议加在Service层的方法上),加上类上表示所有方法支持该注解的缓存;三注解需要指定Key,以返回值作为value操作缓存服务。所以,如果加在Dao层,当新增1行数据时,返回数字1,会将1缓存到Redis,而不是缓存新增的数据。
RedisCacheManager的配置见2.2小节: RedisConfig.java
4.2 @Cacheabl、@CachePut、@CacheEvict的使用
package com.github.redis;

import com.github.mybatis.domain.User;
import org.springframework.beans.factory.annotation.Autowired;
import org.springframework.cache.annotation.CacheConfig;
import org.springframework.cache.annotation.CacheEvict;
import org.springframework.cache.annotation.CachePut;
import org.springframework.cache.annotation.Cacheable;
import org.springframework.stereotype.Service;

import java.util.List;
/**
 * 指定默认缓存区
 * 缓存区:key的前缀,与指定的key构成redis的key,如 user::10001
 */
@CacheConfig(cacheNames = "user")
@Service
public class RedisCacheUserService {


    @Autowired
    private UserDao dao;

    /**
     * @Cacheable 缓存有数据时,从缓存获取;没有数据时,执行方法,并将返回值保存到缓存中
     * @Cacheable 一般在查询中使用
     * 1) cacheNames 指定缓存区,没有配置使用@CacheConfig指定的缓存区
     * 2) key 指定缓存区的key
     * 3) 注解的值使用SpEL表达式
     * eq ==
     * lt <
     * le <=
     * gt >
     * ge >=
     */
    @Cacheable(cacheNames = "user", key = "#id")
    public User selectUserById(String id) {

        return dao.selectUserById(id);
    }

    @Cacheable(key="'list'")
    public List<User> selectUser() {

        return dao.selectUser();
    }

    /**
     * condition 满足条件缓存数据
     */
    @Cacheable(key = "#id", condition = "#number ge 20") // >= 20
    public User selectUserByIdWithCondition(String id, int number) {

        return dao.selectUserById(id);
    }

    /**
     * unless 满足条件时否决缓存数据
     */
    @Cacheable(key = "#id", unless = "#number lt 20") // < 20
    public User selectUserByIdWithUnless(String id, int number) {

        return dao.selectUserById(id);
    }

    /**   * @CachePut 一定会执行方法,并将返回值保存到缓存中
     * @CachePut 一般在新增和修改中使用
     */
    @CachePut(key = "#user.id")
    public User insertUser(User user) {

        dao.insertUser(user);
        return user;
    }

    @CachePut(key = "#user.id", condition = "#user.age ge 20")
    public User insertUserWithCondition(User user) {

        dao.insertUser(user);
        return user;
    }

    @CachePut(key = "#user.id")
    public User updateUser(User user) {

        dao.updateUser(user);
        return user;
    }

    /**
     * 根据key删除缓存区中的数据
     */
    @CacheEvict(key = "#id")
    public void deleteUserById(String id) {

        dao.deleteUserById(id);
    }

    /**
     * allEntries = true :删除整个缓存区的所有值,此时指定的key无效
     * beforeInvocation = true :默认false,表示调用方法之后删除缓存数据;true时,在调用之前删除缓存数据(如方法出现异常)
     */
    @CacheEvict(key = "#id", allEntries = true)
    public void deleteUserByIdAndCleanCache(String id) {

        dao.deleteUserById(id);
    }
}
4.3 在业务类添加注解
/**
 * 查询课程基本信息和描述信息,两张表
 * @param id
 * @return
 */
@Cacheable(key = "'ebs'",value = "courseInfo")
@Override
public CourseInfoForm getCourseInfoById(String id) {

    //1.查询课程基本信息
    EbsCourse ebsCourse = baseMapper.selectById(id);
    if (ebsCourse == null){

        throw new EduException(ResultCode.ERROR,"没有课程信息");
    }
    CourseInfoForm courseInfoForm = new CourseInfoForm();
    BeanUtils.copyProperties(ebsCourse,courseInfoForm);
    //2.查询课程描述信息
    EbsCourseDescription courseDescription = courseDescriptionService.getById(id);
    courseInfoForm.setDescription(courseDescription.getDescription());
    return courseInfoForm;
}
五、启动redis服务
保证redis安装成功,正常启动服务,客户端可以连接到redis服务器;注意密码、IP限制、保护模式等问题。
- 关闭linux防火墙或者开放6379端口
- 注释掉这句话: #bind 127.0.0.1
- 修改保护模式: protected -mode yes 改为 protected -mode no
redis-server  /etc/redis.conf  #配置文件位置根据具体情况
redis-cli                      #客户端工具
127.0.0.1:6379> keys *
(empty list or set)
127.0.0.1:6379>
测试,并查看redis中的key信息:
127.0.0.1:6379> keys *   #可以看到增加一个key
1) "ebs::courseInfo"
127.0.0.1:6379> get ebs::courseInfo
"[\"com.yxzx.ebs.entity.vo.CourseInfoForm\",{\"id\":\"10\",\"teacherId\":\"1\",\"subjectId\":\"\",\"title\":\"Python\xe4\xba\xba\xe5\xb7\xa5\xe6\x99\xba\xe8\x83\xbd\xe6\xa6\x82\xe8\xae\xba\",\"price\":[\"java.math.BigDecimal\",11.0000],\"lessonNum\":11,\"cover\":\"\",\"description\":null,\"subjectParentId\":null}]"
127.0.0.1:6379>
再次请求可以看出控制台不再发送SQL语句,而是从redis中取数据。
六、总结
- 在项目中添加依赖
- 在application.properties中添加redis配置
- 在项目中添加Redis配置类,配置RedisTemplate类和CacheManger类
- 在业务类中添加@Cacheable,@CachePut 和 @CacheEvict注解
- 确保redis服务器连接正常
