mysql Slave_IO_Running:NO 或者connecting(爬坑录)
MySQL数据库主从读写分离配置详解 大家去网上找的话,绝对会有一千万个版本 (一千个程序员有一千个哈姆雷特)。
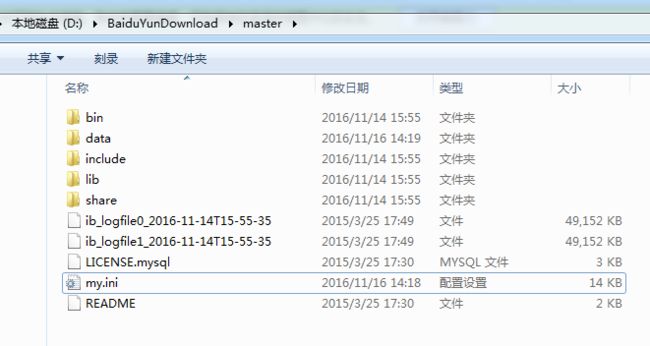
最后,经本人苦苦探索,发现在一台win 7电脑上,去复制一份一模一样的mysql 目录文件在硬盘中,其实也行的通。早知道我不安装虚拟机,弄xp之类的。但这样做也是考虑到实际的情形,mysql的同步并不是很稳定,尤其mysql replication 中slave机器上有两个关键的进程,死一个都不行,一个是slave_sql_running,一个是Slave_IO_Running,一个负责与主机的io通信,一个负责自己的slave mysql进程。
先看我怎么做的:
1. 1、修改主服务器配置:
上图

#vi /etc/my.cnf
binlog-do-db=db1
binlog-do-db=db2
binlog-do-db=db3
binlog-ignore-db = mysql
log-bin=mysql-bin  #启用二进制日志

server-id=3028  #服务器唯一ID,一般取IP最后一段,但这儿挺坑 我开始设置为1 ,一直有毛病,看资料之后改成了其他较少见的数字
[client]
no-beep

# pipe
# socket=0.0
port=3306

[mysql]

default-character-set=utf8


# SERVER SECTION
# ----------------------------------------------------------------------
#
# The following options will be read by the MySQL Server. Make sure that
# you have installed the server correctly (see above) so it reads this
# file.
#
# server_type=3
[mysqld]

# The next three options are mutually exclusive to SERVER_PORT below.
#skip-networking

# enable-named-pipe

# shared-memory

# shared-memory-base-name=MYSQL

# The Pipe the MySQL Server will use
# socket=MYSQL

# The TCP/IP Port the MySQL Server will listen on
port=3306

# Path to installation directory. All paths are usually resolved relative to this.
 basedir=D:/BaiduYunDownload/master

# Path to the database root
datadir=D:/BaiduYunDownload/master/Data
binlog-do-db=db1
binlog-do-db=db2
binlog-do-db=db3
binlog-ignore-db=mysql
log-bin=mysql-bin
log-bin-index=mysql-bin.index


# The default character set that will be used when a new schema or table is
# created and no character set is defined
character-set-server=utf8

# The default storage engine that will be used when create new tables when
default-storage-engine=INNODB

# Set the SQL mode to strict
sql-mode="STRICT_TRANS_TABLES,NO_AUTO_CREATE_USER,NO_ENGINE_SUBSTITUTION"

# Enable Windows Authentication
# plugin-load=authentication_windows.dll

# General and Slow logging.
log-output=FILE
general-log=0
general_log_file="HUKANG-PC.log"
slow-query-log=1
slow_query_log_file="HUKANG-PC-slow.log"
long_query_time=10

# Binary Logging.
# log-bin

# Error Logging.
log-error="HUKANG-PC.err"

# Server Id.
server-id=3028
----------- 底下的 就保持不变 --------------

# The maximum amount of concurrent sessions the MySQL server will
# allow. One of these connections will be reserved for a user with
# SUPER privileges to allow the administrator to login even if the
# connection limit has been reached.
max_connections=151

query_cache_size=0


table_open_cache=2000


tmp_table_size=35M


thread_cache_size=10

myisam_max_sort_file_size=100G


myisam_sort_buffer_size=61M

key_buffer_size=8M

read_buffer_size=64K
read_rnd_buffer_size=256K


innodb_additional_mem_pool_size=5M

innodb_flush_log_at_trx_commit=1


innodb_log_buffer_size=3M


innodb_buffer_pool_size=190M


innodb_log_file_size=48M


innodb_thread_concurrency=9


innodb_autoextend_increment=64
.....
...
..
2、重启MySQL
/etc/init.d/mysql restart
3、建立帐户并授权slave:
#/usr/local/mysql/bin/mysql -uroot -proot
mysql>GRANT FILE ON . TO ‘root’@’%’ IDENTIFIED BY ‘root’;
mysql>GRANT REPLICATION SLAVE, REPLICATION CLIENT ON . to ‘root’@’%’ identified by ‘root’;
刷新权限
mysql> FLUSH PRIVILEGES;
查看mysql现在有哪些用户
mysql>select user,host from mysql.user;
登录主服务器的mysql,查询master的状态
mysql> show master status;
+——————+———-+————–+——————+
| File | Position | Binlog_Do_DB | Binlog_Ignore_DB |
+——————+———-+————–+——————+
| mysql-bin.000010 | 106 | db1,db2,db3 | mysql |
+——————+———-+————–+——————+
Master 重启后会修改mysql-bin(序号加1)
4修改从服务器配置:
#vi /etc/my.cnf
replicate-do-db=db1
replicate-do-db=db2
replicate-do-db=db3
replicate-ignore-db=mysql
master-connect-retry=60
这个比较简单了。
5重启MySQL
/etc/init.d/mysql restart
6登录mysql并停止slave服务
# cd /usr/local/mysql/bin/
# ./mysql -uroot –proot
mysql>slave stop;
设置与master服务器相关的配置参数
mysql>change master to master_host=’10.1.176.158’, master_user=’backup’, master_password=’123456’,MASTER_LOG_FILE=’mysql-bin.000015’,MASTER_LOG_POS=106;
注意:Master重启后slave 要修改MASTER_LOG_FILE,106无单引号。
启动从服务器复制功能
Mysql>start slave;
7检查从服务器复制功能状态
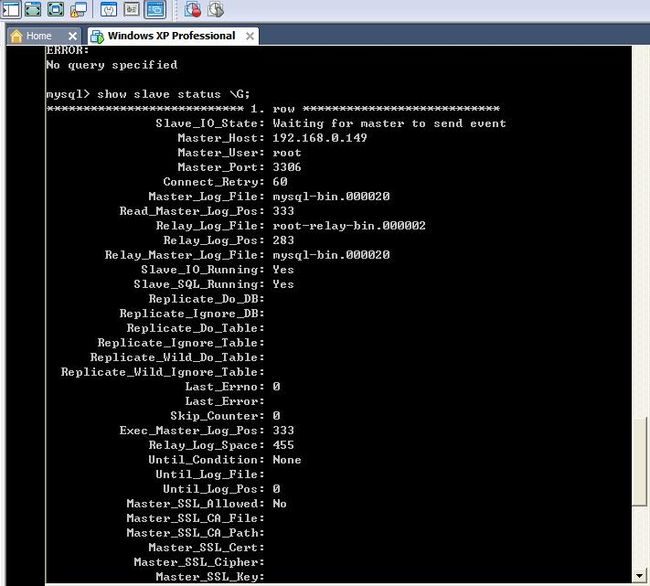
mysql> show slave status\G
以下两个参数必须为YES:
Slave_IO_Running: Yes
Slave_SQL_Running: Yes
返回如下:
***************** 1. row *****************
Slave_IO_State: Waiting for master to send event
Master_Host: 10.1.176.158
Master_User: backup
Master_Port: 3306
Connect_Retry: 60
Master_Log_File: mysql-bin.000010
Read_Master_Log_Pos: 106
Relay_Log_File: bogon-relay-bin.000002
Relay_Log_Pos: 251
Relay_Master_Log_File: mysql-bin.000010
Slave_IO_Running: Yes
Slave_SQL_Running: Yes
Replicate_Do_DB: db1,db2,db3
Replicate_Ignore_DB: mysql
Replicate_Do_Table:
Replicate_Ignore_Table:
Replicate_Wild_Do_Table:
Replicate_Wild_Ignore_Table:
Last_Errno: 0
Last_Error:
Skip_Counter: 0
Exec_Master_Log_Pos: 106
Relay_Log_Space: 406
Until_Condition: None
Until_Log_File:
Until_Log_Pos: 0
Master_SSL_Allowed: No
Master_SSL_CA_File:
Master_SSL_CA_Path:
Master_SSL_Cert:
Master_SSL_Cipher:
Master_SSL_Key:
Seconds_Behind_Master: 0
Master_SSL_Verify_Server_Cert: No
Last_IO_Errno: 0
Last_IO_Error:
Last_SQL_Errno: 0
Last_SQL_Error:
1 row in set (0.00 sec)
反正这最后的2个yes 冒出来就OK了 ,说明你已经配好了。
