SpringBoot整合mybatis随手案例
搭建项目:
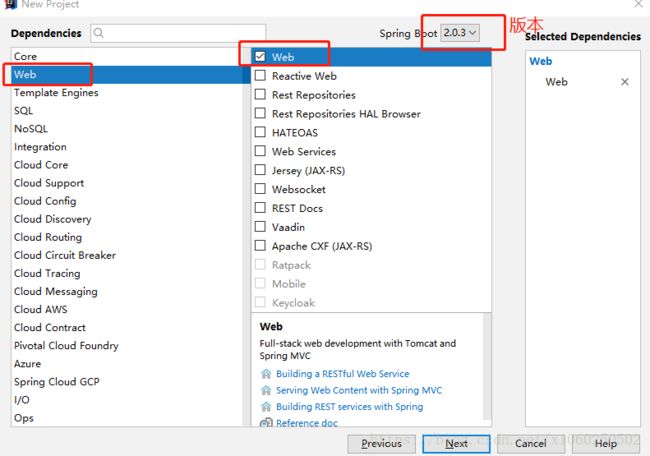
首先进入官方提供的地址下载demo,或者使用idea直接创建工程,自动去官方下载,File-->New-->Project
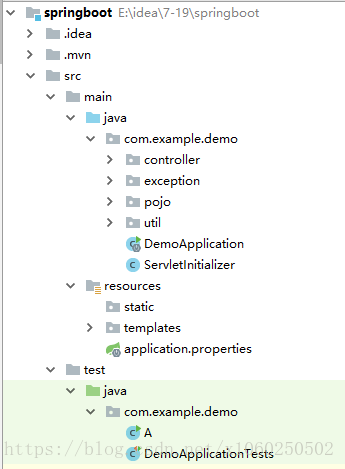
创建之后的工程目录如下:
注意:DemoApplication文件启动,和自己创建的包,需要在你创建文件夹路径之下,如果srpingboot项目启动后直接停止服务,但是需要加入web的依赖
			org.springframework.boot
			spring-boot-starter-web


			org.springframework.boot
			spring-boot-starter-tomcat
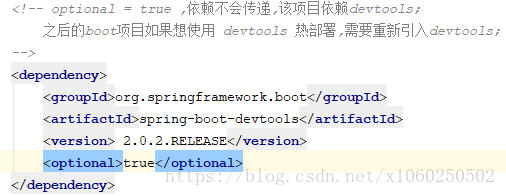
项目引入热部署
在resources下的配置文件application.properties中加入参数配置:
#开启缓存实时刷新
spring.thymeleaf.cache=true
#热部署生效
spring.devtools.restart.enabled=true
#设置重启的目录
spring.devtools.restart.additional-paths=src/main/java
#classpath目录下的WEB-INF文件夹内容修改不重启
#spring.devtools.restart.exclude: static/**
spring.devtools.restart.exclude=WEB-INF/**

#服务端胚子tomcat参数修改
#配置端口号
#server.port=8088

#配置项目名的修改 一般项目正式发布的时候不配置
#server.servlet.context-path=/yanlei

#配置session的最大超时时间,默认30分钟
#server.session-timeout=60

#配置服务绑定地址,  启动服务如果不是绑定IP启动会出错,只有特殊情况下才会配置!
#server.address=10.18.58.170

#tomcat设置url编码
server.tomcat.uri-encoding=UTF-8

#存放tomcat日志文件,Dump等零时文件,默认为系统下的tmp文件夹,修改为E盘下
#server.tomcat.basedir=E:/springboot-tomcat-tmp
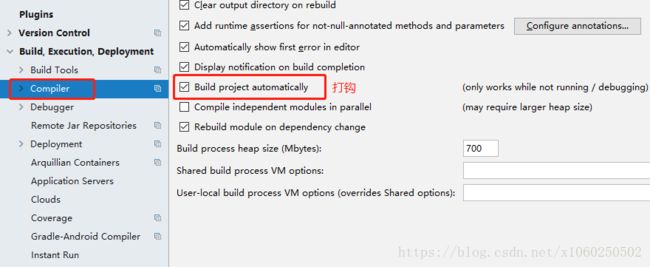
在idea中加入热部署可能不会马上生效,这时打开File-->Settings,如果还是不行,首先检查配置文件,之后再次启动idea试试
之后加入全局异常捕获,需要加入模板依赖 可以使用 --> freemarker 或者加入 --> thymeleaf
			org.springframework.boot
			spring-boot-starter-freemarker


			org.springframework.boot
			spring-boot-starter-thymeleaf
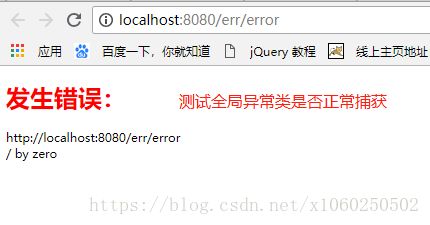
在resources下的templates下创建一个全局异常捕获页面
    捕获全局异常


    发生错误:
创建一个测试异常类,另外创建一个全局异常捕获类
@ControllerAdvice
public class JsonExceptionHandler {

	public static final String IMOOC_ERROR_VIEW = "error";

	//全局异常处理捕获,返回自定义异常页面 自定义页面在templates下就可以
	@ExceptionHandler(value = Exception.class)
    public Object errorHandler(HttpServletRequest reqest,
    		HttpServletResponse response, Exception e) throws Exception {

    	e.printStackTrace();

		ModelAndView mav = new ModelAndView();
        mav.addObject("exception", e);
        mav.addObject("url", reqest.getRequestURL());
        mav.setViewName(IMOOC_ERROR_VIEW);
        return mav;
    }
}
springboot整合mybatis引入依赖到pom文件
			com.alibaba
			druid
			1.1.0


			mysql
			mysql-connector-java
			5.1.41


		    org.mybatis.spring.boot
		    mybatis-spring-boot-starter
		    1.3.1


		    tk.mybatis
		    mapper-spring-boot-starter
		    1.2.4


		    com.github.pagehelper
		    pagehelper-spring-boot-starter
		    1.2.3


			com.alibaba
			druid-spring-boot-starter
			1.1.9


			org.mybatis.generator
			mybatis-generator-core
			1.3.2
			compile
			true
在配置文件中加入数据库的配置
#生产环境热部署配置生效,一般正式环境不加
#restart.include.mapper=/mapper-[\\w-\\.]+jar
#restart.include.pagehelper=/pagehelper-[\\w-\\.]+jar
#加入阿里巴巴提供的driver数据源
spring.datasource.url=jdbc:mysql://localhost:3306/xxxxxx
spring.datasource.username=root
spring.datasource.password=root
spring.datasource.driver-class-name=com.mysql.jdbc.Driver
spring.datasource.druid.initial-size=1
spring.datasource.druid.min-idle=1
spring.datasource.druid.max-active=20
spring.datasource.druid.test-on-borrow=true
spring.datasource.druid.stat-view-servlet.allow=true

# mybatis 配置
mybatis.type-aliases-package=com.com.example.demo.pojo
mybatis.mapper-locations=classpath:mapper/*.xml
# 通用mapper配置
mapper.mappers=com.com.example.demo.utils.MyMapper
mapper.not-empty=false
mapper.identity=MYSQL
# 分页插件配置
pagehelper.helperDialect=mysql
pagehelper.reasonable=true
pagehelper.supportMethodsArguments=true
pagehelper.params=count=countSql
接下来需要加入逆向工程的xml配置文件
逆向工程启动代码,主要运用反射,里面经过大牛封装的,将要生成的数据库设置一下直接运行即可.
import java.io.File;
import java.util.ArrayList;
import java.util.List;

import org.mybatis.generator.api.MyBatisGenerator;
import org.mybatis.generator.config.Configuration;
import org.mybatis.generator.config.xml.ConfigurationParser;
import org.mybatis.generator.internal.DefaultShellCallback;

public class GeneratorDisplay {

	public void generator() throws Exception{

		List warnings = new ArrayList();
		boolean overwrite = true;
		//指定 逆向工程配置文件
		File configFile = new File("generatorConfig.xml");
		ConfigurationParser cp = new ConfigurationParser(warnings);
		Configuration config = cp.parseConfiguration(configFile);
		DefaultShellCallback callback = new DefaultShellCallback(overwrite);
		MyBatisGenerator myBatisGenerator = new MyBatisGenerator(config,
				callback, warnings);
		myBatisGenerator.generate(null);

	}

	public static void main(String[] args) throws Exception {
		try {
			GeneratorDisplay generatorSqlmap = new GeneratorDisplay();
			generatorSqlmap.generator();
		} catch (Exception e) {
			e.printStackTrace();
		}

	}
}
springboot的事务: 相对于增加,修改,删除加入:
@Transactional(propagation = Propagation.REQUIRED)
对于查询操作只需要加入:
@Transactional(propagation = Propagation.SUPPORTS)
需要三层的话记得引入aop:
		    org.springframework.boot
		    spring-boot-starter-aop

