前后端分离学习笔记:1-3 springboot+vue概述--前后端分离
目录
一、前端页面展示(此处按照讲课的顺序进行展示)
二、后端代码编写
三、前后端连通
一、前端页面展示(此处按照讲课的顺序进行展示)
目的:创建前端书籍展示列表
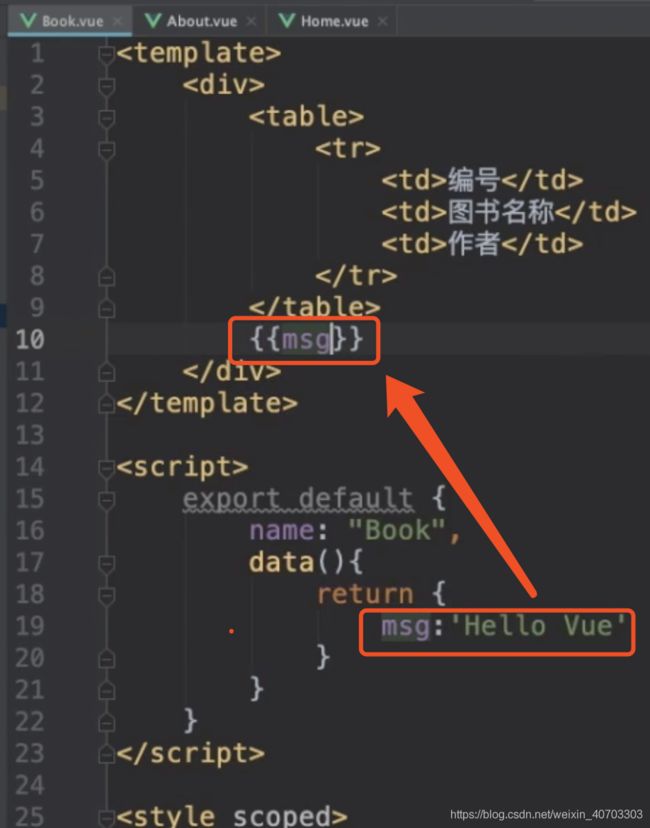
首先创建book.vue
(此处只是简单测试能不能展示)
然后在路由中配置
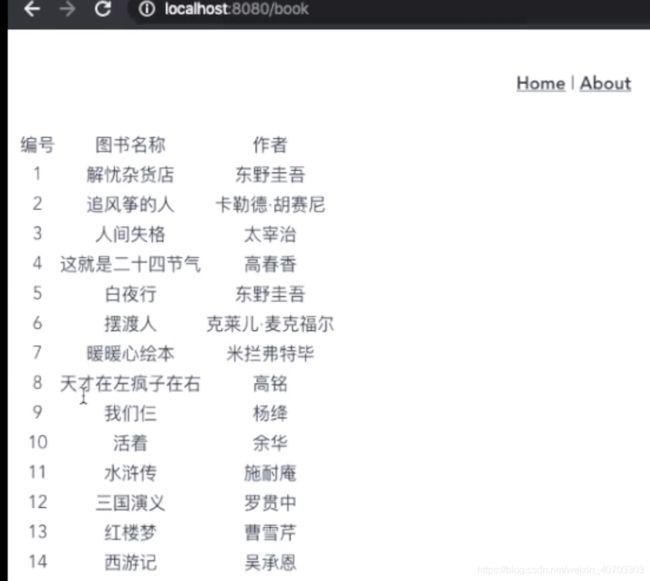
最后界面显示如下
接下来造假数据
创建books数组,将数据写入
通过v-for遍历books
编号
图书名称
作者
{
{item.id}}
{
{item.name}}
{
{item.author}}
结果如下:
二、后端代码编写
1、创建entity(Book实体)
使用@Entity注解简历实体与表的映射关系(实体Book和表名book大小写字母的区别建立映射)
使用@Data生成get、set、toString方法(调用了前面讲的lombok的依赖)
使用@Id说明主键,将成员变量和表字段绑定
package com.jx.springboottest.entity;

import lombok.Data;

import javax.persistence.Entity;
import javax.persistence.Id;

/**
 * @author Shawn
 * @date 2020/6/16 - 2:26 PM
 */
@Entity
@Data
public class Book {
    @Id
    private Integer id;
    private String name;
    private String author;
}
2、创建BookRepository接口
package com.jx.springboottest.repository;

import com.jx.springboottest.entity.Book;
import org.springframework.data.jpa.repository.JpaRepository;

/**
 * @author Shawn
 * @date 2020/6/16 - 3:05 PM
 */
public interface BookRepository extends JpaRepository {

}
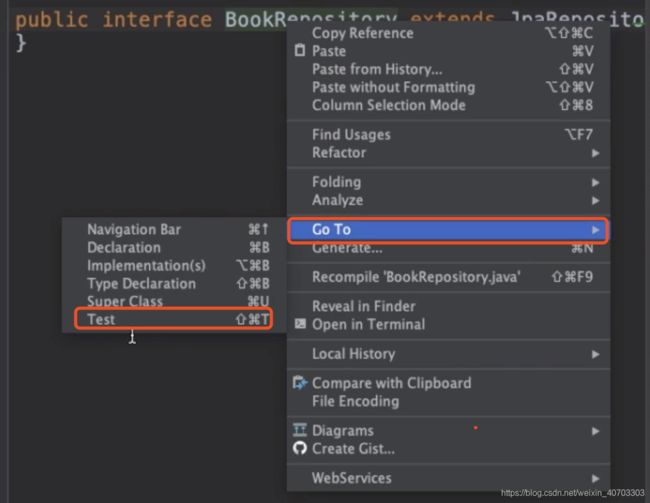
然后对该数据接口进行测试,右键接口名--Go To--Test
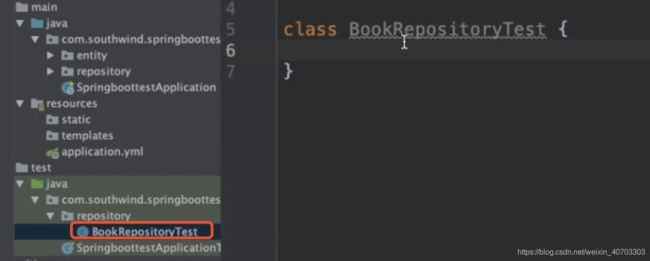
然后自动生成测试类
然后写测试注解
3、创建controller
BookHandler
package com.jx.springboottest.controller;

import com.jx.springboottest.entity.Book;
import com.jx.springboottest.repository.BookRepository;
import org.springframework.beans.factory.annotation.Autowired;
import org.springframework.web.bind.annotation.GetMapping;
import org.springframework.web.bind.annotation.RequestMapping;
import org.springframework.web.bind.annotation.RestController;

import java.util.List;

/**
 * @author Shawn
 * @date 2020/6/16 - 3:53 PM
 */
@RestController
@RequestMapping("/book")
public class BookHandler {
    @Autowired
    private BookRepository bookRepository;
    @GetMapping("/findAll")
    public List findAll(){
        return bookRepository.findAll();
    }
}
然后进行测试(注意这里端口是8181,在application.yml中进行了配置,为了与前端8080不冲突)
三、前后端连通
前端建立ajax请求访问后端8181端口
在VUE中要安装axios组件
vue add axios
由于我们是一刷新页面就要加载数据,因此放入初始化函数created中
created(){
            const _this = this
            axios.get('http://localhost:8181/book/findAll').then(function(resp){
               console.log(resp)
            })
        }
这里先让前端获取到后台的数据打印出来
但这时测试会产生CORS跨域问题
我们可以在后端进行配置
创建CrosConfig类
package com.jx.springboottest.config;

import org.springframework.context.annotation.Configuration;
import org.springframework.web.servlet.config.annotation.CorsRegistry;
import org.springframework.web.servlet.config.annotation.WebMvcConfigurer;

/**
 * @author Shawn
 * @date 2020/6/16 - 4:27 PM
 */
@Configuration
public class CrosConfig implements WebMvcConfigurer {
    @Override
    public void addCorsMappings(CorsRegistry registry) {
        registry.addMapping("/**")
                .allowedOrigins("*")
                .allowedMethods("GET", "HEAD", "POST", "PUT", "DELETE", "OPTIONS")
                .allowCredentials(true)
                .maxAge(3600)
                .allowedHeaders("*");
    }
}
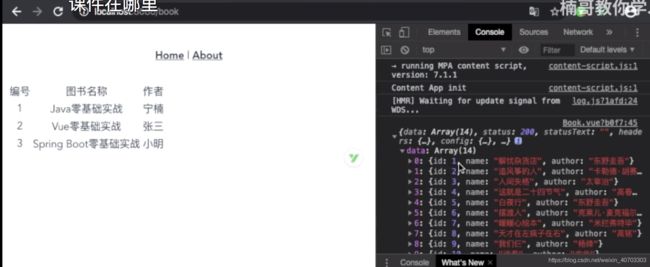
此时再进行测试,可以发现8080访问8181控制台可以展示后台数据
接下来需要将后台数据展示到前端
针对上图说明两点:
(1)resp.data中的data是浏览器控制台中的data,因为我们只获取data的数据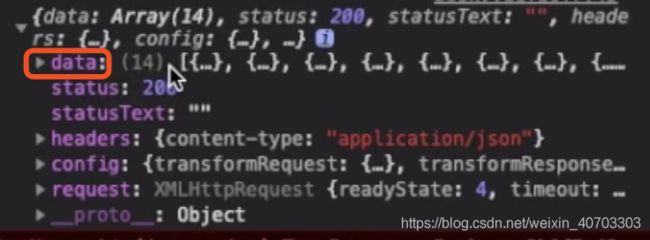
(2)这里不能使用this,因为这里的this在回调函数里,因此指的是function(resp){}这个回调函数,不是上面的books数组
因此定义变量_this获取books数组数据
 created(){
            const _this = this
            axios.get('http://localhost:8181/book/findAll').then(function(resp){
                _this.books = resp.data
            })
        }
这里代码展示如下Book.vue
编号
图书名称
作者
{
{item.id}}
{
{item.name}}
{
{item.author}}
最后结果数据如下
