springboot + dubbo + zookeeper分布式初体验
初次学习分布式应用,本文是基于springboot + dubbo + zookeeper实现的分布式应用,是一个简单的demo,记录学习一下,大佬们看见有错误的地方欢迎指出。
进行编码我们要把准备工作给做好,首先安装一下zookeeper,这里我使用的是docker来安装的(docker是真好用,推荐给大家)。安装docker容器这里就不教大家了,大家自行百度吧。
安装zookeeper
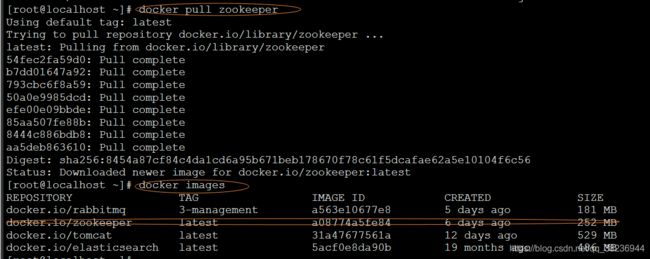
使用docker pull zookeeper命令安装默认版本的zookeeper,如果需要指定版本自己去docker hub搜索需要安装的版本号,安装完毕后,可以使用docker images 查看安装好的镜像。
参考官方文档的启动命令
 --name 后面接的是启动镜像取的名字,还需要-p 来做端口映射(-p 2181:2181)将2181端口暴露出来供外部访问。
-d 后面接的是开启镜像ID,可以通过docker ps 查看开启的镜像,到这里,zookeeper安装完毕。
创建项目
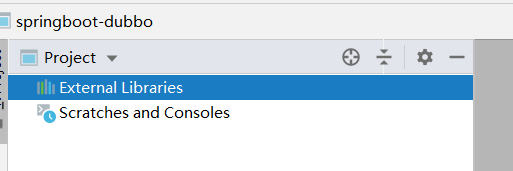
使用idea创建一个空的工程,啥也没有的
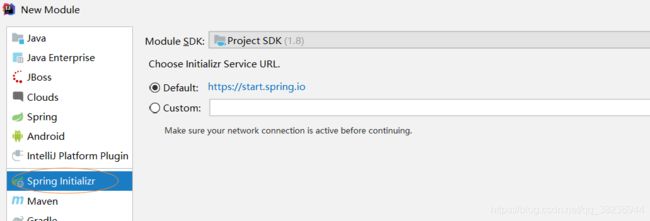
使用idea的快捷创建,创建一个模块,定义为提供者,卖票的提供者,依赖web模板就行
这个模块创建完成,先创建一个service接口以及它的实现类
package com.example.ticket.service;

public interface TicketService {
    public String getTicket();
}
package com.example.ticket.service;

import org.apache.dubbo.config.annotation.Service;

import org.springframework.stereotype.Component;

@Component
@Service  //注意这里的service注解引用
public class TicketServiceImpl implements TicketService {
    @Override
    public String getTicket() {
        return "《龙岭迷窟》";
    }
}
这个模块,暂时完成,同样的方法,再生成一个用户的模块。当然用户模块也得新建一个用户的service及其实现。具体的方法体可以先不用书写。俩个模块都生成完毕,现在需要来引入他们的依赖在提供者pom文件中添加下列语句。
            org.apache.dubbo
            dubbo-spring-boot-starter
            2.7.3


            com.github.sgroschupf
            zkclient
            0.1


                    org.apache.zookeeper
                    zookeeper


            org.apache.curator
            curator-framework
            2.12.0


            org.apache.curator
            curator-recipes
            2.8.0
接着在提供者的配置文件中添加如下配置,用于连接zookeeper
dubbo.application.name=provider-ticket
dubbo.registry.address=zookeeper://xxxx:2181
dubbo.scan.base-packages=com.example.ticket.service
配置好提供者的模块以后,一定要记得启动,紧接着以同样的方法去配置consumer模块。只不过配置文件不用再配置dubbo.scan.base-packages了。
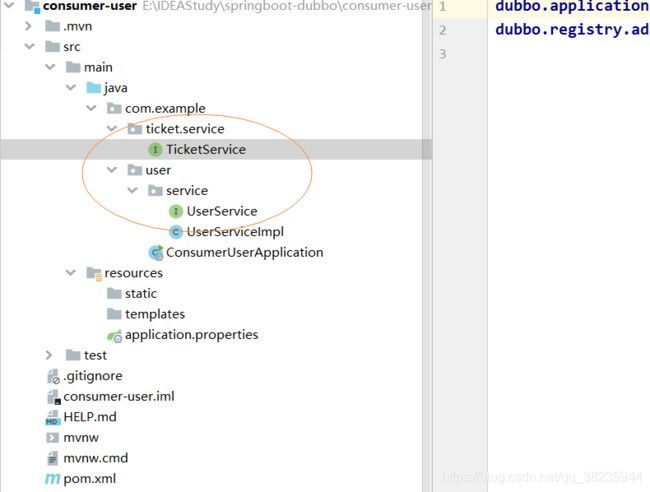
紧接着在consumer模块中,在user同级目录粘贴一份ticket的service,但是我们不需要实现类了。目录结构如图所示
接着我们来编写user的service和他的实现类
package com.example.user.service;

public interface UserService {
    public void hello();
}
package com.example.user.service;

import com.example.ticket.service.TicketService;
import org.apache.dubbo.config.annotation.Reference;
import org.springframework.stereotype.Service;

@Service //这是spring的service了,不要搞错了
public class UserServiceImpl implements UserService {

    @Reference //指向zookeeper里面的实现
    TicketService ticketService;

    @Override
    public void hello() {
        String ticket = ticketService.getTicket();
        System.out.println("买到票:" + ticket);
    }
}
编写测试程序
package com.example.user;

import com.example.user.service.UserServiceImpl;
import org.junit.jupiter.api.Test;
import org.springframework.beans.factory.annotation.Autowired;
import org.springframework.boot.test.context.SpringBootTest;

@SpringBootTest
class ConsumerUserApplicationTests {

    @Autowired
    UserServiceImpl userService;

    @Test
    void contextLoads() {
        userService.hello();
    }

}
测试结果


