一起来学springboot(六)
接着上面的,这次来总结springboot实现web 的功能
Spring MVC 自动配置介绍
Spring Boot整合Spring MVC的自动化配置功能特性
①内置了两个视图解析器: ContentNegotiatingViewResolver和BeanNameViewResolver;
②支持静态资源以及WebJars;
③自动注册了转换器和格式化器;
④支持Http消息转换器;
⑤自助注册了消息代码解析器;
⑥支持静态目页index.html;
⑦定制应用图标favicon.ico;
⑧自动初始化Web数据绑定器ConfigurableWebBindinglnitializer
Spring MVC 扩展实现
试试获取上节的代码。在此基础上进行修改。
①注册视图管理器。先创建一个config包。实现WebMVCConfigurer接口的配置类MyConfig,进行MVC框架功能扩展。代码如下
@Configuration
public class MyMVCconfig implements WebMvcConfigurer {
    @Autowired
    private MyInterceptor myInterceptor;
    //添加视图管理
    @Override
    public void addViewControllers(ViewControllerRegistry registry){
        //请求toLoginPage映射路径或者login.html页面都会自动映射到loginn.htnl页面
        registry.addViewController("/toLoginPage").setViewName("login");
        registry.addViewController("/login.html").setViewName("login");
    }


}
首先是实现WebMvcConfigurer 接口中的addViewControllers方法。在该方法中定义了 /toLoginPage 和 login.html的请求方法。如何使用这两个链接发起页面请求。那么会跳转支login.html页面。
这种方法也实现了页面控制跳转的效果。但是同传统的请求跳转方法而言。这种方法是不能携带一些参数在请求中。
②注册自定义拦截器。同样的,在config包新建一个类MyInterceptor,代码如下:
@Configuration
public class MyInterceptor implements HandlerInterceptor {
    @Override
    public boolean preHandle(HttpServletRequest request, HttpServletResponse response, Object handler) throws Exception {
        String uri = request.getRequestURI();
        Object loginUser = request.getSession().getAttribute("loginUser");
        //当用户的请求头是以“admin"为开头的时候,判断用户是否登录
        if (uri.startsWith("/admin") && null == loginUser){
            response.sendRedirect("/toLoginPage");
            //response.sendRedirect("/login.html");
            return  false;
        }
        return false;
    }

    @Override
    public void postHandle(HttpServletRequest request, HttpServletResponse response, Object handler, ModelAndView modelAndView) throws Exception {
        //向request域中存放年份用于页面动态展示
        request.setAttribute("currentYear", Calendar.getInstance().get(Calendar.YEAR));
    }
}
当用户的请求头是以“admin"为开头的时候,判断用户是否登录.没有登录则重定向到/toLoginPage方法。
然后再MyMVCconfig增加如下代码
 @Autowired
    private MyInterceptor myInterceptor;

@Override
    public void addInterceptors(InterceptorRegistry registry) {
        registry.addInterceptor(myInterceptor).addPathPatterns("/**").excludePathPatterns("/login.html");
    }
引入MyInterceptor拦截器,重写addInterceptors方法进行拦截。addPathPatterns("/**")代表拦截所有路径请求。excludePathPatterns("/login.html")代表针对/login.html进行放行。
当然,如果是想要自定义管理,不想使用mvc提供的默认配置。可以自定义一个配置类。使用@Configuration注解。同时添加@EnableWebMvc注解关闭springboot提供的所有springmvc提供的默认配置。
组件注册整合Servlet三大组件
① 使用组件注册方式整合Servlet
新建一个包为servletComponent。新建一个类MyServlet.使用@Configuration注解将该类注入到Spring容器中。
@Component
public class Myservlet extends HttpServlet {

    @Override
    protected void doGet(HttpServletRequest req, HttpServletResponse resp) throws ServletException, IOException {
       this.doPost(req, resp);
    }

    @Override
    protected void doPost(HttpServletRequest req, HttpServletResponse resp) throws ServletException, IOException {
       resp.getWriter().write("hello myservlet");
    }
}
新建一个类MyFilter,实现Filter接口。且重写init(),doFilter(),destroy等方法。
@Component
public class MyFilter implements Filter {

    @Override
    public void init(FilterConfig filterConfig) throws ServletException {

    }

    @Override
    public void doFilter(ServletRequest servletRequest, ServletResponse servletResponse, FilterChain filterChain) throws IOException, ServletException {
        System.out.println("hello myfilter");
    }

    @Override
    public void destroy() {

    }
}
新建一个类MyListener。实现 ServletContextListener接口。重写contextInitialized()和contextDestroyed()方法
@Component
public class MyListener implements ServletContextListener {
    @Override
    public void contextInitialized(ServletContextEvent sce) {
        System.out.println("执行contextInitialized操作..............");
    }

    @Override
    public void contextDestroyed(ServletContextEvent sce) {
        System.out.println("执行contextDestroyed操作.................");
    }
}
再config包下新建一个Servlert组件配置类ServlertConfig。使用@Configuration注解将标注为配置类。@Bean注解注册Servlet三大组件.
@Configuration
public class ServletConfig {
   @Bean
    public ServletRegistrationBean getServlet(Myservlet myServlet){
        ServletRegistrationBean registrationBean = new ServletRegistrationBean(myServlet,"/myServlet");
        return registrationBean;
    }

    @Bean
    public FilterRegistrationBean getFilter(MyFilter myFilter){
        FilterRegistrationBean registrationBean = new FilterRegistrationBean(myFilter);
        registrationBean.setUrlPatterns(Arrays.asList("/toLoginPage","/myFilter"));
        return registrationBean;
    }
    @Bean
    public ServletListenerRegistrationBean getServletListener(MyListener myListener){
        ServletListenerRegistrationBean registrationBean = new ServletListenerRegistrationBean(myListener);
        return  registrationBean;
    }
}②路径扫描整合Servlet三大组件
还可以使用路径扫描整合三大组件。在①的基础上,先将ServlertConfig类中的代码注释。然后三个自定义的类都去除@Component注解。分别使用
@WebServlet("/annotationServlet"),@WebFilter(value = {"/antionLogin","/antionMyFilter"}),@WebListener
再在主程序启动类增加@ServletComponentScan注解。开启基于注解方式的Servlet组件扫描支持。
@SpringBootApplication
@ServletComponentScan
public class Charpter05Application {

    public static void main(String[] args) {
        SpringApplication.run(Charpter05Application.class, args);
    }

}
文件的上传与下载
文件上传
①编写文件上传的表单页面
动态添加文件上传列表
上传成功
②在全局配置文件中添加文件上传的相关配置
#单个上传文件大小限制,默认为1MB
spring.servlet.multipart.max-file-size=10MB

#总上传文件大小限制,默认为10MB
spring.servlet.multipart.max-request-size=50MB
③进行文件上传处理实现文件上传功能
@Controller
public class FileController {
    @GetMapping("/toUpload")
    public String toUpload(){
        System.out.println("去上传文件页面");
        return "upload";
    }

    @PostMapping("/uploadFile")
    public String uploadFile(MultipartFile[] fileUpload, Model model){
        //设置为默认文件上传成功,返回状态信息
        model.addAttribute("uploadStatus","上传成功");
        for (MultipartFile file : fileUpload){
            String fileName = file.getOriginalFilename();//获取文件名和后缀名
            fileName = UUID.randomUUID()+"_"+fileName;//重新生成文件名
            String dirPath = "C:/file/";
            File filePath = new File(dirPath);

            if(!filePath.exists()){
                filePath.mkdirs();
            }

            try {
                file.transferTo(new File(dirPath+fileName));
            } catch (Exception e) {
                e.printStackTrace();
                model.addAttribute("uploadStatus","上传失败:"+e.getMessage());
            }

        }
        return "upload";
    }


}
④效果如下

文件下载
①添加依赖。
            commons-io
            commons-io
            2.6
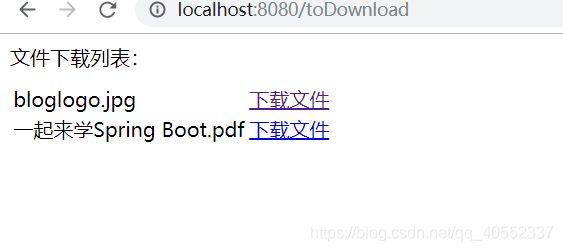
②下载页面
    文件下载


文件下载列表:


        bloglogo.jpg
        下载文件


        一起来学Spring Boot.pdf

            下载文件
③controller方法
 @GetMapping("/toDownload")
    public String toDownload(){
        return "download";
    }

    @GetMapping("/download")
    public ResponseEntity fileDownload(String filename, HttpServletRequest request) throws Exception{
        System.out.println("filename:"+filename);
        String dirPath = "C:/file/";//指定需要下载的文件的路径
        File file = new File(dirPath + File.separator+filename);//创建文件对象
        System.out.println(file.getAbsolutePath());

        HttpHeaders headers = new HttpHeaders();//设置响应头
        headers.setContentDispositionFormData("attachment",filename);//通知浏览器已下载的方式打开
        headers.setContentType(MediaType.APPLICATION_OCTET_STREAM);

        try {
            return new ResponseEntity<>(FileUtils.readFileToByteArray(file),headers,HttpStatus.OK);
        } catch (IOException e) {
            e.printStackTrace();
            return new ResponseEntity(e.getMessage().getBytes(),HttpStatus.EXPECTATION_FAILED);
        }


    }
④效果展示
但是这个对于有中文名的文件虽可下载成功,但是文件名中文文字的地方会变为“——”.因此,可修改代码如下
@GetMapping("/toDownload")
    public String toDownload(){
        return "download";
    }

    @GetMapping("/download")
    public ResponseEntity fileDownload(String filename, HttpServletRequest request) throws Exception{
        System.out.println("filename:"+filename);
        String dirPath = "C:/file/";//指定需要下载的文件的路径
        File file = new File(dirPath + File.separator+filename);//创建文件对象
        System.out.println(file.getAbsolutePath());

        HttpHeaders headers = new HttpHeaders();//设置响应头
        filename = getFileName(request,filename);
        headers.setContentDispositionFormData("attachment",filename);//通知浏览器已下载的方式打开
        headers.setContentType(MediaType.APPLICATION_OCTET_STREAM);

        try {
            return new ResponseEntity<>(FileUtils.readFileToByteArray(file),headers,HttpStatus.OK);
        } catch (IOException e) {
            e.printStackTrace();
            return new ResponseEntity(e.getMessage().getBytes(),HttpStatus.EXPECTATION_FAILED);
        }

        //return new ResponseEntity<>(FileUtils.readFileToByteArray(file),headers, HttpStatus.OK);
    }

    private String getFileName(HttpServletRequest request, String fileName) throws Exception {
        String[] IEBrowserKeyWords = {"MSIE","Tfident","Edge"};

        String userAgent = request.getHeader("User-Agent");
        for (String keyword : IEBrowserKeyWords){
            if (userAgent.contains(keyword)){
                return URLEncoder.encode(fileName,"UTF-8").replace("+"," ");
            }
        }

        return new String(fileName.getBytes("UTF-8"),"ISO-8859-1");
    }