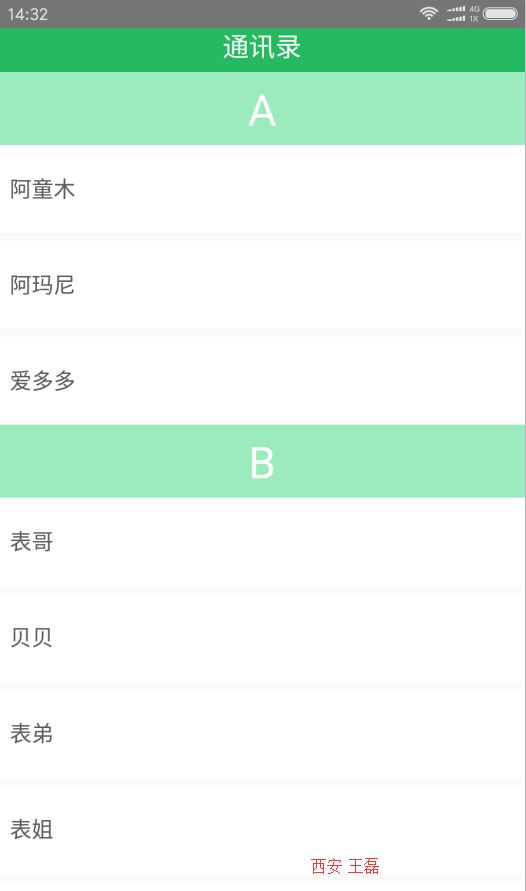
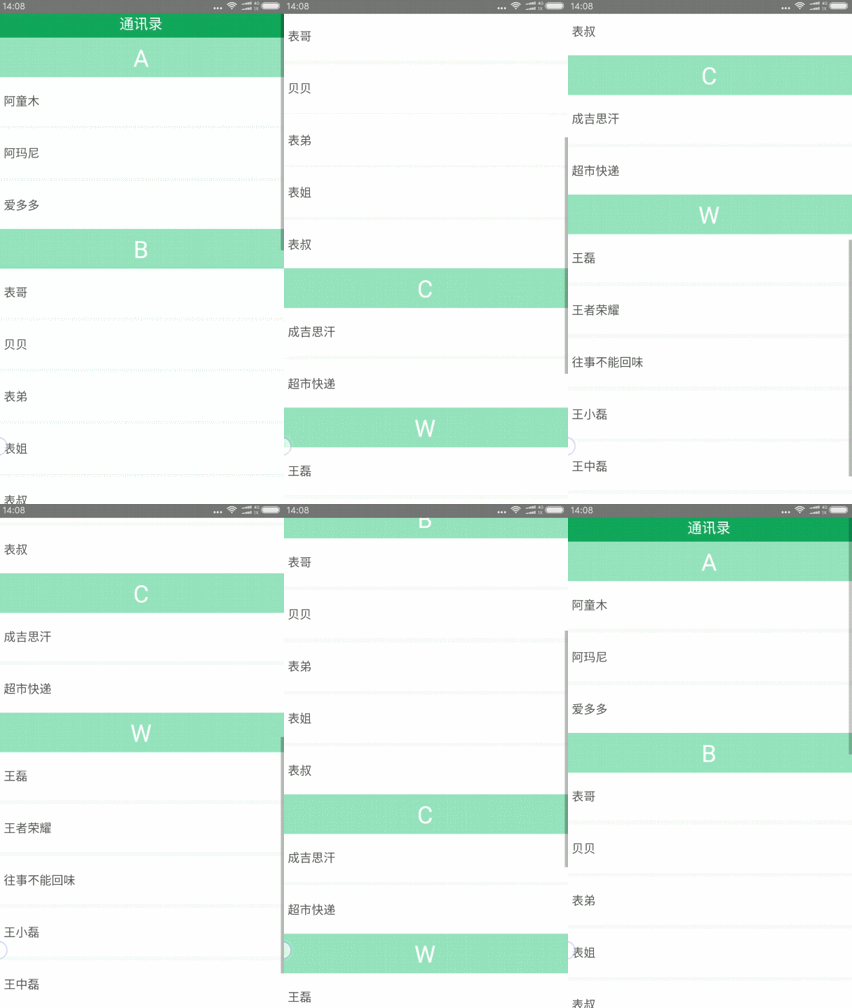
ReactNative分组列表SectionList使用详情及示例详解
《逻辑性最强的React Native环境搭建与调试》
《ReactNative开发工具有这一篇足矣》
《解决React Native unable to load script from assets index.android.bundle on windows》
《React Native App设置&Android版发布》
《史上最易懂——ReactNative分组列表SectionList使用详情及示例详解》
目录
1、SectionList简述
2、SectionList常用属性和方法
3、SectionList示例,通讯录实现以及源码
正文
1、SectionList简述
ReactNative长列表数据组件一共有三个:
ListView 核心组件,数据量大时性能较差,占用内存持续增加,故设计出来FlatList组件。
FlatList 用于替代ListView,支持下拉刷新和上拉加载。
SectionList 高性能的分组列表组件。
本文重点介绍SectionList,SectionList支持下面的常用功能:
完全跨平台
支持水平布局模式
行组件显示或隐藏时可配置回调事件
支持单独的头部组件
支持单独的尾部组件
支持自定义行间分隔线
支持下拉刷新
支持上拉 加载
2、SectionList常用属性和方法
属性集合
属性名 |
类型 |
说明 |
| sections |
Array |
数据源 |
| ItemSeparatorComponent |
|
行与行之间的分隔线组件。不会出现在第一行之前和最后一行之后 |
| SectionSeparatorComponent |
ReactClass |
每个section之间的分隔组件 |
| ListEmptyComponent | ReactClass |
列表为空时渲染该组件。可以是React Component, 也可以是一个render函数, 或者渲染好的element。 |
| ListFooterComponent |
|
尾部组件 |
| ListHeaderComponent |
|
头部组件 |
| columnWrapperStyle |
|
如果设置了多列布局(即将 |
| data |
|
为了简化起见,data属性目前只支持普通数组。如果需要使用其他特殊数据结构,例如immutable数组,请直接使用更底层的 |
| extraData |
any |
如果有除 |
| getItem |
any |
获取控件的绑定数据 |
| getItemCount |
any |
获取绑定数据的条数 |
| getItemLayout |
|
getItemLayout = { (data , index ) = > ( {length : 行高 , offset : 行高 * index , index } ) } 注意如果你指定了 |
| horizontal |
|
设置为true则变为水平布局模式。 |
| initialNumToRender |
number |
指定一开始渲染的元素数量,最好刚刚够填满一个屏幕,这样保证了用最短的时间给用户呈现可见的内容。注意这第一批次渲染的元素不会在滑动过程中被卸载,这样是为了保证用户执行返回顶部的操作时,不需要重新渲染首批元素。 |
| keyExtractor |
|
此函数用于为给定的item生成一个不重复的key。Key的作用是使React能够区分同类元素的不同个体,以便在刷新时能够确定其变化的位置,减少重新渲染的开销。若不指定此函数,则默认抽取 |
| legacyImplementation |
|
设置为true则使用旧的ListView的实现 |
| numColumns |
|
多列布局只能在非水平模式下使用,即必须是 |
| onEndReached |
|
当列表被滚动到距离内容最底部不足 |
| onEndReachedThreshold |
number |
决定当距离内容最底部还有多远时触发 |
| onRefresh |
|
如果设置了此选项,则会在列表头部添加一个标准的 |
| onViewableItemsChanged |
|
在可见行元素变化时调用。可见范围和变化频率等参数的配置请设置 |
| refreshing |
|
在等待加载新数据时将此属性设为true,列表就会显示出一个正在加载的符号 |
| renderItem |
|
根据行数据 |
| viewabilityConfig |
|
请参考 |
方法集合:
| 方法名 | 类型 | 说明 |
| scrollToEnd |
params?: object |
滚动到底部。如果不设置 |
| scrollToIndex |
params: object |
如果不设置 |
| scrollToItem |
params: object |
Requires linear scan through data - use |
| scrollToOffset |
params: object |
Scroll to a specific content pixel offset, like a normal |
| recordInteraction |
Tells the list an interaction has occured, which should trigger viewability calculations, e.g. if |
3、SectionList示例,通讯录实现以及源码
源码:
import React, { Component } from 'react';
import {
  AppRegistry,
  View,
  Text,
  SectionList,
} from 'react-native';


class HomeScreen extends React.Component {

  constructor(props) {
    super(props);
  }

  _renderItem = (info) => {
    var txt = '  ' + info.item.title;
    return <Text
      style={{ height: 60, textAlignVertical: 'center', backgroundColor: "#ffffff", color: '#5C5C5C', fontSize: 15 }}>{txt}Text>
  }

  _sectionComp = (info) => {
    var txt = info.section.key;
    return <Text
      style={{ height: 50, textAlign: 'center', textAlignVertical: 'center', backgroundColor: '#9CEBBC', color: 'white', fontSize: 30 }}>{txt}Text>
  }

  render() {
    var sections = [
      { key: "A", data: [{ title: "阿童木" }, { title: "阿玛尼" }, { title: "爱多多" }] },
      { key: "B", data: [{ title: "表哥" }, { title: "贝贝" }, { title: "表弟" }, { title: "表姐" }, { title: "表叔" }] },
      { key: "C", data: [{ title: "成吉思汗" }, { title: "超市快递" }] },
      { key: "W", data: [{ title: "王磊" }, { title: "王者荣耀" }, { title: "往事不能回味" },{ title: "王小磊" }, { title: "王中磊" }, { title: "王大磊" }] },
    ];

    return (
      <View style={{ flex: 1 }}>
        <SectionList
          renderSectionHeader={this._sectionComp}
          renderItem={this._renderItem}
          sections={sections}
          ItemSeparatorComponent={() => <View><Text>Text>View>}
          ListHeaderComponent={() => <View style={{ backgroundColor: '#25B960', alignItems: 'center', height: 30 }}><Text style={{ fontSize: 18, color: '#ffffff' }}>通讯录Text>View>}
          ListFooterComponent={() => <View style={{ backgroundColor: '#25B960', alignItems: 'center', height: 30 }}><Text style={{ fontSize: 18, color: '#ffffff' }}>通讯录尾部Text>View>}
        />
      View>
    );
  }

}

AppRegistry.registerComponent('App', () => HomeScreen);
附源码github地址: https://github.com/vipstone/react-nation-sectionlist

