第一步:先安装两个mysql,我分别装在了
192.168.45.128
192.168.45.131
第二步;修改 Master 配置文件
命令:vim /etc/my.cnf
分别修改其中的server_id和log_in
第三步:重启MySQL,并连接
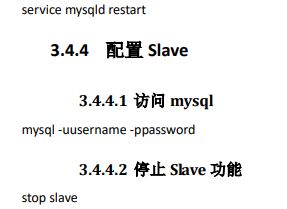
命令:service mysqld restart
mysql -uusername -ppassword
第四步:
在 MySQL 数据库中,为不存在的用户授权,就是同步创建用户并授权. 此用户是从库访问主库使用的用户 ip 地址不能写为%. 因为主从备份中,当前创建的用户,是给从库 Slave 访问主库 Master 使用的.用户必须有指定的访问地址.不能是通用地址.
grant all privileges on *.* to ‘username’@’ip’ identified by ‘password’ with grant option;
flush privileges;
grant all privileges on *.* to 'myslave'@'192.168.70.149' identified by 'myslave' with grant option;
flush privileges;
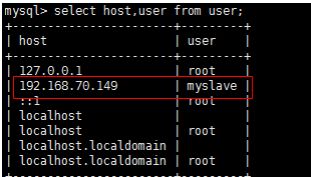
第五步:查看用户
use mysql;
select host, name from user;
第六步:查看master状态
show master status;
至此,master配置完毕
接下来配置slave‘
第一步:修改配置文件信息,我们这次只需要给server_id修改
vim /etc/my.cnf
第二步:
就是重新启动MySQL,连接mysql,停止slave服务
命令分别是
配置主库信息 需要修改的数据是依据 Master 信息修改的. ip 是 Master 所在物理机 IP. 用户名和密码是 Master 提供的 Slave 访问用户名和密码. 日志文件是在 Master 中查看的主库信息提供的.在 Master 中使用命令 show master status 查看日志文件名称.
change master to master_host=’ip’, master_user=’username’, master_password=’password’, master_log_file=’log_file_name’; change master to master_host='192.168.70.148',master_user='myslave',master_password='myslave',master_log_file='master_log.000001';
然后启动
start slave
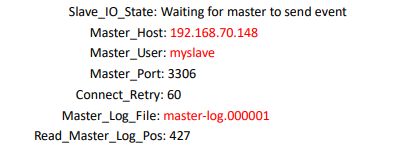
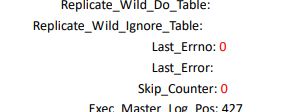
查看slave
show slave status \G;
如果最后显示这些红色点,也就搭建成功了。


