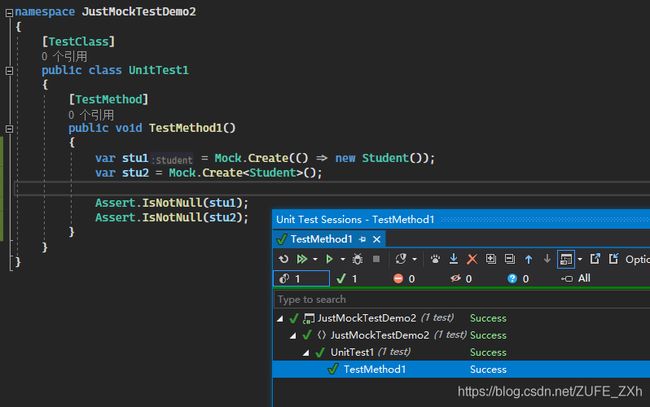
【开始——将 Telerik JustMock 添加到测试项目中】Getting Started - Add Telerik JustMock to Your Test Project
This topic demonstrates how to use Telerik® JustMock in a new test project or integrate it in your existing project.
本章将演示如何在新测试项目中使用 Telerik JustMock 或将其集成到现有项目中。
Before proceeding further, make sure you have successfully completed Installation and Setup.
在此之前,请确保已成功完成安装和设置。
Create New Project with JustMock Test Project Template
使用 JustMock 测试项目模板创建新项目
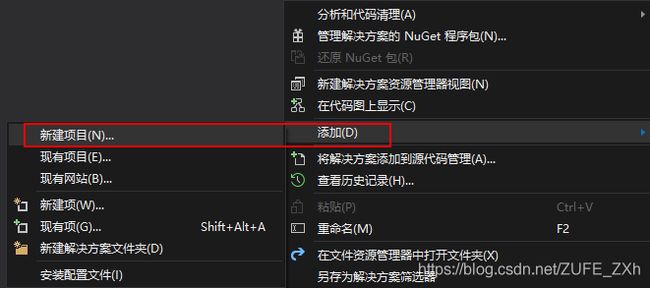
- Start by adding a new test project to your Solution. Right click on the Solution, select Add, then New Project…
首先向解决方案中添加一个新的测试项目。右击解决方案,选择“添加” ,然后选择“新建项目” ..。
2. Select the Test Project template. Enter a Name and click OK.
选择 Test Project 模板。下一步输入名称然后确认。
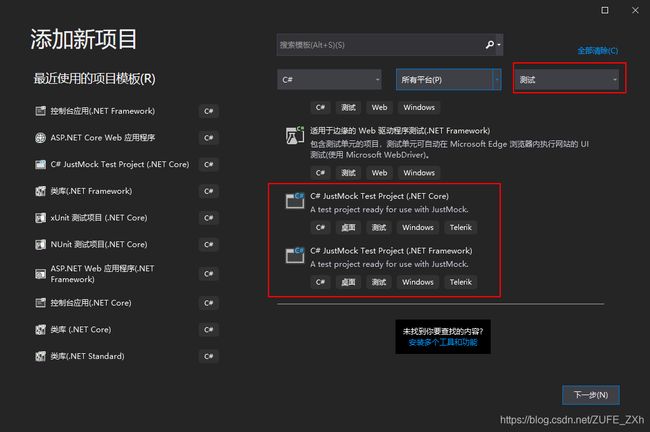
3. Using the default JustMock Test Project template, you can start writing JustMock tests right away.
使用默认的 JustMock Test Project 模板,你就可以开始编写 JustMock 测试了。
Add JustMock to a Test Project
将 JustMock 添加到测试项目
If you want to apply JustMock to an existing unit test project, you need to add a reference to Telerik.JustMock.Dll.
如果您希望将 JustMock 应用于现有测试项目中,则需要添加对 Telerik 的引用 Telerik.JustMock.Dll。
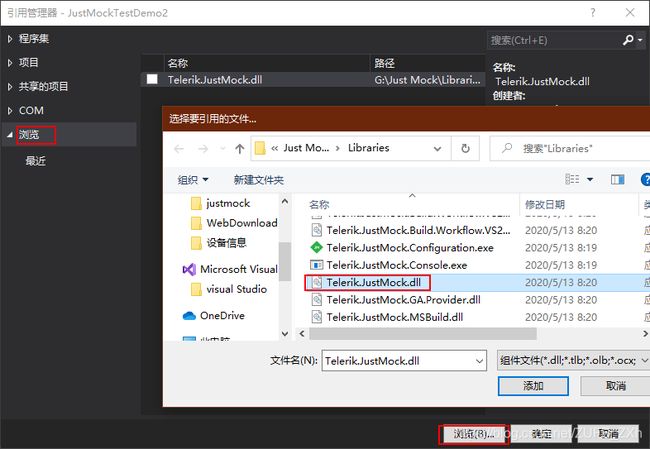
- Right click on your test project and select Add Reference.
右键单击测试项目中的引用,添加引用。 浏览在你的安装目录中找到Telerik.JustMock.Dll。
- Go to the Browse tab and navigate to the Libraries folder in the JustMock installation directory (by default C:\Program Files (x86)\Progress\Telerik JustMock\Libraries). Select Telerik.JustMock.dll and click OK.
转到“浏览”选项卡并找到 JustMock 安装目录中的 Libraries 文件夹(默认情况下是 c:\Program Files (x86)\Progress\Telerik JustMock\Libraries)。选择Telerik.JustMock.dll。
3. Further, you will need to include the Telerik.JustMock namespace into your test project.
此外,您还需要在测试项目中引用命名空间Telerik.JustMock。
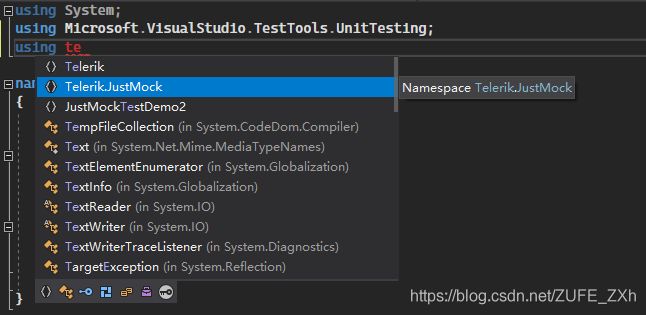
4. Finally, you are ready to create your first test with JustMock.
最后,您可以使用 JustMock 创建你的第一个测试了。


