cocos2d-x在Android的运行流程始末
由于Android的应用层是从Activity开始的,也就是创建完一个Cocos2dx后src文件夹下的Java文件。其中主要看Activity创建时的操作:
    protected void onCreate(Bundle savedInstanceState){
		super.onCreate(savedInstanceState);
	}
这个方法很简单,就是调用父类的onCreate方法,也就是,这个自定义的Activity不做什么,把所有的动作都交给了它的父类Cocos2dxActivity去操作
	@Override
	protected void onCreate(final Bundle savedInstanceState) {
		super.onCreate(savedInstanceState);
		sContext = this;
    	this.mHandler = new Cocos2dxHandler(this);

    	this.init();

		Cocos2dxHelper.init(this, this);
}public void init() {
/*
Adnroid窗口布局参数的作用(从网上获取)
1)fill_parent
设置一个构件的布局为fill_parent将强制性地使构件扩展,以填充布局单元内尽可能多的空间。这跟Windows控件的dockstyle属性大体一致。设置一个顶部布局或控件为fill_parent将强制性让它布满整个屏幕。
2) wrap_content
设置一个视图的尺寸为wrap_content将强制性地使视图扩展以显示全部内容。以TextView和ImageView控件为例,设置为wrap_content将完整显示其内部的文本和图像。布局元素将根据内容更改大小。设置一个视图的尺寸为wrap_content大体等同于设置Windows控件的Autosize属性为True。
3)match_parent
Android2.2中match_parent和fill_parent是一个意思 .两个参数意思一样,match_parent更贴切,于是从2.2开始两个词都可以用。那么如果考虑低版本的使用情况你就需要用fill_parent了
*/
//初始化窗口布局
ViewGroup.LayoutParams framelayout_params =
new ViewGroup.LayoutParams(ViewGroup.LayoutParams.FILL_PARENT,
ViewGroup.LayoutParams.FILL_PARENT);
FrameLayout framelayout = new FrameLayout(this);
framelayout.setLayoutParams(framelayout_params);
//初始化Cocos2dx的文本编辑布局
ViewGroup.LayoutParams edittext_layout_params =
new ViewGroup.LayoutParams(ViewGroup.LayoutParams.FILL_PARENT,
ViewGroup.LayoutParams.WRAP_CONTENT);
Cocos2dxEditText edittext = new Cocos2dxEditText(this);
edittext.setLayoutParams(edittext_layout_params);
framelayout.addView(edittext);
//初始化Cocos2dx视图
this.mGLSurfaceView = this.onCreateView();
//把Cocos2dxGLSurfaceView加入到当前的窗口布局中
framelayout.addView(this.mGLSurfaceView);
// Switch to supported OpenGL (ARGB888) mode on emulator
//在模拟器中切换支持OpenGL模式的渲染(ARGB888)
if (isAndroidEmulator())
this.mGLSurfaceView.setEGLConfigChooser(8 , 8, 8, 8, 16, 0);
//设置Cocos2dx的渲染器
this.mGLSurfaceView.setCocos2dxRenderer(new Cocos2dxRenderer());
//设置Cocos2dx的文本编辑
this.mGLSurfaceView.setCocos2dxEditText(edittext);
//把显示布局(即Cocos2dx的视图)绑定到Activity上,建立显示窗口
setContentView(framelayout);
}首先在init中先看this.mGLSurfaceView = this.onCreateView(); this.mGLSurfaceView是一个Cocos2dxGLSurfaceView类。在进入到Cocos2dxGLSurfaceView这个类中可以看到时继承于GLSurfaceView(可以把GLSurfaceView看成一个视图,里面有个方法设置了这个视图的渲染器,然后通过这个渲染器来进行画面的渲染)。
在Android中,GLSurfaceView是一个支持OpenGL的渲染视图,通过继承SurfaceView中的surface来渲染OpenGL
并提供了以下特性(来自于网上)
1> 管理一个surface,这个surface就是一块特殊的内存,能直接排版到android的视图view上。
2> 管理一个EGL display,它能让opengl把内容渲染到上述的surface上。
3> 用户自定义渲染器(render)。
4> 让渲染器在独立的线程里运作,和UI线程分离。
5> 支持按需渲染(on-demand)和连续渲染(continuous)。
6> 一些可选工具,如调试。
重点是自定义的渲染器,也就是Cocos2dx引擎封装的渲染器。进入Cocos2dxRenderer类,看到他是继承GLSurfaceView.Renderer接口,这个接口定义了三个方法:
onSurfaceCreated: 创建GLSurfaceView时被调用,只调用一次,做初始化工作
onSurfaceChanged: 当GLSurfaceView的几何体被改变时被调用
onDrawFrame: 绘制渲染GLSurfaceView
1. onSurfaceCreated:
	@Override
	public void onSurfaceCreated(final GL10 pGL10, final EGLConfig pEGLConfig) {
		Cocos2dxRenderer.nativeInit(this.mScreenWidth, this.mScreenHeight);
		this.mLastTickInNanoSeconds = System.nanoTime();
	}
private static native void nativeInit(final int pWidth, final int pHeight);void Java_org_cocos2dx_lib_Cocos2dxRenderer_nativeInit(JNIEnv* env, jobject thiz, jint w, jint h)
{
if (!CCDirector::sharedDirector()->getOpenGLView())
{
CCEGLView *view = CCEGLView::sharedOpenGLView();
view->setFrameSize(w, h);
AppDelegate *pAppDelegate = new AppDelegate();
CCApplication::sharedApplication()->run();
}
else
{
ccGLInvalidateStateCache();
CCShaderCache::sharedShaderCache()->reloadDefaultShaders();
ccDrawInit();
CCTextureCache::reloadAllTextures();
CCNotificationCenter::sharedNotificationCenter()->postNotification(EVENT_COME_TO_FOREGROUND, NULL);
CCDirector::sharedDirector()->setGLDefaultValues();
}
}inline CCEGLView* getOpenGLView(void) { return m_pobOpenGLView; }接下来的两句是是设置窗口大小。而AppDelegate才是入口的重点。
执行完上面的步骤后开始初始化App然后初始化AppDelegate,AppDelegate的初始化过程也很简单。就实现了一个获取AppDelegate的单例。
AppDelegate的构造方法是个空方法
AppDelegate::AppDelegate() {

}class AppDelegate : private cocos2d::CCApplication
// sharedApplication pointer
CCApplication * CCApplication::sm_pSharedApplication = 0;

CCApplication::CCApplication()
{
    CCAssert(! sm_pSharedApplication, "");
    sm_pSharedApplication = this;
}创建完AppDelegate后开始run
int CCApplication::run()
{
    // Initialize instance and cocos2d.
    if (! applicationDidFinishLaunching())
    {
        return 0;
    }

    return -1;
}bool AppDelegate::applicationDidFinishLaunching() {
// initialize director
CCDirector* pDirector = CCDirector::sharedDirector();
CCEGLView* pEGLView = CCEGLView::sharedOpenGLView();
pDirector->setOpenGLView(pEGLView);
// turn on display FPS
pDirector->setDisplayStats(true);
// set FPS. the default value is 1.0/60 if you don't call this
pDirector->setAnimationInterval(1.0 / 60);
// create a scene. it's an autorelease object
CCScene *pScene = HelloWorld::scene();
// run
pDirector->runWithScene(pScene);
return true;
}void CCDirector::runWithScene(CCScene *pScene)
{
CCAssert(pScene != NULL, "This command can only be used to start the CCDirector. There is already a scene present.");
CCAssert(m_pRunningScene == NULL, "m_pRunningScene should be null");
pushScene(pScene);
startAnimation();
}void CCDirector::pushScene(CCScene *pScene)
{
CCAssert(pScene, "the scene should not null");
m_bSendCleanupToScene = false;
m_pobScenesStack->addObject(pScene);
m_pNextScene = pScene;
}在CCDirector的init方法中可以找到m_pobScenesStack的创建。
m_pobScenesStack = new CCArray();
m_pobScenesStack->init();CCArray::CCArray()
: data(NULL)
{
init();
}由于调用了CCArray::init方法,所以只初始了存放一个场景的CCArray类
bool CCArray::init()
{
    return initWithCapacity(1);
}
bool CCArray::initWithCapacity(unsigned int capacity)
{
ccArrayFree(data);
data = ccArrayNew(capacity);
return true;
}这里看下CCArray的实现过程
在初始化这个CCArray时,先会清空这个CCArray的所有对象,然后创建ccArray这个结构体。
(
其实CCArray中的数据便是这个ccArray结构体中的一个指向CCObject*的数组
typedef struct _ccArray {
	unsigned int num, max;
	CCObject** arr;
} ccArray;
)
ccArray* ccArrayNew(unsigned int capacity)
{
	if (capacity == 0)
		capacity = 1;

	ccArray *arr = (ccArray*)malloc( sizeof(ccArray) );
	arr->num = 0;
	arr->arr =  (CCObject**)calloc(capacity, sizeof(CCObject*));
	arr->max = capacity;

	return arr;
}calloc在动态分配完内存后,自动初始化该内存空间为零,而malloc不初始化,里边数据是随机的垃圾数据(注意:由于CCArray存放是CCObject指针,在调用calloc时会连续分配长度为sizeof(CCObject*)的内存大小)
最后把当前的场景存到m_pobScenesStack中,最后让m_pNextScene指向该场景
由此可以看到切换场景时不推荐使用pushScene,因为pushScene会不断的把新的场景加到m_pobScenesStack中,而不释放上一个场景的内存空间,导致内存会急剧增长,如果创建的场景很多的话。所以如果要使用pushScene一般的做法便是在创建完一个场景后插入到m_pobScenesStack的头部,然后调用popScene回收上一个场景的内存。(这样的做法会破坏掉栈的先进后出的原则,是不推荐的做法,因为popScene本来就是一个模拟出栈的方法)
void CCDirector::popScene(void)
{
    CCAssert(m_pRunningScene != NULL, "running scene should not null");

    m_pobScenesStack->removeLastObject();
    unsigned int c = m_pobScenesStack->count();

    if (c == 0)
    {
        end();//没有场景,游戏结束(设置一个参数,使Cocos2dx退出主循环来达到目的)
    }
    else
    {
        m_bSendCleanupToScene = true;
        m_pNextScene = (CCScene*)m_pobScenesStack->objectAtIndex(c - 1);
    }
}
再看下replaceScene
void CCDirector::replaceScene(CCScene *pScene)
{
    CCAssert(m_pRunningScene, "Use runWithScene: instead to start the director");
    CCAssert(pScene != NULL, "the scene should not be null");

    unsigned int index = m_pobScenesStack->count();

    m_bSendCleanupToScene = true;
    m_pobScenesStack->replaceObjectAtIndex(index - 1, pScene);

    m_pNextScene = pScene;
}
void CCArray::replaceObjectAtIndex(unsigned int index, CCObject* pObject, bool bReleaseObject/* = true*/)
{
    ccArrayInsertObjectAtIndex(data, pObject, index);
    ccArrayRemoveObjectAtIndex(data, index+1);
}先不扯那么多,执行完场景压栈后会调用startAnimation,这个从这个方法开始便会开始又切换到Java应用中
void CCDisplayLinkDirector::startAnimation(void)
{
    if (CCTime::gettimeofdayCocos2d(m_pLastUpdate, NULL) != 0)
    {
        CCLOG("cocos2d: DisplayLinkDirector: Error on gettimeofday");
    }

    m_bInvalid = false;
#ifndef EMSCRIPTEN
    CCApplication::sharedApplication()->setAnimationInterval(m_dAnimationInterval);
#endif // EMSCRIPTEN
}
void CCApplication::setAnimationInterval(double interval)
{
    JniMethodInfo methodInfo;
    if (! JniHelper::getStaticMethodInfo(methodInfo, "org/cocos2dx/lib/Cocos2dxRenderer", "setAnimationInterval",
        "(D)V"))
    {
        CCLOG("%s %d: error to get methodInfo", __FILE__, __LINE__);
    }
    else
    {
        methodInfo.env->CallStaticVoidMethod(methodInfo.classID, methodInfo.methodID, interval);
    }
}public static void setAnimationInterval(final double pAnimationInterval) {
Cocos2dxRenderer.sAnimationInterval = (long) (pAnimationInterval * Cocos2dxRenderer.NANOSECONDSPERSECOND);
}这样Cocos2dx的GLSurfaceView的创建边执行完毕了。(在创建过程并没有执行Cocos2dx的主循环)
2. onSurfaceChanged:
第二个方法是空实现,略过
@Override
public void onSurfaceChanged(final GL10 pGL10, final int pWidth, final int pHeight) {
}
3. onDrawFrame:
第三个方法是绘制方法。
@Override
public void onDrawFrame(final GL10 gl) {
	Cocos2dxRenderer.nativeRender();
}
private static native void nativeRender();JNIEXPORT void JNICALL Java_org_cocos2dx_lib_Cocos2dxRenderer_nativeRender(JNIEnv* env) {
cocos2d::CCDirector::sharedDirector()->mainLoop();
}这里借鉴上网络上的一段关于Android的渲染逻辑。
游戏引擎要兼顾UI事件和屏幕帧刷新。Android的OpenGL应用采用了UI线程(Main Thread) + 渲染线程(Render Thread)的模式。Activity活在Main Thread(主线程)中,也叫做UI线程。该线程负责捕获与用户交互的信息和事件,并与渲染(Render)线程交互。比如当用户接听电话、切换到其他 程序时,渲染线程必须知道发生了 这些事件,并作出即时的处理,而这些事件及处理方式都是由主线程中的Activity以及其装载的View传递给渲染线程的。
上面的那段话说明Android的渲染便是不断执行Cocos2dx的主函数,因为屏幕每时每刻都会在渲染,每渲染一次调用一次Cocos2dx主函数来绘制游戏的画面。
接下俩看下游戏的结束过程。
Cocos2dx的结束控制是放在主循环中判断:
void CCDisplayLinkDirector::mainLoop(void)
{
    if (m_bPurgeDirecotorInNextLoop)//退出主循环的标志
    {
        m_bPurgeDirecotorInNextLoop = false;
        purgeDirector();//清空导演类
    }
    else if (! m_bInvalid)
     {
         drawScene();//渲染节点树

         // release the objects
         CCPoolManager::sharedPoolManager()->pop();//内存管理
     }
}void CCDirector::end()
{
m_bPurgeDirecotorInNextLoop = true;
}接下来便是purgeDirector方法:
void CCDirector::purgeDirector()
{
    //清空定时器
    getScheduler()->unscheduleAll();

    // don't release the event handlers
    // They are needed in case the director is run again
    //清空触摸分发器
    m_pTouchDispatcher->removeAllDelegates();

    if (m_pRunningScene)//如果还有场景在运行,清空此场景
    {
        m_pRunningScene->onExitTransitionDidStart();
        m_pRunningScene->onExit();
        m_pRunningScene->cleanup();
        m_pRunningScene->release();
    }
    //防止指向其他地址
    m_pRunningScene = NULL;
    m_pNextScene = NULL;

    //清空场景栈
    m_pobScenesStack->removeAllObjects();
    //停止继续渲染
    stopAnimation();
    //清空显示左下角的显示文本
    CC_SAFE_RELEASE_NULL(m_pFPSLabel);
    CC_SAFE_RELEASE_NULL(m_pSPFLabel);
    CC_SAFE_RELEASE_NULL(m_pDrawsLabel);

    //清空CCLabelBMFont文本类的缓存数据
    CCLabelBMFont::purgeCachedData();

    //清空所有缓存
    ccDrawFree();
    CCAnimationCache::purgeSharedAnimationCache();
    CCSpriteFrameCache::purgeSharedSpriteFrameCache();
    CCTextureCache::purgeSharedTextureCache();
    CCShaderCache::purgeSharedShaderCache();
    CCFileUtils::purgeFileUtils();
    CCConfiguration::purgeConfiguration();

    //清空CCUserDefault和CCNotificationCenter
    CCUserDefault::purgeSharedUserDefault();
    CCNotificationCenter::purgeNotificationCenter();

    ccGLInvalidateStateCache();

    CHECK_GL_ERROR_DEBUG();

    //清空视图
    m_pobOpenGLView->end();
    m_pobOpenGLView = NULL;

    //删除导演
    release();
}
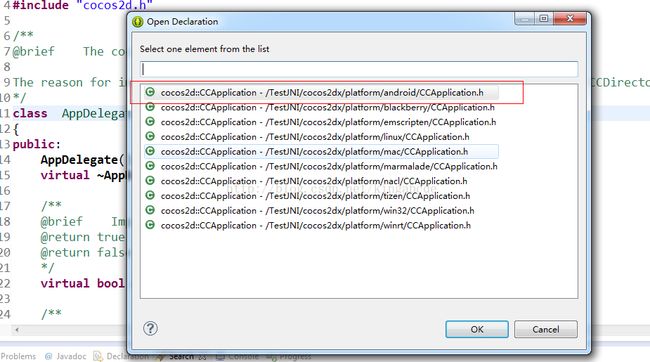
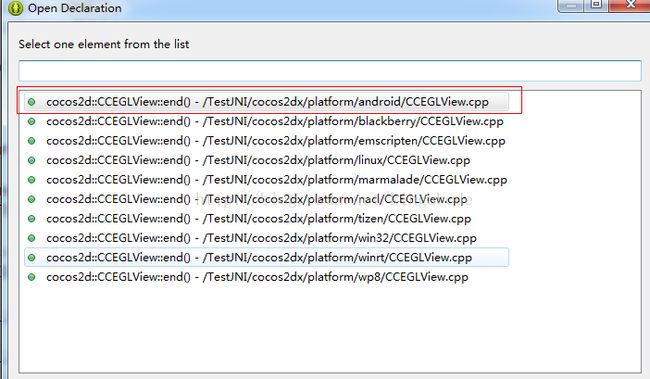
其中主要看m_pobOpenGLView->end()的实现。这个方法每个平台都有自己不同的实现方式,这里选择Android平台。
void CCEGLView::end()
{
    //终止进程
    terminateProcessJNI();
}
#define CLASS_NAME "org/cocos2dx/lib/Cocos2dxHelper"
void terminateProcessJNI() {
JniMethodInfo t;
if (JniHelper::getStaticMethodInfo(t, CLASS_NAME, "terminateProcess", "()V")) {
t.env->CallStaticVoidMethod(t.classID, t.methodID);
t.env->DeleteLocalRef(t.classID);
}
}public static void terminateProcess() {
android.os.Process.killProcess(android.os.Process.myPid());
}至此,整个Cocos2dx游戏在Android的运行始末便结束了。
