【ElasticSearch】分布式安装&集群部署(6.2.2)版本
文章目录
-
- 前言
- 一、安装nodejs
- 二、安装elasticsearch
- 三、安装elasticsearch-head监控elasticsearch集群环境
- 四、Kibana部署安装
前言
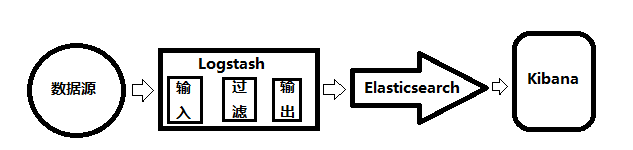
ELK是三个开源软件的缩写,分别表示:Elasticsearch 、Logstash、Kibana。作为大数据入门的基本功,让我们在虚拟机上对以上三个软件进行安装,小伙伴们平时还需要多加练习。
- Elasticsearch:是个开源分布式搜索引擎,提供搜集、分析、存储数据三大功能。它的特点有:分布式,零配置,自动发现,索引自动分片,索引副本机制,restful风格接口,多数据源,自动搜索负载等。
- Logstash:主要是用来日志的搜集、分析、过滤日志的工具,支持大量的数据获取方式。一般工作方式为c/s架构,client端安装在需要收集日志的主机上,server端负责将收到的各节点日志进行过滤、修改等操作在一并发往elasticsearch上去。
- Kibana:可以为 Logstash 和 ElasticSearch 提供的日志分析友好的 Web 界面,可以帮助汇总、分析和搜索重要数据日志。
一、安装nodejs
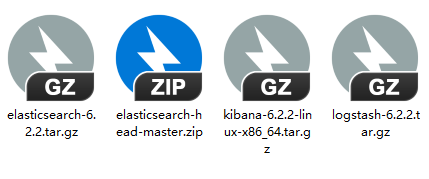
先将以下四个文件通过xftp上传至虚拟机的/opt/目录下
1、由于博主这里是最小化安装先安装get
1.yum install -y wget
2、考虑需要安装elasticsearch-head作为web展示 所以首先安装nodejs 主要是利用npm
1.wget https://npm.taobao.org/mirrors/node/v11.0.0/node-v11.0.0.tar.gz

2.tar –zxvf node-v11.0.0.tar.gz
3、这里我们将解压缩后的node-v11.0.0文件移动到soft目录nodell文件下
mv node-v11.0.0 soft/nodell
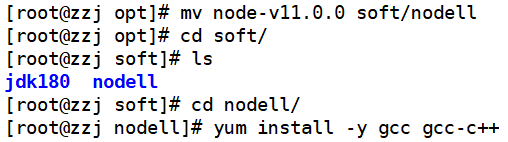
1.yum install gcc gcc-c++

2. ./configure
进行编译和安装
1.make
需要注意的是:make这个过程需要的时间近40分钟,此时我们在xshell6上重新打开一个窗口,进行下面的安装(只有等make的过程结束,才能继续第7、8步)
1.make install

2.node –v
如果出现v11.0.0,那么这一步的安装就算成功了!
二、安装elasticsearch
1、安装3台虚拟机
2、安装jdk ,可以参考这篇博客
手把手教你在Linux环境下安装JDK 1.8.0/Tomcat / MySQL(含字符编码集设置)亲测完美!
3、解压
tar –zxvf elasticsearch-6.2.2
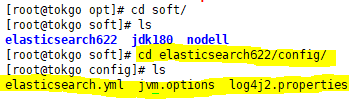
4、将解压缩后的文件elasticsearch-6.2.2移动到soft文件夹elasticsearch622下
1.[root@junyu opt]# mv elasticsearch-6.2.2 soft/elasticsearch622
2.[root@zzj opt]# cd soft/
3.[root@zzj soft]# ls
4.elasticsearch622  jdk180  nodell
5、进入elasticsearch622文件夹下,我们发现有三个文件
6、对elasticsearch.yml文件进行配置修改
1.cluster.name: es-app #集群名称,可以自行修改
2.node.name: es-1 #节点名称,自行修改
3.network.host: 192.168.235.133 #主机地址,这里写本机IP
4.http.port: 9200 #端口
5.http.cors.enabled: true #设置跨域
6.http.cors.allow-origin: "*" #设置访问
7、再启动查看不能启动原因
[1]: max file descriptors [4096] for elasticsearch process is too low, increase to at least [65536]
[2]: max virtual memory areas vm.max_map_count [65530] is too low, increase to at least [262144]
8、问题 1 系统最大文件数太低
1.修改 vi /etc/security/limits.conf 文件末尾追加
2.cm soft nofile 65536
3.cm hard nofile 131072
4.cm soft nproc 4096
5.cm hard nproc 4096
9、问题 2 虚拟内存太低
1.修改vi /etc/sysctl.conf文件末尾追加

2.vm.max_map_count=655360

3.激活文件

4.[root@tokgo config]# sysctl -p

5.vm.max_map_count = 655360
10、新增用户XXX,修改密码
1.[root@tokgo config]# useradd XXX

2.[root@tokgo config]# passwd XXX
11、修改用户权限
1.[root@tokgo config]# ll /etc/sudoers
2.-r--r-----. 1 root root 3907 Nov  4  2016 /etc/sudoers
3.[root@tokgo config]# chmod u+w /etc/sudoers
4.[root@tokgo config]# ll /etc/sudoers
5.-rw-r-----. 1 root root 3907 Nov  4  2016 /etc/sudoers
6.// 我们可以看到这里已经对用户添加可写权限
7.vi /etc/sudoers
![]()
在root用户下面 加入你创建的用户
1.XXX		ALL=(ALL)        ALL
2.!!! 注意这里用	Tab进行空格
12、此时有可能出现问题3 iii.java.nio.file.AccessDeniedException: …/elasticsearch-6.2.2/config/jvm.options
1.chown 用户名 elasticsearch-6.2.2安装目录路径 -R

2.chown XXX -R /opt/soft/elasticsearch622/
13、切换用户 su XXX(elasticsearch 不能在root用户下启动)
//我们先退回到bin目录下,再切换用户
[root@tokgo config]# cd ..
[root@tokgo elasticsearch622]# cd bin/
[root@tokgo bin]# su XXX

//查看目录下文件
[XXX@tokgo bin]$ ls
elasticsearch          elasticsearch-keystore      elasticsearch-service.bat      elasticsearch-translog.bat
elasticsearch.bat      elasticsearch-keystore.bat  elasticsearch-service-mgr.exe
elasticsearch-env      elasticsearch-plugin        elasticsearch-service-x64.exe
elasticsearch-env.bat  elasticsearch-plugin.bat    elasticsearch-translog

//启动elasticsearch
[XXX@tokgo bin]$ ./elasticsearch
14、测试,这时候可能会出现不成功的情况,需要重启网络并关闭防火墙,再重新测试
[root@tokgo nodell]# systemctl restart network
[root@tokgo nodell]# systemctl stop firewalld
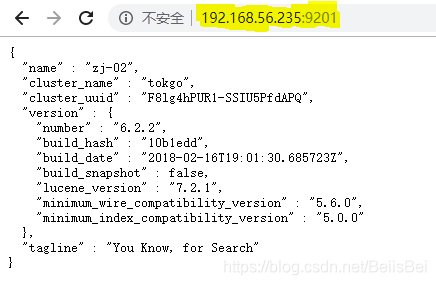
到这里我们elasticsearch安装的第一步已经成功!
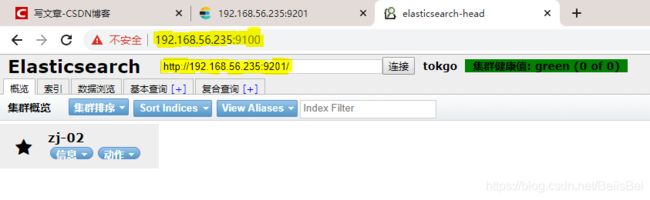
三、安装elasticsearch-head监控elasticsearch集群环境
1、在opt文件夹下安装一下zip解压缩
yum install -y zip unzip
2、对elasticsearch-head-master.zip进行解压缩
unzip elasticsearch-head-master.zip
3、移动到soft文件夹下
mv elasticsearch-head-master soft/elasticsearchhead
4、在elasticsearchhead文件夹下
npm install

//启动elasticsearch-head
npm run start

//如果提示没有bzip2工具,需要安装一下
yum install -y bzip2
四、Kibana部署安装
1、解压缩 gz 文件
tar -zxvf kibana-6.2.2-linux-x86_64.tar.gz
2、移动文件到soft/kibana622
mv kibana-6.2.2-linux-x86_64 soft/kibana622
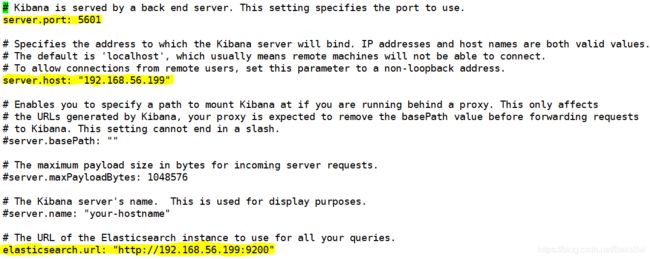
3、进入kibana622文件夹下,修改kibana.yml配置文件
[root@tokgo kibana622]# cd config/
[root@tokgo config]# vi kibana.yml
4、修改kibana.yml,改动下面三处
5、到bin目录下,启动kibana
[root@tokgo kibana622]# cd bin/
[root@tokgo bin]# ls
kibana  kibana-keystore  kibana-plugin
[root@tokgo bin]# ./kibana

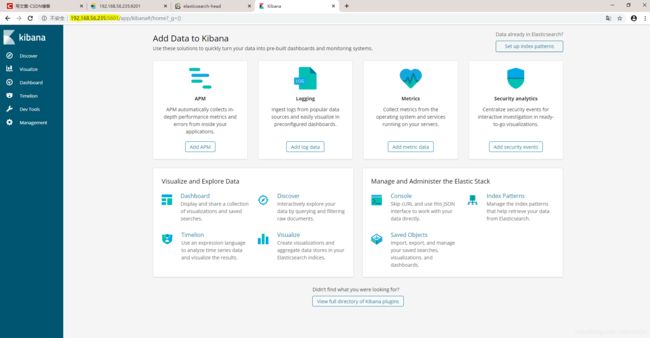
出现如上页面,说明kibana到这里也就安装成功了!
转自:https://blog.csdn.net/BeiisBei/article/details/103342944