初识 OpenCV 之直线,圆,矩形,椭圆,乱舞 详解每个参数
基于OpenCv基础的画直线,圆形。。。等等
详解每个参数
画线 cv::line (LINE_4\LINE_8\LINE_AA)
@param img Image.原图片
@param pt1 First point of the line segment.起点坐标
@param pt2 Second point of the line segment.终点坐标
@param color Line color.颜色
@param thickness Line thickness.厚度
@param lineType Type of the line, see cv::LineTypes.类型
@param shift Number of fractional bits in the point coordinates.小数位数的移位数
*/
CV_EXPORTS_W void line(InputOutputArray img, Point pt1, Point pt2, const Scalar& color,
int thickness = 1, int lineType = LINE_8, int shift = 0);
void Myline(void)
{
Point p;
p.x = 0;
p.y = 0;
Point q = Point(500, 500);
Scalar color = Scalar(0, 0, 255);
line(src, p, q, color, 2, LINE_AA);
}
画椭圆cv::ellipse
@param img Image.源图
@param center Center of the ellipse.中心
@param axes Half of the size of the ellipse main axes.主轴
@param angle Ellipse rotation angle in degrees.旋转的角度 你试一下0和90就知道懂了
@param startAngle Starting angle of the elliptic arc in degrees.开始的角度 0-360是一圈
@param endAngle Ending angle of the elliptic arc in degrees.结束的角度
@param color Ellipse color.颜色
@param thickness Thickness of the ellipse arc outline, if positive. Otherwise, this indicates that
a filled ellipse sector is to be drawn.、、厚度
@param lineType Type of the ellipse boundary. See the line description.
@param shift Number of fractional bits in the coordinates of the center and values of axes.
*/线的类型
CV_EXPORTS_W void ellipse(InputOutputArray img, Point center, Size axes,
double angle, double startAngle, double endAngle,
const Scalar& color, int thickness = 1,
int lineType = LINE_8, int shift = 0);
void MyEllipse(void) {
Scalar color = Scalar(0, 255, 0);
ellipse(src, Point(src.cols / 2, src.rows / 2), Size(src.cols / 4, src.rows / 8), 0, 0, 360, color, 2, LINE_8);
}
画矩形cv::rectangle
void Myrectangle(void)
{
Rect rect = Rect(150,120,400,200);
Scalar color = Scalar(0, 0, 255);
rectangle(src, rect, color, 2, LINE_8);
}
画圆cv::circle
@param img Image where the circle is drawn.源图
@param center Center of the circle.圆心
@param radius Radius of the circle.半径
@param color Circle color.颜色
@param thickness Thickness of the circle outline, if positive. Negative thickness means that a
filled circle is to be drawn.厚度
@param lineType Type of the circle boundary. See the line description.线的类型
@param shift Number of fractional bits in the coordinates of the center and in the radius value.
*/中心和坐标中的小数位数的移位数
CV_EXPORTS_W void circle(InputOutputArray img, Point center, int radius,
const Scalar& color, int thickness = 1,
int lineType = LINE_8, int shift = 0);
void Mycircle(void)
{
Scalar color = Scalar(0, 0, 255);
Point center = Point(src.rows / 2, src.cols / 2);
circle(src, center, 150, color, 2, 8);
}
画填充cv::fillPoly
@param img Image.源图
@param points Polygon vertices.顶点
@param color Polygon color.颜色
@param lineType Type of the polygon boundaries. See the line description.线的类型
@param shift Number of fractional bits in the vertex coordinates.小数位数的移位数
CV_EXPORTS_W void fillConvexPoly(InputOutputArray img, InputArray points,
const Scalar& color, int lineType = LINE_8,
int shift = 0);
/** @overload */
CV_EXPORTS void fillPoly(Mat& img, const Point** pts,
const int* npts, int ncontours,
const Scalar& color, int lineType = LINE_8, int shift = 0,
Point offset = Point() );
void MyPolygon(void)
{
Point p[1][5];
p[0][0] = Point(100, 100);
p[0][1] = Point(100, 200);
p[0][2] = Point(200, 200);
p[0][3] = Point(200, 100);
p[0][4] = Point(100, 100);
const Point* pp[] = { p[0] };
int n[] = { 5 };
Scalar color = Scalar(255, 12, 255);
fillPoly(src, pp, n, 1, color, 8);
}
显示文体:putText
@param img Image.源图
@param text Text string to be drawn.文本
@param org Bottom-left corner of the text string in the image.坐标
@param fontFace Font type, see cv::HersheyFonts.样式
@param fontScale Font scale factor that is multiplied by the font-specific base size.大小
@param color Text color.颜色
@param thickness Thickness of the lines used to draw a text.厚度
@param lineType Line type. See the line for details.线的类型
@param bottomLeftOrigin When true, the image data origin is at the bottom-left corner. Otherwise,
it is at the top-left corner.左上还是左下。。。这个你试一下就最直观有什么变化了。。。
CV_EXPORTS_W void putText( InputOutputArray img, const String& text, Point org,
int fontFace, double fontScale, Scalar color,
int thickness = 1, int lineType = LINE_8,
bool bottomLeftOrigin = false );
void Mytext(void)
{
putText(src, "Hello OpenCV", Point(300, 300), CV_FONT_HERSHEY_COMPLEX, 1.0, Scalar(12, 23, 200), 3, 8);
}
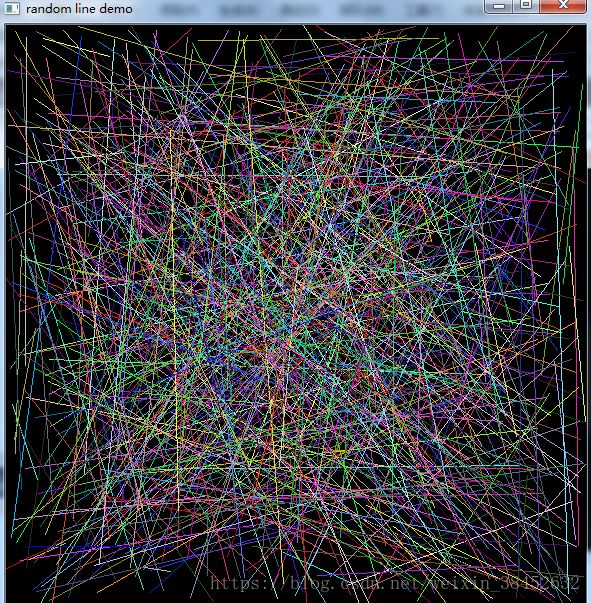
最后一个是群魔乱舞感觉挺酷的,不知道怎么弄个gif上来。。。
颜色随机,长度随机的划线,挺好看的
/** @overload
@param state 64-bit value used to initialize the RNG.
*/
RNG(uint64 state);
给一个64bit的数初始化这个随机数获取算法
inline int RNG::uniform(int a, int b) { return a == b ? a : (int)(next() % (b - a) + a); }
a-b之间的一个数
void RandomLineDemo() {
RNG rng(12345);
Point pt1;
Point pt2;
Mat bg = Mat::zeros(src.size(), src.type());
namedWindow("random line demo", CV_WINDOW_AUTOSIZE);
for (int i = 0; i < 100000; i++) {
pt1.x = rng.uniform(0, src.cols);
pt2.x = rng.uniform(0, src.cols);
pt1.y = rng.uniform(0, src.rows);
pt2.y = rng.uniform(0, src.rows);
Scalar color = Scalar(rng.uniform(0, 255), rng.uniform(0, 255), rng.uniform(0, 255));
if (waitKey(50) > 0) {
break;
}
line(bg, pt1, pt2, color, 1, 8);
imshow("random line demo", bg);
}
}

