- 新建工程
1.1 Create New Project
至此,项目已创建好。
- 配置访问接口
2.1 新建 controller.HelloController 控制器文件
@RestController
public class HelloController {

    @RequestMapping(value = "/hi", method = RequestMethod.GET)
    public String sayHello() {
        return "Hi buddy, How're you today ? ";
    }
}
2.2 修改应用主入口文件MessageSystemApplication,注解添加(exclude = DataSourceAutoConfiguration.class)使其不需要配置数据库。最后如下
@SpringBootApplication(exclude = DataSourceAutoConfiguration.class)
public class MessageSystemApplication {

    public static void main(String[] args) {
        SpringApplication.run(MessageSystemApplication.class, args);
    }

}
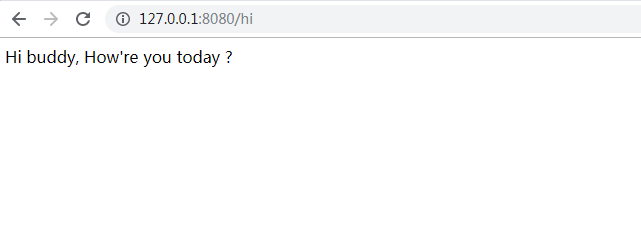
2.3 启动应用,然后在浏览器访问:http://127.0.0.1:8080/hi,服务器相应并返回字符串,如下图:
- 配置阿里云依赖库地址
            alimaven
            Maven Aliyun Mirror
            https://maven.aliyun.com/repository/public

                true


                false
- 配置 MyBatis 应用
4.1 pom.xml 添加依赖和配置
    4.0.0


        org.springframework.boot
        spring-boot-starter-parent
        2.2.5.RELEASE


    cn.longmaster
    message-system
    0.0.1-SNAPSHOT
    message-system
    MessageSystemproject for Spring Boot


        1.8
        UTF-8
        UTF-8


            org.springframework.boot
            spring-boot-starter-web


            org.mybatis.spring.boot
            mybatis-spring-boot-starter
            2.1.1


            mysql
            mysql-connector-java
            runtime


            org.projectlombok
            lombok


            org.springframework.boot
            spring-boot-starter-data-jdbc


            org.springframework.boot
            spring-boot-starter-test
            test


                    org.junit.vintage
                    junit-vintage-engine


                org.springframework.boot
                spring-boot-maven-plugin


                src/main/resources


                src/main/java

                    cn/longmaster/messagesystem/mapper/xml/*.xml


            alimaven
            Maven Aliyun Mirror
            https://maven.aliyun.com/repository/public

                true


                false


            spring-milestones
            Spring Milestones
            https://repo.spring.io/milestone
4.2 配置数据库连接
在resources目录下新建 application.yml 配置文件,并进行数据库配置如下
spring:
  datasource:
    url: jdbc:mysql://127.0.0.1:3306/db_ms?useUnicode=true&&characterEncoding=utf-8&serverTimezone=UTC #注意设置编码格式 #url
    username: root #用户名
    password: longmaster #密码
    driver-class-name: com.mysql.cj.jdbc.Driver #数据库链接驱动

mybatis:
  mapper-locations: classpath:cn/longmaster/messagesystem/mapper/xml/*.xml # 注意:一定要对应mapper映射xml文件的所在路径
  type-aliases-package: cn.longmaster.messagesystem.entity  # 注意:对应实体类的路径
4.3 新建实体类 entity.User
@Data
public class User {
    private int user_id;
    private String job_number;
    private String name;
    private String password;
    private Date birthday;
    private int use_state;
}
4.4 新建 mapper.UserMapper
@Repository
public interface UserMapper {
    /**
     * 新增职工信息
     * @param user
     * @return
     */
    int addUser(@Param("user") User user);
}
4.5 新建 xml, mapper.xml.UserMapper.xml
        INSERT INTO t_user(job_number, name, password, birthday, use_state) VALUES
        (#{user.job_number}, #{user.name}, #{user.password}, #{user.birthday}, 1)
4.6 新建服务类 service.UserService
@Service
public class UserService {
    @Autowired
    UserMapper userMapper;

    public String addUser(User user) {
        if (userMapper.addUser(user) > 0) {
            return "Add Success";
        } else {
            return "Add Fail";
        }
    }
}
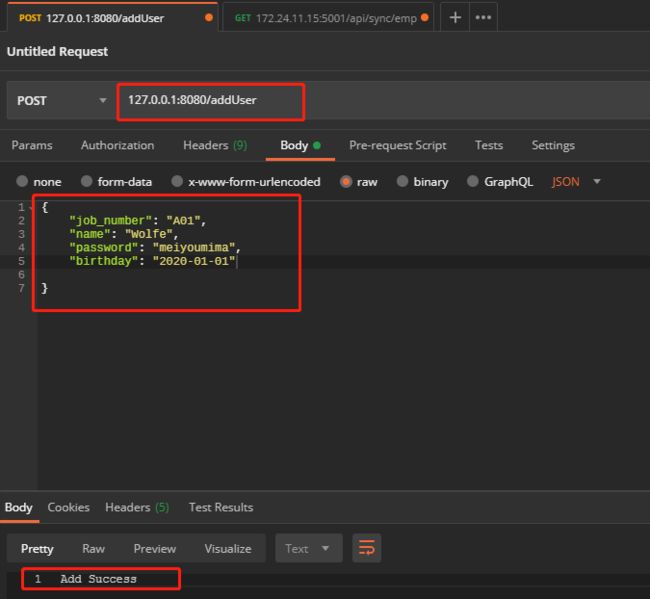
4.7 控制器添加新增方法addUser:
@RestController
public class HelloController {

    @Autowired
    UserService userService;

    @RequestMapping(value = "/hi", method = RequestMethod.GET)
    public String sayHello() {
        return "Hi buddy, How're you today ? ";
    }

    @RequestMapping(value = "/addUser", method = RequestMethod.POST)
    public String addUser(@RequestBody User user) {
        return userService.addUser(user);
    }
}
4.8 应用入口类添加Mapper
@SpringBootApplication
@MapperScan("cn.longmaster.messagesystem.mapper")
public class MessageSystemApplication {

    public static void main(String[] args) {
        SpringApplication.run(MessageSystemApplication.class, args);
    }

}