ShardingSphere 分库分表
什么是 ShardingSphere
Apache ShardingSphere 是一套开源的分布式数据库中间件解决方案组成的生态圈,它由 JDBC、Proxy 和 Sidecar(规划中)这 3 款相互独立,却又能够混合部署配合使用的产品组成。 它们均提供标准化的数据分片、分布式事务和数据库治理功能,可适用于如 Java 同构、异构语言、云原生等各种多样化的应用场景。
- 一套开源的分布式数据库中间件解决方案。
- 有三个产品:JDBC、Proxy、Sidecar。
什么是分库分表
当我们使用读写分离、索引、缓存后,数据库的压力还是很大的时候,这就需要使用到数据库拆分了。
数据库拆分简单来说,就是指通过某种特定的条件,按照某个维度,将我们存放在同一个数据库中的数据分散存放到多个数据库(主机)上面以达到分散单库(主机)负载的效果。
分库分表之垂直拆分
专库专用。一个数据库由很多表的构成,每个表对应着不同的业务,垂直切分是指按照业务将表进行分类,分布到不同的数据库上面,这样也就将数据或者说压力分担到不同的库上面。如下图:

优点:
- 拆分后业务清晰,拆分规则明确。
- 系统之间整合或扩展容易。
- 数据维护简单。
缺点:
- 部分业务表无法 join,只能通过接口方式解决,提高了系统复杂度。
- 受每种业务不同的限制存在单库性能瓶颈,不易数据扩展跟性能提高。
- 事务处理复杂。
分库分表之水平切分
垂直拆分后遇到单机瓶颈,可以使用水平拆分。相对于垂直拆分的区别是:垂直拆分是把不同的表拆到不同的数据库中,而水平拆分是把同一个表拆到不同的数据库中。
相对于垂直拆分,水平拆分不是将表的数据做分类,而是按照某个字段的某种规则来分散到多个库之中,每个表中包含一部分数据。简单来说,我们可以将数据的水平切分理解为是按照数据行的切分,就是将表中的某些行切分到一个数据库,而另外的某些行又切分到其他的数据库中,主要有分表,分库两种模式。如下图:

优点:
- 不存在单库大数据,高并发的性能瓶颈。
- 对应用透明,应用端改造较少。
- 按照合理拆分规则拆分,join 操作基本避免跨库。
- 提高了系统的稳定性跟负载能力。
缺点:
- 拆分规则难以抽象。
- 分片事务一致性难以解决。
- 数据多次扩展难度跟维护量极大。
- 跨库 join 性能较差。
什么是 ShardingSphere-JDBC
定位为轻量级 Java 框架,在 Java 的 JDBC 层提供的额外服务。 它使用客户端直连数据库,以 jar 包形式提供服务,无需额外部署和依赖,可理解为增强版的 JDBC 驱动,完全兼容 JDBC 和各种 ORM 框架。
- 适用于任何基于 JDBC 的 ORM 框架,如:JPA, Hibernate, Mybatis, Spring JDBC Template 或直接使用 JDBC。
- 支持任何第三方的数据库连接池,如:DBCP, C3P0, BoneCP, Druid, HikariCP 等。
- 支持任意实现 JDBC 规范的数据库,目前支持 MySQL,Oracle,SQLServer,PostgreSQL 以及任何遵循 SQL92 标准的数据库。

需要注意的是,分库分表并不是由 ShardingSphere-JDBC 来做,它是用来负责操作已经分完之后的 CRUD 操作。
Sharding-JDBC 分表实操
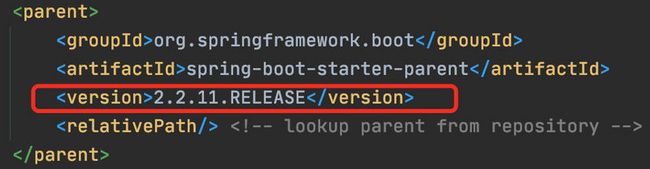
环境使用:Springboot 2.2.11 + MybatisPlus + ShardingSphere-JDBC 4.0.0-RC1 + Druid 连接池
具体 Maven 依赖:
            org.springframework.boot
            spring-boot-starter


            org.springframework.boot
            spring-boot-starter-test


            com.alibaba
            druid-spring-boot-starter
            1.1.20


            mysql
            mysql-connector-java


            org.apache.shardingsphere
            sharding-jdbc-spring-boot-starter
            4.0.0-RC1


            com.baomidou
            mybatis-plus-boot-starter
            3.0.5


            org.projectlombok
            lombok
按照水平分表来创建数据库
- 创建数据库 course_db
- 创建表 course_1 、 course_2
- 约定规则:如果添加的课程 id 为偶数添加到 course_1 中,奇数添加到 course_2 中。
SQL 如下:
create database course_db;

use course_db;

create table course_1 (
    cid bigint(20) primary key ,
    cname varchar(50) not null,
    user_id bigint(20) not null ,
    status varchar(10) not null
) engine = InnoDB;

create table course_2 (
    cid bigint(20) primary key ,
    cname varchar(50) not null,
    user_id bigint(20) not null ,
    status varchar(10) not null
) engine = InnoDB;
配置对应实体类以及 Mapper
/**
 * @author 又坏又迷人
 * 公众号: Java菜鸟程序员
 * @date 2020/11/19
 * @Description: Course实体类
 */
@Data
public class Course {

    private Long cid;
    private String cname;
    private Long userId;
    private String status;

}
mapper:
/**
 * @author 又坏又迷人
 * 公众号: Java菜鸟程序员
 * @date 2020/11/19
 * @Description: mapper
 */
@Repository
@MapperScan("com.jack.shardingspherejdbc.mapper")
public interface CourseMapper extends BaseMapper {

}
启动类配置 MapperScan
@SpringBootApplication
@MapperScan("com.jack.shardingspherejdbc.mapper")
public class ShardingsphereJdbcDemoApplication {

    public static void main(String[] args) {
        SpringApplication.run(ShardingsphereJdbcDemoApplication.class, args);
    }

}
配置 Sharding-JDBC 分片策略
application.properties 内容:
# sharding-jdbc 水平分表策略
# 配置数据源,给数据源起别名
spring.shardingsphere.datasource.names=m1

# 一个实体类对应两张表,覆盖
spring.main.allow-bean-definition-overriding=true

# 配置数据源的具体内容,包含连接池,驱动,地址,用户名,密码
spring.shardingsphere.datasource.m1.type=com.alibaba.druid.pool.DruidDataSource
spring.shardingsphere.datasource.m1.driver-class-name=com.mysql.cj.jdbc.Driver
spring.shardingsphere.datasource.m1.url=jdbc:mysql://localhost:3306/course_db?serverTimezone=GMT%2B8
spring.shardingsphere.datasource.m1.username=root
spring.shardingsphere.datasource.m1.password=123456

# 指定course表分布的情况,配置表在哪个数据库里,表的名称都是什么 m1.course_1,m1.course_2
spring.shardingsphere.sharding.tables.course.actual-data-nodes=m1.course_$->{1..2}

# 指定 course 表里面主键 cid 的生成策略 SNOWFLAKE
spring.shardingsphere.sharding.tables.course.key-generator.column=cid
spring.shardingsphere.sharding.tables.course.key-generator.type=SNOWFLAKE

# 配置分表策略    约定 cid 值偶数添加到 course_1 表,如果 cid 是奇数添加到 course_2 表
spring.shardingsphere.sharding.tables.course.table-strategy.inline.sharding-column=cid
spring.shardingsphere.sharding.tables.course.table-strategy.inline.algorithm-expression=course_$->{cid % 2 + 1}

# 打开 sql 输出日志
spring.shardingsphere.props.sql.show=true
测试代码运行
@RunWith(SpringRunner.class)
@SpringBootTest
class ShardingsphereJdbcDemoApplicationTests {

    @Autowired
    private CourseMapper courseMapper;

    //添加课程
    @Test
    public void addCourse() {
        Course course = new Course();
        //cid由我们设置的策略,雪花算法进行生成
        course.setCname("Java");
        course.setUserId(100L);
        course.setStatus("Normal");
        courseMapper.insert(course);
    }

}
运行结果


我们查询一下看看:
@Test
public void findCourse() {
    QueryWrapper wrapper = new QueryWrapper<>();
    wrapper.eq("cid", 536248443081850881L);
    courseMapper.selectOne(wrapper);
}
可以看到查询的表也是正确的。

Sharding-JDBC 实现水平分库
需求:
- 创建两个数据库,edu_db_1、edu_db_2。
- 每个库中包含:course_1、course_2。
- 数据库规则:userid 为偶数添加到 edu_db_1 库,奇数添加到 edu_db_2。
- 表规则:如果添加的 cid 为偶数添加到 course_1 中,奇数添加到 course_2 中。
创建数据库和表结构
create database edu_db_1;
create database edu_db_2;

use edu_db_1;

create table course_1 (
   `cid` bigint(20) primary key,
   `cname` varchar(50) not null,
   `user_id` bigint(20) not null,
   `status` varchar(10) not null
);

create table course_2 (
   `cid` bigint(20) primary key,
   `cname` varchar(50) not null,
   `user_id` bigint(20) not null,
   `status` varchar(10) not null
);

use edu_db_2;

create table course_1 (
   `cid` bigint(20) primary key,
   `cname` varchar(50) not null,
   `user_id` bigint(20) not null,
   `status` varchar(10) not null
);

create table course_2 (
   `cid` bigint(20) primary key,
   `cname` varchar(50) not null,
   `user_id` bigint(20) not null,
   `status` varchar(10) not null
);
配置分片策略
application.properties 内容:
# sharding-jdbc 水平分库分表策略
# 配置数据源,给数据源起别名
# 水平分库需要配置多个数据库
spring.shardingsphere.datasource.names=m1,m2

# 一个实体类对应两张表,覆盖
spring.main.allow-bean-definition-overriding=true

# 配置第一个数据源的具体内容,包含连接池,驱动,地址,用户名,密码
spring.shardingsphere.datasource.m1.type=com.alibaba.druid.pool.DruidDataSource
spring.shardingsphere.datasource.m1.driver-class-name=com.mysql.cj.jdbc.Driver
spring.shardingsphere.datasource.m1.url=jdbc:mysql://localhost:3306/edu_db_1?serverTimezone=GMT%2B8
spring.shardingsphere.datasource.m1.username=root
spring.shardingsphere.datasource.m1.password=123456

# 配置第二个数据源的具体内容,包含连接池,驱动,地址,用户名,密码
spring.shardingsphere.datasource.m2.type=com.alibaba.druid.pool.DruidDataSource
spring.shardingsphere.datasource.m2.driver-class-name=com.mysql.cj.jdbc.Driver
spring.shardingsphere.datasource.m2.url=jdbc:mysql://localhost:3306/edu_db_2?serverTimezone=GMT%2B8
spring.shardingsphere.datasource.m2.username=root
spring.shardingsphere.datasource.m2.password=123456

# 指定数据库分布的情况和数据表分布的情况
# m1 m2   course_1 course_2
spring.shardingsphere.sharding.tables.course.actual-data-nodes=m$->{1..2}.course_$->{1..2}

# 指定 course 表里面主键 cid 的生成策略 SNOWFLAKE
spring.shardingsphere.sharding.tables.course.key-generator.column=cid
spring.shardingsphere.sharding.tables.course.key-generator.type=SNOWFLAKE

# 指定分库策略    约定 user_id 值偶数添加到 m1 库,如果 user_id 是奇数添加到 m2 库
# 默认写法(所有的表的user_id)
#spring.shardingsphere.sharding.default-database-strategy.inline.sharding-column=user_id
#spring.shardingsphere.sharding.default-database-strategy.inline.algorithm-expression=m$->{user_id % 2 + 1}
# 指定只有course表的user_id
spring.shardingsphere.sharding.tables.course.database-strategy.inline.sharding-column=user_id
spring.shardingsphere.sharding.tables.course.database-strategy.inline.algorithm-expression=m$->{user_id % 2 + 1}

# 指定分表策略    约定 cid 值偶数添加到 course_1 表,如果 cid 是奇数添加到 course_2 表
spring.shardingsphere.sharding.tables.course.table-strategy.inline.sharding-column=cid
spring.shardingsphere.sharding.tables.course.table-strategy.inline.algorithm-expression=course_$->{cid % 2 + 1}

# 打开 sql 输出日志
spring.shardingsphere.props.sql.show=true
测试代码运行
@Test
public void addCourse() {
    Course course = new Course();
    //cid由我们设置的策略,雪花算法进行生成
    course.setCname("python");
    //分库根据user_id
    course.setUserId(100L);
    course.setStatus("Normal");
    courseMapper.insert(course);

    course.setCname("c++");
    course.setUserId(111L);
    courseMapper.insert(course);
}
对应的我们 python 的 userId 为偶数所以添加到 edu_db_1 库中,而 c++是奇数所以添加到 edu_db_2 库中。
运行结果

看下对应的数据库数据,也是没有问题的。


Sharding-JDBC 实现垂直分库
需求:
我们再额外创建一个 user_db 数据库。当我们查询用户信息就去 user_db,课程信息就去 edu_db_1、edu_db_2。
创建数据库和表结构
create database user_db;

use user_db;

create table t_user(
   `user_id` bigint(20) primary key,
   `username` varchar(100) not null,
   `status` varchar(50) not null
);
配置对应实体类和 Mapper
实体类:
/**
 * @author 又坏又迷人
 * 公众号: Java菜鸟程序员
 * @date 2020/11/20
 * @Description:t_user 实体类
 */
@Data
@TableName("t_user")
public class User {
    private Long userId;
    private String username;
    private String status;
}
mapper:
/**
 * @author 又坏又迷人
 * 公众号: Java菜鸟程序员
 * @date 2020/11/20
 * @Description: UserMapper
 */
@Repository
public interface UserMapper extends BaseMapper {
}
配置分片策略
application.properties 内容:
# sharding-jdbc 水平分库分表策略
# 配置数据源,给数据源起别名
# 水平分库需要配置多个数据库
# m0为用户数据库
spring.shardingsphere.datasource.names=m1,m2,m0

# 一个实体类对应两张表,覆盖
spring.main.allow-bean-definition-overriding=true

# 配置第一个数据源的具体内容,包含连接池,驱动,地址,用户名,密码
spring.shardingsphere.datasource.m1.type=com.alibaba.druid.pool.DruidDataSource
spring.shardingsphere.datasource.m1.driver-class-name=com.mysql.cj.jdbc.Driver
spring.shardingsphere.datasource.m1.url=jdbc:mysql://localhost:3306/edu_db_1?serverTimezone=GMT%2B8
spring.shardingsphere.datasource.m1.username=root
spring.shardingsphere.datasource.m1.password=123456

# 配置第二个数据源的具体内容,包含连接池,驱动,地址,用户名,密码
spring.shardingsphere.datasource.m2.type=com.alibaba.druid.pool.DruidDataSource
spring.shardingsphere.datasource.m2.driver-class-name=com.mysql.cj.jdbc.Driver
spring.shardingsphere.datasource.m2.url=jdbc:mysql://localhost:3306/edu_db_2?serverTimezone=GMT%2B8
spring.shardingsphere.datasource.m2.username=root
spring.shardingsphere.datasource.m2.password=123456

# 配置user数据源的具体内容,包含连接池,驱动,地址,用户名,密码
spring.shardingsphere.datasource.m0.type=com.alibaba.druid.pool.DruidDataSource
spring.shardingsphere.datasource.m0.driver-class-name=com.mysql.cj.jdbc.Driver
spring.shardingsphere.datasource.m0.url=jdbc:mysql://localhost:3306/user_db?serverTimezone=GMT%2B8
spring.shardingsphere.datasource.m0.username=root
spring.shardingsphere.datasource.m0.password=123456
# 配置user_db数据库里面t_user  专库专表
spring.shardingsphere.sharding.tables.t_user.actual-data-nodes=m0.t_user
# 配置主键的生成策略
spring.shardingsphere.sharding.tables.t_user.key-generator.column=user_id
spring.shardingsphere.sharding.tables.t_user.key-generator.type=SNOWFLAKE
# 指定分表策略
spring.shardingsphere.sharding.tables.t_user.table-strategy.inline.sharding-column=user_id
spring.shardingsphere.sharding.tables.t_user.table-strategy.inline.algorithm-expression=t_user

# 指定数据库分布的情况和数据表分布的情况
# m1 m2   course_1 course_2
spring.shardingsphere.sharding.tables.course.actual-data-nodes=m$->{1..2}.course_$->{1..2}

# 指定 course 表里面主键 cid 的生成策略 SNOWFLAKE
spring.shardingsphere.sharding.tables.course.key-generator.column=cid
spring.shardingsphere.sharding.tables.course.key-generator.type=SNOWFLAKE

# 指定分库策略    约定 user_id 值偶数添加到 m1 库,如果 user_id 是奇数添加到 m2 库
# 默认写法(所有的表的user_id)
#spring.shardingsphere.sharding.default-database-strategy.inline.sharding-column=user_id
#spring.shardingsphere.sharding.default-database-strategy.inline.algorithm-expression=m$->{user_id % 2 + 1}
# 指定只有course表的user_id
spring.shardingsphere.sharding.tables.course.database-strategy.inline.sharding-column=user_id
spring.shardingsphere.sharding.tables.course.database-strategy.inline.algorithm-expression=m$->{user_id % 2 + 1}

# 指定分表策略    约定 cid 值偶数添加到 course_1 表,如果 cid 是奇数添加到 course_2 表
spring.shardingsphere.sharding.tables.course.table-strategy.inline.sharding-column=cid
spring.shardingsphere.sharding.tables.course.table-strategy.inline.algorithm-expression=course_$->{cid % 2 + 1}

# 打开 sql 输出日志
spring.shardingsphere.props.sql.show=true
测试代码运行
@Autowired
private UserMapper userMapper;

@Test
public void addUser(){
    User user = new User();
    user.setUsername("Jack");
    user.setStatus("Normal");
    userMapper.insert(user);
}

@Test
public void findUser() {
  QueryWrapper wrapper = new QueryWrapper<>();
  wrapper.eq("user_id", 536472243283165185L);
  userMapper.selectOne(wrapper);
}
添加方法运行结果

查询方法运行结果

Sharding-JDBC 公共表
概念
- 存储固定数据的表,表数据很少发生变化,查询时经常要进行关联。
- 在每个数据库中都创建出相同结构公共表。
- 操作公共表时,同时操作添加了公共表的数据库中的公共表,添加记录时,同时添加,删除时,同时删除。
在多个数据库中创建公共表
# use user_db;
# use edu_db_1;
use edu_db_2;

create table t_dict(
   `dict_id` bigint(20) primary key,
   `status` varchar(100) not null,
   `value` varchar(100) not null
);
配置公共表的实体类和 mapper
实体类:
/**
 * @author 又坏又迷人
 * 公众号: Java菜鸟程序员
 * @date 2020/11/20
 * @Description:Dict实体类
 */
@Data
@TableName("t_dict")
public class Dict {
    private Long dictId;
    private String status;
    private String value;
}
mapper:
/**
 * @author 又坏又迷人
 * 公众号: Java菜鸟程序员
 * @date 2020/11/20
 * @Description: DictMapper
 */
@Repository
public interface DictMapper extends BaseMapper {
}
配置分片策略
application.properties:
# sharding-jdbc 水平分库分表策略
# 配置数据源,给数据源起别名
# 水平分库需要配置多个数据库
# m0为用户数据库
spring.shardingsphere.datasource.names=m1,m2,m0

# 一个实体类对应两张表,覆盖
spring.main.allow-bean-definition-overriding=true

# 配置第一个数据源的具体内容,包含连接池,驱动,地址,用户名,密码
spring.shardingsphere.datasource.m1.type=com.alibaba.druid.pool.DruidDataSource
spring.shardingsphere.datasource.m1.driver-class-name=com.mysql.cj.jdbc.Driver
spring.shardingsphere.datasource.m1.url=jdbc:mysql://localhost:3306/edu_db_1?serverTimezone=GMT%2B8
spring.shardingsphere.datasource.m1.username=root
spring.shardingsphere.datasource.m1.password=123456

# 配置第二个数据源的具体内容,包含连接池,驱动,地址,用户名,密码
spring.shardingsphere.datasource.m2.type=com.alibaba.druid.pool.DruidDataSource
spring.shardingsphere.datasource.m2.driver-class-name=com.mysql.cj.jdbc.Driver
spring.shardingsphere.datasource.m2.url=jdbc:mysql://localhost:3306/edu_db_2?serverTimezone=GMT%2B8
spring.shardingsphere.datasource.m2.username=root
spring.shardingsphere.datasource.m2.password=123456

# 配置user数据源的具体内容,包含连接池,驱动,地址,用户名,密码
spring.shardingsphere.datasource.m0.type=com.alibaba.druid.pool.DruidDataSource
spring.shardingsphere.datasource.m0.driver-class-name=com.mysql.cj.jdbc.Driver
spring.shardingsphere.datasource.m0.url=jdbc:mysql://localhost:3306/user_db?serverTimezone=GMT%2B8
spring.shardingsphere.datasource.m0.username=root
spring.shardingsphere.datasource.m0.password=123456
# 配置user_db数据库里面t_user  专库专表
spring.shardingsphere.sharding.tables.t_user.actual-data-nodes=m0.t_user
# 配置主键的生成策略
spring.shardingsphere.sharding.tables.t_user.key-generator.column=user_id
spring.shardingsphere.sharding.tables.t_user.key-generator.type=SNOWFLAKE
# 指定分表策略
spring.shardingsphere.sharding.tables.t_user.table-strategy.inline.sharding-column=user_id
spring.shardingsphere.sharding.tables.t_user.table-strategy.inline.algorithm-expression=t_user

# 指定数据库分布的情况和数据表分布的情况
# m1 m2   course_1 course_2
spring.shardingsphere.sharding.tables.course.actual-data-nodes=m$->{1..2}.course_$->{1..2}

# 指定 course 表里面主键 cid 的生成策略 SNOWFLAKE
spring.shardingsphere.sharding.tables.course.key-generator.column=cid
spring.shardingsphere.sharding.tables.course.key-generator.type=SNOWFLAKE

# 指定分库策略    约定 user_id 值偶数添加到 m1 库,如果 user_id 是奇数添加到 m2 库
# 默认写法(所有的表的user_id)
#spring.shardingsphere.sharding.default-database-strategy.inline.sharding-column=user_id
#spring.shardingsphere.sharding.default-database-strategy.inline.algorithm-expression=m$->{user_id % 2 + 1}
# 指定只有course表的user_id
spring.shardingsphere.sharding.tables.course.database-strategy.inline.sharding-column=user_id
spring.shardingsphere.sharding.tables.course.database-strategy.inline.algorithm-expression=m$->{user_id % 2 + 1}

# 指定分表策略    约定 cid 值偶数添加到 course_1 表,如果 cid 是奇数添加到 course_2 表
spring.shardingsphere.sharding.tables.course.table-strategy.inline.sharding-column=cid
spring.shardingsphere.sharding.tables.course.table-strategy.inline.algorithm-expression=course_$->{cid % 2 + 1}

# 公共表配置
spring.shardingsphere.sharding.broadcast-tables=t_dict
# 配置主键的生成策略
spring.shardingsphere.sharding.tables.t_dict.key-generator.column=dict_id
spring.shardingsphere.sharding.tables.t_dict.key-generator.type=SNOWFLAKE

# 打开 sql 输出日志
spring.shardingsphere.props.sql.show=true
测试代码运行
@Autowired
private DictMapper dictMapper;

@Test
public void addDict() {
    Dict dict = new Dict();
    dict.setStatus("Normal");
    dict.setValue("启用");
    dictMapper.insert(dict);
}

@Test
public void deleteDict() {
    QueryWrapper wrapper = new QueryWrapper<>();
    wrapper.eq("dict_id", 536486065947541505L);
    dictMapper.delete(wrapper);
}
添加方法运行结果

删除方法运行结果

什么是读写分离
了解读写分离前,我们先了解下什么是主从复制。
主从复制,是用来建立一个和主数据库完全一样的数据库环境,称为从数据库,主数据库一般是准实时的业务数据库。一台服务器充当主服务器,而另外一台服务器充当从服务器。
主从复制原理

主库将变更写入 binlog 日志,然后从库连接到主库之后,从库有一个 IO 线程,将主库的 binlog 日志拷贝到自己本地,写入一个 relay 中继日志(relay log)中。接着从库中有一个 SQL 线程会从中继日志读取 binlog,然后执行 binlog 日志中的内容,也就是在自己本地再次执行一遍 SQL 语句,从而使从服务器和主服务器的数据保持一致。
也就是说:从库会生成两个线程,一个 I/O 线程,一个 SQL 线程; I/O 线程会去请求主库的 binlog,并将得到的 binlog 写到本地的 relay-log(中继日志)文件中; 主库会生成一个 log dump 线程, 用来给从库 I/O 线程传 binlog; SQL 线程,会读取 relay log 文件中的日志,并解析成 sql 语句逐一执行。
需要注意的是,就是从库同步主库数据的过程是串行化的,也就是说主库上并行的操作,在从库上会串行执行。
由于从库从主库拷贝日志以及串行执行 SQL 的特点,在高并发场景下,从库的数据是有延时的。
在实际运用中,时常会出现这样的情况,主库的数据已经有了,可从库还是读取不到,可能要过几十毫秒,甚至几百毫秒才能读取到。
- 半同步复制:解决主库数据丢失问题。也叫 semi-sync 复制,指的就是主库写入 binlog 日志之后,就会强制将数据立即同步到从库,从库将日志写入自己本地的 relay log 之后,接着会返回一个 ack 给主库,主库接收到至少一个从库的 ack 之后才会认为写操作完成了。
- 并行复制:解决从库复制延迟的问题。指的是从库开启多个线程,并行读取 relay log 中不同库的日志,然后并行存放不同库的日志,这是库级别的并行。
主从同步延迟问题
MySQL 可以通过 MySQL 命令 show slave status 获知当前是否主从同步正常工作。
另外一个重要指标就是 Seconds_Behind_Master,根据输出的 Seconds_Behind_Master 参数的值来判断:
- NULL,表示 io_thread 或是 sql_thread 有任何一个发生故障。
- 0,表示主从复制良好。
- 正值,表示主从已经出现延时,数字越大表示从库延迟越严重。
导致主从同步延迟情况
- 主库的从库太多,导致复制延迟。
- 从库硬件比主库差,导致复制延迟。
- 慢 SQL 语句过多。
- 主从复制的设计问题,例如主从复制单线程,如果主库写并发太大,来不及传送到从库,就会导致延迟。Mysql5.7 之后可以支持多线程复制。设置参数
slave_parallel_workers>0和slave_parallel_type='LOGICAL_CLOCK'。 - 网络延迟。
主从同步解决方案
- 使用 PXC 架构(下篇文章介绍)
- 避免一些无用的 IO 消耗,可以上 SSD。
- IO 调度要选择 deadline 模式。
- 适当调整 buffer pool 的大小。
- 避免让数据库进行各种大量运算,数据库只是用来存储数据的,让应用端多分担些压力,或者可以通过缓存来完成。
说到底读写分离就是主库进行写操作,从库进行读操作。具体可以搭配一主一从、一主多从、多主多从。根据业务场景来进行选择。
搭建一主一从 MySQL 环境
我使用的是两台 Centos7 虚拟机,主服务器 IP 为:192.168.3.107,从服务器 IP:192.168.3.108。
MySQL 环境为:8.0.15。
这里不讲如何搭建 MySQL 环境了。
首先我们进入主服务器输入以下命令:
vim /etc/my.cnf在[mysqld]节点下加入:
#设置主mysql的id
server-id = 1
#启用二进制日志
log-bin=mysql-bin
#设置logbin格式
binlog_format = STATEMENT
也可以加入 binlog-do-db 来指定同步的数据库 ,或者使用 binlog-ignore-db 来忽略同步的数据库,如果不写则同步所有数据库!
然后我们进入从服务器输入以下命令:
vim /etc/my.cnf在[mysqld]节点下加入:
#设置从mysql的id
server-id = 2
#启用中继日志
relay-log = mysql-relay
最后我们使用下面命令在主和从都执行,重启 MySQL 服务器。
/etc/init.d/mysqld restart以上完毕之后我们登录主服务器的 MySQL。
mysql -u root -p进入 MySQL 后执行以下命令:
#创建用于主从复制的账号db_sync,密码db_sync
create user 'db_sync'@'%' identified with mysql_native_password by 'db_sync';
#授权
grant replication slave on *.* to 'db_sync'@'%';
#刷新权限
FLUSH PRIVILEGES;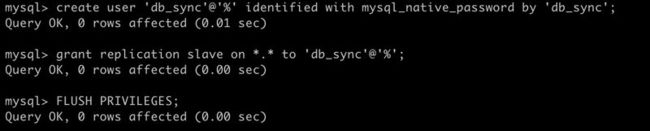
然后我们执行以下命令,记得file和position的值!
show master status;
以上完毕之后我们登录从服务器的 MySQL。
mysql -u root -p;进入 MySQL 后执行以下命令:
STOP SLAVE;接着我们输入命令来连接主服务器:
#修改从库指向到主库
# master_host 主ip地址
# master_port 主mysql暴露的端口
# master_user 主mysql的用户名
# master_password 主mysql的密码
# master_log_file 填写刚才查看到的file
# master_log_pos 填写刚才查看到的position
CHANGE MASTER TO
master_host = '192.168.3.107',
master_port = 3306,
master_user = 'db_sync',
master_password = 'db_sync',
master_log_file = 'mysql-bin.000006',
master_log_pos = 863;
然后启动我们的 slave:
START SLAVE;最后一定要查看一下是否成功!
show slave status \G;Slave_IO_Runing和Slave_SQL_Runing字段值都为Yes,表示同步配置成功。

Sharding-JDBC 实现读写分离
Sharding-JDBC 实现读写分离则是根据sql 语句语义分析,当 sql 语句有 insert、update、delete 时,Sharding-JDBC 就把这次操作在主数据库上执行;当 sql 语句有 select 时,就会把这次操作在从数据库上执行,从而实现读写分离过程。
但 Sharding-JDBC 并不会做数据同步,数据同步是配置 MySQL 后由 MySQL 自己完成的。
搭建环境成功后我们在主库和从库上都建库建表:
create database user_db;

use user_db;

create table t_user(
   `user_id` bigint(20) primary key,
   `username` varchar(100) not null,
   `status` varchar(50) not null
);
配置读写分离策略
application.properties:
# 配置数据源,给数据源起别名
# m0为用户数据库
spring.shardingsphere.datasource.names=m0,s0

# 一个实体类对应两张表,覆盖
spring.main.allow-bean-definition-overriding=true

#user_db 主服务器
spring.shardingsphere.datasource.m0.type=com.alibaba.druid.pool.DruidDataSource
spring.shardingsphere.datasource.m0.driver-class-name=com.mysql.cj.jdbc.Driver
spring.shardingsphere.datasource.m0.url=jdbc:mysql://192.168.3.107:3306/user_db?serverTimezone=GMT%2B8
spring.shardingsphere.datasource.m0.username=root
spring.shardingsphere.datasource.m0.password=123456

#user_db 从服务器
spring.shardingsphere.datasource.s0.type=com.alibaba.druid.pool.DruidDataSource
spring.shardingsphere.datasource.s0.driver-class-name=com.mysql.cj.jdbc.Driver
spring.shardingsphere.datasource.s0.url=jdbc:mysql://192.168.3.108:3306/user_db?serverTimezone=GMT%2B8
spring.shardingsphere.datasource.s0.username=root
spring.shardingsphere.datasource.s0.password=123456

# 主库从库逻辑数据源定义 ds0 为 user_db
spring.shardingsphere.sharding.master-slave-rules.ds0.master-data-source-name=m0
spring.shardingsphere.sharding.master-slave-rules.ds0.slave-data-source-names=s0

# 配置user_db数据库里面t_user  专库专表
#spring.shardingsphere.sharding.tables.t_user.actual-data-nodes=m0.t_user
# t_user 分表策略,固定分配至 ds0 的 t_user 真实表
spring.shardingsphere.sharding.tables.t_user.actual-data-nodes=ds0.t_user

# 配置主键的生成策略
spring.shardingsphere.sharding.tables.t_user.key-generator.column=user_id
spring.shardingsphere.sharding.tables.t_user.key-generator.type=SNOWFLAKE
# 指定分表策略
spring.shardingsphere.sharding.tables.t_user.table-strategy.inline.sharding-column=user_id
spring.shardingsphere.sharding.tables.t_user.table-strategy.inline.algorithm-expression=t_user

# 打开 sql 输出日志
spring.shardingsphere.props.sql.show=true
测试代码运行
@Autowired
private UserMapper userMapper;

@Test
public void addUser(){
    User user = new User();
    user.setUsername("Jack");
    user.setStatus("Normal");
    userMapper.insert(user);
}

@Test
public void findUser() {
  QueryWrapper wrapper = new QueryWrapper<>();
  wrapper.eq("user_id", 536553906142969857L);
  userMapper.selectOne(wrapper);
}
添加方法运行结果
m0 就是我们配置的主库。

可以看到添加是没问题的。然后我们看一下从库里有没有数据。

查询方法运行结果
可以看到结果也是 OK 的!

什么是 ShardingSphere-Proxy
定位为透明化的数据库代理端,提供封装了数据库二进制协议的服务端版本,用于完成对异构语言的支持。 目前提供 MySQL 和 PostgreSQL 版本,它可以使用任何兼容 MySQL/PostgreSQL 协议的访问客户端(如:MySQL Command Client, MySQL Workbench, Navicat 等)操作数据,对 DBA 更加友好。
- 向应用程序完全透明,可直接当做 MySQL/PostgreSQL 使用。
- 适用于任何兼容 MySQL/PostgreSQL 协议的的客户端。

简单理解为:之前我们要配置多个数据源,而现在我们使用 ShardingSphere-Proxy 之后,我们相当于只操作一个库一个表,而多库多表操作被封装在了 ShardingSphere-Proxy 里面。是一个透明化的代理端。
下载 ShardingSphere-Proxy
下载地址:
https://archive.apache.org/di...
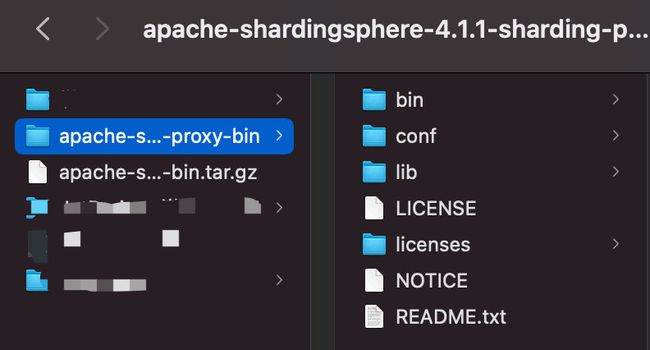
下载完进行解压
Sharding-Proxy 配置(分表)
进入到 conf 中打开server.yaml。
将此部分注释打开即可。
然后我们打开config-sharding.yaml文件进行分库分表的配置

根据提示,如果使用 mysql,需要把 mysql 的驱动 jar 包放到 lib 目录下。拷贝即可。
然后我在主服务器创建了一个数据库
create database test_db;打开如下注释填写对应参数:
schemaName: sharding_db

dataSources:
  ds_0:
    url: jdbc:mysql://192.168.3.107:3306/test_db?serverTimezone=UTC&useSSL=false
    username: root
    password: 123456
    connectionTimeoutMilliseconds: 30000
    idleTimeoutMilliseconds: 60000
    maxLifetimeMilliseconds: 1800000
    maxPoolSize: 50

shardingRule:
  tables:
    t_order:
      actualDataNodes: ds_${0}.t_order_${0..1}
      tableStrategy:
        inline:
          shardingColumn: order_id
          algorithmExpression: t_order_${order_id % 2}
      keyGenerator:
        type: SNOWFLAKE
        column: order_id
  bindingTables:
    - t_order
  defaultDatabaseStrategy:
    inline:
      shardingColumn: user_id
      algorithmExpression: ds_${0}
  defaultTableStrategy:
    none:
然后我们保存进入 bin 目录启动./start.sh。
启动成功后我们进入 logs 目录查看 stdout.log 日志文件。如下图即启动成功!

然后我们进入端口为 3307 的 mysql,ShardingSphere-Proxy默认端口为:3307
mysql -uroot -proot -h127.0.0.1 -P3307
新建一张表插入条数据。
use sharding_db;
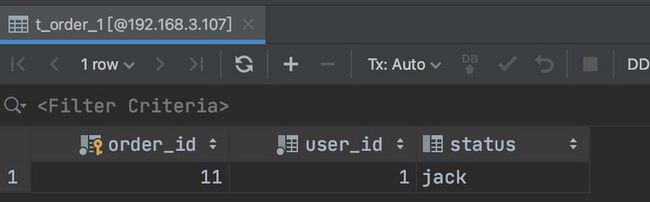
create table if not exists ds_0.t_order(`order_id` bigint primary key,`user_id` int not null,`status` varchar(50));
insert into t_order(`order_id`,`user_id`,`status`)values(11,1,'jack');
按照 order_id 进行分配,因为是奇数所以被分到了 t_order_1 表里。
Sharding-Proxy 配置(分库)
我们在主库创建数据库:
create database test_1;我们在从库创建数据库:
create database test_2;我们还是打开config-sharding.yaml进行如下配置:
schemaName: sharding_db

dataSources:
  ds_0:
    url: jdbc:mysql://192.168.3.107:3306/test_1?serverTimezone=UTC&useSSL=false
    username: root
    password: 123456
    connectionTimeoutMilliseconds: 30000
    idleTimeoutMilliseconds: 60000
    maxLifetimeMilliseconds: 1800000
    maxPoolSize: 50
  ds_1:
    url: jdbc:mysql://192.168.3.108:3306/test_2?serverTimezone=UTC&useSSL=false
    username: root
    password: 123456
    connectionTimeoutMilliseconds: 30000
    idleTimeoutMilliseconds: 60000
    maxLifetimeMilliseconds: 1800000
    maxPoolSize: 50

shardingRule:
  tables:
    t_order:
      actualDataNodes: ds_${0..1}.t_order_${1..2}
      tableStrategy:
        inline:
          shardingColumn: order_id
          algorithmExpression: t_order_${order_id % 2 + 1}
      keyGenerator:
        type: SNOWFLAKE
        column: order_id
  bindingTables:
    - t_order
  defaultDatabaseStrategy:
    inline:
      shardingColumn: user_id
      algorithmExpression: ds_${user_id % 2}
  defaultTableStrategy:
    none:
之后进入 bin 目录下重启一下 Proxy。
./stop.sh
./start.sh
进入 mysql
mysql -uroot -proot -h127.0.0.1 -P3307创建表添加数据
use sharding_db;

create table if not exists ds_0.t_order(`order_id` bigint primary key,`user_id` int not null,`status` varchar(50));

insert into t_order(`order_id`,`user_id`,`status`)values(11,1,'jack');
可以看到结果已经插入到了对应的库中表中。

配置 Sharding-Proxy 读写分离
我们还是使用之前的一主一从搭配主从复制,在主和从上创建数据库:
create database master_slave_user;修改 config-master_slave.yaml 文件(此文件为读写分离的配置)
schemaName: master_slave_db

dataSources:
  master_ds:
    url: jdbc:mysql://192.168.3.107:3306/master_slave_user?serverTimezone=UTC&useSSL=false&allowPublicKeyRetrieval=true
    username: root
    password: 123456
    connectionTimeoutMilliseconds: 30000
    idleTimeoutMilliseconds: 60000
    maxLifetimeMilliseconds: 1800000
    maxPoolSize: 50
  slave_ds_0:
    url: jdbc:mysql://192.168.3.108:3306/master_slave_user?serverTimezone=UTC&useSSL=false&allowPublicKeyRetrieval=true
    username: root
    password: 123456
    connectionTimeoutMilliseconds: 30000
    idleTimeoutMilliseconds: 60000
    maxLifetimeMilliseconds: 1800000
    maxPoolSize: 50

masterSlaveRule:
  name: ms_ds
  masterDataSourceName: master_ds
  slaveDataSourceNames:
    - slave_ds_0
#   - slave_ds_1
之后进入 bin 目录下重启一下 Proxy。
./stop.sh
./start.sh
进入 mysql
mysql -uroot -proot -h127.0.0.1 -P3307创建表添加数据
use master_slave_db;

create table if not exists master_slave_user.t_order(`order_id` bigint primary key,`user_id` int not null,`status` varchar(50));

insert into t_order(`order_id`,`user_id`,`status`)values(11,1,'Jack');
可以看到下图:主库和从库都已经存在数据了。


读取操作就不再演示了,读取的是从库数据。