翻译 | 《JavaScript Everywhere》第23章 GraphQL和React Native
写在最前面
大家好呀,我是毛小悠,是一位前端开发工程师。正在翻译一本英文技术书籍。
为了提高大家的阅读体验,对语句的结构和内容略有调整。如果发现本文中有存在瑕疵的地方,或者你有任何意见或者建议,可以在评论区留言,或者加我的微信:code_maomao,欢迎相互沟通交流学习。
(σ゚∀゚)σ..:*☆哎哟不错哦
第23章 GraphQL和React Native
在宾夕法尼亚州匹兹堡的安迪·沃霍尔博物馆,有一个名为“银云”的永久装置。
该装置是一个稀疏的房间,里面有十几个矩形的铝箔气球,每个气球都充满了氦气和普通空气。结果是,气球的悬浮时间要比充满大气的气球更长,但不会像氦气球那样漂浮在天花板上。博物馆的顾客走过博物馆,可以嬉戏地击打气球以保持漂浮。
当前,我们的应用程序很像“银云”的房间。可以很有趣地单击图标并在应用程序shell中浏览,但是最终这只是一个空荡荡的房间。在本章中,我们将通过首先探索如何使用React Native的列表视图显示内容来开始填充我们的应用程序。然后,我们将使用Apollo Client连接到我们的数据API。建立连接后,我们将编写GraphQL查询,这些查询将在应用程序屏幕上显示数据。
在本地运行我们的API
我们的移动应用程序的开发需要访问我们的API的本地实例。如果你一直在阅读本书,那么你应该已经在计算机上启动了Notedly API及其数据库。
如果没有,我在本书的附录A中添加了有关如何获取并运行API副本以及一些示例数据的说明。如果你已经在运行API了,但是希望使用其他数据,请从API项目目录的根目录运行npm run seed。
创建列表和可滚动内容视图
列表无处不在。在生活中,我们保留待办事项清单、杂货清单和来宾清单。在应用程序中,列表是最常见的UI模式之一:社交媒体帖子列表、文章列表、歌曲列表、电影列表等。清单(看我在那儿做了什么?)一直在继续。那么,React Native将创建可滚动内容列表变成一个简单的过程就不足为奇了。
这两种类型在React Native是FlatList和SectionList 。 FlatList在一个大量项目的滚动列表是非常有用的。
React Native在幕后做了一些有用的事情,例如仅渲染最初可见的项目以提高性能。SectionList非常类似于FlatList,只是它允许列表项组具有标题。
考虑一下联系人列表中的联系人,这些列表通常按字母数字顺序来排序分组。
出于我们的目的,我们将使用FlatList显示笔记列表,用户可以滚动查看并单击浏览以阅读完整的笔记。为此,我们创建一个名为NoteFeed的新组件,该组件可用于显示笔记列表。目前,我们是使用一些替代数据,但是我们将很快连接到我们的API。
首先,让我们在src/components/NoteFeed.js中创建一个新组件。我们将从导入依赖项并添加一系列临时数据开始。
import React from 'react';
import { FlatList, View, Text } from 'react-native';
import styled from 'styled-components/native';
// our dummy data
const notes = [
{ id: 0, content: 'Giant Steps' },
{ id: 1, content: 'Tomorrow Is The Question' },
{ id: 2, content: 'Tonight At Noon' },
{ id: 3, content: 'Out To Lunch' },
{ id: 4, content: 'Green Street' },
{ id: 5, content: 'In A Silent Way' },
{ id: 6, content: 'Lanquidity' },
{ id: 7, content: 'Nuff Said' },
{ id: 8, content: 'Nova' },
{ id: 9, content: 'The Awakening' }
];
const NoteFeed = () => {
// our component code will go here
};
export default NoteFeed;现在我们可以编写组件代码,其中将包含FlatList:
const NoteFeed = props => {
return (
id.toString()}
renderItem={({ item }) => {item.content} }
/> );
};在前面的代码中,你可以看到FlatList接收三个属性,这些属性简化了对数据进行迭代的过程:
data
此属性指向列表将包含的数据数组。
keyExtractor
列表中的每个项目都必须具有唯一的键值。我们正在使用keyExtractor将唯一的id值用作key。
renderItem
此属性定义应在列表中呈现的内容。现在,我们要从notes数组传递单个项目,并将其显示为Text。
我们可以通过更新src/screens/feed.js组件以显示数据来查看列表:
import React from 'react';
// import NoteFeed
import NoteFeed from '../components/NoteFeed';
const Feed = props => {
return 让我们回到src/components/NoteFeed.js文件,并更新renderItem以使用样式化的组件在列表项之间添加一些间距:
// FeedView styled component definition
const FeedView = styled.View`
height: 100;
overflow: hidden;
margin-bottom: 10px;
`;
const NoteFeed = props => {
return (
  id.toString()}
renderItem={({ item }) => (  {item.content}  )}
/>  );
};如果你浏览我们的应用程序,则会看到可滚动的数据列表。最后,我们可以在列表项之间添加分隔符。通过使用React Native,无需通过CSS添加底部边框,而是可以将ItemSeparatorComponent属性传递给FlatList。这使我们可以进行实现细粒度的控制,将任何类型的组件作为分隔符放置在列表元素之间。它还可以避免在不需要的地方放置分隔符,例如在列表中的最后一项之后。为了我们的目的,我们将添加一个简单的边框,将其作为样式化的组件View创建:
// FeedView styled component definition
const FeedView = styled.View`
height: 100;
overflow: hidden;
margin-bottom: 10px;
`;
// add a Separator styled component
const Separator = styled.View`
height: 1;
width: 100%;
background-color: #ced0ce;
`;
const NoteFeed = props => {
return (
id.toString()}
ItemSeparatorComponent={() => {item.content} )}
/> );
};与其直接在FlatList中呈现和样式化笔记的内容,不如将其隔离在其自己的组件中。为此,我们将介绍一种称为ScrollView。
ScrollView的功能正是你所期望的:ScrollView不会符合屏幕的大小,而是会溢出内容,从而允许用户滚动。
让我们在src/components/Note.js中创建一个新组件:
import React from 'react';
import { Text, ScrollView } from 'react-native';
import styled from 'styled-components/native';
const NoteView = styled.ScrollView`
padding: 10px;
`;
const Note = props => {
return (
 {props.note.content}
);
};
export default Note;最后,我们将导入src/components/NoteFeed.js组件,并在FeedView中使用它,以使用新的Note组件。最终的组件代码如下(图23-1):
import React from 'react';
import { FlatList, View, Text } from 'react-native';
import styled from 'styled-components/native';
import Note from './Note';
// our dummy data
const notes = [
{ id: 0, content: 'Giant Steps' },
{ id: 1, content: 'Tomorrow Is The Question' },
{ id: 2, content: 'Tonight At Noon' },
{ id: 3, content: 'Out To Lunch' },
{ id: 4, content: 'Green Street' },
{ id: 5, content: 'In A Silent Way' },
{ id: 6, content: 'Lanquidity' },
{ id: 7, content: 'Nuff Said' },
{ id: 8, content: 'Nova' },
{ id: 9, content: 'The Awakening' }
];
// FeedView styled-component definition
const FeedView = styled.View`
height: 100;
overflow: hidden;
margin-bottom: 10px;
`;
const Separator = styled.View`
height: 1;
width: 100%;
background-color: #ced0ce;
`;
const NoteFeed = props => {
return (
id.toString()}
ItemSeparatorComponent={() =>
)}
/>
);
};
export default NoteFeed;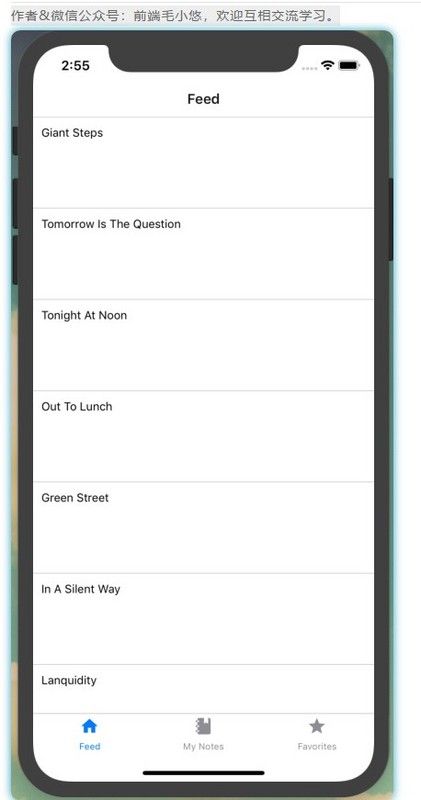
图23-1。使用FlatList,我们可以显示数据列表
有了这个,我们布置了一个简单的FlatList。现在,实现使从列表项路由到单个路由。
使列表可路由
在移动应用程序中,一种非常常见的模式是点击列表中的项目以查看更多信息或扩展功能。如果你回想起前一章,则我们的摘要位于笔记屏幕上方的导航列表中。
在React Native中,我们可以使用TouchableOpacity作为包装器来使任何视图响应用户的点击。
这意味着我们可以在 TouchableOpacity包裹我们的 FeedView的内容和点击切换路由。就好像我们过去用按钮一样的方式。
让我们继续更新我们的src/components/NoteFeed.js组件来做到这一点。
首先,我们必须更新我们的react-native import,在src/components/NoteFeed.js引入TouchableOpacity
import { FlatList, View, TouchableOpacity } from 'react-native';接下来,我们更新组件以使用TouchableOpacity:
const NoteFeed = props => {
return (
id.toString()}
ItemSeparatorComponent={() =>
props.navigation.navigate('Note', {
id: item.id
})
}
>
)}
/>
);
};我们还需要更新feed.js屏幕组件,以将导航属性传递到feed。在src/screens/feed.js中:
const Feed = props => { return 这样,我们可以轻松导航到通用笔记屏幕。让我们自定义该屏幕,以便它显示笔记的ID。你可能已经注意到,在NoteFeed组件导航中,我们传递了id属性。在screens/note.js中,我们可以读取该属性的值:
import React from 'react';
import { Text, View } from 'react-native';
const NoteScreen = props => {
const id = props.navigation.getParam('id');
return (
 This is note {id}
);
};
export default NoteScreen;现在,我们可用于从列表视图导航到详细信息页面。接下来,让我们看一下如何将API中的数据集成到应用程序中。
带有Apollo客户端的GraphQL
至此,我们准备在应用程序中读取和显示数据。我们将访问在本书第一部分中创建的GraphQL API。我们将使用Apollo Client,这是本书Web部分中的GraphQL客户端的库。Apollo Client提供了许多有用的功能,以简化在JavaScript UI应用程序中使用GraphQL的工作。Apollo的客户端功能包括从远程API获取数据、本地缓存、GraphQL语法处理、本地状态管理等。
首先,我们首先需要设置我们的配置文件。我们将环境变量存储在名为config.js的文件中。在React Native中,有几种方法可以管理环境和配置变量,但是我发现这种样式的配置文件是最直接、最有效的。首先,我包含了config-example.js文件,你可以使用我们的应用程序值进行复制和编辑。在终端应用程序中,从项目目录的根目录:
$ cp config.example.js config.js从这里我们可以更新任何dev或prod环境变量。在目前的情况下,这只是生产API_URI值:
// set environment variables
const ENV = {
dev: {
API_URI: `http://${localhost}:4000/api`
},
prod: {
// update the API_URI value with your publicly deployed API address
API_URI: 'https://your-api-uri/api'
}
};现在,我们将基于Expo的环境能够使用getEnvVars函数访问这两个值。我们不会深入研究配置文件的其余部分,但是如果你有兴趣进一步探索此设置,请对它进行探索。
从这里我们可以将客户端连接到我们的API。在我们的src/Main.js文件中,我们将使用Apollo客户端库设置Apollo。如果你完成了本书的网络部分,这将非常熟悉:
import React from 'react';
import Screens from './screens';
// import the Apollo libraries
import { ApolloClient, ApolloProvider, InMemoryCache } from '@apollo/client';
// import environment configuration
import getEnvVars from '../config';
const { API_URI } = getEnvVars();
// configure our API URI & cache
const uri = API_URI;
const cache = new InMemoryCache();
// configure Apollo Client
const client = new ApolloClient({
uri,
cache
});
const Main = () => {
// wrap our app in the ApolloProvider higher-order component
return (

);
};
export default Main;这样,我们的应用程序就不会有明显的变化,我们现在已经连接到我们的API。接下来,让我们看看如何从该API查询数据。
编写GraphQL查询
现在我们已经连接到我们的API,让我们查询一些数据。我们将从查询数据库中所有要显示在NoteFeed列表中的笔记开始。然后,我们将查询要在“笔记详细信息”视图中显示的各个笔记。
笔记查询
为了简化并减少重复,我们将使用批量笔记API查询而不是分页的noteFeed查询。编写查询组件的工作方式与在React Web应用程序中完全相同。在src/screens/feed.js中,我们导入useQuery和GraphQL语言(gql)库,如下所示:
// import our React Native and Apollo dependencies
import { Text } from 'react-native';
import { useQuery, gql } from '@apollo/client';
接下来,我们编写查询:
const GET_NOTES = gql`
query notes {
notes {
id
createdAt
content
favoriteCount
author {
username
id
avatar
}
}
}
`;
最后,我们更新组件以调用查询:
const Feed = props => {
const { loading, error, data } = useQuery(GET_NOTES);
// if the data is loading, our app will display a loading indicator
if (loading) return Loading ;
// if there is an error fetching the data, display an error message
if (error) return Error loading notes ;
// if the query is successful and there are notes, return the feed of notes
return 总之,我们的src/screens/feed.js文件编写如下:
import React from 'react';
import { Text } from 'react-native';
// import our Apollo libraries
import { useQuery, gql } from '@apollo/client';
import NoteFeed from '../components/NoteFeed';
import Loading from '../components/Loading';
// compose our query
const GET_NOTES = gql`
query notes {
notes {
id
createdAt
content
favoriteCount
author {
username
id
avatar
}
}
}
`;
const Feed = props => {
const { loading, error, data } = useQuery(GET_NOTES);
// if the data is loading, our app will display a loading indicator
if (loading) return Loading ;
// if there is an error fetching the data, display an error message
if (error) return Error loading notes ;
// if the query is successful and there are notes, return the feed of notes
return 编写查询后,我们可以更新src/components/NoteFeed.js组件以使用通过props传递给它的数据:
const NoteFeed = props => {
return (
id.toString()}
ItemSeparatorComponent={() =>
props.navigation.navigate('Note', {
id: item.id
})
}
>
)}
/>
);
};进行此更改后,在运行Expo的情况下,我们将在列表中看到本地API的数据,如图23-2所示。
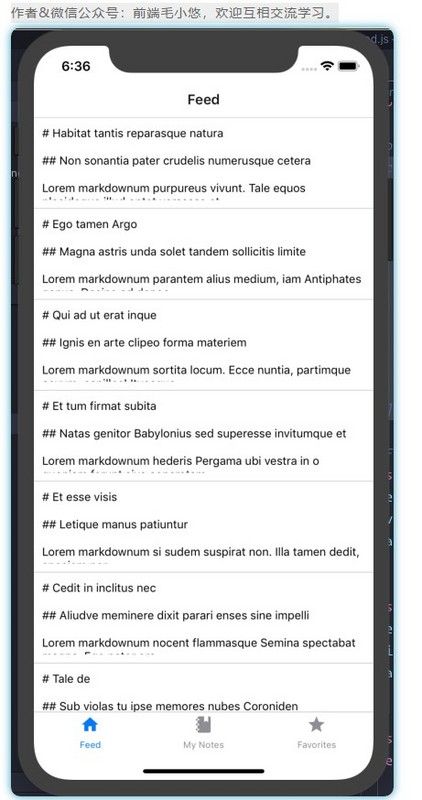
图23-2。我们的API数据显示在我们的Feed视图中
现在,在列表中点击笔记预览仍会显示常规笔记页面。让我们通过在src/screens/note.js文件中进行笔记查询来解决该问题:
import React from 'react';
import { Text } from 'react-native';
import { useQuery, gql } from '@apollo/client';
import Note from '../components/Note';
// our note query, which accepts an ID variable
const GET_NOTE = gql`
query note($id: ID!) {
note(id: $id) {
id
createdAt
content
favoriteCount
author {
username
id
avatar
}
}
}
`;
const NoteScreen = props => {
const id = props.navigation.getParam('id');
const { loading, error, data } = useQuery(GET_NOTE, { variables: { id } });
if (loading) return Loading ;
// if there's an error, display this message to the user
if (error) return Error! Note not found ;
// if successful, pass the data to the note component
return 最后,让我们更新src/components/Note组件文件以显示笔记内容。我们将添加两个新的依赖关系,react-native-markdown-renderer和date-fns,以一种更加用户友好的方式来解析API中的Markdown和日期。
import React from 'react';
import { Text, ScrollView } from 'react-native';
import styled from 'styled-components/native';
import Markdown from 'react-native-markdown-renderer';
import { format } from 'date-fns';
const NoteView = styled.ScrollView`
padding: 10px;
`;
const Note = ({ note }) => {
return (


Note by {note.author.username} / Published{' '}
{format(new Date(note.createdAt), 'MMM do yyyy')}

{note.content}

);
};
export default Note;
进行了这些更改后,我们将在应用程序的feed视图中看到笔记列表。轻按笔记预览将带我们进入笔记的全部可滚动内容(请参见图23-3)。

图23-3。通过编写GraphQL查询,我们可以在屏幕之间导航以查看笔记预览和完整笔记
添加加载指示器
当前,当在我们的应用程序中加载数据时,它会在屏幕上闪烁“ Loading”字样。这可能在传达消息时很有效,但同时也会给用户带来极大的伤害。React Native为我们提供了一个内置的ActivityIndicator,它可以显示适合操作系统的加载指示器。让我们编写一个简单的组件,将其用作应用程序中的加载指示器。
在src/components/Loading.js中创建一个文件,并组成一个简单的组件,该组件在屏幕中心显示活动指示器:
import React from 'react';
import { View, ActivityIndicator } from 'react-native';
import styled from 'styled-components/native';
const LoadingWrap = styled.View`
flex: 1;
justify-content: center;
align-items: center;
`;
const Loading = () => {
return (


);
};
export default Loading;
现在,我们可以替换GraphQL查询组件中的“正在加载”文本。在src/screens/feed.js和src/screens/note.js中,首先导入Loading组件:
import Loading from '../components/Loading';然后,在两个文件中,如下更新Apollo加载状态:
if (loading) return 这样,当我们的API数据正在加载时,我们的应用程序现在将显示旋转活动指示器(请参见图23-4)。
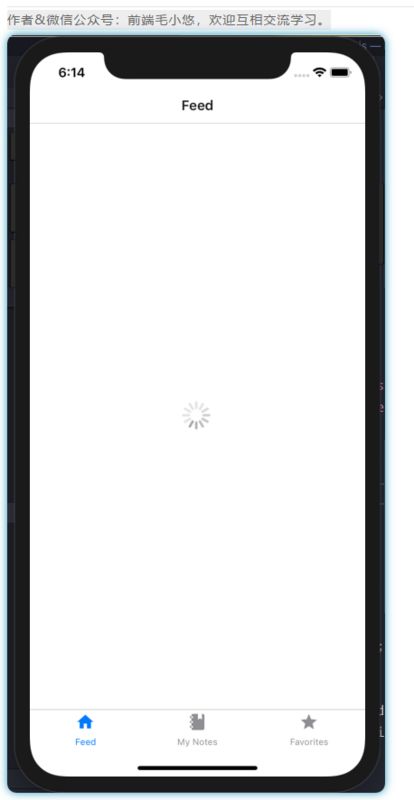
图23-4。使用ActivityIndicator,我们可以添加操作系统-适当的加载指示器
结论
在本章中,我们首先研究了如何使用常见的应用程序UI模式将列表视图集成到React Native应用程序中。在此,我们配置了Apollo Client,并将来自API的数据集成到应用程序中。有了这个,我们已经拥有构建许多常见类型的应用程序所需的一切,例如新闻应用程序或集成来自网站的博客。在下一章中,我们将向我们的应用程序添加身份验证并显示特定于用户的查询。
如果有理解不到位的地方,欢迎大家纠错。如果觉得还可以,麻烦您点赞收藏或者分享一下,希望可以帮到更多人。