Appium+Python移动端 实战——教你如何xpath定位自动化测试
今日份问题
我:手动就可以操作简单的测试,为什么要自动化测试
老师:主要是回归测试。改了bug之后,重新再来测试。这样用回归测试就比手动测试要节约成本
Appium+Python移动端实战
- 一、前提
- 二、上实战
一、前提
- 开启模拟器(我的是直接用的Android Studio的模拟器,所以在开启模拟器之前我还要开启Android Studio)
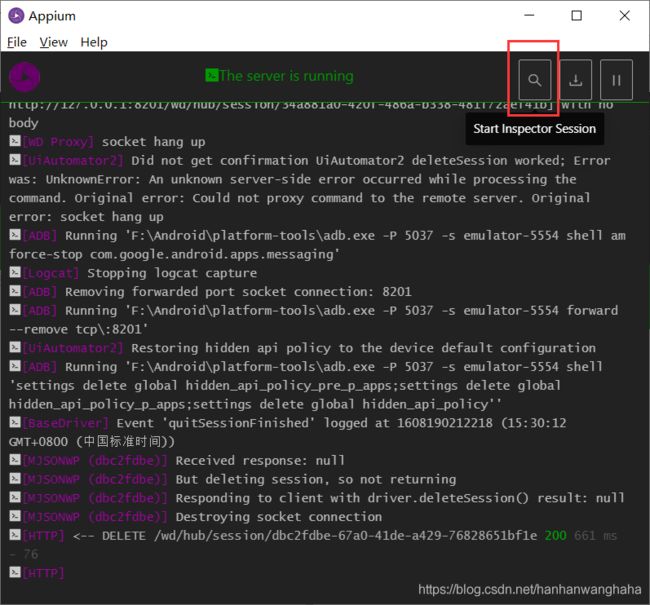
- 打开appium服务器
- 打开pycharm
- 打开cmd
二、上实战
打开模拟器
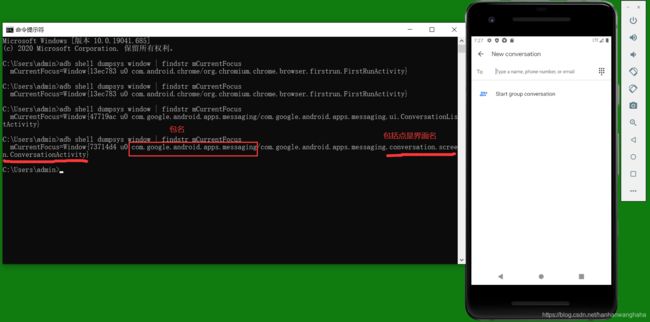
在cmd中输入代码:
adb shell dumpsys window | findstr mCurrentFocus
可查询到包名和界面名(界面名可以省略包名,但是我害怕漏了那个点,一般都不省略)
比如说我的包名:
com.google.android.apps.messaging
界面名
.conversation.screen.ConversationActivity
or
com.google.android.apps.messaging.conversation.screen.ConversationActivity
进入编辑界面,在框里面输入代码连接模拟器
代码如下
下面的代码注释:
第一条:平台的名字,不区分大小写,“Android”;“ios”
第二条:平台的版本,可以不写后续版本号
第三条:设备的名字,不能为空 (cmd后 adb devices可以看)
第四条:要打开的应用程序包名(上面cmd的命令可查出来)
第五条:要打开的应用程序的界面名(上面cmd的命令可查出来)
第六条:设备的名字
{

  "platformName": "Android",
  "platformVersion": "5.0",
  "deviceName": "emulator-5554",
  "appPackage": "com.google.android.apps.messaging",
  "appActivity": "com.google.android.apps.messaging.ui.ConversationListActivity",
  "udid": "emulator-5554"
}
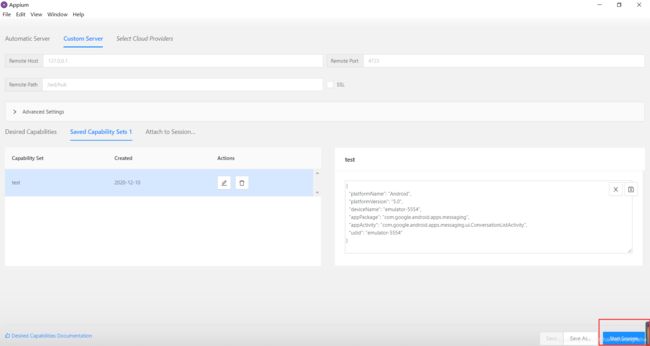
填完之后记得保存
在点击Start Session,就可以进入appium的自动化界面,模拟器也会自动跟着运行
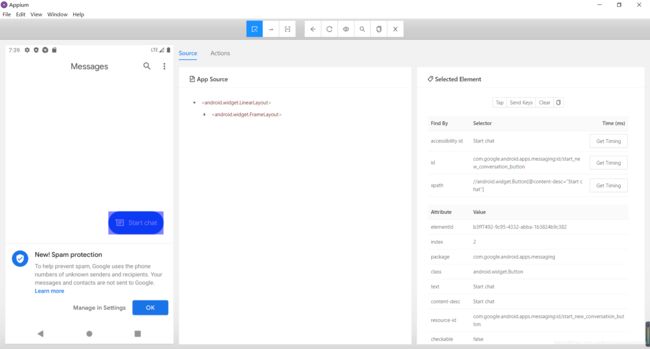
接下来我们就来查看我们要按的键的xpath路径,点击我想要自动运行的键,在Select Element中可以看到xpath路径。
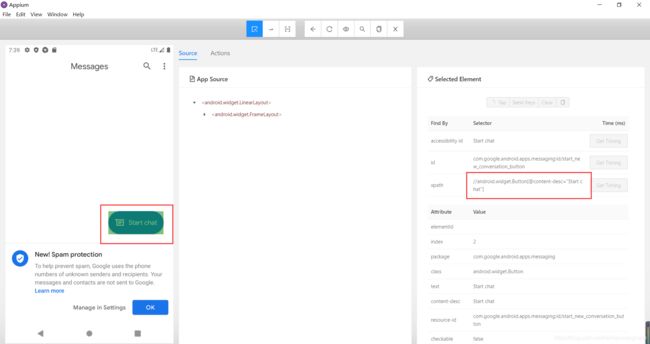
将路径的中括号部分保留下来,例如我的是
//android.widget.Button[@content-desc="Start chat"]
需要的是
[@content-desc="Start chat"]
但放在pycharm中的会有报错,因此就需要换引号(这个自行调整就是)
于是放在pycahrm 中的python代码就应该是
driver.find_element_by_xpath("//*[@content-desc='Start chat']").click() #点击事件
上实战代码
from appium import webdriver
import time
desired_caps=dict()
desired_caps['platformName']='Android'#平台的名字,不区分大小写,“Android”;“ios”
desired_caps['platformVersion']='5.0'#平台的版本,可以不写后续版本号
desired_caps['deviceName']='emulator-5554'#设备的名字,不能为空
# desired_caps['appPackage']='com.google.android.apps.messaging' #要打开的应用程序包名
# desired_caps['appActivity']='.ui.ConversationListActivity'#要打开的应用程序的界面名
desired_caps['udid']='emulator-5554'#连接设备的唯一标识
driver=webdriver.Remote('http://localhost:4723/wd/hub',desired_caps)#连接 appium 服务器


driver.start_activity("com.google.android.apps.messaging", "com.google.android.apps.messaging.ui.ConversationListActivity") #包名(前面是包名,后面是界面名)
time.sleep(3)
driver.find_element_by_xpath("//*[@content-desc='Conversation list']").click()  #点击事件
time.sleep(3)
driver.find_element_by_xpath("//*[@content-desc='Start chat']").click()  #点击事件
time.sleep(5)
driver.quit()

#如何定位一组元素,比如说我要打开设置的第三个选项
# driver.start_activity("com.android.settings",".Settings")
# A=driver.find_elements_by_class_name("android.widget.LinearLayout")
# A[6].click()
# time.sleep(5)
# driver.quit()
https://blog.csdn.net/hanhanwanghaha欢迎关注这个超级无敌可爱的人鸭,有什么问题留言私信皆可,看见必回!
创作不易,如有转载,请注明出处

