GithubCI+webhook实现push自动化部署(更灵活的脚本模式)
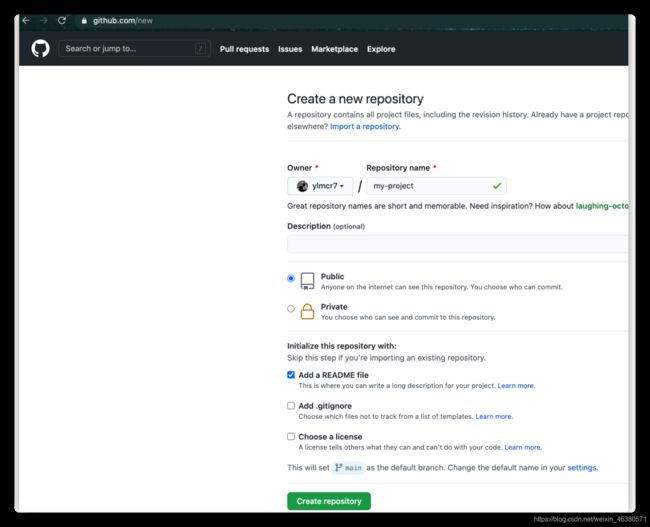
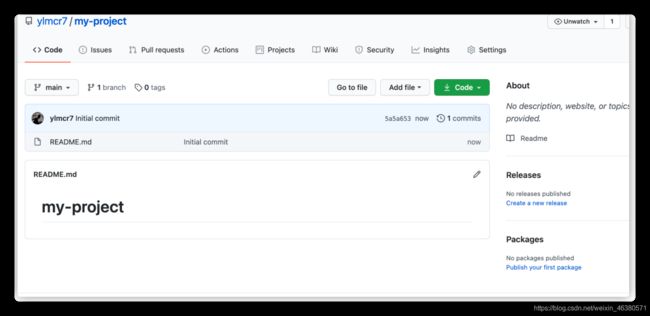
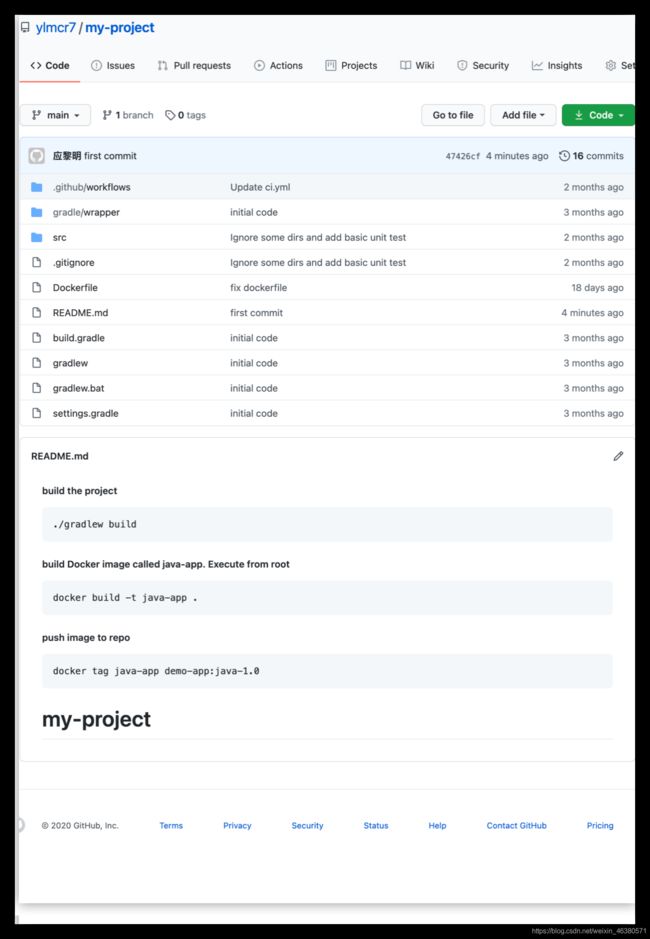
1.创建一个仓库并上传代码
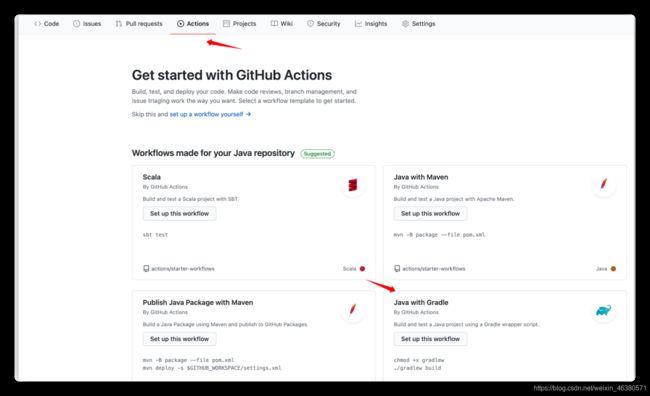
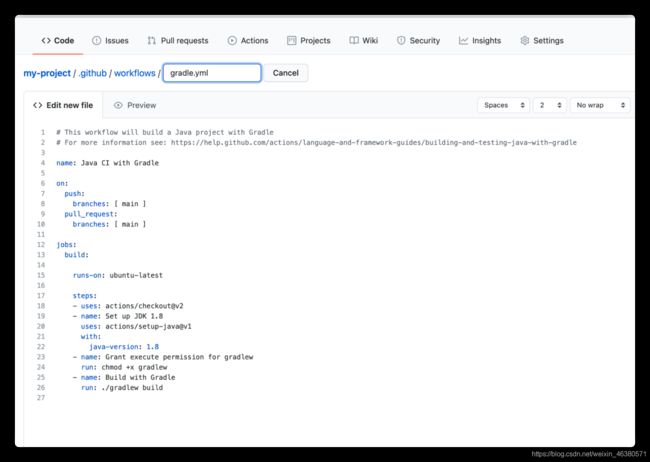
2.打开actions 选择对应的环境
- 我们不需要自己编写,可以根据现成的进行改动
- 参数介绍
name: Java CI with Gradle  #工作流程描述 在干么   #自定义

on:          #定义触发以下的工作流程事件   当一下操作进行时,将会触发工作流程
  push:
    branches: [ main ]    #触发的主分支
  pull_request:           #每次创建拉取请求时
    branches: [ main ]    #以main为目标,此工作流程将被执行
#以下是事件发生时 被执行的部分,
jobs:     #工作
  build:    #工作的名称     #自定义

    runs-on: ${
     matrix} #引用下面的变量
    strategy:
    	matrix:  #指标 可以选择多个版本  或多个操作系统
    	  os: [ubuntu-latest,windows-latest,macOS-latest]   #可以是数组
    steps:
    - uses: actions/checkout@v2     #checkout结账步骤  # v2是版本   #检查代码
    - name: Set up JDK 1.8
      uses: actions/setup-java@v1   #定义java环境    不需要配置任何东西,例如jenkins会配置java版本
      with:
        java-version: 1.8     # java版本  并将会安装他
    - name: Grant execute permission for gradlew #每次引用动作时,都将使用 此属性 对应 - uses
      run: chmod +x gradlew       #使用run 来执行命令
    - name: Build with Gradle
      run: ./gradlew build        #步骤近调用build


#以上的所有操作均在一个环境中执行
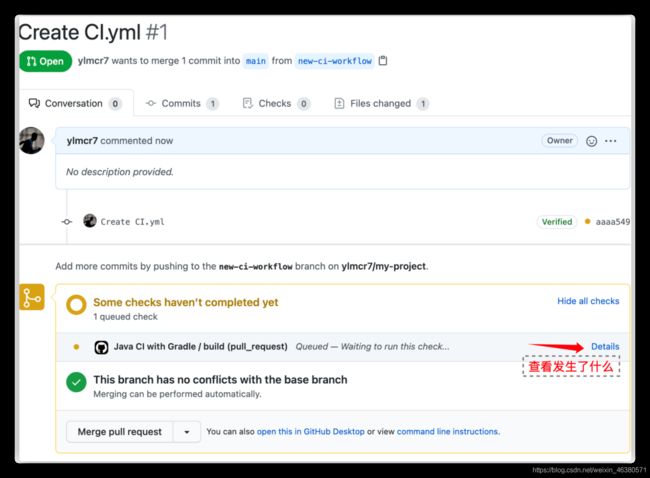
- 创建合并到其中的请求
- 触发了请求
提交创建请求
3.我们添加动作 push 到我们的docker hub上
https://github.com/marketplace/actions/docker-build-push-action
看到事例参数,是我们可以链接到docker hub
steps:
  - uses: actions/[email protected]
    name: Check out code

  - uses: mr-smithers-excellent/docker-build-push@v5
    name: Build & push Docker image
    with:
      image: repo/image
      tags: v1, latest
      registry: registry-url.io
      dockerfile: Dockerfile.ci
      username: ${
     {
      secrets.DOCKER_USERNAME }}
      password: ${
     {
      secrets.DOCKER_PASSWORD }}
- 更改文件
# For more information see: https://help.github.com/actions/language-and-framework-guides/building-and-testing-java-with-gradle

name: Java CI with Gradle

on:
  push:
    branches: [ main ]
  pull_request:
    branches: [ main ]

jobs:
  build:

    runs-on: ${
     {
     matrix.os}}
    straety:
      maritx:
        os: ubuntu-latest

    steps:
    - uses: actions/checkout@v2
    - name: Set up JDK 1.8
      uses: actions/setup-java@v1
      with:
        java-version: 1.8
    - name: Grant execute permission for gradlew
      run: chmod +x gradlew
    - name: Build with Gradle
      run: ./gradlew build
    - name: build and push Docker images
      uses: mr-smithers-excellent/docker-build-push@v5
      with:
      image: ylmcr7/d1
      registry: docker.io
      username: ${
     {
      secrets.DOCKER_USERNAME }}
      password: ${
     {
      secrets.DOCKER_PASSWORD }}
4.触发webhook模块实现自动化部署
https://docs.github.com/cn/free-pro-team@latest/developers/webhooks-and-events/about-webhooks
Webhook,也就是人们常说的钩子,是一个很有用的工具。你可以通过定制 Webhook 来监测你在 Github.com 上的各种事件,最常见的莫过于 push 事件。如果你设置了一个监测 push 事件的 Webhook,那么每当你的这个项目有了任何提交,这个 Webhook 都会被触发,这时 Github 就会发送一个 HTTP POST 请求到你配置好的地址。
如此一来,你就可以通过这种方式去自动完成一些重复性工作;比如,你可以用 Webhook 来自动触发一些持续集成(CI)工具的运作,比如 Travis CI;又或者是通过 Webhook 去部署你的线上服务器。
Github 开发者平台的文档中对 Webhook 的所能做的事是这样描述
https://docs.github.com/cn/free-pro-team@latest/developers/webhooks-and-events/about-webhooks
You’re only limited by your imagination.
面临的问题
我们公司正使用github作为我们的公开仓库,但是考虑到github 是个开源的仓库,所以我们使用阿里云的OSS作为一个实时的备份系统,使用webhook拉取我们的代码到本地服务器进行部署;为了实现这一个自动化的流程,所以我们使用webhook;
需要准备东西:
- 一个能够响应 Webhook 的外网服务器(有nginx服务)
- 独立外网的服务器;
- github仓库配置webhook
如果你准备好了 ,那跟随我一起揭开这神秘的面纱;
参考:
https://jerryzou.com/posts/webhook-practice/
https://aotu.io/notes/2016/01/07/auto-deploy-website-by-webhooks-of-github/index.html
http://www.showerlee.com/archives/2893
https://docs.github.com/cn/free-pro-team@latest/developers/webhooks-and-events/about-webhooks
1.响应 Webhook 的服务器
为了响应 Webhook 所发出的请求,从而做一些我们想做的事情,我们得先实现一个响应服务器。本文采用 Node 来实现一个原型,你当然也可以用 PHP,python 等,全凭个人喜好啦。代码很短,就直接陈列在下方了:
这个脚本 需要修改只有 token
还有var commands命令
cat >index.js <<"EOF"
const http = require('http');
const exec = require('exec');

const PORT = 7316;
const token = '070453a71f21b53f0af7bab4f41d4908680d1fcb';

const deployServer = http.createServer(function(request, response) {
  if (/^\/deploy\?token=/i.test(request.url) && request.url.includes(token)) {
    var commands = [
        'sh test.sh'
 //       'sh sashimi-online-github.sh'
    ].join(' && ');

    exec(commands, function(err, out, code) {
      if (err instanceof Error) {
        response.writeHead(500);
        response.end('Server Internal Error.');
        throw err
      }
      process.stderr.write(err);
      process.stdout.write(out);
      response.writeHead(200);
      response.end('Deploy Done.');
    });
  } else {
    response.writeHead(404);
    response.end('Not Found.');
  }
});

deployServer.listen(PORT);
EOF
ps:如果还需要实现更多,更复杂的功能,直接在 commands 数组中添加便是。
只要启动了服务器,那么 Webhook 就可以通过类似于 http://121.199.xxx.xxx:7316/deploy/ 来测试一下的脚本了;
- 贴出来test.sh 用来做测试看效果
cat >test.sh<<"EOF"
#!/bin/bash
echo "123">> test.log
EOF
2.启动服务
# 在后台启动部署服务器
$ node server.js &
Run Node Server Forever
我在实际使用的时候发现,我的 Node 服务器时不时会自动停掉,具体原因我暂时还没有弄清楚。不过似乎很多人都遇到了这样的困扰,要解决这个问题,forever 是个不错的选择。借助 forever 这个库,它可以保证 Node 持续运行下去,一旦服务器挂了,它都会重启服务器。
安装 forever:
$ [sudo] npm install -g forever
运行:
$ cd {
      部署服务器的根目录 }
$ forever start index.js
如果服务器安装的是 Ubuntu 系统,而 Ubuntu 中原本就有一个叫 node 的包。为了避免冲突,在 Ubuntu 上安装或使用 Node 得用 nodejs 这个名字。而 forever 默认是使用 node 作为执行脚本的程序名。所以为了处理 Ubuntu 存在的这种特殊情况,在启动 forever 时得另外添加一个参数:
$ forever start server.js -c nodejs
3. 配置nginx
到这一步服务已经跑起来了,但是对外网并不能直接访问到,所以还需要配置一下Nginx做一下反向代理:
[root@web01 ~]# cat /application/nginx/conf/extra/blog.conf
server {

    listen       80;
    `````````````````
    location /deploy {

      proxy_set_header host $host;
      proxy_set_header X-real-ip $remote_addr;
      proxy_set_header X-forward-for $proxy_add_x_forwarded_for;
      proxy_pass http://localhost:7316;
    }
    ````````````````
}
重启nginx
ngin -t
nginx -s reload
netstat -ntlp | grep 7310
OK,到这里整个服务已经搭建完成,下一步就只需要配置Github webhooks。
4.配置github webhooks
如果像是本文这种最简易的应用,Webhook 的配置是十分简单的。首先进入你的 repo 主页,通过点击页面上的按钮 [settings] -> [Webhooks & service] 进入 Webhooks 配置主页面。也可以通过下面这个链接直接进入配置页面:
https://github.com/[ 用户名 ]/[ 仓库名称 ]/settings/hooks
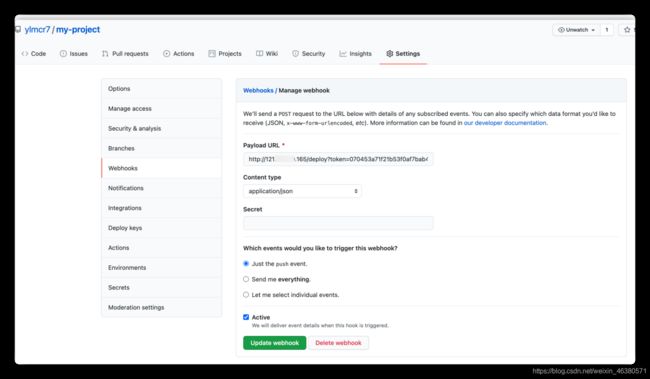
初次打卡webhook你是否和我一样懵逼
token 值哪里来?
Seret值要不要填
Payload URL哪里来
接下来 让我带你一步步设置
1.Payload URL
http://121.*.*.165/deploy?token=070453a71f21b53f0af7bab4f41d4908680d1fcb
你就用这个模板就可以了 网上套你自己的nginx站点ip
2.在Github下创建Personal access token
访问你的代码仓库如下路径
https://github.com/settings/tokens

这个token注意要和index.js文件里面的token值保持一致;
3.配置GitHub CI.yaml内容
此时我们只是配置好了webhook,还不行,我们还要配置githubCI.yaml文件,当我们提交代码是,会自动触发webhook去我们的服务器执行commands;
# This workflow will build a Java project with Gradle
# For more information see: https://help.github.com/actions/language-and-framework-guides/building-and-testing-java-with-gradle

name: Java CI with Gradle

on:
  push:
    branches: [ main ]
  pull_request:
    branches: [ main ]

jobs:
  build:

    runs-on: ubuntu-latest

    steps:
    - uses: actions/checkout@v2
    - name: Set up JDK 1.8
      uses: actions/setup-java@v1
      with:
        java-version: 1.8
    - name: Grant execute permission for gradlew
      run: chmod +x gradlew
    - name: Build with Gradle
      run: ./gradlew build

    - name: Build And Push Docker images
      uses: mr-smithers-excellent/docker-build-push@v4
      with:
        image: ylmcr7/ubuntu
        registry: docker.io
        username: ${
     {
      secrets.DOCKER_USERNAME }}
        password: ${
     {
      secrets.DOCKER_PASSWORD }}
    - name: Invoke deployment hook           #使用其他仓库的这个内容
      uses: jasongitmail/fast-webhook@v1
      with:
        url: ${
     {
      secrets.WEBHOOK_URL }}
        json: '{"hook": "233"}'
$ WEBHOOK_URL的值和Payload URL保持一致;设置方法参考上面
此时有了这些文件 ,我们的github actions webhook才能协同工作;
5.测试提交代码
https://github.com/ylmcr7/my-project
我们使用这个项目进行测试;你可以先fork然后再进行
因为我走的是ssh. 所我就先开始了
1.下载代码
git clone
2.上传新文件
$ touch 12.txt
$ git add .
$ git commit -m "12.txt"
$ git push
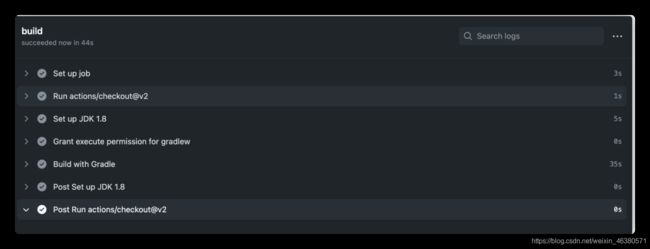
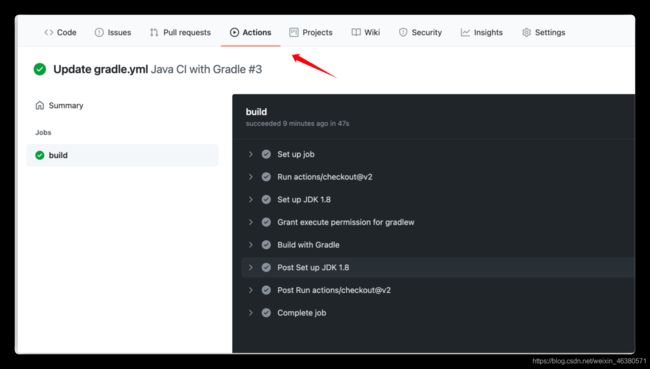
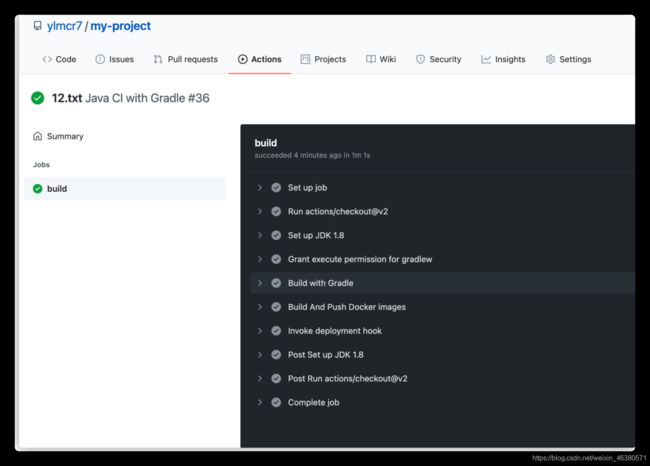
3.查看github actions是否成功
4.查看comands是否被执行成功
[root@web01 ~]# stat test.log
  文件:"test.log"
  大小:29        	块:8          IO 块:4096   普通文件
设备:fd01h/64769d	Inode:1185632     硬链接:1
权限:(0644/-rw-r--r--)  Uid:(    0/    root)   Gid:(    0/    root)
最近访问:2020-12-17 15:18:18.053332721 +0800
最近更改:2020-12-17 17:18:20.743987833 +0800
最近改动:2020-12-17 17:18:20.743987833 +0800
创建时间:-
OK 大功告成
!!!!!!!
