python爬虫(6)——Selenium的使用
目录
下载安装Selenium
selenium元素定位
控制浏览器操作
控制浏览器窗口大小
控制浏览器前进后退
刷新页面
WebDriver常用方法
点击和输入
提交
其他方法
鼠标事件
键盘事件
获取断言信息
设置元素等待
显式等待
隐式等待
定位一组元素
多表单切换
多窗口切换
警告框
下拉列表框选择
文件上传
调用JavaScript代码
窗口截图
关闭浏览器
下载安装Selenium
在DOS窗口输入命令pip install selenium
然后使用python编辑器输入如下代码进行运行:
from selenium import webdriver

driver=webdriver.Chrome()
driver.get("http://www.baidu.com")

print(driver.title)
driver.quit()
运行报错:
Traceback (most recent call last):
  File "E:\预PyCharm项目\教程\Demo\venv\lib\site-packages\selenium\webdriver\common\service.py", line 76, in start
    stdin=PIPE)
  File "F:\python\InstallationFiles\lib\subprocess.py", line 756, in __init__
    restore_signals, start_new_session)
  File "F:\python\InstallationFiles\lib\subprocess.py", line 1155, in _execute_child
    startupinfo)
FileNotFoundError: [WinError 2] 系统找不到指定的文件。

During handling of the above exception, another exception occurred:

Traceback (most recent call last):
  File "E:/预PyCharm项目/教程/第二章/demo1/demo1-1.py", line 3, in
    driver=webdriver.Chrome()
  File "E:\预PyCharm项目\教程\Demo\venv\lib\site-packages\selenium\webdriver\chrome\webdriver.py", line 73, in __init__
    self.service.start()
  File "E:\预PyCharm项目\教程\Demo\venv\lib\site-packages\selenium\webdriver\common\service.py", line 83, in start
    os.path.basename(self.path), self.start_error_message)
selenium.common.exceptions.WebDriverException: Message: 'chromedriver' executable needs to be in PATH. Please see https://sites.google.com/a/chromium.org/chromedriver/home
因为使用selenium驱动不同的浏览器,需要单独下载并设置不同的浏览器驱动。
各浏览器驱动地址:
注意:要下载和自己电脑浏览器版本相同的浏览器驱动,否则会报错
| 浏览器驱动 | 地址 |
|---|---|
| Firefox浏览器驱动 | https://github.com/mozilla/geckodriver/releases |
| Chrome浏览器驱动 | https://npm.taobao.org/mirrors/chromedriver |
| IE浏览器驱动 | http://selenium-release.storage.googleapis.com/index.html |
| Edge浏览器驱动 | https://developer.microsoft.com/en-us/microsoft-edge/tools/webdriver |
| Opera浏览器驱动 | https://github.com/operasoftware/operachromiumdriver/releases |
| PhantomJS浏览器驱动 | http://phantomjs.org/ |
下载成功后就是设置浏览器驱动。
然后将其添加到Path中
我的电脑-->属性-->系统设置-->高级-->环境变量-->系统变量-->Path
再次运行上面的python代码,如果还是报错。
可以自己定义驱动器的路径:
driver = webdriver.Chrome(r"F:\BrowserDriver\chromedriver\chromedriver_win32\chromedriver.exe")运行成功则在控制台打印:
百度一下,你就知道其他的浏览器驱动:
webdriver.Chrome()# 谷歌浏览器
webdriver.Firefox()# 火狐浏览器
webdriver.Ie() # IE浏览器
webdriver.Edge() # Edge浏览器
webdriver.Opera() # Opera浏览器
webdriver.PhantomJS() # PhantomJS浏览器
selenium元素定位
| 定位方式 | 对应方法 | 描述 |
|---|---|---|
| id | find_element_by_id() | 通过元素的ID属性 |
| name | find_element_by_name() | 通过元素的name属性 |
| className | find_element_by_class_name() | 通过元素的class属性(即类名) |
| tagName | find_element_by_tag_name() | 通过元素的标签名 |
| linkText | find_element_by_link_text() | 通过超链接的文本值(是a元素)必须精确匹配 |
| partialLinkText | find_element_by_partial_link_text() | 通过超链接的文本值(是a元素)是模糊匹配 |
| xpath | find_element_by_xpath() | 通过xpath表达式 |
| cssSelector | find_element_by_css_selector() | 通过CSS选择器 |
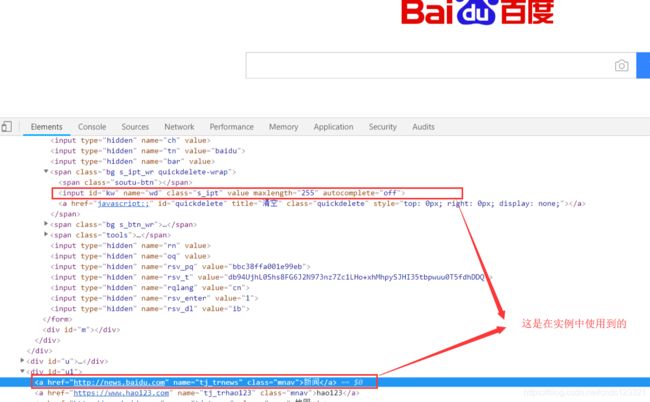
实例介绍:
from selenium import webdriver

options = webdriver.ChromeOptions()  # 由于浏览器安装的原因,这里自定义了浏览器的exe安装路径
options.binary_location = r"F:\谷歌浏览器\安装文件\Chrome-78.0.3904.108\Google\Chrome\Application\chrome.exe"

driver = webdriver.Chrome(options=options)
driver.get("http://www.baidu.com")

# 通过ID定位
driver.find_element_by_id("kw")

# 通过name定位
driver.find_element_by_name("wd")

# 通过className定位
driver.find_element_by_class_name("s_ipt")

# 通过tagName定位
driver.find_element_by_tag_name("input")

# 通过xpath表达式定位(能够定位成功的xpath表达式有很多,这里只写一种)
driver.find_element_by_xpath("//input[@id='kw']")

# 通过CSS选择器定位(能够定位成功的CSS选择器有很多,这里只写一种)
driver.find_element_by_css_selector(".s_ipt")

# 通过a元素的文本值进行精确定位(精确地位即a标签的完整文本值)
driver.find_element_by_link_text("新闻")

# 通过a元素的文本值进行模糊定位(模糊定位即a标签的一些文本值)
driver.find_element_by_partial_link_text("新")

driver.quit()
控制浏览器操作
控制浏览器窗口大小
让某种浏览器以自定义尺寸打开,让访问的页面在这种尺寸下运行。
python代码如下:
from selenium import webdriver

options = webdriver.ChromeOptions()  # 由于浏览器安装的原因,这里自定义了浏览器的exe安装路径
options.binary_location = r"F:\谷歌浏览器\安装文件\Chrome-78.0.3904.108\Google\Chrome\Application\chrome.exe"

driver = webdriver.Chrome(options=options)
driver.get("http://www.baidu.com")

driver.set_window_size(300, 400)  # 第一个参数是浏览器的宽度;第二个参数是浏览器的高度
# driver.maximize_window()# 控制浏览器全屏显示

# driver.quit() # 这行代码先注释掉,以免运行后直接关掉
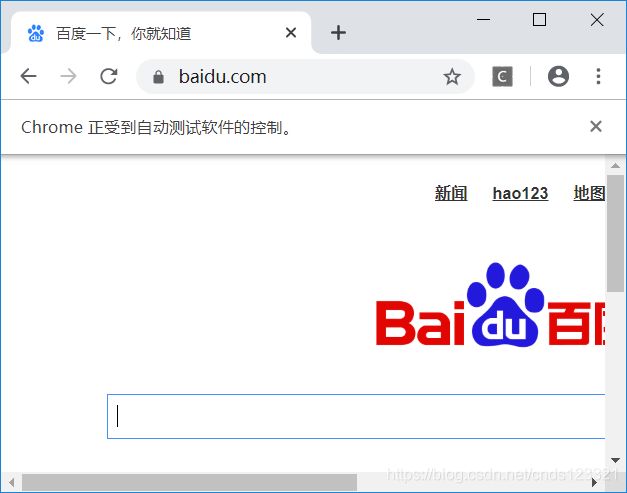
运行效果如下:
控制浏览器前进后退
在使用浏览器浏览网页时,浏览器提供了后退和前进按钮,可以方便地在浏览过的网页之间切换,WebDriver也提供了对应的back()和forward()方法来模拟后退和前进按钮。
from selenium import webdriver

options = webdriver.ChromeOptions()  # 由于浏览器安装的原因,这里自定义了浏览器的exe安装路径
options.binary_location = r"F:\谷歌浏览器\安装文件\Chrome-78.0.3904.108\Google\Chrome\Application\chrome.exe"

driver = webdriver.Chrome(options=options)

# 访问百度首页,即第一个页面
first_url = "https://www.baidu.com/"
print("现在访问: " + first_url)
driver.get(first_url)

# 访问新闻页面,即第二个页面
second_url = "http://news.baidu.com/"
print("现在访问:" + second_url)
driver.get(second_url)

# 后退到百度首页(第一个页面)
print("后退到百度首页:" + first_url)
driver.back()

# 前进到新闻页面(第二个页面)
print("前进到新闻页面:" + second_url)
driver.forward()

# driver.quit() # 这行代码先注释掉,以免运行后直接关掉
由于页面切换比较快,图片不好展示,以控制台打印来显示执行过程:
现在访问: https://www.baidu.com/
现在访问:http://news.baidu.com/
后退到百度首页:https://www.baidu.com/
前进到新闻页面:http://news.baidu.com/
刷新页面
如果需要手动刷新页面,可以使用refresh()方法。
from selenium import webdriver

options = webdriver.ChromeOptions()  # 由于浏览器安装的原因,这里自定义了浏览器的exe安装路径
options.binary_location = r"F:\谷歌浏览器\安装文件\Chrome-78.0.3904.108\Google\Chrome\Application\chrome.exe"

driver = webdriver.Chrome(options=options)

# 手动刷新页面
driver.refresh()

# driver.quit() # 这行代码先注释掉,以免运行后直接关掉
WebDriver常用方法
点击和输入
from selenium import webdriver

# clear():清除输入框中的文本
# send_keys(value):模拟按键在输入框中输入文本值
# click():单击按钮元素

options = webdriver.ChromeOptions()  # 由于浏览器安装的原因,这里自定义了浏览器的exe安装路径
options.binary_location = r"F:\谷歌浏览器\安装文件\Chrome-78.0.3904.108\Google\Chrome\Application\chrome.exe"
driver = webdriver.Chrome(options=options)
driver.get("http://www.baidu.com")

# 清除ID为"kw"的输入框中的文本
driver.find_element_by_id("kw").clear()
# 向ID为"kw"的输入框中输入一个值
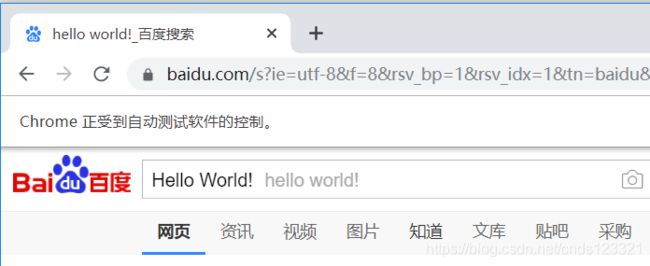
driver.find_element_by_id("kw").send_keys("Hello World!")
# 点击ID为"su"的按钮
driver.find_element_by_id("su").click()

# driver.quit() # 这行代码先注释掉,以免运行后直接关掉
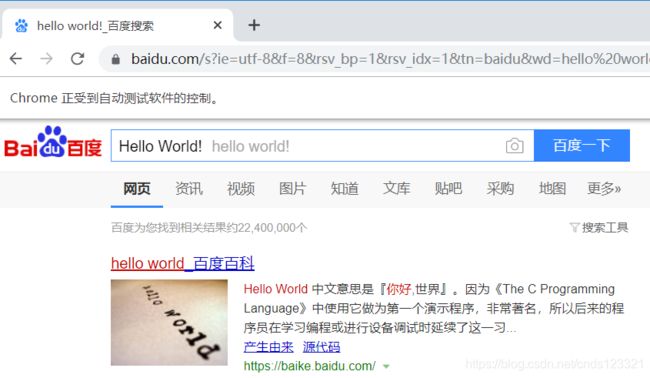
运行成功,会有如下效果:
提交
submit()方法用于提交表单。 例如, 在搜索框输入关键字之后的“回车” 操作, 就可以通过该方法模拟。
from selenium import webdriver

# submit():用于提交表单,和click()方法相似

options = webdriver.ChromeOptions()  # 由于浏览器安装的原因,这里自定义了浏览器的exe安装路径
options.binary_location = r"F:\谷歌浏览器\安装文件\Chrome-78.0.3904.108\Google\Chrome\Application\chrome.exe"
driver = webdriver.Chrome(options=options)
driver.get("http://www.baidu.com")

# 获取ID为"kw"的输入框
search_text = driver.find_element_by_id("kw")
# 清除ID为"kw"的输入框中的文本
search_text.clear()
# 向ID为"kw"的输入框中输入一个值
search_text.send_keys("Hello World!")
# 并使用submit()方法提交
search_text.submit()

# driver.quit() # 这行代码先注释掉,以免运行后直接关掉
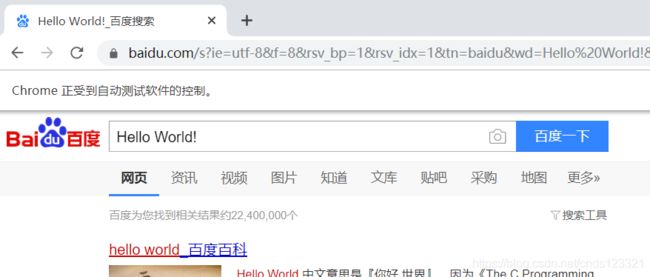
运行成功的效果如下:
和上面的click()方法类似。
其他方法
from selenium import webdriver

# size:属性,返回元素的尺寸,结果是一个字典
# text:属性,返回元素的文本
# get_attribute(attributeName):方法,返回元素的属性值,参数是要获取的属性名字
# is_displayed():设置该元素是否用户可见

options = webdriver.ChromeOptions()  # 由于浏览器安装的原因,这里自定义了浏览器的exe安装路径
options.binary_location = r"F:\谷歌浏览器\安装文件\Chrome-78.0.3904.108\Google\Chrome\Application\chrome.exe"
driver = webdriver.Chrome(options=options)
driver.get("http://www.baidu.com")

# 获取ID为"kw"的元素的尺寸大小
size = driver.find_element_by_id("kw").size
print(size)

# 获取ID为"tj_trnews"的元素的文本
text = driver.find_element_by_name("tj_trnews").text
print(text)

# 返回ID为"tj_trnews"的元素的属性值
attribute = driver.find_element_by_name("tj_trnews").get_attribute("href")
print(attribute)

# 返回ID为"tj_trnews"的元素的结果是否可见,返回值是True或False
result = driver.find_element_by_name("tj_trnews").is_displayed()
print(result)

driver.quit()
控制台打印结果为:
{'height': 22, 'width': 500}
新闻
http://news.baidu.com/
True
鼠标事件
from selenium import webdriver
from selenium.webdriver.common.action_chains import ActionChains  # 导入鼠标操作方法的类

# 在 WebDriver 中, 将这些关于鼠标操作的方法封装在 ActionChains 类提供。
# ActionChains 类提供了鼠标操作的常用方法:
# perform(): 执行所有 ActionChains 中存储的行为;
# context_click(): 右击;
# double_click(): 双击;
# drag_and_drop(): 拖动;
# move_to_element(): 鼠标悬停。

options = webdriver.ChromeOptions()  # 由于浏览器安装的原因,这里自定义了浏览器的exe安装路径
options.binary_location = r"F:\谷歌浏览器\安装文件\Chrome-78.0.3904.108\Google\Chrome\Application\chrome.exe"
driver = webdriver.Chrome(options=options)
driver.get("http://www.baidu.com")

# 获取ID为"su"的元素
element = driver.find_element_by_id("su")
# 执行鼠标悬停操作
# 调用 ActionChains()类, 将浏览器驱动 driver 作为参数传入。
# move_to_element(element)方法是模拟鼠标悬停操作,在调用是传入要指定的元素
# perform()相当于提交
ActionChains(driver).move_to_element(element).perform()

driver.quit()
键盘事件
示例代码如下:
from selenium import webdriver
# 使用键盘事件需要引入keys模块
from selenium.webdriver.common.keys import Keys

options = webdriver.ChromeOptions()  # 由于浏览器安装的原因,这里自定义了浏览器的exe安装路径
options.binary_location = r"F:\谷歌浏览器\安装文件\Chrome-78.0.3904.108\Google\Chrome\Application\chrome.exe"
driver = webdriver.Chrome(options=options)
driver.get("http://www.baidu.com")

# 输入框输入内容
driver.find_element_by_id("kw").send_keys("Hello")
# 输入空格键
driver.find_element_by_id("kw").send_keys(Keys.SPACE)
# 输入框输入内容
driver.find_element_by_id("kw").send_keys("World!")
# 复制输入框内容
driver.find_element_by_id("kw").send_keys(Keys.CONTROL, "c")
# 通过回车键提交输入框内容
driver.find_element_by_id("su").send_keys(Keys.ENTER)

# driver.quit()
运行效果图如下:
代码解释说明:
- from selenium.webdriver.common.keys import Keys:在使用键盘按键方法前需要先导入 keys 类。
-
send_keys(Keys.BACK_SPACE) :删除键(BackSpace)
-
send_keys(Keys.SPACE):空格键(Space)
-
send_keys(Keys.TAB) :制表键(Tab)
-
send_keys(Keys.ESCAPE) :回退键(Esc)
-
send_keys(Keys.ENTER): 回车键(Enter)
-
send_keys(Keys.CONTROL,'a') :全选(Ctrl+A)
-
send_keys(Keys.CONTROL,'c') :复制(Ctrl+C)
-
send_keys(Keys.CONTROL,'x') :剪切(Ctrl+X)
-
send_keys(Keys.CONTROL,'v') :粘贴(Ctrl+V)
-
send_keys(Keys.F1) 键盘 F1
-
……
-
send_keys(Keys.F12) 键盘 F12
获取断言信息
将程序实际产生的结果与自己预期想要产生的结果进行比较,即为断言。
在selenium中通常使用title、URL和text等信息进行断言。
import time

from selenium import webdriver

options = webdriver.ChromeOptions()  # 由于浏览器安装的原因,这里自定义了浏览器的exe安装路径
options.binary_location = r"F:\谷歌浏览器\安装文件\Chrome-78.0.3904.108\Google\Chrome\Application\chrome.exe"
driver = webdriver.Chrome(options=options)
driver.get("http://www.baidu.com")

print("搜索提交之前:")
print(driver.title)  # 打印当前页面的title
print(driver.current_url)  # 打印当前页面的URL

driver.find_element_by_id("kw").send_keys("Hello World!")
driver.find_element_by_id("su").click()
time.sleep(3)# 延迟3秒

print("搜索提交之后:")
print(driver.title)  # 打印当前页面的title
print(driver.current_url)  # 打印当前页面的URL

print(driver.find_element_by_css_selector("span.nums_text").text)  # 打印结果

driver.quit()
控制台打印:
搜索提交之前:
百度一下,你就知道
https://www.baidu.com/
搜索提交之后:
Hello World!_百度搜索
https://www.baidu.com/s?ie=utf-8&f=8&rsv_bp=1&rsv_idx=1&tn=baidu&wd=Hello%20World!&rsv_pq=ac825d880001b31a&rsv_t=6e57kMEF39ti66UkqskIuuYFq1L5LER8TH%2F7tKqs8vlflFjmFTI8%2FAKVk7w&rqlang=cn&rsv_enter=0&rsv_dl=tb&rsv_sug3=12&inputT=190&rsv_sug4=191
百度为您找到相关结果约22,400,000个
代码解释说明:
-
title:用于获得当前页面的标题。
-
current_url:用户获得当前页面的URL。
-
text:获取元素的文本信息。
设置元素等待
WebDriver提供了两种类型的等待:显式等待和隐式等待。
显式等待
显式等待即是等待某个条件成立时再继续执行,否则在达到最大时长时抛出超时异常。
from selenium import webdriver
from selenium.webdriver.common.by import By
from selenium.webdriver.support import expected_conditions as EC
from selenium.webdriver.support.ui import WebDriverWait

# 设置元素等待
# 显式等待:在某个条件成立时继续执行,否则在超时后抛出异常
# 隐式等待:

options = webdriver.ChromeOptions()  # 由于浏览器安装的原因,这里自定义了浏览器的exe安装路径
options.binary_location = r"F:\谷歌浏览器\安装文件\Chrome-78.0.3904.108\Google\Chrome\Application\chrome.exe"
driver = webdriver.Chrome(options=options)
driver.get("http://www.baidu.com")

element = WebDriverWait(driver, 5, 0.5).until(EC.presence_of_element_located((By.ID, "kw")))
element.send_keys("Hello World!")

# driver.quit()
运行完成后如果不关闭浏览器,就会出现如下:
如果把"kw"改成"kww"
由于不存在这个元素就会报异常TimeoutException
代码解释说明:
- 本例中是判断ID为"kw"的元素是否存在。
- 注意需要导入如下模块:
from selenium.webdriver.common.by import By
from selenium.webdriver.support import expected_conditions as EC
from selenium.webdriver.support.ui import WebDriverWait
- WebDriverWait类是由WebDirver 提供的等待方法。在设置时间内,默认每隔一段时间检测一次当前页面元素是否存在,如果超过设置时间检测不到则抛出异常。
- WebDriverWait()一般由until()或until_not()方法配合使用。until()方法提供一个驱动程序作为参数直到返回值为True;until_not()方法与until()方法相反,直到返回值为False。
WebDriverWait参数介绍:
WebDriverWait(driver,timeout,poll_frequency,ignored_exceptions)
# driver:浏览器的驱动
# timeout:最长超时时间,默认以秒为单位
# poll_frequency:检测的间隔(步长)时间,默认为0.5S。
# ignored_exceptions :超时后的异常信息,默认情况下抛NoSuchElementException异常。
隐式等待
隐式等待通过implicitly_wait()方法来实现,默认设置为0.
from time import ctime

from selenium import webdriver
from selenium.common.exceptions import NoSuchCookieException

# 设置元素等待
# 显式等待:在某个条件成立时继续执行,否则在超时后抛出异常
# 隐式等待:如果元素可以定位则继续执行,否则以轮询的方式不断判断元素是否被定位到,直到超出设置时长才抛出异常

options = webdriver.ChromeOptions()  # 由于浏览器安装的原因,这里自定义了浏览器的exe安装路径
options.binary_location = r"F:\谷歌浏览器\安装文件\Chrome-78.0.3904.108\Google\Chrome\Application\chrome.exe"
driver = webdriver.Chrome(options=options)
driver.get("http://www.baidu.com")

# 设置隐式等待为10秒
driver.implicitly_wait(10)  # 默认参数的单位是秒

try:
    print(ctime())  # 输出现在时间
    driver.find_element_by_id("kww").send_keys("Hello World!")  # 查找id为"kww"的元素,如果没有找到10秒后抛出异常
except NoSuchCookieException as e:
    print(e)
finally:
    print(ctime())  # 输入现在时间
    driver.quit()
控制台抛出异常的打印:
定位一组元素
定位一组元素和定位单个元素相似,只是多个s而已。
driver.find_elements_by_id()# 通过ID查找一组元素
driver.find_elements_by_name()# 通过name属性查找一组元素
driver.find_elements_by_class_name()# 通过class名查找一组元素
driver.find_elements_by_tag_name()# 通过标签名查找一组元素
driver.find_elements_by_link_text()# 通过a标签的文本值精确匹配一组元素
driver.find_elements_by_partial_link_text()# 通过a标签的文本值模糊匹配一组元素
driver.find_elements_by_xpath()# 通过XPATH表达式查找一组元素
driver.find_elements_by_css_selector()# 通过CSS选择器查找一组元素
下面只演示其中一个的例子,使用和定位单个元素相同。
from selenium import webdriver

# 定位一组元素

options = webdriver.ChromeOptions()  # 由于浏览器安装的原因,这里自定义了浏览器的exe安装路径
options.binary_location = r"F:\谷歌浏览器\安装文件\Chrome-78.0.3904.108\Google\Chrome\Application\chrome.exe"
driver = webdriver.Chrome(options=options)
driver.get("http://www.baidu.com")

# 通过ID查找一组a标签的元素,返回一个列表
elements = driver.find_elements_by_tag_name("a")
# 选好遍历列表
for element in elements:
    print(element.text)

driver.quit()
控制台打印:
新闻
hao123
地图
视频
贴吧
学术
登录
设置
更多产品
把百度设为主页
关于百度
About  Baidu
百度推广
使用百度前必读
意见反馈
京公网安备11000002000001号
多表单切换
在Web应用中经常会遇到frame/iframe表单嵌套页面的应用,WebDriver只能在一个页面上对元素识别与定位,对于frame/iframe表单内嵌页面上的元素无法直接定位。
这时就需要通过switch_to.frame()方法将当前定位的主体切换为frame/iframe表单的内嵌页面中。
下面以网易邮箱的登录为例:
from selenium import webdriver

# 多表单切换

options = webdriver.ChromeOptions()  # 由于浏览器安装的原因,这里自定义了浏览器的exe安装路径
options.binary_location = r"F:\谷歌浏览器\安装文件\Chrome-78.0.3904.108\Google\Chrome\Application\chrome.exe"
driver = webdriver.Chrome(options=options)
driver.get("https://mail.163.com/")

# 点击“密码登录”超链接,跳转至登录表单
driver.find_element_by_id("switchAccountLogin").click()
# 跳到iframe表单
iframe = driver.find_element_by_tag_name("iframe")
driver.switch_to.frame(iframe)
driver.find_element_by_xpath("//input[@name='email']").send_keys("10086")
driver.find_element_by_name("password").send_keys("123456")
# 跳回到最外层的页面
# driver.switch_to.default_content()

# driver.quit()
运行成功的效果如下:
代码解释说明:
- switch_to.frame()默认可用直接读取表单的id或name属性。
- 如果没有可用的id和name属性,可用使用其他方式读取到该iframe元素,然后作为参数传递进去
- switch_to.default_content()方法可用跳回到最外层的页面。
多窗口切换
在页面操作过程中有时候点击某个链接会弹出新的窗口,这时就需要主机切换到新打开的窗口上进行操作。
WebDriver提供了switch_to.window()方法,可以实现在不同的窗口之间切换。
以百度注册为例:
from selenium import webdriver

# 多窗口切换

options = webdriver.ChromeOptions()  # 由于浏览器安装的原因,这里自定义了浏览器的exe安装路径
options.binary_location = r"F:\谷歌浏览器\安装文件\Chrome-78.0.3904.108\Google\Chrome\Application\chrome.exe"
driver = webdriver.Chrome(options=options)
driver.get("https://passport.baidu.com/v2/?login&tpl=mn&u=http%3A%2F%2Fwww.baidu.com%2F")

# 获取当前页面的窗口句柄
current_handle = driver.current_window_handle

# 打开“立即注册”新窗口
driver.find_element_by_link_text("立即注册").click()

# 获取当前打开的所有的窗口的句柄
all_handles = driver.window_handles

# 切换窗口
for handle in all_handles:
    if handle != current_handle:
        # 切换窗口
        driver.switch_to.window(handle)
        # 为输入框填入值
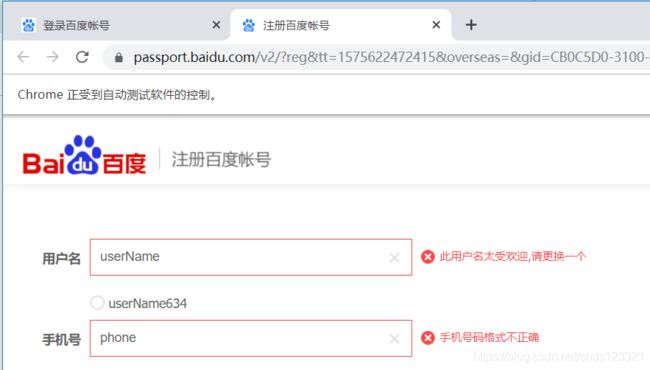
        driver.find_element_by_name("userName").send_keys("userName")
        driver.find_element_by_name("phone").send_keys("phone")

# driver.quit()
打开的浏览器页面如下:
代码解释说明:
- current_window_handle:属性,获取当前窗口的句柄。
- window_handles:属性,获取所有窗口的句柄。
- switch_to.window():方法,切换到相应的窗口,参数是要切换的窗口的句柄。
警告框
webdriver可用处理由JavaScript产生的alert、confirm及prompt等对话框。
示例如下:
from selenium import webdriver
from selenium.webdriver.common.action_chains import ActionChains
import time

# 处理警告框

options = webdriver.ChromeOptions()  # 由于浏览器安装的原因,这里自定义了浏览器的exe安装路径
options.binary_location = r"F:\谷歌浏览器\安装文件\Chrome-78.0.3904.108\Google\Chrome\Application\chrome.exe"
driver = webdriver.Chrome(options=options)
driver.get("http://www.baidu.com")

# 将鼠标放在“设置”链接上
link=driver.find_element_by_link_text("设置")
ActionChains(driver).move_to_element(link).perform()

# 打开“搜索设置”
driver.find_element_by_link_text("搜索设置").click()
time.sleep(6)# 需要等待一段时间

# 点击“保存设置”
driver.find_element_by_link_text("保存设置").click()

# 接受警告框
# driver.switch_to.alert.accept()
# 打印警告框信息
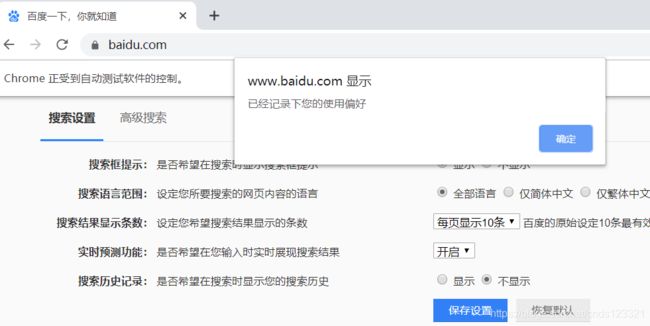
print(driver.switch_to.alert.text)

# driver.quit()
控制台打印:
已经记录下您的使用偏好浏览器如下:
代码解释说明:
- switch_to.alert:是获取当前页面的警告框
- text:属性,接受alert、confirm、prompt中的文字信息
- accept():接受现有警告框
- dismiss():解散现有警告框
- send_keys(text):发送文本至警告框。text即是你要发送的文本。
下拉列表框选择
可用Select类来处理下拉列表框。
import time

from selenium import webdriver
from selenium.webdriver.common.action_chains import ActionChains
from selenium.webdriver.support.select import Select

# 下拉列表框选择

options = webdriver.ChromeOptions()  # 由于浏览器安装的原因,这里自定义了浏览器的exe安装路径
options.binary_location = r"F:\谷歌浏览器\安装文件\Chrome-78.0.3904.108\Google\Chrome\Application\chrome.exe"
driver = webdriver.Chrome(options=options)
driver.get("http://www.baidu.com")

# 将鼠标放在“设置”链接上
link = driver.find_element_by_link_text("设置")
ActionChains(driver).move_to_element(link).perform()

# 打开“搜索设置”
driver.find_element_by_link_text("搜索设置").click()
time.sleep(6)  # 需要等待一段时间

# 获取下拉列表框并选择值
select = driver.find_element_by_name("NR")
# Select(select).select_by_index(2)# 通过索引进行选择,索引从0开始
# Select(select).select_by_value("20")# 通过值进行选择
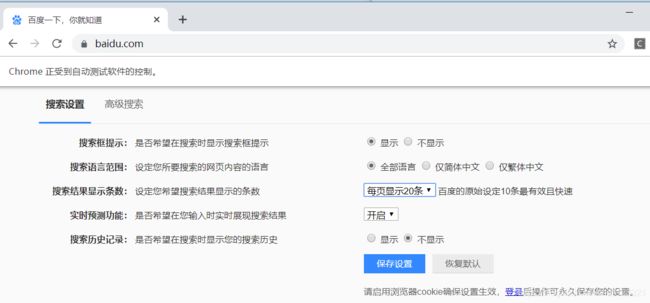
Select(select).select_by_visible_text("每页显示20条")# 通过显式的文本进行选择

# driver.quit()
浏览器效果如下:
文件上传
对于通过input标签实现的上传功能,可以将其看作是一个输入框,即通过send_keys()指定本地文件路径的方式实现文件上传。
from selenium import webdriver

# 下拉列表框选择

options = webdriver.ChromeOptions()  # 由于浏览器安装的原因,这里自定义了浏览器的exe安装路径
options.binary_location = r"F:\谷歌浏览器\安装文件\Chrome-78.0.3904.108\Google\Chrome\Application\chrome.exe"
driver = webdriver.Chrome(options=options)
driver.get("https://download.csdn.net/upload")

driver.find_element_by_id("txt_userfile").send_keys(r"C:\Users\Administrator\Documents\temp\temp.txt")

# driver.quit()
操作cookie
WebDriver提供了操作Cookie的相关方法,可以读取、添加和删除cookie信息。
WebDriver操作cookie的方法:
| 方法 | 描述 |
|---|---|
| get_cookies() | 获得所有的cookie信息 |
| get_cookie(name) | 返回字典的key为“name”的cookie信息 |
| add_cookie(cookie_dict) | 添加cookie。参数是一个字典对象,必须拥有name和value值 |
| delete_cookie(name,optionsString) | 删除cookie信息,“name”是要删除的cookie名称;“optionsString”是该cookie的选项 |
| delete_all_cookies() | 删除所有的cookie信息 |
from selenium import webdriver

# 操作cookie

options = webdriver.ChromeOptions()  # 由于浏览器安装的原因,这里自定义了浏览器的exe安装路径
options.binary_location = r"F:\谷歌浏览器\安装文件\Chrome-78.0.3904.108\Google\Chrome\Application\chrome.exe"
driver = webdriver.Chrome(options=options)
driver.get("https://www.baidu.com/")

# 获取cookie信息
cookie=driver.get_cookies()
# 打印
print(cookie)

# 写入cookie信息
driver.add_cookie({"name":"张三","value":"123456"})
# 打印
print(driver.get_cookies())

# 删除cookie
driver.delete_all_cookies()
# 打印
print(driver.get_cookies())

driver.quit()
控制台打印:
[{'domain': '.baidu.com', 'httpOnly': False, 'name': 'H_PS_PSSID', 'path': '/', 'secure': False, 'value': '1434_21120_30210_30071_22159'}, {'domain': '.baidu.com', 'expiry': 1607165433.523985, 'httpOnly': False, 'name': 'BAIDUID', 'path': '/', 'secure': False, 'value': 'C2D902C0E736D3D3F1BCEC5909153B0E:FG=1'}, {'domain': '.baidu.com', 'expiry': 3723113080.523962, 'httpOnly': False, 'name': 'BIDUPSID', 'path': '/', 'secure': False, 'value': 'C2D902C0E736D3D30F3C6E6D815F1039'}, {'domain': '.baidu.com', 'httpOnly': False, 'name': 'delPer', 'path': '/', 'secure': False, 'value': '0'}, {'domain': '.baidu.com', 'expiry': 3723113080.523975, 'httpOnly': False, 'name': 'PSTM', 'path': '/', 'secure': False, 'value': '1575629434'}, {'domain': '.baidu.com', 'expiry': 1575715833.924175, 'httpOnly': False, 'name': 'BDORZ', 'path': '/', 'secure': False, 'value': 'B490B5EBF6F3CD402E515D22BCDA1598'}, {'domain': 'www.baidu.com', 'expiry': 1576493433, 'httpOnly': False, 'name': 'BD_UPN', 'path': '/', 'secure': False, 'value': '12314753'}, {'domain': 'www.baidu.com', 'httpOnly': False, 'name': 'BD_HOME', 'path': '/', 'secure': False, 'value': '0'}]
[{'domain': 'www.baidu.com', 'httpOnly': False, 'name': '张三', 'path': '/', 'secure': True, 'value': '123456'}, {'domain': '.baidu.com', 'httpOnly': False, 'name': 'H_PS_PSSID', 'path': '/', 'secure': False, 'value': '1434_21120_30210_30071_22159'}, {'domain': '.baidu.com', 'expiry': 1607165433.523985, 'httpOnly': False, 'name': 'BAIDUID', 'path': '/', 'secure': False, 'value': 'C2D902C0E736D3D3F1BCEC5909153B0E:FG=1'}, {'domain': '.baidu.com', 'expiry': 3723113080.523962, 'httpOnly': False, 'name': 'BIDUPSID', 'path': '/', 'secure': False, 'value': 'C2D902C0E736D3D30F3C6E6D815F1039'}, {'domain': '.baidu.com', 'httpOnly': False, 'name': 'delPer', 'path': '/', 'secure': False, 'value': '0'}, {'domain': '.baidu.com', 'expiry': 3723113080.523975, 'httpOnly': False, 'name': 'PSTM', 'path': '/', 'secure': False, 'value': '1575629434'}, {'domain': '.baidu.com', 'expiry': 1575715833.924175, 'httpOnly': False, 'name': 'BDORZ', 'path': '/', 'secure': False, 'value': 'B490B5EBF6F3CD402E515D22BCDA1598'}, {'domain': 'www.baidu.com', 'expiry': 1576493433, 'httpOnly': False, 'name': 'BD_UPN', 'path': '/', 'secure': False, 'value': '12314753'}, {'domain': 'www.baidu.com', 'httpOnly': False, 'name': 'BD_HOME', 'path': '/', 'secure': False, 'value': '0'}]
[]
调用JavaScript代码
WebDriver提供了execute_script()方法来执行JavaScript代码。
import time

from selenium import webdriver

# 执行JavaScript代码

options = webdriver.ChromeOptions()  # 由于浏览器安装的原因,这里自定义了浏览器的exe安装路径
options.binary_location = r"F:\谷歌浏览器\安装文件\Chrome-78.0.3904.108\Google\Chrome\Application\chrome.exe"
driver = webdriver.Chrome(options=options)
driver.get("https://www.baidu.com/")

driver.set_window_size(300, 400)  # 设置浏览器大小

# 通过JavaScript设置浏览器窗口的滚动条位置
js1 = "window.scrollTo(100,300)"
driver.execute_script(js1)
time.sleep(5)

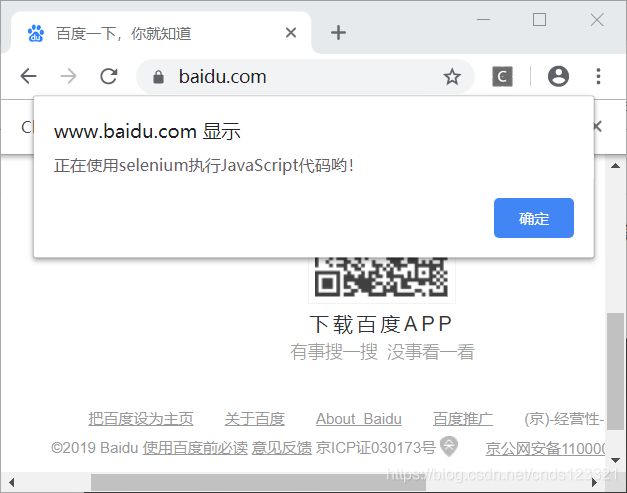
js2 = "alert('正在使用selenium执行JavaScript代码哟!')"
driver.execute_script(js2)

# driver.quit()
浏览器效果如下:
窗口截图
WebDriver提供了截图函数get_screenshot_as_file()来截取当前窗口。
import time

from selenium import webdriver

# 窗口截图

options = webdriver.ChromeOptions()  # 由于浏览器安装的原因,这里自定义了浏览器的exe安装路径
options.binary_location = r"F:\谷歌浏览器\安装文件\Chrome-78.0.3904.108\Google\Chrome\Application\chrome.exe"
driver = webdriver.Chrome(options=options)
driver.get("https://www.baidu.com/")

driver.set_window_size(300, 400)  # 设置浏览器大小

# 截取当前窗口,并指定截图图片的保存位置
driver.get_screenshot_as_file("screen_shot.png")

driver.quit()
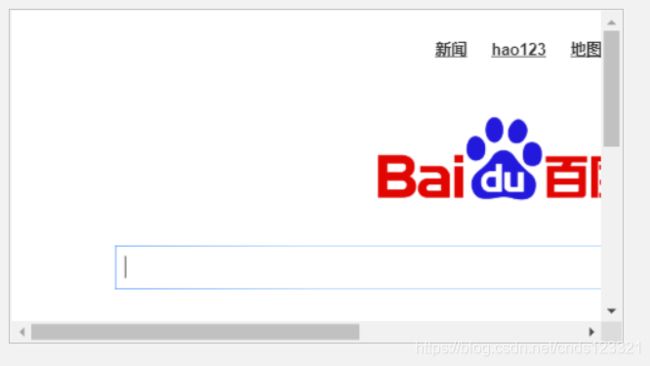
图片如下:
关闭浏览器
webdriver提供两个方法
-
close() 关闭单个窗口
-
quit() 关闭所有窗口
from selenium import webdriver

# 关闭窗口
# close() 关闭单个窗口
# quit() 关闭所有窗口

options = webdriver.ChromeOptions()  # 由于浏览器安装的原因,这里自定义了浏览器的exe安装路径
options.binary_location = r"F:\谷歌浏览器\安装文件\Chrome-78.0.3904.108\Google\Chrome\Application\chrome.exe"
driver = webdriver.Chrome(options=options)
driver.get("https://www.baidu.com/")

# 关闭窗口
driver.quit()


