Ubuntu 安装 ImageMagic(6.9.1-6)及 PHP 的 imagick (3.0.1)扩展
关于 ImageMagic 和 imagick 的介绍,见《图片处理神器ImageMagick以及PHP的imagick扩展》 和 《Ubuntu下安装ImageMagick和MagicWand For PHP》,安装和代码也都参考自这几篇文章,同时记录下了自己的安装过程以及自己在安装过程中遇到的问题。
说明:ImageMagic 的 PHP 扩展可以用 imagick 和 MagicWand for PHP,这里安装使用 imagick。
安装环境:Ubuntu 13.10 (GNU/Linux 3.11.0-12-generic i686)
Nginx 版本:1.2.7
Nginx 安装路径:/usr/local/nginx
Nginx 网站根目录:/home/wwwroot
PHP 版本:5.3.27
PHP 框架:ThinkPHP 3.2.2
PHP 安装路径:/usr/local/php
PHP 配置文件 php.ini 路径:/usr/local/php/etc/php.ini
(一)安装 ImageMagic (6.9.1-6)
下载地址:http://www.imagemagick.org/download/ImageMagick-6.9.1-6.tar.gz
① 下载安装包 ImageMagick-6.9.1-6.tar.gz 并通过 ftp 上传到服务器环境,可以通过命令:
find / -name *.tar.gz
找到之前安装包的存放路径,cd 进入该目录:
cd /home/***/lnmp/lnmp1.0-full/
解压压缩包:
tar -zxvf ImageMagick-6.9.1-6.tar.gz
cd 进入解压之后的目录:
cd ImageMagick-6.9.1-6/
② 配置:
./configure --enable-shared --enable-lzw --without-perl --with-modules
③ 编译和安装:
make && make install
④ 测试 ImageMagic 是否安装成功:
convert -version
如果执行该命令后报错:
/usr/local/bin/convert: error while loading shared libraries: libMagickCore-6.Q16.so.2: cannot open shared object file: No such file or directory
则需要执行 ldconfig(ldconfig命令的用途, 主要是在默认搜寻目录( /lib和/usr/lib ) 以及动态库配置文件 /etc/ld.so.conf 内所列的目录下, 搜索出可共享的动态链接库( 格式如lib*.so* ), 进而创建出动态装入程序( ld.so )所需的连接和缓存文件. 缓存文件默认为/etc/ld.so.cache, 此文件保存已排好序的动态链接库名字列表. ):
root@***:/home/***/lnmp/lnmp1.0-full/ImageMagick-6.9.1-6# ldconfig
此时再使用 convert -version,就可以显示版本信息了,也就说明安装成功了:
root@***:/home/***/lnmp/lnmp1.0-full/ImageMagick-6.9.1-6# /usr/local/bin/convert -version


Version: ImageMagick 6.9.1-6 Q16 i686 2016-06-15 http://www.imagemagick.org

Copyright: Copyright (C) 1999-2015 ImageMagick Studio LLC

License: http://www.imagemagick.org/script/license.php

Features: Cipher DPC Modules OpenMP

Delegates (built-in): bzlib freetype jng jpeg ltdl png xml zlib
(参考:《undefined reference to `inflateReset2'》)
(二). 安装 imagick
主要参考《Linux下php安装imagick》
① 下载、拷贝、安装 imagick
下载地址:http://pecl.php.net/get/imagick-3.0.1.tgz
root@***:/home/***/lnmp/lnmp1.0-full# tar -zxvf imagick-3.0.1.tgz
解压之后,进入解压后的目录:
root@***:/home/***/lnmp/lnmp1.0-full# cd imagick-3.0.1/
② 用 phpize 生成 configure 配置文件
root@***:/home/***/lnmp/lnmp1.0-full/imagick-3.0.1# /usr/local/php/bin/phpize
如果报错:checking for MagickWand.h header file... configure: error: Cannot locate header file MagickWand.h,则:
ln -s /usr/local/include/ImageMagick-6 /usr/local/include/ImageMagick
(参考: 《安装imagick时Cannot locate header file MagickWand.h错误的解决》)
③ 配置:
root@***:/home/***/lnmp/lnmp1.0-full/imagick-3.0.1# ./configure --with-php-config=/usr/local/php/bin/php-config --with-imagick=/usr/local/imagemagick
④ 编译与安装
make && make install
make install 成功后显示:
root@***:/home/***/lnmp/lnmp1.0-full/imagick-3.0.1# make install

Installing shared extensions:     /usr/local/php/lib/php/extensions/no-debug-non-zts-20090626/

Installing header files:          /usr/local/php/include/php/
⑤ 配置 php,让 php 支持 imagick
vi /usr/local/php/etc/php.ini  #编辑配置文件,在最后一行添加以下内容

extension="imagick.so"
⑥ 重启 php-fpm:
ps aux | grep php-fpm

kill -QUIT 1219

/usr/local/php/sbin/php-fpm
(参考:《php修改php.ini重启nginx php.ini设置不生效》)
⑦ 重启 Nginx:
nginx -s reload
⑧ 测试 imagick 是否添加成功:
在 php 文件中输入:
<?php

phpinfo();
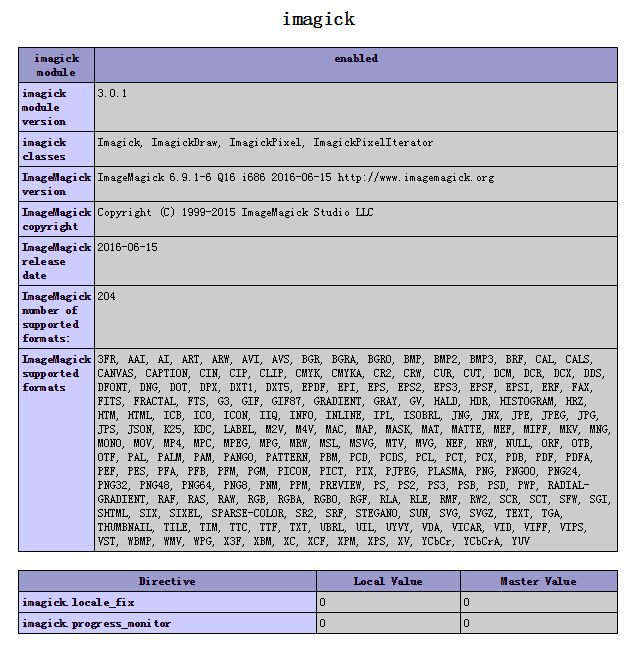
如果在 info 页有如下内容,则说明添加成功:

(三)使用 imagick 减小上传图片的品质(80%)
工具类:

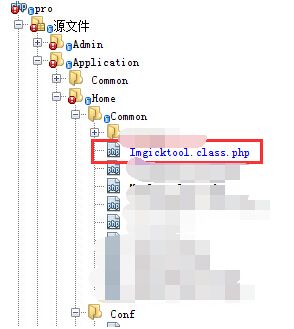
Imgicktool.class.php:
<?php

/*

 * 图片压缩类  重新封装了Imagick

 */


namespace Home\Common;


class Imgicktool{


    //Imagick对象实例

    public $obj = null;


    public function __construct()

    {

        //判断是否加载了该扩展

        if(!extension_loaded('Imagick'))

        {

            return false;

        }

        $this->obj = new \Imagick();

    }

    /*

     * png2jpg转换图片格式

     *

     * @param string src_img 源图片路径

     * @param string dest_img 要生成的图片的路径

     * @return boolean 转换成共返回true  否则false

     */

    public function png2jpg($src_img,$dest_img)

    {

        if(!is_object($this->obj))

        {

            return false;

        }

        try

        {

            $this->obj->readImage($src_img);

            if($this->obj->writeImage($dest_img))

            {

                $this->destory();

                return $dest_img;

            }

            return false;

        }

        catch (ImagickException $e)

        {

            return false;

        }

    }


    /*

     * 去掉图片的profile信息

     *

     * @param string src_img 源图片路径

     * @return string src_img 图片名称 否则返回false

     */

    public function strip_profile($src_img,$dest_img = '')

    {

        if(!is_object($this->obj))

        {

            return false;

        }

        try

        {

            $dest_img = empty($dest_img) ? $src_img : $dest_img;

            $this->obj->readImage($src_img);

            $this->obj->stripImage ();

            if($this->obj->writeImage ($dest_img))

            {

                $this->destory();

                return $src_img;

            }

            return false;

        }

        catch (ImagickException $e)

        {

            return false;

        }

    }


    /*

     * 设置jpg图片质量

     *

     * @param string src_img 源图片路径

     * @param string dest_img 要生成的图片的路径

     * @return boolean 转换成共返回true  否则false

     */

    public function set_quality($src_img,$quality = 70,$dest_img = '')

    {

        if(!is_object($this->obj))

        {       echo 'error1';

            return false;

        }

        try

        {

            $dest_img = empty($dest_img) ? $src_img : $dest_img;

            $this->obj->readImage($src_img);

            $this->obj->setImageCompression(Imagick::COMPRESSION_JPEG);

            $this->obj->setImageCompressionQuality($quality);

            if($this->obj->writeImage($dest_img))

            {

                $this->destory();

                return $dest_img;

            }

                        echo 'error2';

            return false;

        }

        catch (ImagickException $e)

        {

                        echo 'error3';

            return false;

        }

    }


    /*

     * 图片瘦身

     *

     * @param string src_img 源图片路径

     * @param int quality 设置图片压缩质量

     * @param string dest_img 要生成的图片的路径

     * @return boolean 转换成共返回true  否则false

     */

    public function slimming($src_img,$quality = 60,$dest_img = '')

    {

        if(!is_object($this->obj))

        {

            return false;

        }

        try

        {

            $dest_img = empty($dest_img) ? $src_img : $dest_img;

            $this->obj->readImage($src_img);

            $this->obj->setImageFormat('jpeg');

            $this->obj->setImageCompression(\Imagick::COMPRESSION_JPEG);

            //将图片的质量降低到原来的60%

            $quality = $this->obj->getImageCompressionQuality() * $quality / 100;

            $this->obj->setImageCompressionQuality($quality);

            $this->obj->stripImage();


            if($this->obj->writeImage($dest_img))

            {

                $this->destory();

                return $dest_img;

            }

            return false;

        }

        catch (ImagickException $e)

        {

            return false;

        }

    }


    /*

     * 生成缩略图

     *

     * @param string src_img 源图片路径

     * @param int quality 设置图片压缩质量

     * @param string dest_img 要生成的图片的路径

     * @return boolean 转换成共返回true  否则false

     */

    public function thump($src_img,$width = 250,$height = '')

    {

        if(!is_object($this->obj))

        {

            return false;

        }

        try

        {


            $file_info = pathinfo($src_img);

            //生成缩略图名称

            $file_name = substr($file_info['basename'],0,strrpos($file_info['basename'],'.'));

            $dest_img = $file_info['dirname'] . '/' . $file_name . '_thump.' . $file_info['extension'];

            $this->obj->readImage($src_img);

            //计算要获得缩略图的高度

            $img_width = $this->obj->getImageWidth();

            $img_height = $this->obj->getImageHeight();

            $dest_height = $img_height * ($width / $img_width);

            $this->obj->resizeImage($width, $dest_height, Imagick::FILTER_CATROM, 1, false);

            //生成图片

            if($this->obj->writeImage($dest_img))

            {

                $this->destory();

                return $dest_img;

            }

            return false;

        }

        catch (ImagickException $e)

        {

            return false;

        }

    }


    /*

     * 释放资源

     *

     */

    function destory()

    {

        if(is_object($this->obj))

        {

            $this->obj->clear();


            $this->obj->destroy();

        }

    }

}
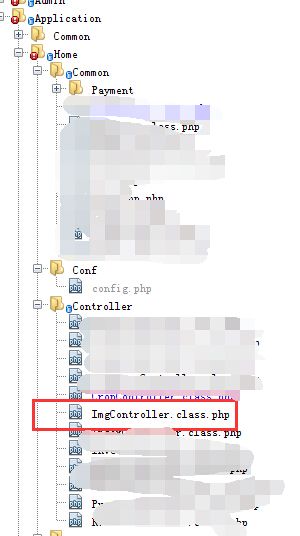
测试文件 ImgController.class.php:

<?php

namespace Home\Controller;

use Home\Common\Imgicktool;

use Think\Controller;


class ImgController extends Controller{


    function info(){

        phpinfo();

    }


    function quality(){

        $srcFile = APP_PATH.'/test/test.jpg';

        $destFile = APP_PATH.'/test/test.jpg';

        $qua = new Imgicktool();

        $qua->slimming($srcFile, 80, $destFile);

    }


}
参考:
1.《Ubuntu下安装ImageMagick和MagicWand For PHP》
2.《undefined reference to `inflateReset2'》
3.《php修改php.ini重启nginx php.ini设置不生效》
5.《安装imagick时Cannot locate header file MagickWand.h错误的解决》
7. Centos 安装 ImageMagic 时,make 报错,参考《红帽安装ImageMagick出错》
8. PHP 5.4的不能安装 imagick-3.0.1《linux下安装ImageMagick-6.5.1-2 老是编译有错误,哪位高手知道怎么解决吗》,这是在正式环境下 (CentOS6)下遇到的问题,imagick 各个版本下载地址:http://pecl.php.net/package/imagick/