Arduino A4950 驱动直流电机 超详细版
Arduino A4950 驱动直流电机
对于自己做车的大部份同学来说,我和大家一样,用的最多的就是L298N驱动器,这次在家想试着自己研究一个驱动能力更好的更加方便的电机驱动,而网上使用Arduino L298N 驱动小车的例子非常的多 A4950 的一篇也没有,那好吧,希望这篇文章能给L298N用腻了的同学提供一个更好更新的选项
1.实验准备
1.Arduino 系列单片机
2.直流电机
3.A4950驱动器
2.A4950芯片简介

一个A4950驱动器可驱动两个直流电机
驱动板工作电压范围:7.6V~30V
| A4950引脚 | 对应引脚 |
|---|---|
| VCC | 单片机5V |
| GND | 单片机GND |
| VM | 驱动电源7.6~30V |
| AIN1 | 控制A电机的1号PWM引脚 |
| AIN2 | 控制A电机的2号PWM引脚 |
| AOUT1 | 电机A正极 |
| ATOU2 | 电机A负极 |
| BN1 | 控制A电机的1号PWM引脚 |
| BIN2 | 控制A电机的2号PWM引脚 |
| BOUT1 | 电机B正极 |
| BTOU2 | 电机B负极 |
一个模块上有两组 VCC GND VM 至少接一组
单片机 A4950 驱动电源 记得共地
A4950 驱动是通过比较两个控制引脚输出PWM的大小关系来确定电机方向的
两个控制引脚输出PWM的差值决定电机的转速
3.程序设计
我们接下来的代码都已驱动一个电机为例,剩下一个如法炮制就可以了
3.1简易驱动板
unsigned int Motor_AIN1=2; //控制A电机的PWM引脚 一定改成自己用的
unsigned int Motor_AIN2=3;
char Motor_Order; //定义一个字符型变量存储串口输入命令
void setup()
{
Serial.begin(9600); //打开串口
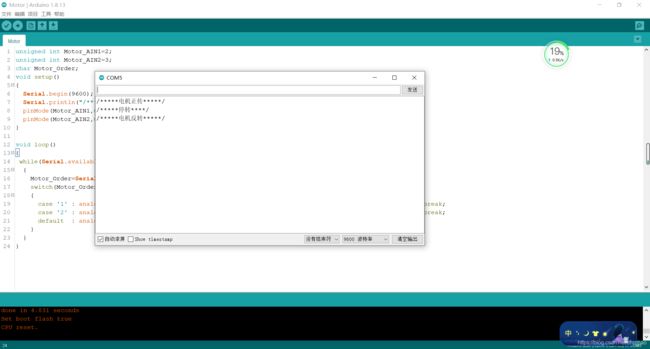
Serial.println("/*****开始驱动*****/");
pinMode(Motor_AIN1,OUTPUT); //设置两个驱动引脚为输出模式
pinMode(Motor_AIN2,OUTPUT);
}
void loop()
{
while(Serial.available()>0) //检测串口是否有命令
{
Motor_Order=Serial.read(); //将命令存储在变量中
switch(Motor_Order)
{
//发送字符1电机正转
case '1' : analogWrite(Motor_AIN1,250); analogWrite(Motor_AIN2,0);Serial.println("/*****电机正传*****/");break;
//发送字符2电机反转
case '2' : analogWrite(Motor_AIN1,0); analogWrite(Motor_AIN2,250);Serial.println("/*****电机反转*****/");break;
//发送其他字符电机停转
default : analogWrite(Motor_AIN1,0); analogWrite(Motor_AIN2,0);Serial.println("/*****停转****/");break;
}
}
}
烧录之后打开串口分别输入指令就可以了
3.2串口输入调速版接上位机版(高级版)
好吧这个对萌新来说看起来好像有一点复杂
简单说功能就是在串口按照输入协议:
控制A电机的1号引脚PWM值.控制A电机的2号引脚PWM值
注:控制A电机的1号引脚PWM值(一个英文的点)控制A电机的2号引脚PWM值
例: 在串口输入 10.255
功能:控制A电机的1号PWM引脚输出0,控制A电机的1号PWM引脚输出255
实现:电机反转,控制速度的PWM差值为 255-10=245
先把完整的代码贴上,我会逐个部分讲解
先讲一下逻辑实现的步骤
1.从串口接收一个包含被一个点分开的两个数字的字符串
2.从一个完整字符串中截取出两个数字字符串
3.将数字字符串转换成整形
4.通过PWM引脚将转换好的数值输出
第二步详细实现:1.获取分割符号(既:点的位置)2.根据点的位置前后截取
unsigned int Motor_AIN1=2;
unsigned int Motor_AIN2=3;
String   Motor_Order,String_Motor_AIN1_Value,String_Motor_AIN2_Value;
unsigned int Motor_AIN1_Value,Motor_AIN2_Value,Point_desepote;
void setup()
{

  // put your setup code here, to run once:
  Serial.begin(9600);
  Serial.println("/*****开始测试*****/");
  pinMode(Motor_AIN1,OUTPUT);
  pinMode(Motor_AIN2,OUTPUT);
}
/*****************获取截止位****************/
unsigned int Motor_Point_desepote(String Motor_Order)
{

  unsigned int desepote,point_desepote;
  for(desepote=0;desepote<Motor_Order.length();desepote++)
    if (Motor_Order[desepote]=='.')
    {

      point_desepote=desepote+1;
      Serial.print("点的位置为:");
      Serial.println(point_desepote);
      break;
    }
    return point_desepote;
}
/****************截取字符串函数***************/
String String_fragment(String Complete_information,unsigned int Intitial_Position,unsigned int Final_Position)
{

  String Fragment;
  unsigned int location;
  for(location=Intitial_Position-1;location<Final_Position;location++)
  Fragment+=Complete_information[location];
  return Fragment;
}
/******************电机驱动函数**************/
void Drive_Motor(unsigned int Motor_AIN1_Value,unsigned int Motor_AIN2_Value)
{

  analogWrite(Motor_AIN1,Motor_AIN1_Value);
  analogWrite(Motor_AIN2,Motor_AIN2_Value);
  Serial.println("/*****驱动电机*****/");
}
void loop()
{

  // put your main code here, to run repeatedly:
  while(Serial.available()>0)
  {

    Motor_Order=Serial.readString();
    Point_desepote=Motor_Point_desepote(Motor_Order);
    String_Motor_AIN1_Value=String_fragment(Motor_Order,1,Point_desepote-1);
    String_Motor_AIN2_Value=String_fragment(Motor_Order,Point_desepote+1,Motor_Order.length());
//    Serial.print("String_Motor_AIN1_Value:");
//    Serial.println(String_Motor_AIN1_Value);
//    Serial.print("String_Motor_AIN2_Value:");
//    Serial.println(String_Motor_AIN2_Value);
    Motor_AIN1_Value=constrain(String_Motor_AIN1_Value.toInt(),0,255);
    Motor_AIN2_Value=constrain(String_Motor_AIN2_Value.toInt(),0,255);
    Serial.print("Motor_AIN1_Value:");
    Serial.println(Motor_AIN1_Value);
    Serial.print("Motor_AIN2_Value:");
    Serial.println(Motor_AIN2_Value);
    if(Motor_AIN1_Value==Motor_AIN2_Value)
    {

     Drive_Motor(Motor_AIN1_Value,Motor_AIN2_Value);
     Serial.println("电机停转");
    }
    else if(Motor_AIN1_Value>Motor_AIN2_Value)
    {

      Drive_Motor(Motor_AIN1_Value,Motor_AIN2_Value);
      Serial.println("电机正转");
    }
    else if(Motor_AIN1_Value<Motor_AIN2_Value)
    {

      Drive_Motor(Motor_AIN1_Value,Motor_AIN2_Value);
      Serial.println("电机反转");
    }
  }
}
3.2.1 定义部分
unsigned int Motor_AIN1=2;
unsigned int Motor_AIN2=3;
String   Motor_Order,String_Motor_AIN1_Value,String_Motor_AIN2_Value;
unsigned int Motor_AIN1_Value,Motor_AIN2_Value,Point_desepote;
| 变量名称 | 功能 |
|---|---|
| Motor_AIN1 | 控制A电机的1号PWM引脚号 |
| Motor_AIN2 | 控制A电机的2号PWM引脚 |
| Motor_Order | 用来存储串口处的完整指令 |
| String_Motor_AIN1_Value | 存储控制A电机的1号PWM值字符串变量 |
| String_Motor_AIN2_Value | 存储控制A电机的2号PWM值字符串变量 |
| Motor_AIN1_Value | 存储控制A电机的1号PWM值整形变量 |
| Motor_AIN2_Value | 存储控制A电机的2号PWM值整形变量 |
| Point_desepote | 存储初始命令点的位置 |
3.2.2获取点的位置
/*****************获取截止位****************/
unsigned int Motor_Point_desepote(String Motor_Order)
{

  unsigned int desepote,point_desepote;
  for(desepote=0;desepote<Motor_Order.length();desepote++)
    if (Motor_Order[desepote]=='.')
    {

      point_desepote=desepote+1;
      Serial.print("点的位置为:");
      Serial.println(point_desepote);
      break;
    }
    return point_desepote;
}
功能:检索字符串中点的位置并返回
注: 字符串长度表示方式 : 字符串名.length()
例: Motor_Order.length()
3.2.3字符串截取函数
/****************截取字符串函数***************/
String String_fragment(String Complete_information,unsigned int Intitial_Position,unsigned int Final_Position)
{

  String Fragment;
  unsigned int location;
  for(location=Intitial_Position-1;location<Final_Position;location++)
  Fragment+=Complete_information[location];
  return Fragment;
}
功能:从指定字符串中截从第(Intitial_Position)位截取到第(Final_Position)位
并作为字符串变量返回
注:使用方法 : String_fragment(要截取字符串变量名,截取的初始位,截取的终止位)
3.2.4电机驱动函数
void Drive_Motor(unsigned int Motor_AIN1_Value,unsigned int Motor_AIN2_Value)
{

  analogWrite(Motor_AIN1,Motor_AIN1_Value);
  analogWrite(Motor_AIN2,Motor_AIN2_Value);
  Serial.println("/*****驱动电机*****/");
}
这个不多说了只要分别输入数值就可以了
3.2.5初始化设置函数
void setup()
{

  // put your setup code here, to run once:
  Serial.begin(9600);                    //打开串口
  Serial.println("/*****开始测试*****/");
  pinMode(Motor_AIN1,OUTPUT);            //设置两控制引脚为输出模式
  pinMode(Motor_AIN2,OUTPUT);
}
3.2.6主函数实现
void loop()
{

  // put your main code here, to run repeatedly:
  while(Serial.available()>0)              //判断串口是否接收到数据
  {

    Motor_Order=Serial.readString();       //将串口的字符串存到Motor_Order中
    Point_desepote=Motor_Point_desepote(Motor_Order);//获取Motor_Order字符串中点的位置
    String_Motor_AIN1_Value=String_fragment(Motor_Order,1,Point_desepote-1);//截取存储控制A电机的1号PWM值字符串变量(从第一位截取到点的前一位)
    String_Motor_AIN2_Value=String_fragment(Motor_Order,Point_desepote+1,Motor_Order.length());//截取存储控制A电机的2号PWM值字符串变量(从点的后一位截取到最后一位)
//    Serial.print("String_Motor_AIN1_Value:");
//    Serial.println(String_Motor_AIN1_Value);
//    Serial.print("String_Motor_AIN2_Value:");
//    Serial.println(String_Motor_AIN2_Value);
    Motor_AIN1_Value=constrain(String_Motor_AIN1_Value.toInt(),0,255);//将截取存储控制A电机的1号PWM值字符串变量转换成整形,并设定值约束其在0~255范围内
    Motor_AIN2_Value=constrain(String_Motor_AIN2_Value.toInt(),0,255);
    //将截取存储控制A电机的2号PWM值字符串变量转换成整形,并设定值约束其在0~255范围内
    Serial.print("Motor_AIN1_Value:");   //将数值打印以便观察
    Serial.println(Motor_AIN1_Value);
    Serial.print("Motor_AIN2_Value:");
    Serial.println(Motor_AIN2_Value);
    //驱动控制部分
    if(Motor_AIN1_Value==Motor_AIN2_Value)  //如果Motor_AIN1_Value=Motor_AIN2_Value   Motor_AIN1_Value,Motor_AIN2_Value  两PWM差值为0  电机停转
    {

     Drive_Motor(Motor_AIN1_Value,Motor_AIN2_Value);
     Serial.println("电机停转");
    }
    else if(Motor_AIN1_Value>Motor_AIN2_Value)//如果Motor_AIN1_Value>Motor_AIN2_Value ,   Motor_AIN1_Value-Motor_AIN2_Value 两PWM差值为为正  电机正转
    {

      Drive_Motor(Motor_AIN1_Value,Motor_AIN2_Value);
      Serial.println("电机正转");
    }
    else if(Motor_AIN1_Value<Motor_AIN2_Value)//如果Motor_AIN1_Value>Motor_AIN2_Value ,   Motor_AIN1_Value-Motor_AIN2_Value 两PWM差值为为负  电机反转
    {

      Drive_Motor(Motor_AIN1_Value,Motor_AIN2_Value);
      Serial.println("电机反转");
    }
  }
}
打开串口输入命令效果如图

到这里就全部结束了,还有一个要说的
我为什么一定要转换成字符串型之后再转换成整形,而不是在一个函数里直接解决,因为arduino官方库没找到类似指定位置的字符串截取函数,单独列出来方便理解,方便类似功能移植
4. 后言
本文章是通过Arduino系列单片机代码实现功能,同样的如果看懂原理,用其他单片机当然也可以实现,A4950的模块详细资料好多我就不贴了,希望有帮到大家