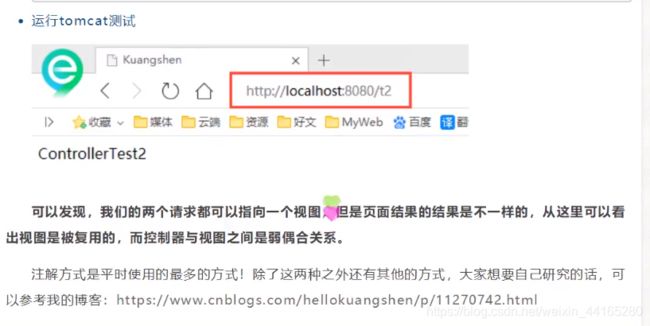
SpringMVC
一日一句:没有笨人,只有懒人!
简介:“springmvc是一种web层mvc框架,它是spring的一个模块,拥有spring的特性。springmvc分离了控制器、模型对象、分派器以及处理程序对象的角色。”
ssm: mybatis+spring+SpringMVC MVC三层结构
SSM=javaweb做项目;
spring: IOC和AOP
SpringMVC:SpringMVC的执行流程!
SpringMVC: SSM框架整合!
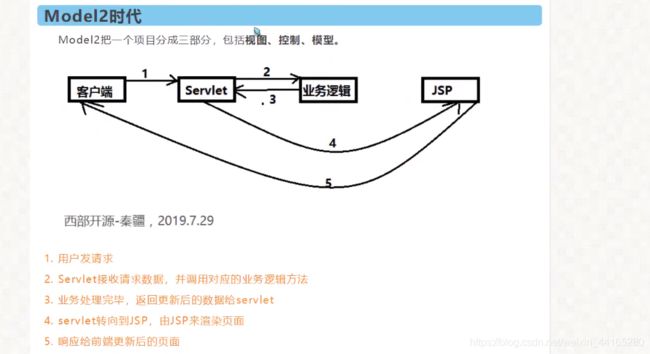
MVC:模型(dao,service) 视图(jsp) 控制器(servlet)
<?xml version="1.0" encoding="UTF-8"?>
<project xmlns="http://maven.apache.org/POM/4.0.0"
         xmlns:xsi="http://www.w3.org/2001/XMLSchema-instance"
         xsi:schemaLocation="http://maven.apache.org/POM/4.0.0 http://maven.apache.org/xsd/maven-4.0.0.xsd">
    <modelVersion>4.0.0</modelVersion>

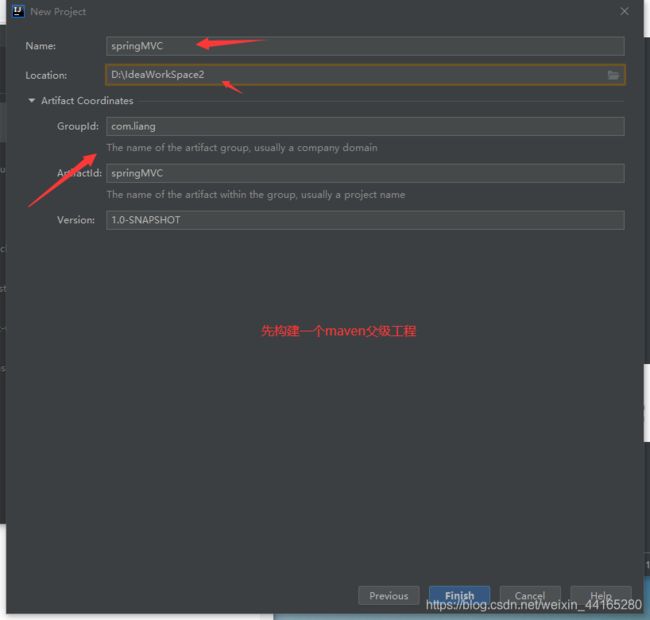
    <groupId>com.liang</groupId>
    <artifactId>springMVC</artifactId>
    <version>1.0-SNAPSHOT</version>

    <properties>
        <maven.compiler.source>8</maven.compiler.source>
        <maven.compiler.target>8</maven.compiler.target>
    </properties>
<!--导入依赖-->
    <dependencies>
        <dependency>
            <groupId>junit</groupId>
            <artifactId>junit</artifactId>
            <version>4.12</version>
        </dependency>

        <dependency>
            <groupId>org.springframework</groupId>
            <artifactId>spring-webmvc</artifactId>
            <version>5.1.9.RELEASE</version>
        </dependency>

        <dependency>
            <groupId>javax.servlet</groupId>
            <artifactId>servlet-api</artifactId>
            <version>2.5</version>
        </dependency>

        <dependency>
            <groupId>javax.servlet.jsp</groupId>
            <artifactId>jsp-api</artifactId>
            <version>2.2</version>
        </dependency>

        <dependency>
            <groupId>javax.servlet.jsp.jstl</groupId>
            <artifactId>jstl</artifactId>
            <version>1.2</version>
        </dependency>

    </dependencies>


</project>
<?xml version="1.0" encoding="UTF-8"?>
<project xmlns="http://maven.apache.org/POM/4.0.0"
         xmlns:xsi="http://www.w3.org/2001/XMLSchema-instance"
         xsi:schemaLocation="http://maven.apache.org/POM/4.0.0 http://maven.apache.org/xsd/maven-4.0.0.xsd">
    <parent>
        <artifactId>springMVC</artifactId>
        <groupId>com.liang</groupId>
        <version>1.0-SNAPSHOT</version>
    </parent>
    <modelVersion>4.0.0</modelVersion>

    <artifactId>springmvc-01-serlvet</artifactId>

    <properties>
        <maven.compiler.source>8</maven.compiler.source>
        <maven.compiler.target>8</maven.compiler.target>
    </properties>

    <dependencies>
        <dependency>
            <groupId>javax.servlet</groupId>
            <artifactId>servlet-api</artifactId>
            <version>2.5</version>
        </dependency>

        <dependency>
            <groupId>javax.servlet.jsp</groupId>
            <artifactId>jsp-api</artifactId>
            <version>2.2</version>
        </dependency>

    </dependencies>

</project>
什么是springmvc?

spring:大杂烩,我们可以将springmvc中所有要用到的bean,注册到spring中!

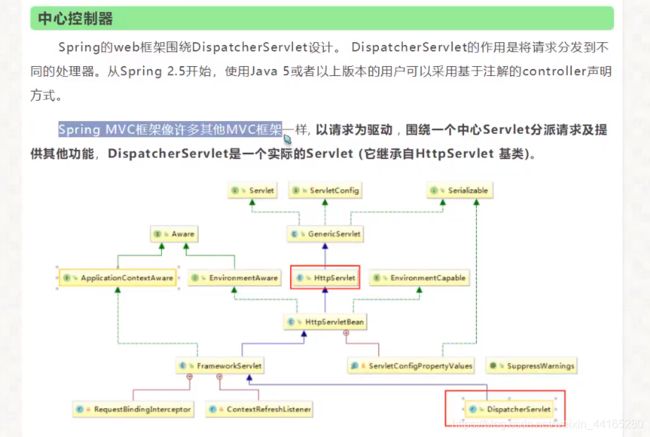
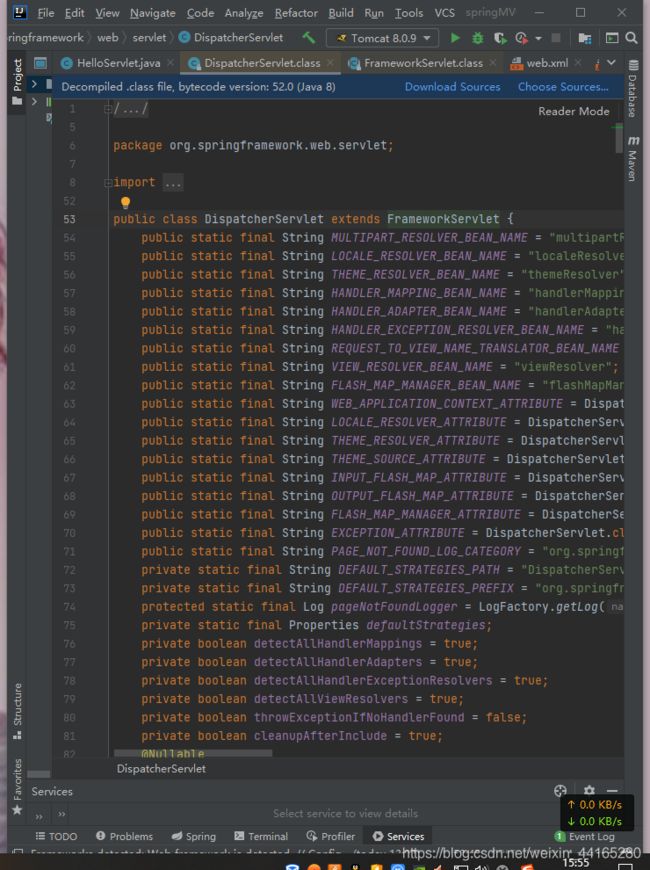
只要实现了HttpServlet本质上来说都是属于servlet


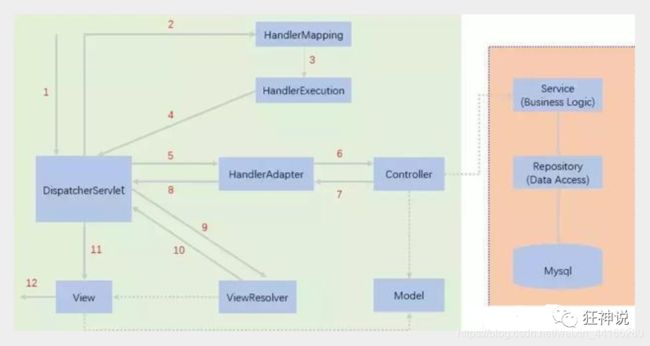
springMVC的执行流程

1.用户发送请求
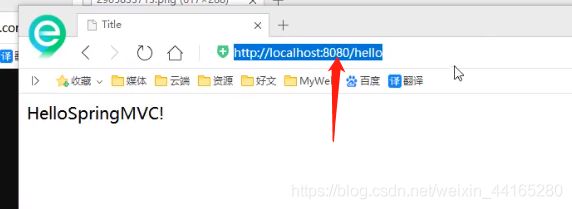
2.请求到了dispatcherServlet,执行以下代码
3.委托请求给处理器handlermapping和handlerAdapter适配器

4.处理器返回model and view
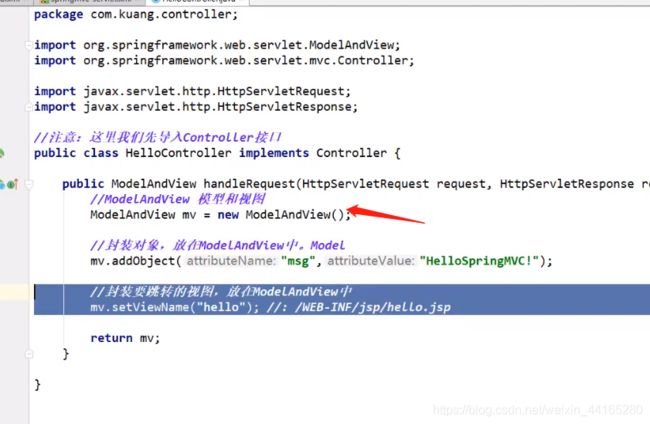
5. model渲染视图,然后返回给前端控制器
虚线就是我们做的,实线springmvc已经帮我们做了


编辑controller
package com.liang.controller;

import org.springframework.web.servlet.ModelAndView;
import org.springframework.web.servlet.mvc.Controller;

import javax.servlet.http.HttpServletRequest;
import javax.servlet.http.HttpServletResponse;

public class HelloController implements Controller {

    @Override
    public ModelAndView handleRequest(HttpServletRequest httpServletRequest, HttpServletResponse httpServletResponse) throws Exception {

        ModelAndView mv = new ModelAndView();

        //业务代码
        String result = "HelloSpringMVC";
        mv.addObject("msg",result);


        //视图跳转
mv.setViewName("test");


        return mv;
    }
}
在resources下创建springmvc-servlet.xml配置文件
<beans xmlns="http://www.springframework.org/schema/beans"
       xmlns:xsi="http://www.w3.org/2001/XMLSchema-instance"
       xsi:schemaLocation="http://www.springframework.org/schema/beans
       http://www.springframework.org/schema/beans/spring-beans.xsd">


    <bean class="org.springframework.web.servlet.handler.BeanNameUrlHandlerMapping"/>

    <bean class="org.springframework.web.servlet.mvc.SimpleControllerHandlerAdapter"/>

<bean class="org.springframework.web.servlet.view.InternalResourceViewResolver" id="InternalResourceViewResolver">

    <property name="prefix" value="/WEB-INF/jsp/"/>

    <property name="suffix" value=".jsp"/>
bean>

<bean id="/hello" class="com.liang.controller.HelloController"/>
beans>
在web下的WEB-INF下创建一个jsp目录,存放jsp文件,在里面创建test.jsp文件
<%--
  Created by IntelliJ IDEA.
  User: Administrator
  Date: 2021/1/3
  Time: 18:20
  To change this template use File | Settings | File Templates.
--%>
<%@ page contentType="text/html;charset=UTF-8" language="java" %>


    Title


${msg}
写好web.xml配置文件
<web-app xmlns="https://jakarta.ee/xml/ns/jakartaee"
         xmlns:xsi="http://www.w3.org/2001/XMLSchema-instance"
         xsi:schemaLocation="https://jakarta.ee/xml/ns/jakartaee https://jakarta.ee/xml/ns/jakartaee/web-app_5_0.xsd"
         version="5.0">


    <servlet>
        <servlet-name>springmvcservlet-name>
        <servlet-class>org.springframework.web.servlet.DispatcherServletservlet-class>

    <init-param>
        <param-name>contextConfigLocationparam-name>
        <param-value>classpath:springmvc-servlet.xmlparam-value>
    init-param>

        <load-on-startup>1load-on-startup>

    servlet>


    <servlet-mapping>
        <servlet-name>springmvcservlet-name>
        <url-pattern>/url-pattern>
    servlet-mapping>


web-app>
Maven可能存在资源过滤问题,我们将配置完善
<build>
<resources>
<resource>
<directory>src/main/java</directory>
<includes>
<include>**/*.properties
**/ *.xml</include>
</includes>
<filtering>false</filtering>
</resource>
<resource>
<directory>src/main/resources</directory>
<includes>
<include>**/*.properties
**/ *.xml</include>
</includes>
<filtering>false</filtering>
</resource>
</resources>
</build>
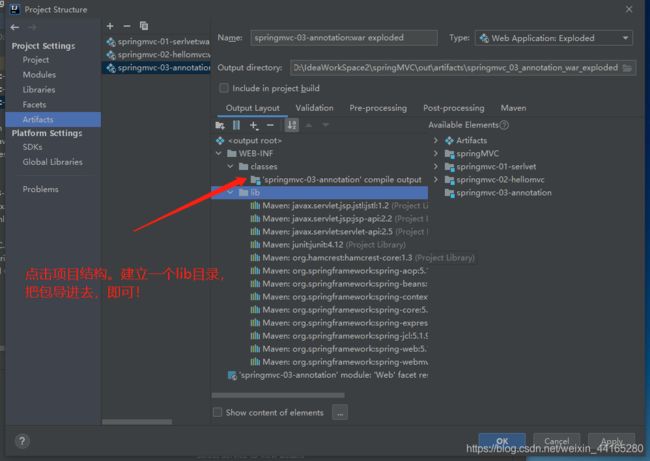
springmvc-servlet.xml配置文件,以下文件中除了
<beans xmlns="http://www.springframework.org/schema/beans"
       xmlns:xsi="http://www.w3.org/2001/XMLSchema-instance"
       xmlns:context="http://www.springframework.org/schema/context"
       xmlns:mvc="http://www.springframework.org/schema/mvc"
       xsi:schemaLocation="http://www.springframework.org/schema/beans
       http://www.springframework.org/schema/beans/spring-beans.xsd
       http://www.springframework.org/schema/context
       https://www.springframework.org/schema/context/spring-context.xsd
       http://www.springframework.org/schema/mvc
       https://www.springframework.org/schema/mvc/spring-mvc.xsd">


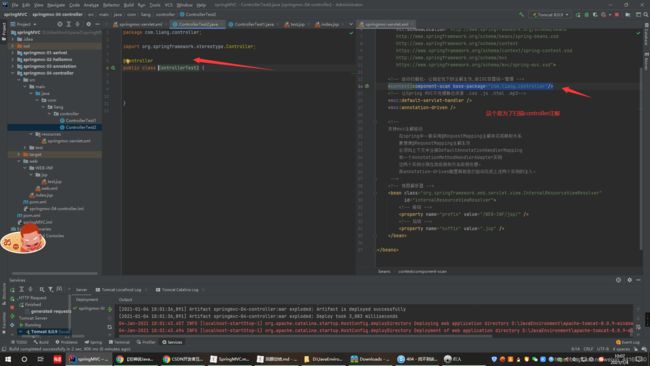
    <context:component-scan base-package="com.kuang.controller"/>

    <mvc:default-servlet-handler />
    <mvc:annotation-driven />


    <bean class="org.springframework.web.servlet.view.InternalResourceViewResolver"
          id="internalResourceViewResolver">

        <property name="prefix" value="/WEB-INF/jsp/" />

        <property name="suffix" value=".jsp" />
    bean>

beans>
controller控制层
package com.kuang.controller;

import org.springframework.stereotype.Controller;
import org.springframework.ui.Model;
import org.springframework.web.bind.annotation.RequestMapping;
import org.springframework.web.bind.annotation.RestController;

@Controller
//@RestController  返回json字符串
//@RequestMapping("/hello")
public class HelloController {


    //localhost:8080/hello/h1
    @RequestMapping("/h1")
    public String hello(Model model){

        //封装数据
        model.addAttribute("msg","hello,springmvcAnnotation!");

        return "hello";//会被视图解释器处理
    }

}
package com.liang.controller;

import org.springframework.stereotype.Controller;
import org.springframework.ui.Model;
import org.springframework.web.bind.annotation.RequestMapping;

@Controller  //代表这个类会被spring接管,被注解的类,中的所有方法
//如果返回值是string,并且有具体页面可以跳转,那么就会被试图解释器解析;
public class ControllerTest2 {


    @RequestMapping("/t2")
    public String test1(Model model){


        model.addAttribute("msg","hello,controller2");
        return "test";//return是view     //WEB-INF/jsp/test.jsp
    }
}
RestFul风格
package com.liang.controller;

import org.springframework.stereotype.Controller;
import org.springframework.ui.Model;
import org.springframework.web.bind.annotation.RequestMapping;

@Controller
public class RestFulController {


    @RequestMapping("/add")
    public String test1(int a, int b, Model model){
     //model是传数据的
    int res = a+b;
    model.addAttribute("msg","结果为"+res);
        return "/test.jsp";
    }

}

使用@PathVariable注解,让方法参数的值对应绑定到一个url模板变量上

package com.liang.controller;

import org.springframework.stereotype.Controller;
import org.springframework.ui.Model;
import org.springframework.web.bind.annotation.PathVariable;
import org.springframework.web.bind.annotation.RequestMapping;

@Controller
public class RestFulController {

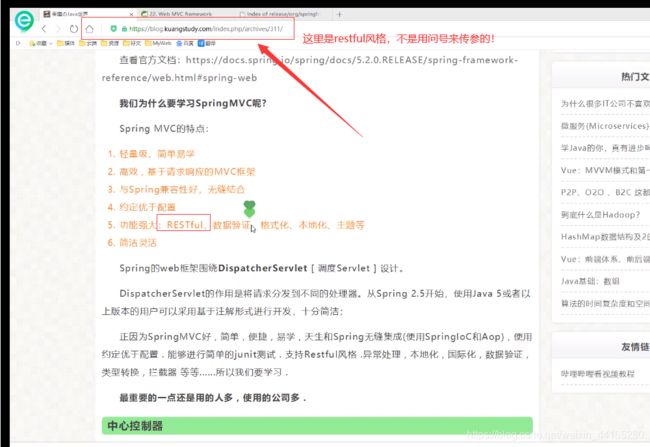
//原来的:http://localhost:8080/add?a=1&b=2
//RestFul: http://localhost:8080/add/a/b


    @RequestMapping("/add/{a}/{b}")
    public String test1(@PathVariable int a,@PathVariable int b, Model model){
     //model是传数据的
    int res = a+b;
    model.addAttribute("msg","结果为"+res);
        return "test";
    }

}
400请求出问题,500代码有问题
创建一个post风格提交的表单
<%--
  Created by IntelliJ IDEA.
  User: Administrator
  Date: 2021/1/4
  Time: 13:41
  To change this template use File | Settings | File Templates.
--%>
<%@ page contentType="text/html;charset=UTF-8" language="java" %>
<html>
<head>
    <title>Title</title>
</head>
<body>
<form action="/add/" method="post">
    <input type="text" name="a">
    <input type="text" name="b">
    <input type="submit">
</form>


</body>
</html>
转发和重定向
首先把resources下xml中配置的视图解释器注释掉,以下是测试不配置试图解释器的情况

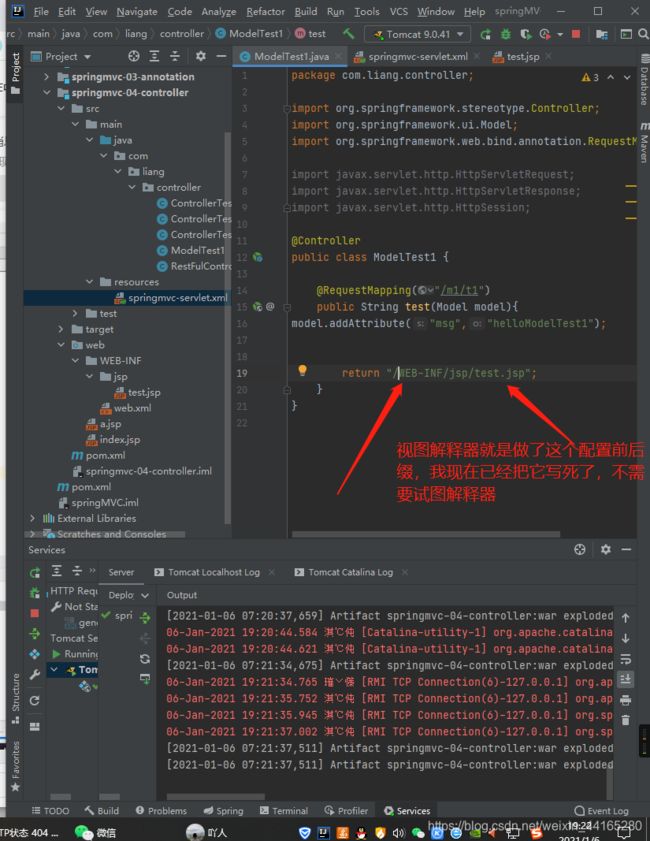
转发,默认的情况下是转发
package com.liang.controller;

import org.springframework.stereotype.Controller;
import org.springframework.ui.Model;
import org.springframework.web.bind.annotation.RequestMapping;

import javax.servlet.http.HttpServletRequest;
import javax.servlet.http.HttpServletResponse;
import javax.servlet.http.HttpSession;

@Controller
public class ModelTest1 {


    @RequestMapping("/m1/t1")
    public String test(Model model){


        //转发
model.addAttribute("msg","helloModelTest1");
return "forward:/WEB-INF/jsp/test.jsp";//通过添加关键字forward来说明他是转发
    }
}
重定向,需要重定向的时候加个关键字redirect
package com.liang.controller;

import org.springframework.stereotype.Controller;
import org.springframework.ui.Model;
import org.springframework.web.bind.annotation.RequestMapping;

import javax.servlet.http.HttpServletRequest;
import javax.servlet.http.HttpServletResponse;
import javax.servlet.http.HttpSession;

@Controller
public class ModelTest1 {


    @RequestMapping("/m1/t1")
    public String test(Model model){


        //重定向
model.addAttribute("msg","helloModelTest1");
return "redirect:/index.jsp";//通过添加关键字redirect来说明他是重定向
    }
}

总结:springmvc中的xml中配置的视图解释器的作用是,把访问转发或者重定向的前后缀写好,返回的时候直接写个路径即可,如果没有配置视图解释器就要自己写前后缀这样就比较麻烦,其中转发是默认的一般通过添加关键字forward来说明他是转发,重定向就是回到指定的首页加个关键字redirect
接受请求参数及数据回显
要使用lombok注解data,记得首先要去xml导入相对应的包,还要下载插件
package com.liang.controller;

import com.liang.pojo.User;
import org.springframework.stereotype.Controller;
import org.springframework.ui.Model;
import org.springframework.ui.ModelMap;
import org.springframework.web.bind.annotation.GetMapping;
import org.springframework.web.bind.annotation.RequestMapping;
import org.springframework.web.bind.annotation.RequestParam;

@Controller
@RequestMapping("/user")
public class UserController {


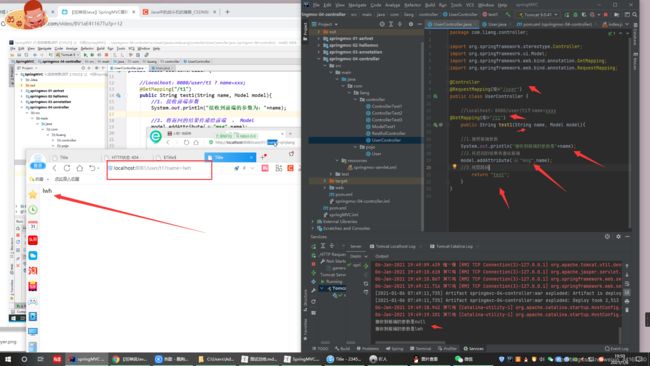
    //localhost:8080/user/t1?name=xxxx
@GetMapping("/t1")//@RequestParam("username") 这个无论用不用,前端都要加上,说明这个需要从前端接收数据
    public String test1(@RequestParam("username") String name, Model model){


    //1.接受前端参数
    System.out.println("接收到前端的参数是"+name);
    //2.将返回的结果传递给前端,传给前端就用model
    model.addAttribute("msg",name);
    //3.视图跳转
        return "test";
    }
    //前端接受的是一个对象:id, name ,age
    /*
    1.接受前端用户传递的参数,判断参数的名字,假设名字直接在方法上,可以直接使用
    2.假设传递的是一个对象User,匹配User对象中的字段名:如果名字一致则ok,否则,匹配不到
     */
    @GetMapping("t2")
    public String test2(User user){

        System.out.println(user);
    return "test";

    }
}
创建一个pojo包建个User实体类
package com.liang.pojo;

import lombok.AllArgsConstructor;
import lombok.Data;
import lombok.NoArgsConstructor;

@Data
@AllArgsConstructor //有参
@NoArgsConstructor  //无参
public class User {


    private int id;
    private String name;
    private int age;

}
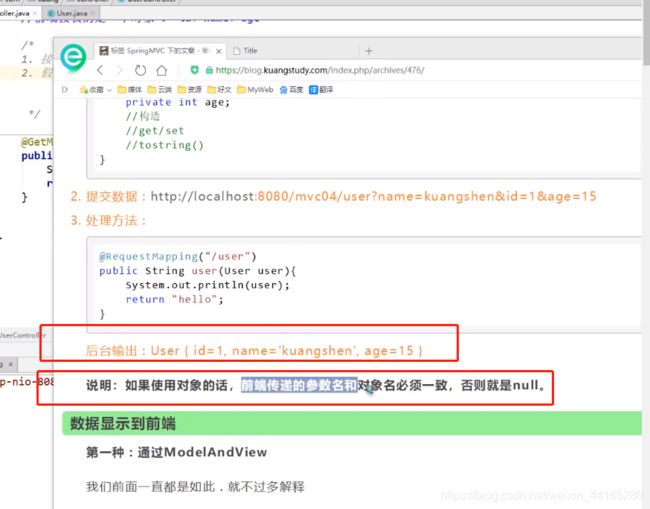
传对象用的几种方式
Model、ModelMap、LinkedHashMap


@RequestParam(“username”) 这个无论用不用,前端都要加上,说明这个需要从前端接收数据
使用Model接收前端参数
package com.liang.controller;

import com.liang.pojo.User;
import org.springframework.stereotype.Controller;
import org.springframework.ui.Model;
import org.springframework.ui.ModelMap;
import org.springframework.web.bind.annotation.GetMapping;
import org.springframework.web.bind.annotation.RequestMapping;
import org.springframework.web.bind.annotation.RequestParam;

@Controller
@RequestMapping("/user")
public class UserController {


    //localhost:8080/user/t1?name=xxxx
@GetMapping("/t1")//@RequestParam("username") 这个无论用不用,前端都要加上,说明这个需要从前端接收数据
    public String test1(@RequestParam("username") String name, Model model){


    //1.接受前端参数
    System.out.println("接收到前端的参数是"+name);
    //2.将返回的结果传递给前端,传给前端就用model
    model.addAttribute("msg",name);
    //3.视图跳转
        return "test";
    }
    //前端接受的是一个对象:id, name ,age
    /*
    1.接受前端用户传递的参数,判断参数的名字,假设名字直接在方法上,可以直接使用
    2.假设传递的是一个对象User,匹配User对象中的字段名:如果名字一致则ok,否则,匹配不到
    3.一一匹配太麻烦了,直接传对象
     */
    @GetMapping("t2")
    public String test2(User user){

        System.out.println(user);
    return "test";

    }

}
404乱码问题
如何配置过滤器解决乱码
首先建一个filter包
package com.liang.filter;

import javax.servlet.*;
import java.io.IOException;

public class EncodingFilter implements Filter {

    @Override
    public void init(FilterConfig filterConfig) throws ServletException {


    }

    @Override
    public void doFilter(ServletRequest servletRequest, ServletResponse servletResponse, FilterChain filterChain) throws IOException, ServletException {

        servletRequest.setCharacterEncoding("utf-8");
        servletResponse.setCharacterEncoding("utf-8");

        filterChain.doFilter(servletRequest,servletResponse);
    }

    @Override
    public void destroy() {


    }
}
写完后,在web.xml添加配置
<filter>
        <filter-name>encodingfilter-name>
        <filter-class>com.liang.filter.EncodingFilterfilter-class>
    filter>
        <filter-mapping>
            <filter-name>encodingfilter-name>
            <url-pattern>/*url-pattern>
        filter-mapping>

设置tomcat
![]()
get请求不会乱码,因为已经自动配置了过滤器,但是post会中文乱码喔
不得不说,乱码问题是在我们开发中十分常见的问题,也是让我们程序猿比较头大的问题!
以前乱码问题通过过滤器解决 , 而SpringMVC给我们提供了一个过滤器 , 可以在web.xml中配置 .
修改了xml文件需要重启服务器!
<filter>
   <filter-name>encodingfilter-name>
   <filter-class>org.springframework.web.filter.CharacterEncodingFilterfilter-class>
   <init-param>
       <param-name>encodingparam-name>
       <param-value>utf-8param-value>
   init-param>
filter>
<filter-mapping>
   <filter-name>encodingfilter-name>
   <url-pattern>/*url-pattern>
filter-mapping>
package com.liang.controller;

import org.springframework.stereotype.Controller;
import org.springframework.ui.Model;
import org.springframework.web.bind.annotation.GetMapping;
import org.springframework.web.bind.annotation.Mapping;
import org.springframework.web.bind.annotation.PostMapping;
import org.springframework.web.bind.annotation.RequestMapping;

@Controller
public class EncodingController {


    @PostMapping("/e/t")
    public String test(Model model,String name){

        System.out.println(name);
        model.addAttribute("msg",name); //获取表单提交的值
        return "test"; //跳转到test页面显示输入的值
    }
}
web.xml配置文件
<web-app xmlns="https://jakarta.ee/xml/ns/jakartaee"
         xmlns:xsi="http://www.w3.org/2001/XMLSchema-instance"
         xsi:schemaLocation="https://jakarta.ee/xml/ns/jakartaee https://jakarta.ee/xml/ns/jakartaee/web-app_5_0.xsd"
         version="5.0">


<servlet>
    <servlet-name>springmvcservlet-name>
    <servlet-class>org.springframework.web.servlet.DispatcherServletservlet-class>
    <init-param>
        <param-name>contextConfigLocationparam-name>
        <param-value>classpath:springmvc-servlet.xmlparam-value>
    init-param>
    <load-on-startup>1load-on-startup>
servlet>

    <servlet-mapping>
        <servlet-name>springmvcservlet-name>
        <url-pattern>/url-pattern>
    servlet-mapping>


    <filter>
        <filter-name>encodingfilter-name>
        <filter-class>org.springframework.web.filter.CharacterEncodingFilterfilter-class>
        <init-param>
            <param-name>encodingparam-name>
            <param-value>utf-8param-value>
        init-param>
    filter>
    <filter-mapping>
        <filter-name>encodingfilter-name>
        <url-pattern>/*url-pattern>
    filter-mapping>
web-app>
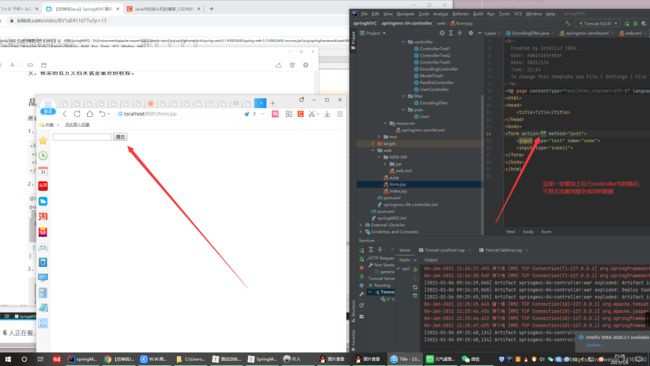
form.jsp在web目录下,别放WEB-INF下面,可能会访问不到
<%@ page contentType="text/html;charset=UTF-8" language="java" %>
<html>
<head>
    <title>Title</title>
</head>
<body>
<form action="/e/t" method="post">
    <input type="text" name="name">
    <input type="submit">
</form>
</body>
</html>
web-inf下的jsp目录中的test.jsp文件
<%@ page contentType="text/html;charset=UTF-8" language="java" %>
<html>
<head>
    <title>Title</title>
</head>
<body>
${
     msg}
</body>
</html>
resources下的springmvc-servlet.xml配置文件
<beans xmlns="http://www.springframework.org/schema/beans"
       xmlns:xsi="http://www.w3.org/2001/XMLSchema-instance"
       xmlns:context="http://www.springframework.org/schema/context"
       xmlns:mvc="http://www.springframework.org/schema/mvc"
       xsi:schemaLocation="http://www.springframework.org/schema/beans
       http://www.springframework.org/schema/beans/spring-beans.xsd
       http://www.springframework.org/schema/context
       https://www.springframework.org/schema/context/spring-context.xsd
       http://www.springframework.org/schema/mvc
       https://www.springframework.org/schema/mvc/spring-mvc.xsd">


    <context:component-scan base-package="com.liang.controller"/>

    <mvc:default-servlet-handler />
    <mvc:annotation-driven />


    <bean class="org.springframework.web.servlet.view.InternalResourceViewResolver"
          id="internalResourceViewResolver">

        <property name="prefix" value="/WEB-INF/jsp/" />

        <property name="suffix" value=".jsp" />

    bean>


beans>


