React中使用Antd组件
文章目录
- Antd的基本使用
-
-
- 安装和初始化
- 简单使用
-
- Antd的高级配置
- Antd的自定义主题
Antd的基本使用
进入Antd官方网站点击开始使用,然后进入在create-react-app中使用进行Antd的使用学习

安装和初始化
在react项目中进行安装yarn add antd或者npm i antd安装
简单使用
在App.js文件中引入按钮并使用
注意,这里还需要引入css样式import 'antd/dist/antd.css'
import React, {
      Component } from 'react'
import {
      Button } from 'antd';	//引入按钮
import 'antd/dist/antd.css';   //还需要引入css样式
export default class App extends Component {

  render() {

    return (
      <div>
        <Button>我是antd的按钮哦</Button>
      </div>
    )
  }
}
Antd的高级配置
目的是不用引入import 'antd/dist/antd.css'各个组件就可以拥有自己的css样式
- 前提需要
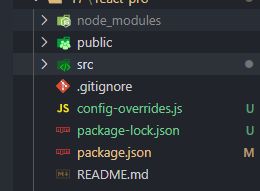
安装react-app-rewired / customize-cra - 需要配置
package.json文件
 "scripts": {

    "start": "react-app-rewired start",
    "build": "react-app-rewired build",
    "test": "react-app-rewired test",
    "eject": "react-scripts eject"
  }
const {

    addDecoratorsLegacy,
    override,
    fixBabelImports
} = require("customize-cra");

module.exports = override(
    addDecoratorsLegacy(),
    fixBabelImports('import', {

        libraryName: 'antd',
        libraryDirectory: 'es',
        style: 'css',
    })
)
现在从antd组件库里面引入组件,那么组件就拥有各自的样式了。
import React, {
      Component } from 'react'
import {
      Button } from 'antd';
export default class App extends Component {

  render() {

    return (
      <div>
        <Button>我是antd的按钮哦</Button>
      </div>
    )
  }
}
Antd的自定义主题
先安装yarn add less less-loader -D
修改了config-overrides文件
const {

    addDecoratorsLegacy,
    override,
    fixBabelImports,
    addLessLoader
} = require("customize-cra");

module.exports = override(
    addDecoratorsLegacy(),
    fixBabelImports('import', {

        libraryName: 'antd',
        libraryDirectory: 'es',
        style: true,  //一定要把style变成true!
    }),
    addLessLoader({

        javascriptEnabled: true,
        modifyVars: {
      '@primary-color': '#090' },
    }),
)
在根目录下新建theme.js文件
module.exports = {

    '@primary-color':' #090', // 全局主色
    '@link-color':' #1890ff', // 链接色
    '@success-color':' #52c41a', // 成功色
    '@warning-color':' #faad14', // 警告色
    '@error-color':' #f5222d', // 错误色
    '@font-size-base':' 14px', // 主字号
    '@heading-color':' rgba(0, 0, 0, 0.85)', // 标题色
    '@text-color':' rgba(0, 0, 0, 0.65)', // 主文本色
    '@text-color-secondary':' rgba(0, 0, 0, 0.45)', // 次文本色
    '@disabled-color':' rgba(0, 0, 0, 0.25)', // 失效色
    '@border-radius-base':' 4px', // 组件/浮层圆角
    '@border-color-base':' #d9d9d9', // 边框色
    '@box-shadow-base':' 0 2px 8px rgba(0, 0, 0, 0.15)', // 浮层阴影
}
在config-overrides文件中引入`theme.js文件
import modifyVars from "./theme"
addLessLoader({

    javascriptEnabled: true,
    modifyVars
}),


