Work with PE Headers using x32dbg
Content
- 1. Create an executable file
-
- (1) Create a C Program
- (2) Compile the C program
- 2. Work with x32dbg
-
- (1) Find the PE header in x32dbg
- (2) Detailed things in PE header
1. Create an executable file
(1) Create a C Program
Create a new folder called “test” in C:/, and create a text document called “1.cpp” in the folder.
Like this:
![]()
Right click the file and edit it with Notepad++. Input the codes as follows.
![]()
#includeSave the file.
(2) Compile the C program
Open the Developer’s command prompt of Visual Studio 2017 in the start menu.
![]()
Switch to the file location C:\test using “cd C:\test”
![]()
Then compile 1.cpp using “cl 1.cpp”
![]()
We can run it using command “1.exe”
![]()
Success.
2. Work with x32dbg
(1) Find the PE header in x32dbg
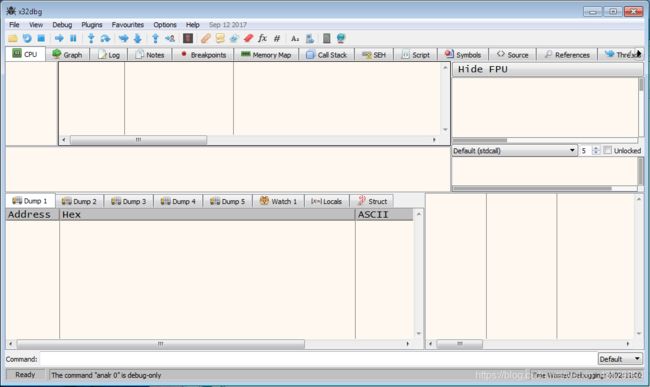
1.Open x32dbg.

2. Drug 1.exe to the opened x32dbg

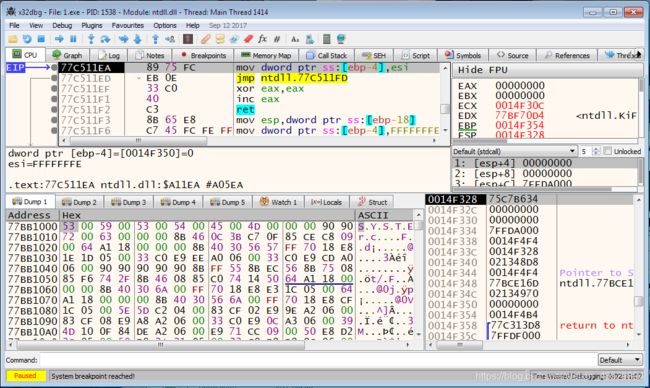
3. Press F9 (Run) to go to the entry point of file

4. You will see call, jmp commands.

5. Set breakpoint to the jmp command using F2 key

6. Press F9(Run) to continue till this breakpoint

7. Press F8(Step over) to continue till push, push, push, call 
8. On call command press F7(Step into)

Congratulations! you found main function of C program
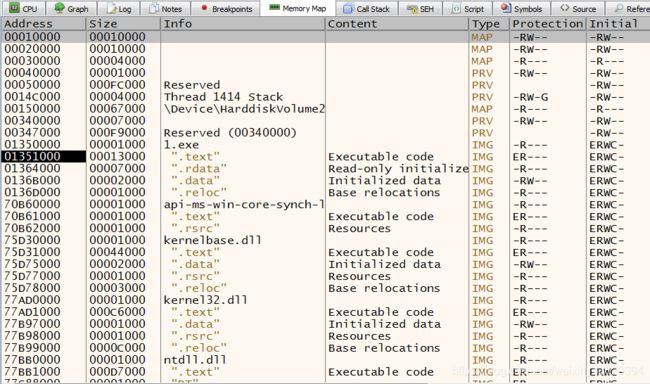
9. Press CTRL+M to go to memory map

10. You see table with memory segments. Find memory segment with name of your exe file and double click on it

11. At Dump 1 window you will get the beginning of this segment. It is PE-header
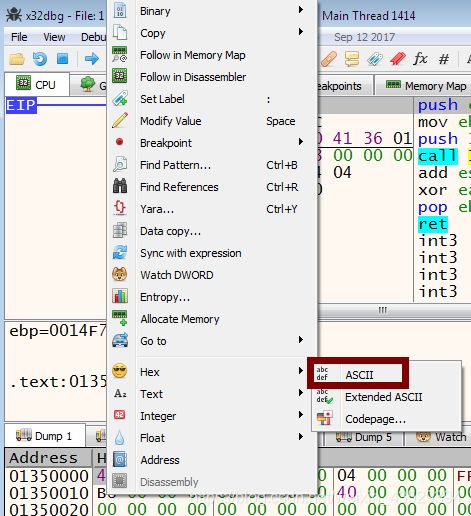
12. Right click to display ASCII.

The PE executable file format:
OLD EXE (MZ header)

+0  WORD e_magic;         // Magic number MZ
 2  WORD e_cblp;          // Bytes on last page of file
 4  WORD e_cp;            // Pages in file
 6  WORD e_crlc;          // Relocations
 8  WORD e_cparhdr;       // Size of header in paragraphs
 A  WORD e_minalloc;      // Minimum extra paragraphs needed
 C  WORD e_maxalloc;      // Maximum extra paragraphs needed
 E  WORD e_ss;            // Initial (relative) SS value
10  WORD e_sp;            // Initial SP value
12  WORD e_csum;          // Checksum
14  WORD e_ip;            // Initial IP value
16  WORD e_cs;            // Initial (relative) CS value
18  WORD e_lfarlc;        // File address of relocation table
1A  WORD e_ovno;          // Overlay number
1C  WORD e_res[4];        // Reserved words
24  WORD e_oemid;         // OEM identifier (for e_oeminfo)
26  WORD e_oeminfo;       // OEM information; e_oemid specific
28  WORD e_res2[10];      // Reserved words
3C  DWORD e_lfanew;       // File address of new exe header
 :
 :
 \/
NEW EXE
+0 PE
 4 WORD  Machine;
 6 WORD  NumberOfSections;
 8 DWORD   TimeDateStamp;
 C DWORD   PointerToSymbolTable;
10 DWORD   NumberOfSymbols;
14 WORD  SizeOfOptionalHeader;
16 WORD  Characteristics;
 :
 :
- Verify that first two bytes are MZ

- Go to 0x3c offset from MZ position and find the offset of PE header (in example its 0xF8)

- Add 0xF8 to the beginning of segment (address of MZ) and verify that PE signature there

(2) Detailed things in PE header
- Look at the format. We can see that the offset of ImageBase is 0x34
NEW EXE
+0 PE
 4 WORD  Machine;
 6 WORD  NumberOfSections;
 8 DWORD   TimeDateStamp;
 C DWORD   PointerToSymbolTable;
10 DWORD   NumberOfSymbols;
14 WORD  SizeOfOptionalHeader;
16 WORD  Characteristics;

18 Optional Header

18 WORD    Magic;
1a UCHAR   MajorLinkerVersion;
1b UCHAR   MinorLinkerVersion;
1c DWORD   SizeOfCode;
20 DWORD   SizeOfInitializedData;
24 DWORD   SizeOfUninitializedData;
28 DWORD   AddressOfEntryPoint;
2c DWORD   BaseOfCode;
30 DWORD   BaseOfData;    //    // NT additional fields.
   //
34 DWORD   ImageBase;
-
Add 0x34 offset to PE signature position and get 4-byte number from it. This is ImageBase field

We need to reverse it to get the actual number. That is 01 35 00 00. Remeber that ImageBase is 01 35 00 00. -
Add 0x28 offset to PE signature position and get 4-byte number from it. It is EntryPoint field

We can know the sddress of EntryPoint is 00 00 12 E1
Add up ImageBase and EntryPoint, that is 01350000 + 000012E1
Click on the CPU panel, then press Ctrl+G and input “01350000+000012E1”.

Press OK

We got the address of EntryPoint. -
Go to 0x80 offset and get 4-byte number. This is Import Directory table (IDT) address
-
Add ImageBase to IDT and go to this memory location. It is actual IDT.
TO BE UPDATED…