Zabbix安装部署【超级详细】
环境准备
VMware Workstation Pro 15.0 版本
内存 4G
处理器 2G
硬盘 50G
网络适配器 NAT
清空 /etc/yum.repos.d/ 下面的所有文件,并下载阿里云的centos7镜像
rm -rf /etc/yum.repos.d/*
wget -O /etc/yum.repos.d/CentOS-Base.repo http://mirrors.aliyun.com/repo/Centos-7.repo
查看 /etc/yum.repos.d/ 下面的文件,源文件已经下载完成
[root@localhost ~]# ll /etc/yum.repos.d/
总用量 4
-rw-r--r--. 1 root root 2523 12月 26 19:31 CentOS-Base.repo
清空缓存,生成缓存
yum clean all
yum makecache
下载httpd,关闭防火墙并开启httpd服务
systemctl stop firewalld
systemctl disable firewalld
systemctl enable httpd
systemctl start httpd
安装MySQL
yum install -y mariadb mariadb-server
systemctl enable mariadb
systemctl start mariadb
安装php环境
yum install -y php php-mysql下载安装包
rpm -ivh http://repo.zabbix.com/zabbix/3.4/rhel/7/x86_64/zabbix-release-3.4-2.el7.noarch.rpm安装zabbix的包
yum install -y zabbix-server-mysql zabbix-get zabbix-web zabbix-web-mysql zabbix-agent zabbix-sender创建一个zabbix库并设置为utf8的字符编码格式如图

创建账户并且授权设置密码,刷新并退出如图

切换到此目录下并查看文件
[root@localhost ~]# cd /usr/share/doc/zabbix-server-mysql-3.4.15/
[root@localhost zabbix-server-mysql-3.4.15]# ls
AUTHORS  ChangeLog  COPYING  create.sql.gz  NEWS  README
进行解压
[root@localhost zabbix-server-mysql-3.4.15]# gunzip create.sql.gz
[root@localhost zabbix-server-mysql-3.4.15]# ls
AUTHORS  ChangeLog  COPYING  create.sql  NEWS  README
使用zabbix表对表进行导入
mysql
user zabbix;
source create.sql;
配置zabbix server配置文件
配置文件目录
[root@localhost zabbix-server-mysql-3.4.15]# cd /etc/zabbix
[root@localhost zabbix]# vi zabbix_server.conf
对zabbix_server.conf进行配置
set nu 显示行数
91 DBHost=localhost
100 DBName=zabbix
116 DBUser=zabbix
125 DBPassword=zabbix
131 DBSocket=/var/lib/mysql/mysql.sock运行zabbix-server服务,开机自启zabbix-server服务如图
[root@localhost zabbix]# systemctl start zabbix-server.service
[root@localhost zabbix]# systemctl enable zabbix-server.service
Created symlink from /etc/systemd/system/multi-user.target.wants/zabbix-server.service to /usr/lib/systemd/system/zabbix-server.service.
进入 /etc/httpd/conf.d/zabbix.conf 配置时间如图
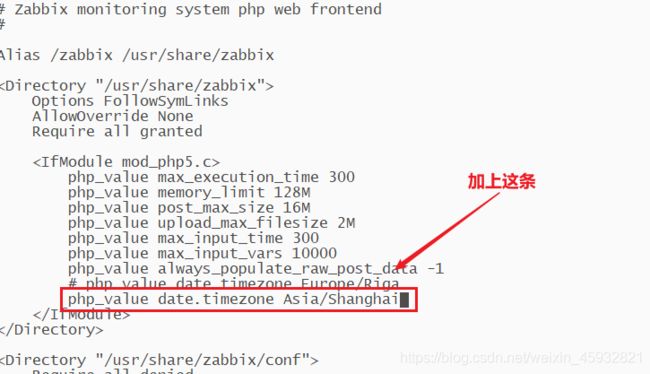
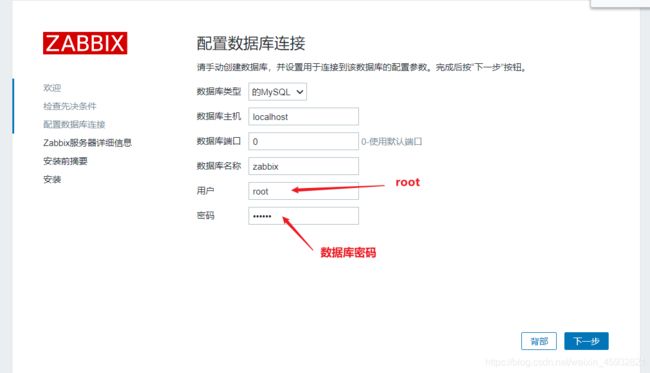
配置数据库密码
使用mysql_secure_installation,相关操作如下:
[root@localhost ~]# mysql_secure_installation
NOTE: RUNNING ALL PARTS OF THIS SCRIPT IS RECOMMENDED FOR ALL MySQL
SERVERS IN PRODUCTION USE! PLEASE READ EACH STEP CAREFULLY!
In order to log into MySQL to secure it, we'll need the current
password for the root user. If you've just installed MySQL, and
you haven't set the root password yet, the password will be blank,
so you should just press enter here.
Enter current password for root (enter for none):<–初次运行直接回车
OK, successfully used password, moving on…
Setting the root password ensures that nobody can log into the MySQL
root user without the proper authorisation.
Set root password? [Y/n]    #是否设置root用户密码,输入y并回车或直接回车
New password:               #设置root用户的密码
Re-enter new password:      #再输入一次你设置的密码
Password updated successfully!
Reloading privilege tables..
… Success!
By default, a MySQL installation has an anonymous user, allowing anyone
to log into MySQL without having to have a user account created for
them. This is intended only for testing, and to make the installation
go a bit smoother. You should remove them before moving into a
production environment.
Remove anonymous users? [Y/n]   #是否删除匿名用户,生产环境建议删除,所以直接回车
… Success!
Normally, root should only be allowed to connect from 'localhost'. This
ensures that someone cannot guess at the root password from the network.
Disallow root login remotely? [Y/n] #是否禁止root远程登录,根据自己的需求选择Y/n并回车,建议禁止
… Success!
By default, MySQL comes with a database named 'test' that anyone can
access. This is also intended only for testing, and should be removed
before moving into a production environment.
Remove test database and access to it? [Y/n] #是否删除test数据库,直接回车
- Dropping test database…
… Success!
- Removing privileges on test database…
… Success!
Reloading the privilege tables will ensure that all changes made so far
will take effect immediately.
Reload privilege tables now? [Y/n] #是否重新加载权限表,直接回车
… Success!
Cleaning up…
All done! If you've completed all of the above steps, your MySQL
installation should now be secure.
Thanks for using MySQL!
重启httpd服务
systemctl restart httpd查看 本机IP
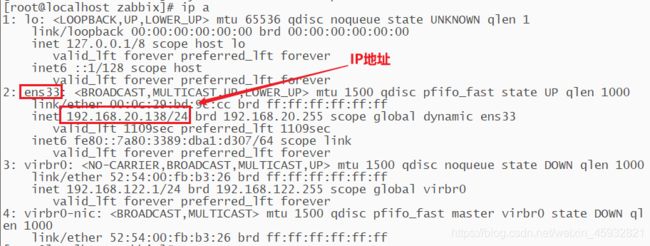
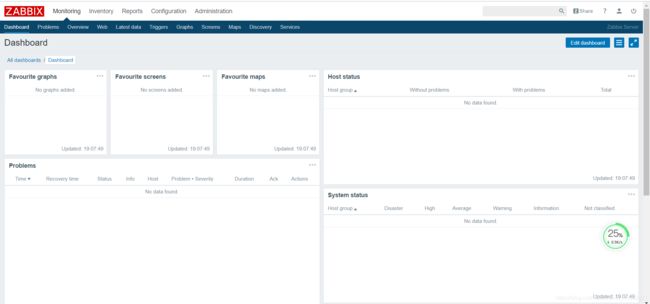
登陆zabbix网址:http://IP地址/zabbix
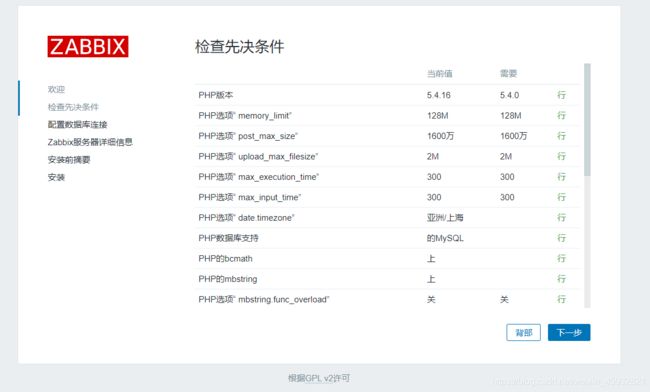
所以我们登录 http://192.168.20.138/zabbix 登陆成功
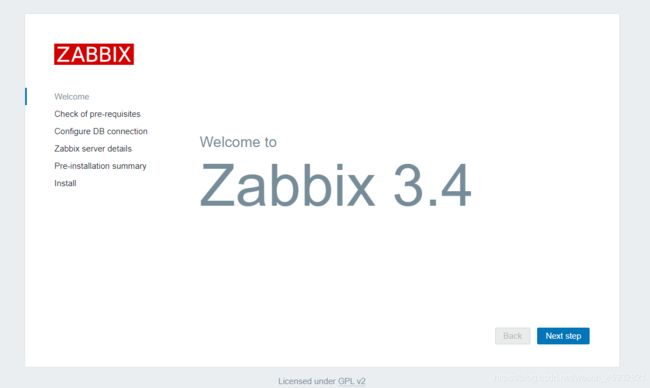
点击 Next step
点击下一步
点击下一步
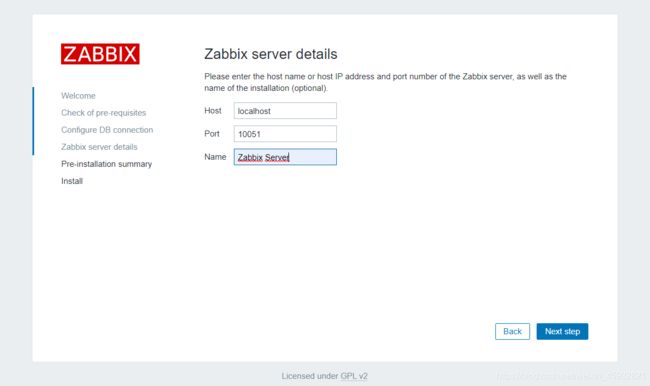
后面一直点下一步
登陆账户是Admin
密码是zabbix

安装完成