Gluster-Heketi-Kubernetes 安装步骤(以DaemonSet形式安装) Ubuntu 16.04
参考文档:https://github.com/gluster/gluster-kubernetes
实验环境:
Kubernetes:v1.12.1
Glusterfs: 3.7.6
OS: Ubuntu 16.04
Docker:18.6.1
详细情况如下图所示:
要求:
1. 至少三个gluster节点:至少需要3个节点用来部署glusterfs集群,并且这3个节点每个节点需要至少一个空余的磁盘。本案例中使用master,worker3,worker4作为gluster集群节点,加入的磁盘及各个节点IP如下:
master: 192.168.0.50   磁盘:/dev/sdb
worker3: 192.168.0.53  磁盘:/dev/sdc
worker4: 192.168.0.54  磁盘:/dev/sdg
删除所有分区(Each node must have at least one raw block device attached (like an EBS Volume or a local disk) for use by heketi. These devices must not have any data on them, as they will be formatted and partitioned by heketi.):
#master
sudo wipefs -a /dev/sdb

#worker3
sudo wipefs -a /dev/sdc

#worker4
sudo wipefs -a /dev/sdg
2. 安装Glusterfs客户端:每个gluster集群的节点需要安装gulsterfs的客户端。本案例中,需要在master, worker3,worker4上运行:
sudo apt-get install glusterfs-client3. 加载内核模块:每个gluster集群的节点加载内核模块dm_thin_pool,dm_mirror,dm_snapshot。本案例中,需要在master, worker3,worker4上运行,执行语句:
sudo modprobe dm_thin_pool
sudo modprobe dm_mirror
sudo modprobe dm_snapshot
4. 开放端口
2222:GlusterFS pod的sshd
24007:Gluster Daemon
24008: GlusterFs 管理
49152-49251 :每个brick可能会用到的port
5. 默认情况下,出于安全原因,集群不会在主服务器master上调度pod。如果您希望能够在主服务器master上调度pod,请运行:(本案例将master作为gluster集群节点,因此需要开放该权限。否则,无需执行下面的语句。)
kubectl taint nodes --all node-role.kubernetes.io/master-
主要步骤:
1. 在master节点,下载gluster-kubernetes, 运行
git clone https://github.com/gluster/gluster-kubernetes.git该项目提供了自动化安装工具和各种模板。
2. 进入文件夹
cd gluster-kubernetes/deploy3. 执行
vim kube-templates/glusterfs-daemonset.yaml修改kube-templates/glusterfs-daemonset.yaml内容,改变了pod存活检查和读取检查部分内容,如下:(如果不执行,会gluster pod会报错!)
注释了- "if command -v /usr/local/bin/status-probe.sh; then /usr/local/bin/status-probe.sh readiness; else systemctl status glusterd.service; fi"
添加:
- "systemctl status glusterd.service"
修改后的结果如下图所示:
修改后的文件如下:
---
kind: DaemonSet
apiVersion: extensions/v1beta1
metadata:
  name: glusterfs
  labels:
    glusterfs: daemonset
  annotations:
    description: GlusterFS DaemonSet
    tags: glusterfs
spec:
  template:
    metadata:
      name: glusterfs
      labels:
        glusterfs: pod
        glusterfs-node: pod
    spec:
      nodeSelector:
        storagenode: glusterfs
      hostNetwork: true
      containers:
      - image: gluster/gluster-centos:latest
        imagePullPolicy: IfNotPresent
        name: glusterfs
        env:
        # set GLUSTER_BLOCKD_STATUS_PROBE_ENABLE to "1" so the
        # readiness/liveness probe validate gluster-blockd as well
        - name: GLUSTER_BLOCKD_STATUS_PROBE_ENABLE
          value: "1"
        - name: GB_GLFS_LRU_COUNT
          value: "15"
        - name: TCMU_LOGDIR
          value: "/var/log/glusterfs/gluster-block"
        resources:
          requests:
            memory: 100Mi
            cpu: 100m
        volumeMounts:
        - name: glusterfs-heketi
          mountPath: "/var/lib/heketi"
        - name: glusterfs-run
          mountPath: "/run"
        - name: glusterfs-lvm
          mountPath: "/run/lvm"
        - name: glusterfs-etc
          mountPath: "/etc/glusterfs"
        - name: glusterfs-logs
          mountPath: "/var/log/glusterfs"
        - name: glusterfs-config
          mountPath: "/var/lib/glusterd"
        - name: glusterfs-dev-disk
          mountPath: "/dev/disk"
        - name: glusterfs-dev-mapper
          mountPath: "/dev/mapper"
        - name: glusterfs-misc
          mountPath: "/var/lib/misc/glusterfsd"
        - name: glusterfs-cgroup
          mountPath: "/sys/fs/cgroup"
          readOnly: true
        - name: glusterfs-ssl
          mountPath: "/etc/ssl"
          readOnly: true
        - name: kernel-modules
          mountPath: "/usr/lib/modules"
          readOnly: true
        securityContext:
          capabilities: {}
        - name: glusterfs-ssl
          mountPath: "/etc/ssl"
          readOnly: true
        - name: kernel-modules
          mountPath: "/usr/lib/modules"
          readOnly: true
        securityContext:
          capabilities: {}
          privileged: true
        readinessProbe:
          timeoutSeconds: 3
          initialDelaySeconds: 40
          exec:
            command:
            - "/bin/bash"
            - "-c"
            #- "if command -v /usr/local/bin/status-probe.sh; then /usr/local/bin/status-probe.sh readiness; else systemctl status glusterd.service; fi"  //注释
            - "systemctl status glusterd.service"  //添加
          periodSeconds: 25
          successThreshold: 1
          failureThreshold: 50
        livenessProbe:
          timeoutSeconds: 3
          initialDelaySeconds: 40
          exec:
            command:
            - "/bin/bash"
            - "-c"
            #- "if command -v /usr/local/bin/status-probe.sh; then /usr/local/bin/status-probe.sh readiness; else systemctl status glusterd.service; fi"  //注释
            - "systemctl status glusterd.service"   //添加
          periodSeconds: 25
          successThreshold: 1
          failureThreshold: 50
      volumes:
      - name: glusterfs-heketi
        hostPath:
          path: "/var/lib/heketi"
      - name: glusterfs-run
      - name: glusterfs-lvm
        hostPath:
          path: "/run/lvm"
      - name: glusterfs-etc
        hostPath:
          path: "/etc/glusterfs"
      - name: glusterfs-logs
        hostPath:
          path: "/var/log/glusterfs"
      - name: glusterfs-config
        hostPath:
          path: "/var/lib/glusterd"
      - name: glusterfs-dev-disk
        hostPath:
          path: "/dev/disk"
      - name: glusterfs-dev-mapper
        hostPath:
          path: "/dev/mapper"
      - name: glusterfs-misc
        hostPath:
          path: "/var/lib/misc/glusterfsd"
      - name: glusterfs-cgroup
        hostPath:
          path: "/sys/fs/cgroup"
      - name: glusterfs-ssl
        hostPath:
          path: "/etc/ssl"
      - name: kernel-modules
        hostPath:
          path: "/usr/lib/modules"
4. 管理员必须提供GlusterFS集群拓扑信息。这是一个拓扑文件的形式,它描述了在GlusterFS集群中存在的节点,以及连接在它们上的块设备,以供heketi使用。我们创建的my-topology.json, 执行:
vim my-topology.json文件代码:
{
  "clusters": [
    {
      "nodes": [
        {
          "node": {
            "hostnames": {
              "manage": [
                "master"
              ],
              "storage": [
                "192.168.0.50"
              ]
            },
            "zone": 1
          },
          "devices": [
            "/dev/sdb"
          ]
        },
        {
          "node": {
            "hostnames": {
              "manage": [
                "worker3"
              ],
              "storage": [
                "192.168.0.53"
              ]
            },
            "zone": 1
          },
          "devices": [
            "/dev/sdc"
          ]
        },
        {
          "node": {
            "hostnames": {
              "manage": [
                "worker4"
              ],
              "storage": [
                "192.168.0.54"
              ]
            },
            "zone": 1
          },
          "devices": [
            "/dev/sdg"
          ]
        }
      ]
    }
  ]
}
需要根据自身gluster集群磁盘配置情况,修改此my-topology.json,需要修改manage、storage、devices内容。其中manage:节点名;storage:节点IP;devices: 磁盘名。
5. 执行:
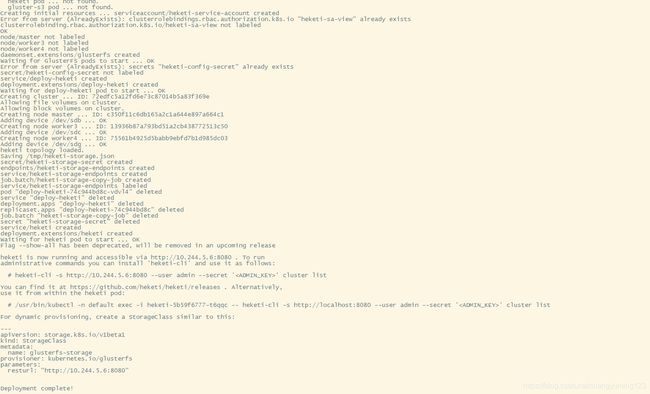
gk-deploy –g my-topology.json执行成功的结果如下:
验证案例:
1. 定义storageClass,执行:
vim storageclass-gluster-heketi.yaml文件内容:
apiVersion: storage.k8s.io/v1beta1

kind: StorageClass

metadata:

  name: glusterfs-storage

provisioner: kubernetes.io/glusterfs

parameters:

      resturl: "http://10.244.5.6:8080"  //依据生成的heketi pod的IP修改
执行:
kubectl create –f storageclass-gluster-heketi.yaml2. 定义pvc, 执行:
vim pvc-gluster-heketi.yaml文件内容:
kind: PersistentVolumeClaim

apiVersion: v1

metadata:

  name: pvc-gluster-heketi

spec:

  storageClassName: glusterfs-storage

  accessModes:

    - ReadWriteOnce

  resources:

    requests:

          storage: 1Gi
执行:
kubectl create –f pvc-gluster-heketi.yaml3. 定义Pod使用PVC,执行:
vim pod-use-pvc.yaml文件内容:
apiVersion: v1

kind: Pod

metadata:

  name: pod-use-pvc

spec:

  containers:

  - name: pod-use-pvc

    image: nginx

    imagePullPolicy: IfNotPresent

    volumeMounts:

    - name: gluster-volume

      mountPath: "/pv-data"

      readOnly: false

  volumes:

  - name: gluster-volume

    persistentVolumeClaim:

          claimName: pvc-gluster-heketi
执行:
kubectl create –f pod-use-pvc.yaml4. 进入pod查看是否可以使用volume ,执行:
Kubectl exec –it pod-use-pvc -- /bin/bash创建test.txt正常
可能遇到的问题:
执行
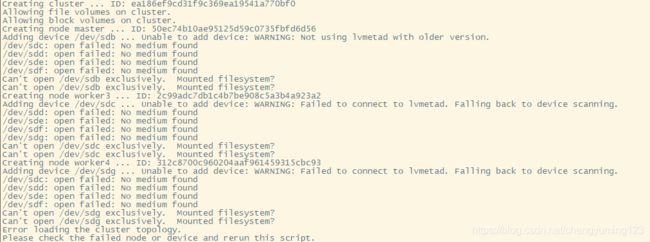
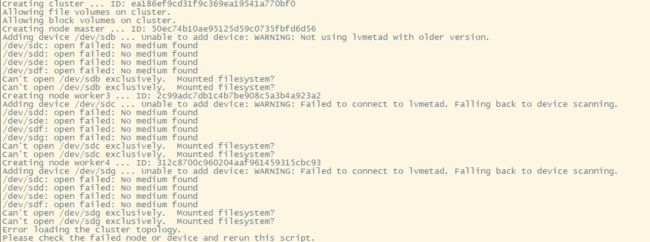
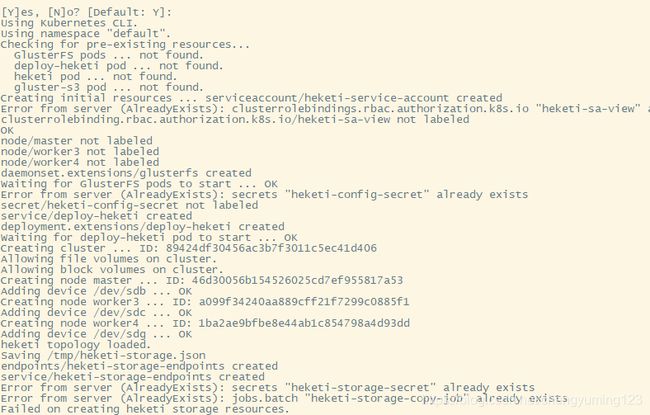
gk-deploy -g my-topology.json出现如下问题,显示无法挂载新加入的磁盘,详细情况如下:
首先查看pod运行情况
kubectl get pods执行
kubectl exec -it deploy-heketi-74c944bd8c-4zln4 -- /bin/bash进入deploy-heketi-74c944bd8c-4zln4中,删除所创建的集群和节点
执行
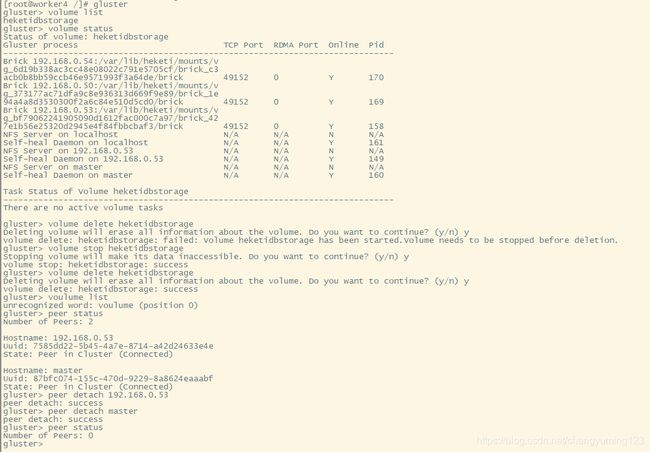
kubectl exec -it glusterfs-8d47r -- bin/bash进入glusterfs-8d47r中,删除所有的卷和peer
删除脚本所创建的一些资源,执行:
kubectl delete -f kube-templates/重启所有k8s节点,包括master和所有worker
每个kubernetes集群的节点加载内核模块dm_thin_pool,dm_mirror,dm_snapshot。
执行语句:
sudo modprobe dm_thin_pool

sudo modprobe dm_mirror

sudo modprobe dm_snapshot
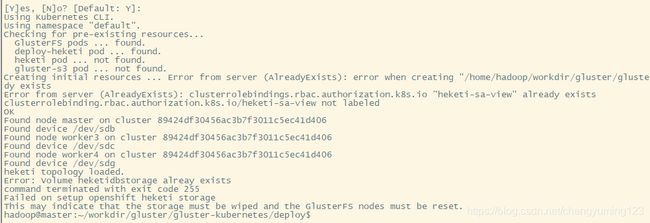
在master节点上执行:(如果首次安装,则无需执行;否则,一定要删除,否则后面会报错,报错信息如下图所示!!!)
kubectl delete service/heketi-storage-endpoints在master节点上进入
cd workdir/gluster/gluster-kubernetes/deploy执行
gk-deploy –g my-topology.json
卸载Gluterfs Heketi
1. 进入heketi pod中删除所有的节点和cluster
2. 进入gluster pod中删除所有的volume和peer
3. 删除依赖gluster的PV,PVC,SC(利用kubectl delete pv/* 操作)
4. 执行 kubectl delete -f kube-templates/,删除相关的pod
5. .。。。删除其他相关的资源

