乐优商城学习笔记 Day02(非教程)
乐优商城学习Day02:
注意:此次代码都是在第一天的基础上
第一天的链接如下:
https://blog.csdn.net/zcylxzyh/article/details/97616746
此次笔记内容主要为:(省去了前端的项目结构解释。如果有笔记的话,解释可看笔记)
1.导入已有资源,安装vue插件,配置域名
2.Vuetify框架
3.安装虚拟机,CentOs6.5,在虚拟机,安装nginx
4.数据库导入数据(附:数据库安装和彻底删除)
5.商品分类查询
6.跨域问题
下面开始第二天的学习:
1.导入已有资源,安装vue插件,配置域名
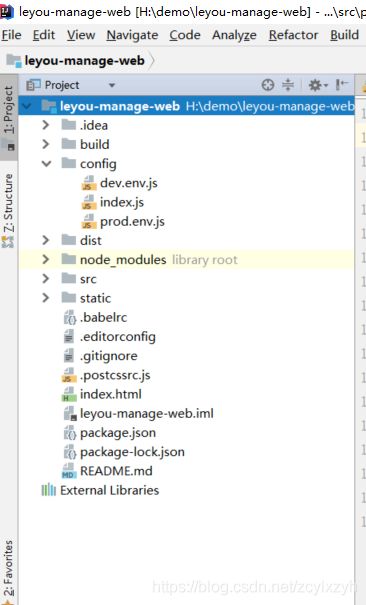
首先导入leyou-manage-web
然后安装vue插件

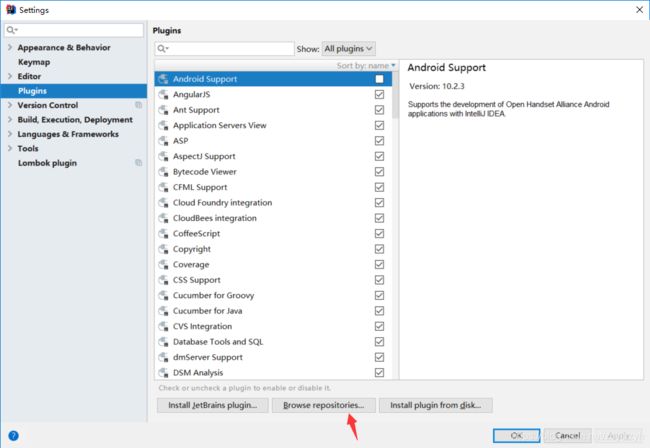

然后下载安装,安装之后
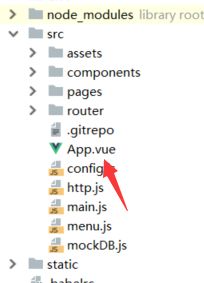
这里有关vue的文件就会变成这样
然后我们配置域名,这里我们使用SwitchHosts工具

我们的配置如下:

至此,第一部分结束。
2.Vuetify框架
官方网站:https://vuetifyjs.com/zh-Hans/
使用方法:
基于官方网站的文档进行学习:
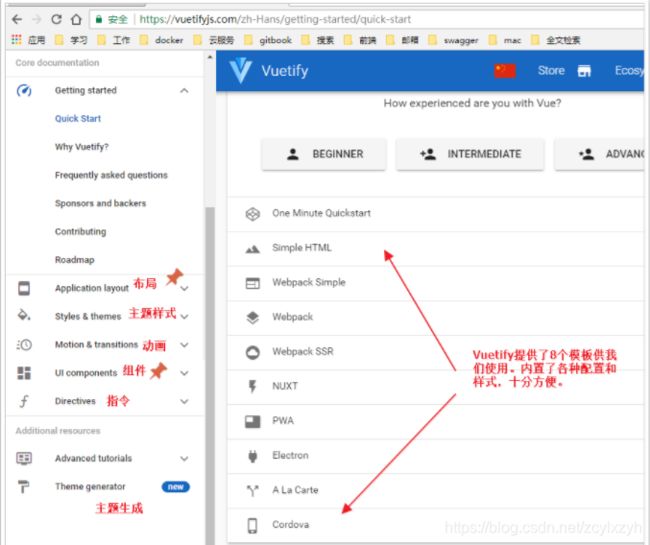
我们重点关注UI components即可,里面有大量的UI组件,我们要用的时候再查看,不用现在学习,先看下有什么:
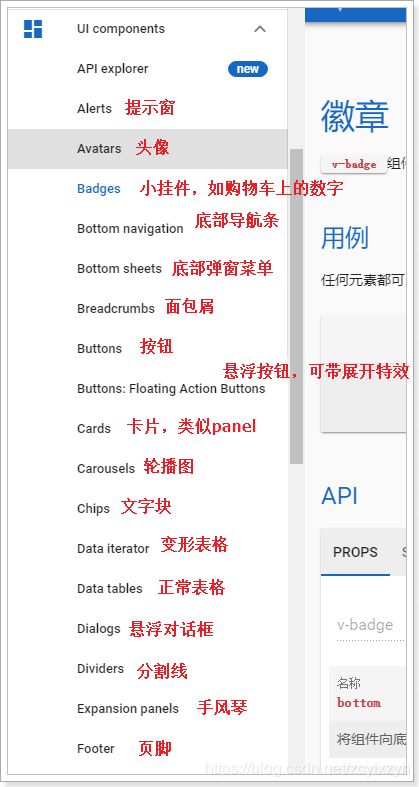
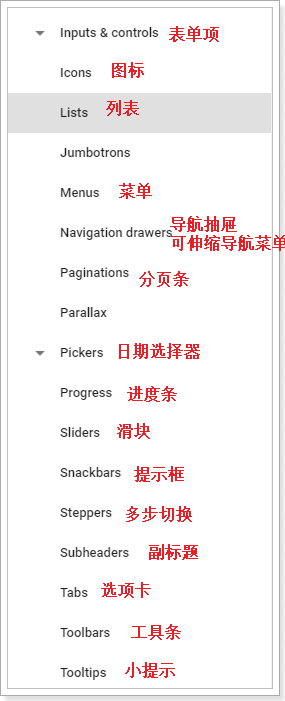
以后用到什么组件,就来查询即可。
至此,第二部分结束。
3.安装虚拟机,CentOs6.5 和 在虚拟机安装nginx
什么是nginx:

nginx可以作为web服务器,但更多的时候,我们把它作为网关,因为它具备网关必备的功能:
- 反向代理
- 负载均衡
- 动态路由
- 请求过滤
Web服务器分2类:
- web应用服务器,如:
- tomcat
- resin
- jetty
- web服务器,如:
- Apache 服务器
- Nginx
- IIS
区分:web服务器不能解析jsp等页面,只能处理js、css、html等静态资源。
并发:web服务器的并发能力远高于web应用服务器。
今天主要用nginx做反向代理
- 代理:通过客户机的配置,实现让一台服务器(代理服务器)代理客户机,客户的所有请求都交给代理服务器处理。
- 反向代理:用一台服务器,代理真实服务器,用户访问时,不再是访问真实服务器,而是代理服务器。
nginx可以当做反向代理服务器来使用:
- 我们需要提前在nginx中配置好反向代理的规则,不同的请求,交给不同的真实服务器处理
- 当请求到达nginx,nginx会根据已经定义的规则进行请求的转发,从而实现路由功能

接下来我们就来讲解怎么安装虚拟机和在虚拟机上安装nginx:
a.安装虚拟机:
具体安装虚拟机和CentOs的过程的博客
https://blog.csdn.net/zcylxzyh/article/details/98031743
b.在虚拟机上安装nginx
参照本人写的这个博客
https://blog.csdn.net/zcylxzyh/article/details/98072052
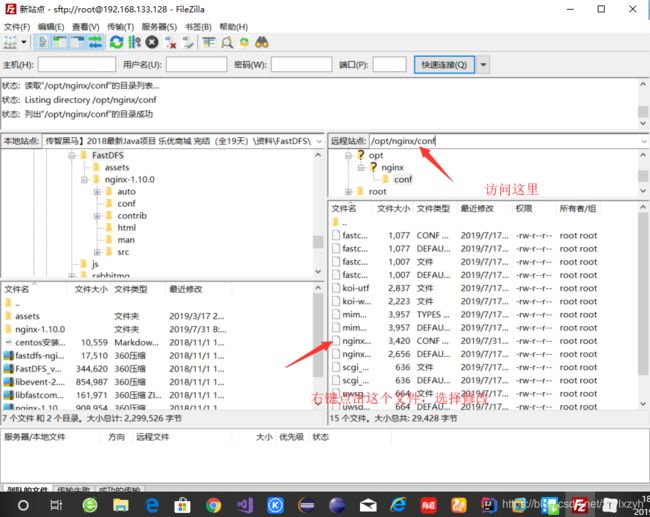
c.更改nginx.conf文件
#user  nobody;
worker_processes  1;

#error_log  logs/error.log;
#error_log  logs/error.log  notice;
#error_log  logs/error.log  info;

#pid        logs/nginx.pid;


events {
    worker_connections  1024;
}


http {
    include       mime.types;
    default_type  application/octet-stream;

    #log_format  main  '$remote_addr - $remote_user [$time_local] "$request" '
    #                  '$status $body_bytes_sent "$http_referer" '
    #                  '"$http_user_agent" "$http_x_forwarded_for"';

    #access_log  logs/access.log  main;

    sendfile        on;
    #tcp_nopush     on;

    #keepalive_timeout  0;
    keepalive_timeout  65;

    #gzip  on;
	server {
        listen       80;
        server_name  manage.leyou.com;

        proxy_set_header X-Forwarded-Host $host;
        proxy_set_header X-Forwarded-Server $host;
        proxy_set_header X-Forwarded-For $proxy_add_x_forwarded_for;

        location / {
			proxy_pass http://192.168.31.193:9001; #主机地址下的9001端口
			proxy_connect_timeout 600;
			proxy_read_timeout 600;
        }
    }
	server {
        listen       80;
        server_name  api.leyou.com;

        proxy_set_header X-Forwarded-Host $host;
        proxy_set_header X-Forwarded-Server $host;
        proxy_set_header X-Forwarded-For $proxy_add_x_forwarded_for;

        location / {
			proxy_pass http://192.168.31.193:10010;
			proxy_connect_timeout 600;
			proxy_read_timeout 600;
        }
    }

    server {
        listen       80;
        server_name  localhost;

        #charset koi8-r;

        #access_log  logs/host.access.log  main;

        location / {
            root   html;
            index  index.html index.htm;
        }

        #error_page  404              /404.html;

        # redirect server error pages to the static page /50x.html
        #
        error_page   500 502 503 504  /50x.html;
        location = /50x.html {
            root   html;
        }

        # proxy the PHP scripts to Apache listening on 127.0.0.1:80
        #
        #location ~ \.php$ {
        #    proxy_pass   http://127.0.0.1;
        #}

        # pass the PHP scripts to FastCGI server listening on 127.0.0.1:9000
        #
        #location ~ \.php$ {
        #    root           html;
        #    fastcgi_pass   127.0.0.1:9000;
        #    fastcgi_index  index.php;
        #    fastcgi_param  SCRIPT_FILENAME  /scripts$fastcgi_script_name;
        #    include        fastcgi_params;
        #}

        # deny access to .htaccess files, if Apache's document root
        # concurs with nginx's one
        #
        #location ~ /\.ht {
        #    deny  all;
        #}
    }


    # another virtual host using mix of IP-, name-, and port-based configuration
    #
    #server {
    #    listen       8000;
    #    listen       somename:8080;
    #    server_name  somename  alias  another.alias;

    #    location / {
    #        root   html;
    #        index  index.html index.htm;
    #    }
    #}


    # HTTPS server
    #
    #server {
    #    listen       443 ssl;
    #    server_name  localhost;

    #    ssl_certificate      cert.pem;
    #    ssl_certificate_key  cert.key;

    #    ssl_session_cache    shared:SSL:1m;
    #    ssl_session_timeout  5m;

    #    ssl_ciphers  HIGH:!aNULL:!MD5;
    #    ssl_prefer_server_ciphers  on;

    #    location / {
    #        root   html;
    #        index  index.html index.htm;
    #    }
    #}

}
然后重新加载nginx配置文件
nginx -s reload

然后访问manage.leyou.com成功
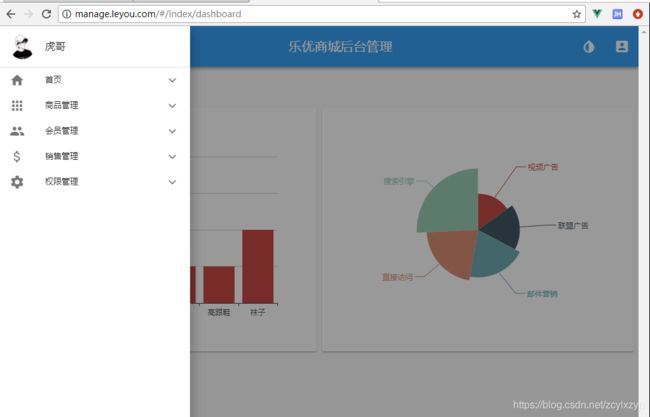
至此,第三阶段结束。
4.数据库导入数据(附:数据库安装和彻底删除)
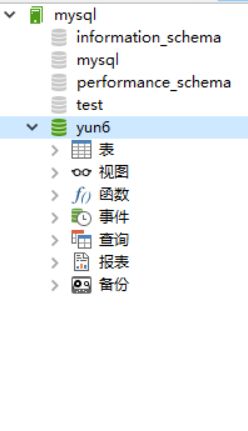
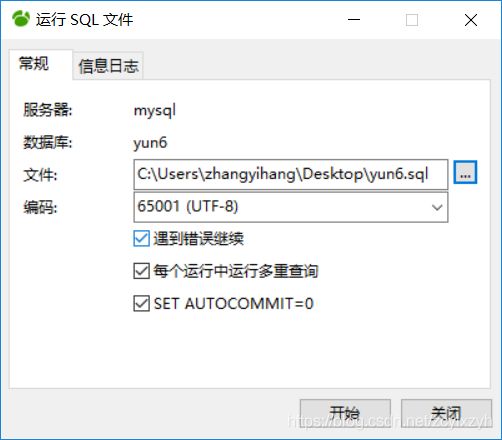
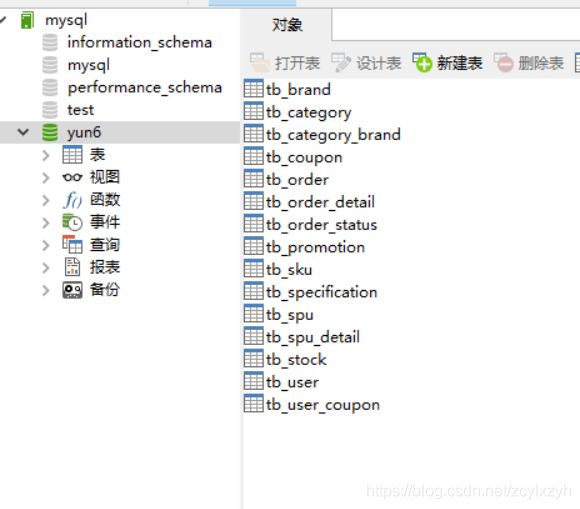
这里我们启动数据库将数据导入进去:
注意:我一开始是用5.5版本的数据库时导入出错,后来删除5.5版本,下载5.6版本的数据库再次导入就成功了,所以请大家也注意。
完全卸载mysql可以参照:
https://blog.csdn.net/cxy_Summer/article/details/70142322
安装mysql可以参照
https://www.cnblogs.com/muhehe/p/7701989.html
至此,第四部分结束。
5.商品分类查询
因为我们已经有了前端页面,所以我们进行后台的代码编写:
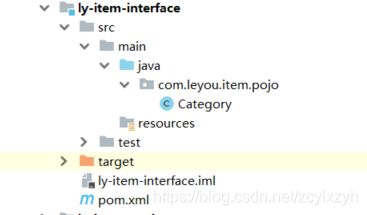
首先在 ly-item=>ly-item-interface=>src=>main=>java=>com.leyou.item.pojo中创建名为Category的类。
Category类代码如下:
package com.leyou.item.pojo;

import lombok.Data;
import tk.mybatis.mapper.annotation.KeySql;

import javax.persistence.Id;
import javax.persistence.Table;

@Table(name="tb_category")
@Data
public class Category {

	@Id
	@KeySql(useGeneratedKeys=true)
	private Long id;
	private String name;
	private Long parentId;
	private Boolean isParent; // 注意isParent生成的getter和setter方法需要手动加上Is
	private Integer sort;
	// getter和setter略
}
此时需要修改pom文件,修改后的pom文件如下:
<?xml version="1.0" encoding="UTF-8"?>
<project xmlns="http://maven.apache.org/POM/4.0.0"
         xmlns:xsi="http://www.w3.org/2001/XMLSchema-instance"
         xsi:schemaLocation="http://maven.apache.org/POM/4.0.0 http://maven.apache.org/xsd/maven-4.0.0.xsd">
    <parent>
        <artifactId>ly-item</artifactId>
        <groupId>com.leyou.service</groupId>
        <version>1.0.0-SNAPSHOT</version>
    </parent>
    <modelVersion>4.0.0</modelVersion>

    <groupId>com.leyou.service</groupId>
    <artifactId>ly-item-interface</artifactId>
<dependencies>
    <dependency>
        <groupId>tk.mybatis</groupId>
        <artifactId>mapper-core</artifactId>
        <version>1.0.4</version>
    </dependency>
</dependencies>

</project>
然后编写controller,分析如下:
编写一个controller一般需要知道四个内容:
- 请求方式:决定我们用GetMapping还是PostMapping
- 请求路径:决定映射路径
- 请求参数:决定方法的参数
- 返回值结果:决定方法的返回值
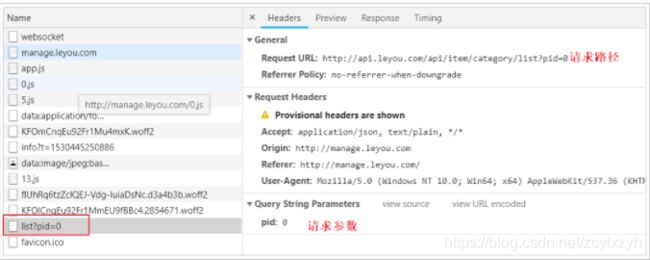
- 请求方式:Get
- 请求路径:/api/item/category/list。其中/api是网关前缀,/item是网关的路由映射,真实的路径应该是/category/list
- 请求参数:pid=0,根据tree组件的说明,应该是父节点的id,第一次查询为0,那就是查询一级类目
- 返回结果:??
根据前面tree组件的用法我们知道,返回的应该是json数组:

对应的java类型可以是List集合,里面的元素就是类目对象了。也就是List
分析结束。
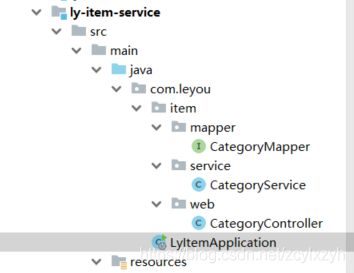
在ly-item-service=>src=>main=>java=>com.leyou=>item=>web下创建类名为CategoryController的类。
CategoryController代码如下:
package com.leyou.item.web;

import com.leyou.item.pojo.Category;
import com.leyou.item.service.CategoryService;
import org.springframework.beans.factory.annotation.Autowired;
import org.springframework.http.ResponseEntity;
import org.springframework.web.bind.annotation.GetMapping;
import org.springframework.web.bind.annotation.RequestMapping;
import org.springframework.web.bind.annotation.RequestParam;
import org.springframework.web.bind.annotation.RestController;

import java.util.List;

@RestController
@RequestMapping("category")
public class CategoryController {

    @Autowired
    private CategoryService categoryService;

    //    根据父节点ID查询商品分类
    @GetMapping("list")
    public ResponseEntity<List<Category>> queryCategoryListByPid(@RequestParam("pid") Long pid) {

            return ResponseEntity.ok(categoryService.queryCategoryListByPid(pid));
    }

}
然后编写service:
一般service层我们会定义接口和实现类,不过这里我们就偷懒一下,直接写实现类了
在与web同级的目录下找到service包,在下面创建名为CategoryService的类。
CategoryService的代码如下:
package com.leyou.item.service;

import com.leyou.common.enums.ExceptionEnum;
import com.leyou.common.exception.LyException;
import com.leyou.item.pojo.Category;
import com.leyou.item.mapper.CategoryMapper;
import org.springframework.beans.factory.annotation.Autowired;
import org.springframework.stereotype.Service;
import org.springframework.util.CollectionUtils;

import java.util.List;

@Service
public class CategoryService {

    @Autowired
    private CategoryMapper categoryMapper;

    public List<Category> queryCategoryListByPid(Long pid) {

        //查询条件,mapper会把对象中的非空属性作为查询条件
        Category t = new Category();
        t.setParentId(pid);
        List<Category> list = categoryMapper.select(t);
        //判断结果
        if (CollectionUtils.isEmpty(list)) {

            //返回404
            throw new LyException(ExceptionEnum.CATEGORY_NOT_FOND);
        }
        return list;
    }
}
然后我们编写mapper:
item下创建mapper包,mapper包与web同级,在mapper包下创建名为CategoryMapper的接口
CategoryMapper代码如下:
package com.leyou.item.mapper;

import com.leyou.item.pojo.Category;
import tk.mybatis.mapper.common.Mapper;

public interface CategoryMapper extends Mapper<Category>{

}
package com.leyou;

import org.springframework.boot.SpringApplication;
import org.springframework.boot.autoconfigure.SpringBootApplication;
import org.springframework.cloud.client.discovery.EnableDiscoveryClient;
import tk.mybatis.spring.annotation.MapperScan;

@SpringBootApplication
@EnableDiscoveryClient
@MapperScan("com.leyou.item.mapper")
public class LyItemApplication {

    public static void main(String[] args) {

        SpringApplication.run(LyItemApplication.class);
    }
}
不经过网关访问时:
http://localhost:8081/category/list?pid=0

通过网关访问:
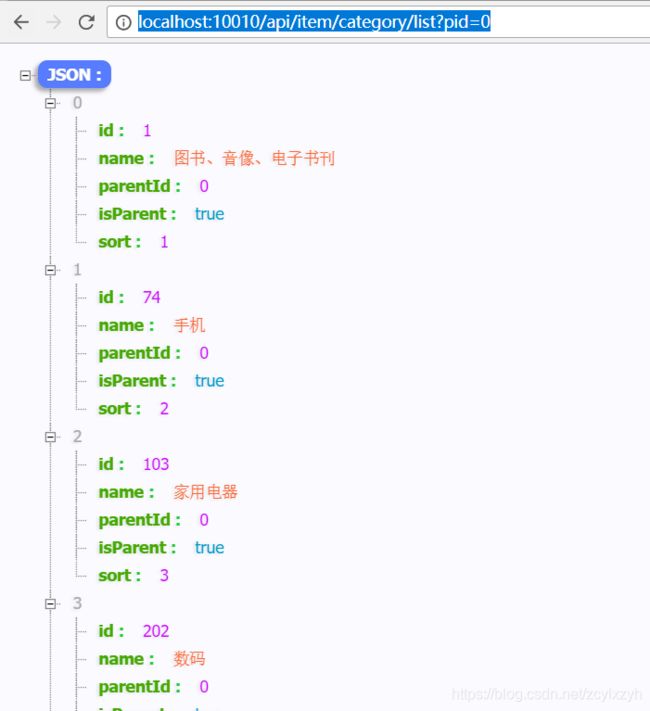
http://localhost:10010/api/item/category/list?pid=0
但是刷新后台管理页面时:
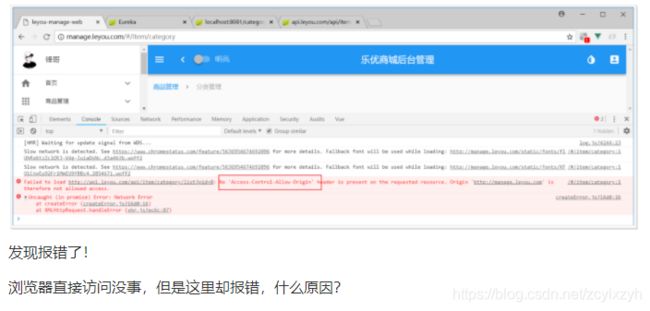
这就是跨域问题了。
至此,第5部分结束。
6.跨域问题
跨域:浏览器对于javascript的同源策略的限制 。
以下情况都属于跨域:
| 跨域原因说明 | 示例 |
|---|---|
| 域名不同 | www.jd.com 与 www.taobao.com |
| 域名相同,端口不同 | www.jd.com:8080 与 www.jd.com:8081 |
| 二级域名不同 | item.jd.com 与 miaosha.jd.com |
如果域名和端口都相同,但是请求路径不同,不属于跨域,如:
www.jd.com/item
www.jd.com/goods
而我们刚才是从 manage.leyou.com去访问api.leyou.com,这属于二级域名不同,跨域了。
为什么有跨域问题:
跨域不一定会有跨域问题。
因为跨域问题是浏览器对于ajax请求的一种安全限制:一个页面发起的ajax请求,只能是与当前页域名相同的路径,这能有效的阻止跨站攻击。
因此:跨域问题 是针对ajax的一种限制。
解决方案:
目前比较常用的跨域解决方案有3种:
- Jsonp
最早的解决方案,利用script标签可以跨域的原理实现。
限制:- 需要服务的支持
- 只能发起GET请求
- nginx反向代理
思路是:利用nginx把跨域反向代理为不跨域,支持各种请求方式
缺点:需要在nginx进行额外配置,语义不清晰 - CORS
规范化的跨域请求解决方案,安全可靠。
优势:- 在服务端进行控制是否允许跨域,可自定义规则
- 支持各种请求方式
缺点: - 会产生额外的请求
我们这里会采用cors的跨域方案。
什么是cors:
CORS是一个W3C标准,全称是"跨域资源共享"(Cross-origin resource sharing)。
它允许浏览器向跨源服务器,发出XMLHttpRequest请求,从而克服了AJAX只能同源使用的限制。
CORS需要浏览器和服务器同时支持。目前,所有浏览器都支持该功能,IE浏览器不能低于IE10。
- 浏览器端:
目前,所有浏览器都支持该功能(IE10以下不行)。整个CORS通信过程,都是浏览器自动完成,不需要用户参与。 - 服务端:
CORS通信与AJAX没有任何差别,因此你不需要改变以前的业务逻辑。只不过,浏览器会在请求中携带一些头信息,我们需要以此判断是否允许其跨域,然后在响应头中加入一些信息即可。这一般通过过滤器完成即可。
原理:
浏览器会将ajax请求分为两类,其处理方案略有差异:简单请求、特殊请求。
简单请求:
只要同时满足以下两大条件,就属于简单请求。:
(1) 请求方法是以下三种方法之一:
- HEAD
- GET
- POST
(2)HTTP的头信息不超出以下几种字段:
- Accept
- Accept-Language
- Content-Language
- Last-Event-ID
- Content-Type:只限于三个值application/x-www-form-urlencoded、multipart/form-data、text/plain
当浏览器发现发起的ajax请求是简单请求时,会在请求头中携带一个字段:Origin.
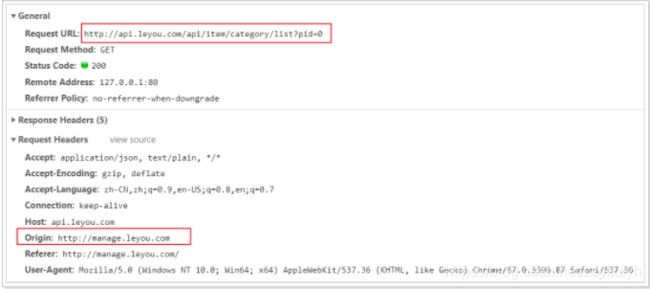
Origin中会指出当前请求属于哪个域(协议+域名+端口)。服务会根据这个值决定是否允许其跨域。
如果服务器允许跨域,需要在返回的响应头中携带下面信息:
Access-Control-Allow-Origin: http://manage.leyou.com
Access-Control-Allow-Credentials: true
Content-Type: text/html; charset=utf-8
-
Access-Control-Allow-Origin:可接受的域,是一个具体域名或者*(代表任意域名)
-
Access-Control-Allow-Credentials:是否允许携带cookie,默认情况下,cors不会携带cookie,除非这个值是true
-
有关cookie:
要想操作cookie,需要满足3个条件:
-
服务的响应头中需要携带Access-Control-Allow-Credentials并且为true。
-
浏览器发起ajax需要指定withCredentials 为true
-
响应头中的Access-Control-Allow-Origin一定不能为*,必须是指定的域名
特殊请求:
不符合简单请求的条件,会被浏览器判定为特殊请求,,例如请求方式为PUT。
预检请求
特殊请求会在正式通信之前,增加一次HTTP查询请求,称为"预检"请求(preflight)。
浏览器先询问服务器,当前网页所在的域名是否在服务器的许可名单之中,以及可以使用哪些HTTP动词和头信息字段。只有得到肯定答复,浏览器才会发出正式的XMLHttpRequest请求,否则就报错。
一个“预检”请求的样板:
OPTIONS /cors HTTP/1.1
Origin: http://manage.leyou.com
Access-Control-Request-Method: PUT
Access-Control-Request-Headers: X-Custom-Header
Host: api.leyou.com
Accept-Language: en-US
Connection: keep-alive
User-Agent: Mozilla/5.0...
与简单请求相比,除了Origin以外,多了两个头:
- Access-Control-Request-Method:接下来会用到的请求方式,比如PUT
- Access-Control-Request-Headers:会额外用到的头信息
预检请求的响应
服务的收到预检请求,如果许可跨域,会发出响应:
HTTP/1.1 200 OK
Date: Mon, 01 Dec 2008 01:15:39 GMT
Server: Apache/2.0.61 (Unix)
Access-Control-Allow-Origin: http://manage.leyou.com
Access-Control-Allow-Credentials: true
Access-Control-Allow-Methods: GET, POST, PUT
Access-Control-Allow-Headers: X-Custom-Header
Access-Control-Max-Age: 1728000
Content-Type: text/html; charset=utf-8
Content-Encoding: gzip
Content-Length: 0
Keep-Alive: timeout=2, max=100
Connection: Keep-Alive
Content-Type: text/plain
除了Access-Control-Allow-Origin和Access-Control-Allow-Credentials以外,这里又额外多出3个头:
- Access-Control-Allow-Methods:允许访问的方式
- Access-Control-Allow-Headers:允许携带的头
- Access-Control-Max-Age:本次许可的有效时长,单位是秒,过期之前的ajax请求就无需再次进行预检了
如果浏览器得到上述响应,则认定为可以跨域,后续就跟简单请求的处理是一样的了。
实现:
虽然原理比较复杂,但是前面说过:
- 浏览器端都有浏览器自动完成,我们无需操心
- 服务端可以通过拦截器统一实现,不必每次都去进行跨域判定的编写。
事实上,SpringMVC已经帮我们写好了CORS的跨域过滤器:CorsFilter ,内部已经实现了刚才所讲的判定逻辑,我们直接用就好了。
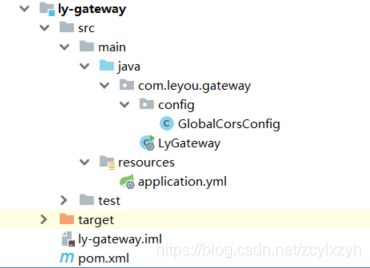
在ly-gateway=>src=>main=>java=>com.leyou.gateway创建包config在包下创建类GlobalCorsConfig
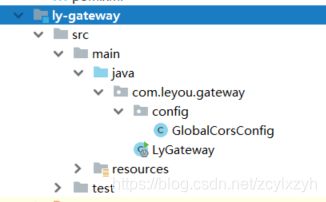
GlobalCorsConfig代码如下:
package com.leyou.gateway.config;

import org.springframework.context.annotation.Bean;
import org.springframework.context.annotation.Configuration;
import org.springframework.web.cors.CorsConfiguration;
import org.springframework.web.cors.UrlBasedCorsConfigurationSource;
import org.springframework.web.filter.CorsFilter;

@Configuration
public class GlobalCorsConfig {

    @Bean
    public CorsFilter corsFilter() {

        //1.添加CORS配置信息
        CorsConfiguration config = new CorsConfiguration();
        //1) 允许的域,不要写*,否则cookie就无法使用了,因为是add所以可以有多个
        config.addAllowedOrigin("http://manage.leyou.com");
        //2) 是否发送Cookie信息
        config.setAllowCredentials(true);
        //3) 允许的请求方式
        config.addAllowedMethod("OPTIONS");
        config.addAllowedMethod("HEAD");
        config.addAllowedMethod("GET");
        config.addAllowedMethod("PUT");
        config.addAllowedMethod("POST");
        config.addAllowedMethod("DELETE");
        config.addAllowedMethod("PATCH");
        // 4)允许的头信息
        config.addAllowedHeader("*");
        //5)有效时长:单位秒
        config.setMaxAge(3600L);

        //2.添加映射路径,我们拦截一切请求
        UrlBasedCorsConfigurationSource configSource = new UrlBasedCorsConfigurationSource();
        configSource.registerCorsConfiguration("/**", config);

        //3.返回新的CorsFilter.
        return new CorsFilter(configSource);
    }
}
package com.leyou.common.enums;

        import lombok.AllArgsConstructor;
        import lombok.Getter;
        import lombok.NoArgsConstructor;

@Getter
@NoArgsConstructor
@AllArgsConstructor
//枚举是指只能有固定实例个数的类
public enum ExceptionEnum {

    PRICE_CANNOT_BE_NULL(400,"价格不能为空!"),
    CATEGORY_NOT_FOND(404,"商品分类没查到")
    ;
    private  int code ;
    private  String msg ;

}
重新访问:
http://manage.leyou.com/#/item/category
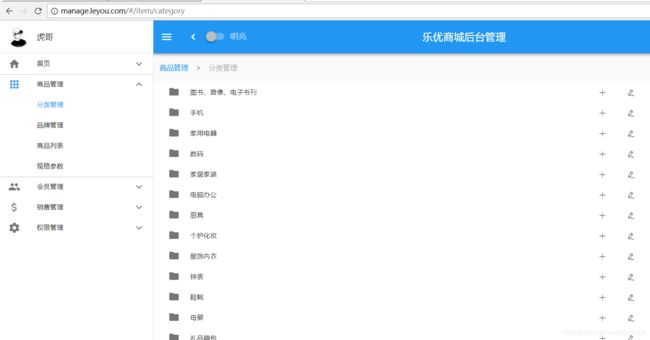
分类的增删改功能暂时就不做了,页面已经预留好了事件接口,有兴趣的同学可以完成一下。
至此,今天的任务结束。
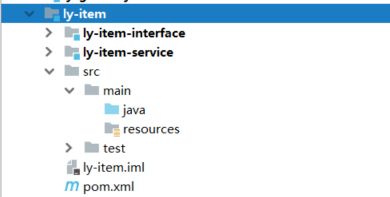
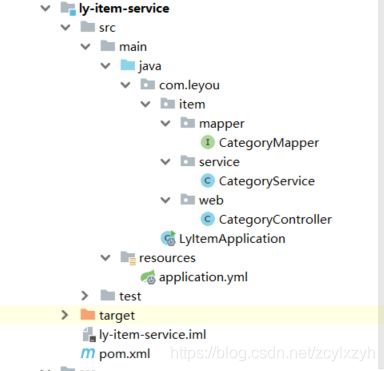
附:截止至今天的整体架构截图:
leyou:

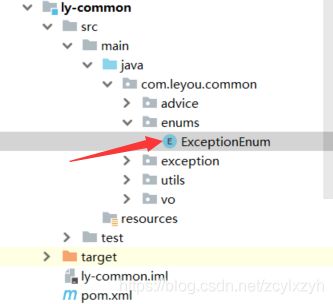
ly-common:

ly-gateway:
ly-item:
ly-item-interface:
ly-item-service:
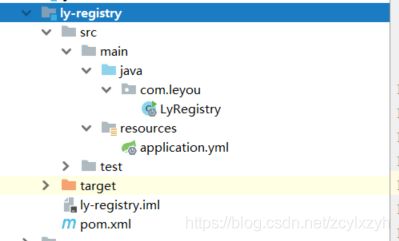
ly-registry:
