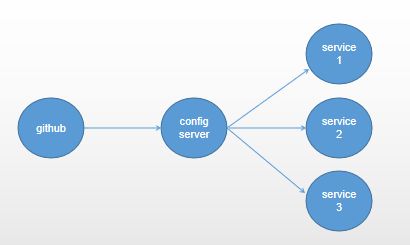
在SpringCloud的微服务架构中,随着服务的不断迭代增加,为了方便管理,使用配置中心使所有服务能够被集中管理。在SpringCloud的配置中心,有两个角色:其一是ConfigServer,是从github、gitee、gitlab等网络管理资源中取出配置。其二是ConfigClient,也就是各个服务,他们是配置的实际使用者。
1、ConfigServer
新建一个Config的modular项目,并加入依赖(如下所示),spring-cloud-config-server是ConfigServer的依赖。它也是一个服务,我直接将它注册到服务中心中。
    org.springframework.cloud
    spring-cloud-config-server


    org.springframework.cloud
    spring-cloud-starter-netflix-eureka-client
然后在启动类上加入注解@EnableConfigServer,表示这是一个配置中心的Server项目
@SpringBootApplication
@EnableEurekaClient
@EnableConfigServer
public class ConfigApplication {

    public static void main(String[] args) {
        SpringApplication.run(ConfigApplication.class, args);
    }

}
最后是配置文件
eureka:
  client:
    service-url:
      defaultZone: http://root:root@localhost:1001/eureka/
spring:
  application:
    name: config
  cloud:
    config:
      server:
        git:
          uri: https://github.com/XXXXXXXX/config-cloud
          username:
          password:
          basedir: /config/basedir
          search-paths: repos
server:
  port: 2002
uri: git项目的仓库地址
username、password: 如果git项目是公开的,这两个值不需要输入
basedir:使用基于VCS的后端(git,svn)文件被检出或克隆到本地文件系统。 默认情况下,它们放在系统临时目录中,前缀为config-repo-。 在linux上,例如可以是/tmp/config-repo-
search-paths: 在git项目下,如果配置文件存储的位置不是在根目录下而是一些文件夹下面,那么则使用该配置指定文件夹路径,配置文件在该仓库的search-paths路径下
接下来是配置的读取
启动项目可以看到这样一些信息
我们可以通过一些系统给我们提供的接口去访问配置信息的内容
格式如下:
"{[/{name}-{profiles}.properties],methods=[GET]}"
"{[/{name}-{profiles}.yml || /{name}-{profiles}.yaml],methods=[GET]}"
"{[/{name}/{profiles:.*[^-].*}],methods=[GET]}"
"{[/{label}/{name}-{profiles}.yml || /{label}/{name}-{profiles}.yaml],methods=[GET]}"
"{[/{name}/{profiles}/{label:.*}],methods=[GET]}"
"{[/{name}-{profiles}.json],methods=[GET]}"
"{[/{label}/{name}-{profiles}.properties],methods=[GET]}"
"{[/{label}/{name}-{profiles}.json],methods=[GET]}"
"{[/{name}/{profile}/{label}/**],methods=[GET],produces=[application/octet-stream]}"
"{[/{name}/{profile}/{label}/**],methods=[GET]}"
"{[/{name}/{profile}/**],methods=[GET],params=[useDefaultLabel]}"
其实说白了也没有那么复杂,我们可以根据上面的任意一种格式去读取信息,其中有三个值是供我们填写的
name 文件名: 配置文件的抬头名
profiles 环境: 即dev、test、prod
label 分支: 不填的话默认是master分支
例如 product-dev.proties中,name为product,profiles为dev,具体实践如下
下面是几种不同请求的结果
注意:在设置文件的时候,如果一个配置文件叫做order.yml,那么我们光使用localhost:2002/order.json或localhost:2002/order.properties是不能访问到信息的,我们必须输入一个profiles,这个时候profiles可以是任意值代替,它读取的内容都一样。
2、ConfigClient
服务是作为配置的具体使用者,也就是Client端,他们从ConfigServer中读取对应的配置文件,接下来我将对之前的两个服务product和order的配置文件进行改造。(这里只写order服务)
在order的modular项目中加入依赖
     org.springframework.cloud
     spring-cloud-config-client
下面这一段很重要
在配置文件改造之前,需要提前bootstrap.yml和application.yml的加载顺序以及相关的其他信息,bootstrap.yml是在加载上下文阶段就读取的系统配置。
在加入上面的依赖后,ConfigClient项目启动过程中,会自动取加载ConfigServer从github中读取的配置,这个地方需要我们将注册服务和连接ConfigServer的配置放置在bootstrap.yml中。必须要提前装载,因为如果放置在application.yml中,服务会从默认配置中心默认的8888端口中读取服务,而不是我这个项目之前设定的2002端口。
除非我是用的ConfigServer的端口也是8888,那么就也可以放在application.yml中了。
所以我把之前application.yml改造成了bootstrap.yml
eureka:
  client:
    service-url:
      defaultZone: http://root:root@localhost:1001/eureka/

spring:
  application:
    name: order
  cloud:
    config:
      discovery:
        enabled: true
        service-id: config
      label: master
      profile: test
配置的过程就是将{name}/{profile}/{label}解析的过程
与之前ConfigServer读取配置文件一样,我们的spring.application.name 就是我们要读取的文件的 name,这个很重要。
discovery.enabled:true 表明使用配置中心读取配置
discovery.service-id:config 使用服务中的ConfigServer的service-id
label 分支
profile 环境
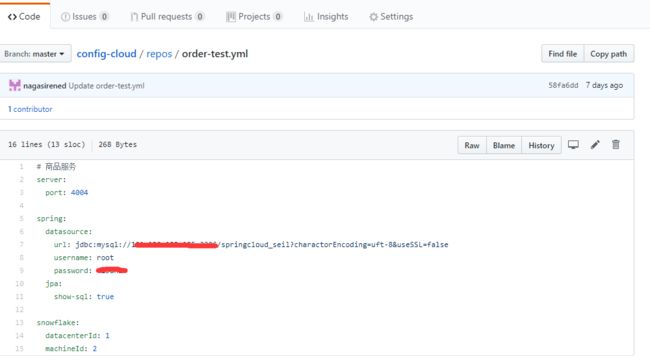
按照我上面的配置,意义就是在配置中心中找到名为config的服务,将它读取github的配置中的名为 order-test.yml(properties)的配置读取出来并加载到当前项目。
3、消息总线
到目前为止还存在这么一个问题:如果github的配置被修改提交了,它实际上没有立即加载到ConfigServer上,按照以往的项目经验。如果一些静态内容改动了,尝试刷新一些缓存。那如果底层配置文件改了呢,我们需要先重启ConfigServer,再重启ConfigClient项目。要是只能这样的话岂不是我们做了半天只将一些配置整合到了一起而已,看起来作用并不大。
因此SpringCloud还提供给了我们一个工具(Spring Cloud Bus)。它的定位是 Spring Cloud 体系内的消息总线,使用 message broker 来连接分布式系统的所有节点。它的主要作用是在git中的配置文件修改了之后,主动去通知使用配置中心的节点并更新配置。
我这儿使用了rabbitMQ作为承载消息的中间件,也可以选择别的kafka、activeMQ等。我选择rabbitMQ的原因是我只会这个emmmm
首先在config 、order、product三个modular项目中都加入了依赖(如下),并在order、product中配置rabbitMQ的配置信息
     org.springframework.cloud
     spring-cloud-starter-bus-amqp
spring:
  rabbitmq:
    host: xxxx
    port: 5672
    username: guest
    password: guest
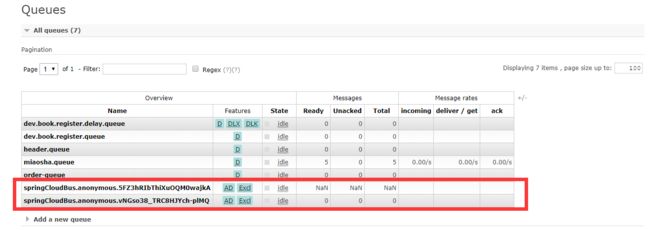
在项目启动后,会发现在rabbitMQ中自动增加了三个随机命名的队列(config、order、product)。当服务关闭之后,对应服务的队列会自动消失。
测试消息总线
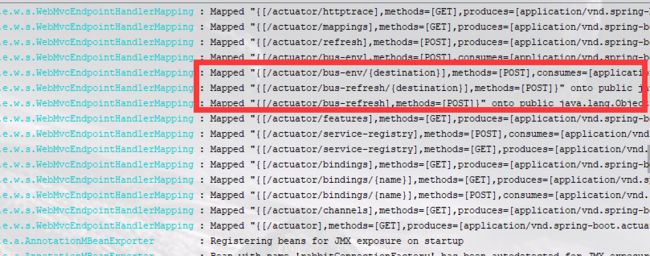
spring cloud bus 的实际上在ConfigServer配置中心内使用了一个POST方式提交的bus-refresh的接口去推送和刷新配置信息,这个接口并没有直接暴露给我们,需要我们去配置下面这个内容才能使用
management:
  endpoints:
    web:
      exposure:
        include: "*"
重启order项目之后就可以看到暴露了bus-refresh接口
再接下来,我使用在order服务中的雪花算法的配置文件作为修改点进行消息总线的测试。原来的配置是这样
snowflake:
  datacenterId: 3
  machineId: 4
通过在Order中写入一个测试方法去读取
这里的Controller上必须加入一个 @RefreshScope 注解
@Value("${snowflake.machineId}")
Long machineId;

@Value("${snowflake.datacenterId}")
Long datacenterId;

@GetMapping("getSnowFlake")
public void getSnowFlake( ){
   log.info("datacenterId : {}",datacenterId);
   log.info("machineId : {}",machineId);
}
第一次读取内容的结果是
现在我设置新的值为
snowflake:
  datacenterId: 7
  machineId: 8
再次执行测试方法,执行结果是:
可以看到结果并没有按照预想的一样,变成了7和8,这个时候需要我们去ConfigServer项目(我这儿端口是2002)执行post的/actuator/bus-refresh接口
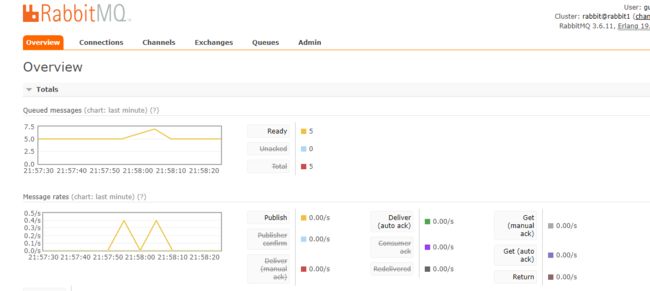
执行结果,可以看到rabbitMQ执行了消息的传递
最新执行结果,修改后的值已经被刷新到了order服务中
