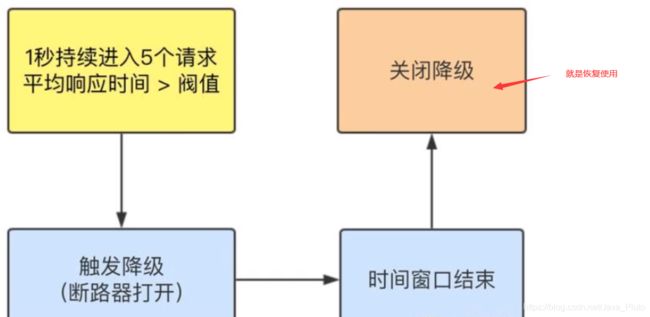
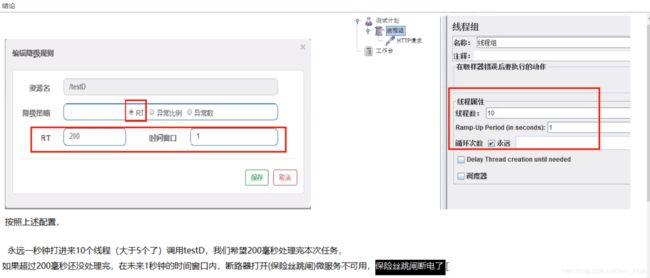
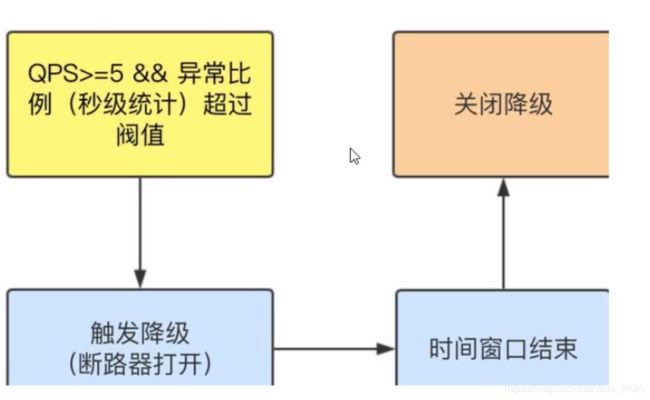
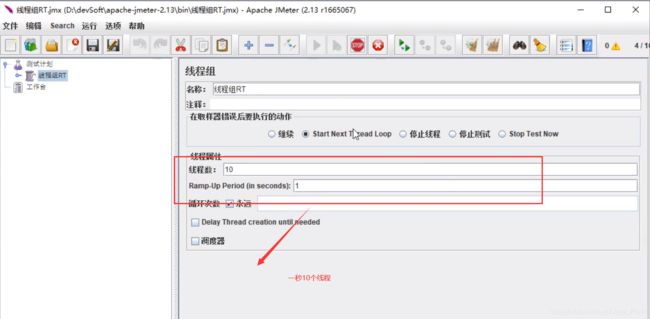
与Spring Cloud Alibaba 开源负责人一起深入理解 Sentinel实现熔断与限流

官网:https://github.com/alibaba/Sentinel
中文:https://github.com/alibaba/Sentinel/wiki/%E4%BB%8B%E7%BB%8D
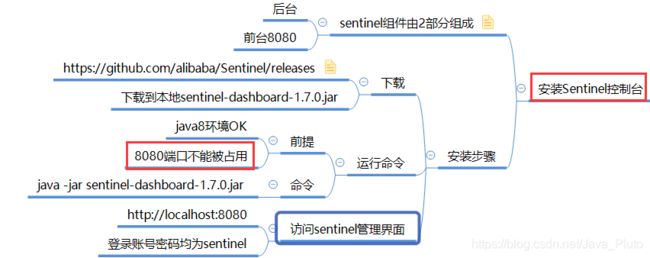
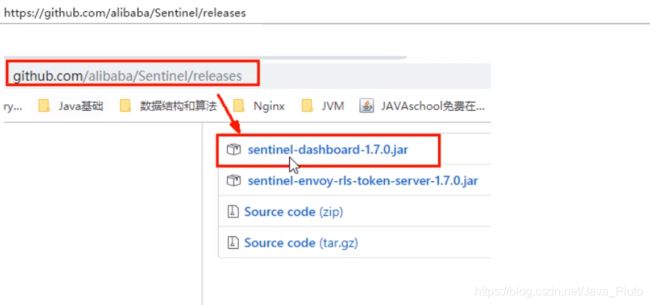
下载:https://github.com/alibaba/Sentinel/releases

1 初始化演示工程
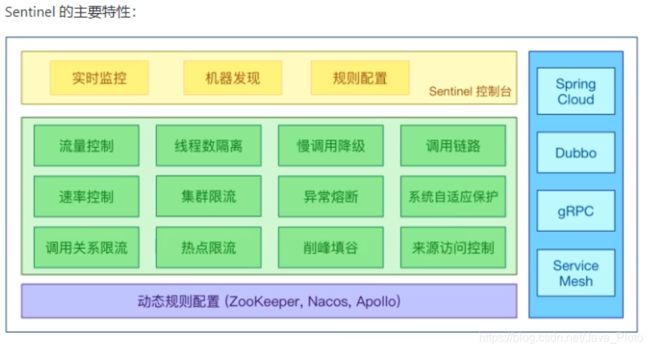
1.1 大纲;
1.2 创建cloudalibaba-sentinel-service8401
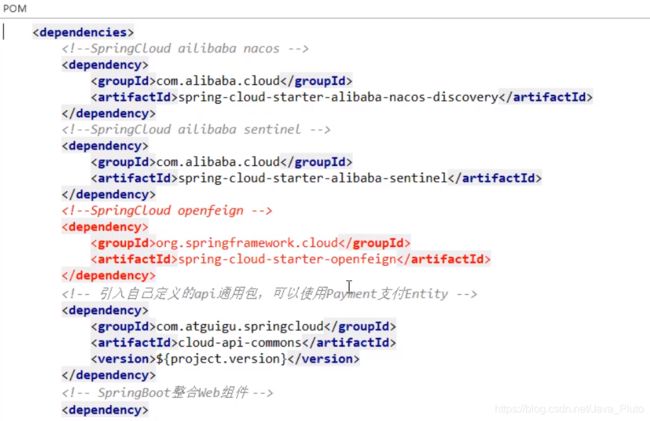
pom:
<?xml version="1.0" encoding="UTF-8"?>
<project xmlns="http://maven.apache.org/POM/4.0.0"
         xmlns:xsi="http://www.w3.org/2001/XMLSchema-instance"
         xsi:schemaLocation="http://maven.apache.org/POM/4.0.0 http://maven.apache.org/xsd/maven-4.0.0.xsd">
    <parent>
        <artifactId>cloud2020</artifactId>
        <groupId>com.eiletxie.springcloud</groupId>
        <version>1.0-SNAPSHOT</version>
    </parent>
    <modelVersion>4.0.0</modelVersion>

    <artifactId>cloudalibaba-sentinel-service8401</artifactId>

    <dependencies>
        <!-- SpringCloud ailibaba nacos-->
        <dependency>
            <groupId>com.alibaba.cloud</groupId>
            <artifactId>spring-cloud-starter-alibaba-nacos-discovery</artifactId>
        </dependency>
        <!-- SpringCloud ailibaba sentinel-datasource-nacos 持久化需要用到-->
        <dependency>
            <groupId>com.alibaba.csp</groupId>
            <artifactId>sentinel-datasource-nacos</artifactId>
        </dependency>
        <!-- SpringCloud ailibaba sentinel-->
        <dependency>
            <groupId>com.alibaba.cloud</groupId>
            <artifactId>spring-cloud-starter-alibaba-sentinel</artifactId>
        </dependency>
        <dependency><!-- 引用自己定义的api通用包,可以使用Payment支付Entity -->
            <groupId>com.eiletxie.springcloud</groupId>
            <artifactId>cloud-api-commons</artifactId>
            <version>${
     project.version}</version>
        </dependency>
        <dependency>
            <groupId>org.springframework.cloud</groupId>
            <artifactId>spring-cloud-starter-openfeign</artifactId>
        </dependency>
        <dependency>
            <groupId>org.springframework.boot</groupId>
            <artifactId>spring-boot-starter-web</artifactId>
        </dependency>
        <!--监控-->
        <dependency>
            <groupId>org.springframework.boot</groupId>
            <artifactId>spring-boot-starter-actuator</artifactId>
        </dependency>
        <!--热部署-->
        <dependency>
            <groupId>org.springframework.boot</groupId>
            <artifactId>spring-boot-devtools</artifactId>
            <scope>runtime</scope>
            <optional>true</optional>
        </dependency>
        <dependency>
            <groupId>org.projectlombok</groupId>
            <artifactId>lombok</artifactId>
            <optional>true</optional>
        </dependency>
        <dependency>
            <groupId>org.springframework.boot</groupId>
            <artifactId>spring-boot-starter-test</artifactId>
            <scope>test</scope>
        </dependency>
    </dependencies>
</project>
yml:
server:
  port: 8401

spring:
  application:
    name: cloudalibaba-sentinal-service
  cloud:
    nacos:
      discovery:
        #Nacos服务注册中心地址
        server-addr: localhost:8848
    sentinel:
      transport:
        #配置Sentin dashboard地址
        dashboard: localhost:8080
        # 默认8719端口,假如被占用了会自动从8719端口+1进行扫描,直到找到未被占用的 端口
        port: 8719
management:
  endpoints:
    web:
      exposure:
        include: '*'
localhost:8080 控制台的地址,指定控制台后客户端会自动向该地址发送心跳包
(默认8719) 客户端提供给Dashboard访问或者查看Sentinel的运行访问的参数
主启动类:
/**
 * @Author EiletXie
 * @Since 2020/3/17 12:52
 */
@EnableDiscoveryClient
@SpringBootApplication
public class MainApp8401 {


    public static void main(String[] args) {

        SpringApplication.run(MainApp8401.class,args);
    }
}
controller:
package com.eiletxie.springcloud.alibaba.controller;

import com.alibaba.csp.sentinel.annotation.SentinelResource;
import com.alibaba.csp.sentinel.slots.block.BlockException;
import lombok.extern.slf4j.Slf4j;
import org.springframework.web.bind.annotation.GetMapping;
import org.springframework.web.bind.annotation.RequestMapping;
import org.springframework.web.bind.annotation.RequestParam;
import org.springframework.web.bind.annotation.RestController;

import java.util.concurrent.TimeUnit;

/**
 * @Author EiletXie
 * @Since 2020/3/17 12:54
 */
@RestController
@Slf4j
public class FlowLimitController {


    @GetMapping("/testA")
    public String testA() {

        return "----testA";
    }

    @GetMapping("/testB")
    public String testB() {

        return "----testB";
    }
}
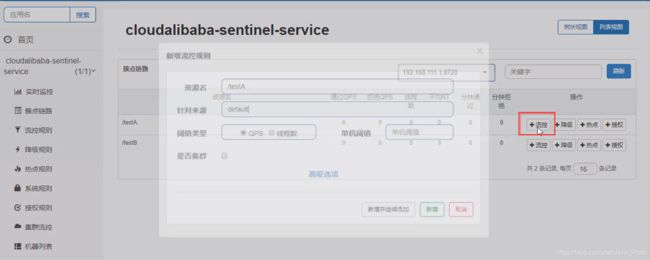
2.流控规则:
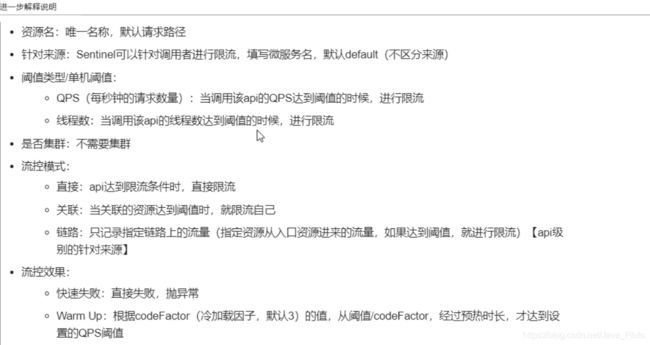
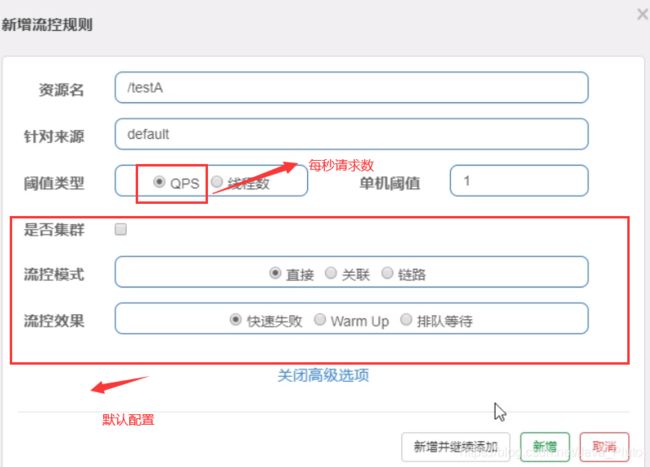
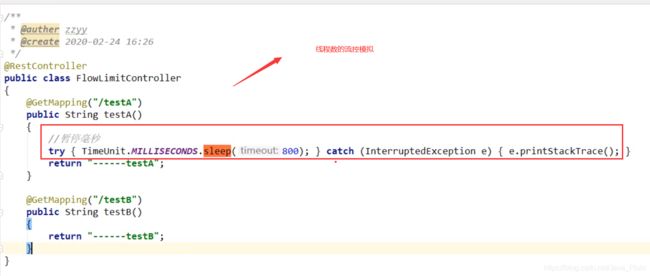
2.1直接:api达到限流条件时,直接限流
QPS (每秒钟的请求数量) :当调用该api的QPS达到阈值的时候,进行限流
线程数:当调用该api的线程数达到阈值的时候,进行限流

去掉暂停毫秒的代码,就是普通的QPS的模拟
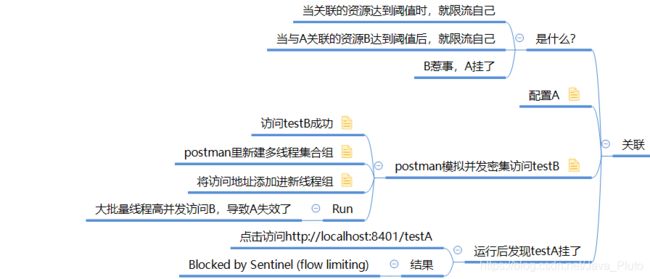
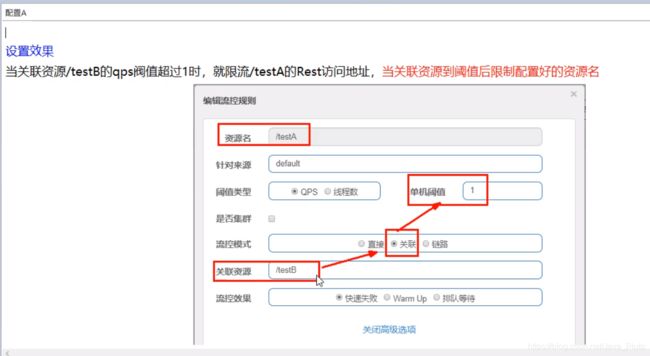
2.2 关联: 当关联的资源达到阈值时,就限流自己
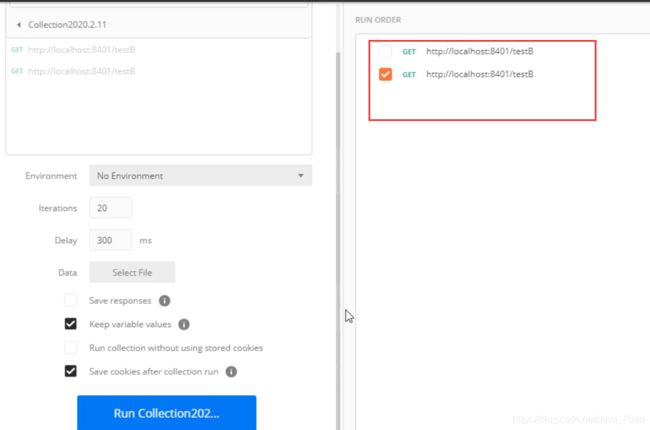
模拟访问B
3.流控效果:
3.1预热
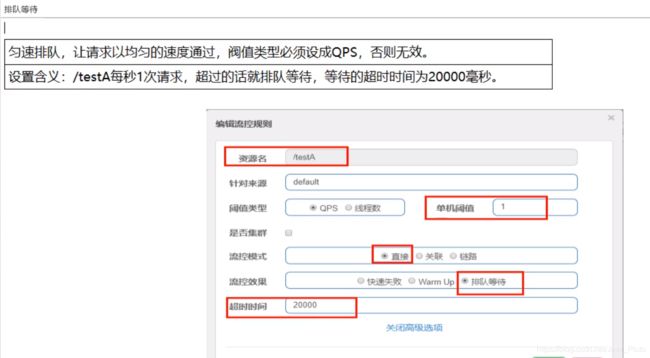
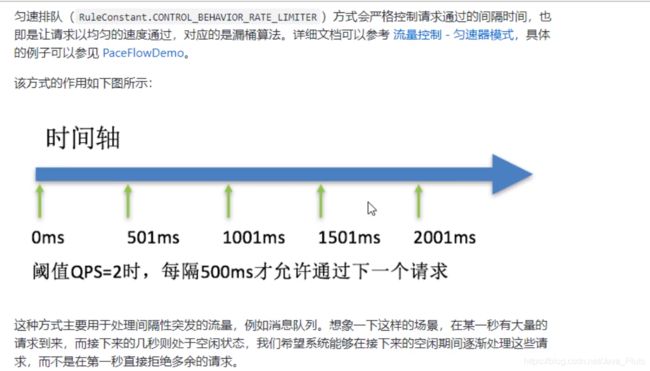
3.2.排队等待
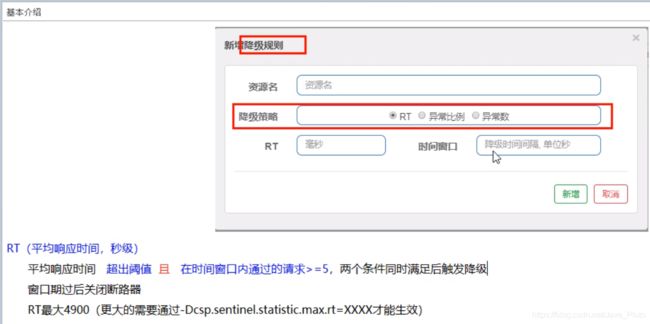
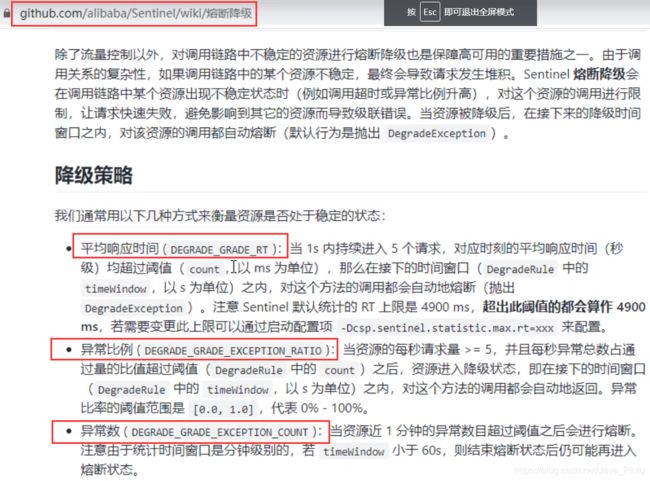
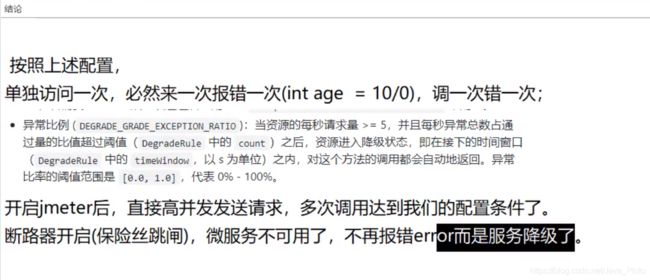
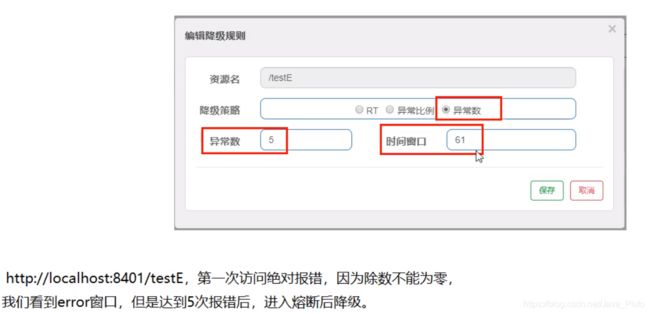
3:异常数:


效果演示:
![]()

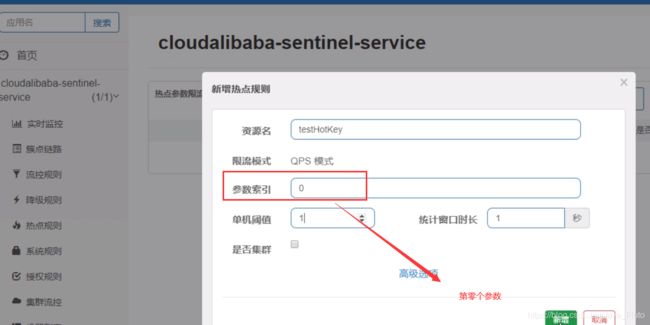
热点key限流:
官网:https://github.com/alibaba/Sentinel/wiki/热点参数限流

效果演示:



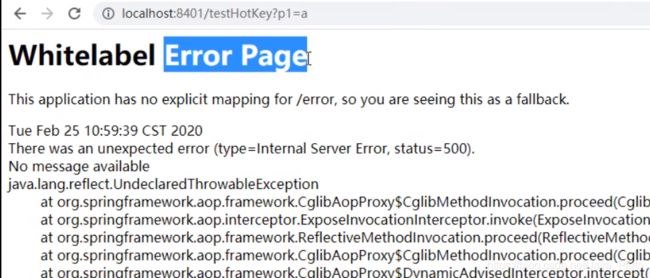
错误页面:(无blockHandler的兜底方法)

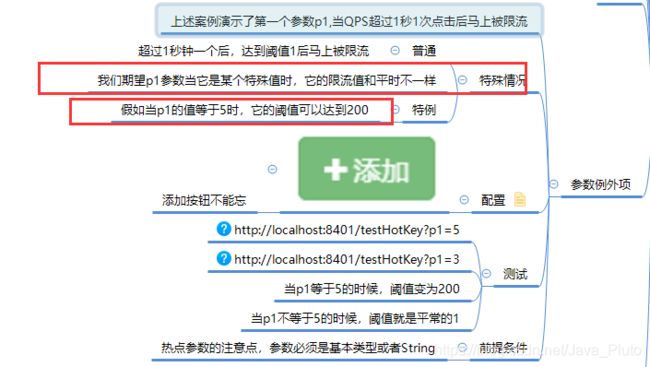
4.参数例外项
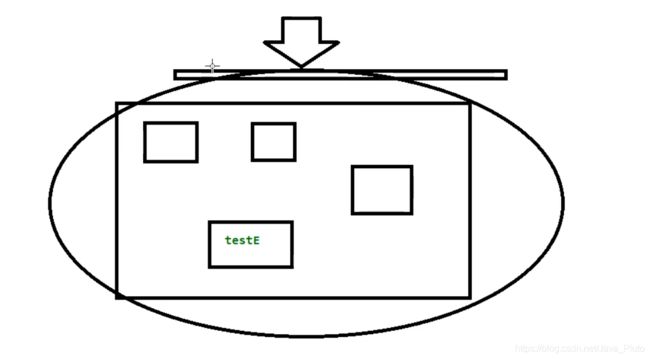
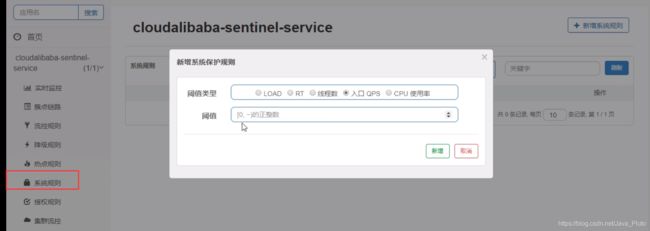
系统规则:(系统入口的限流,而非细粒度的rest)*
官网:https://github.com/alibaba/Sentinel/wiki/%E7%B3%BB%E7%BB%9F%E8%87%AA%E9%80%82%E5%BA%94%E9%99%90%E6%B5%81


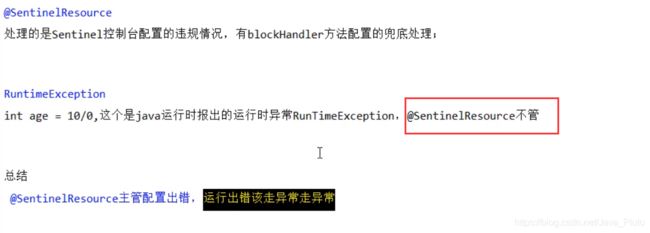
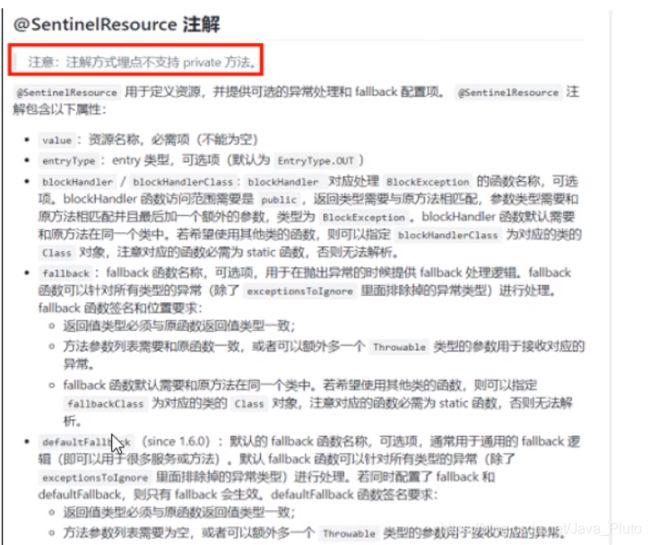
@SentinelResource

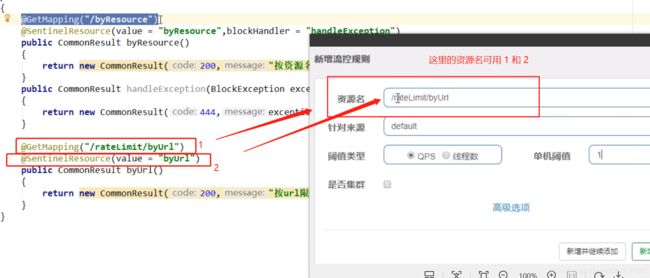
增加的流控规则随着关闭8401,流控规则消失----------》解决需要规则持久化
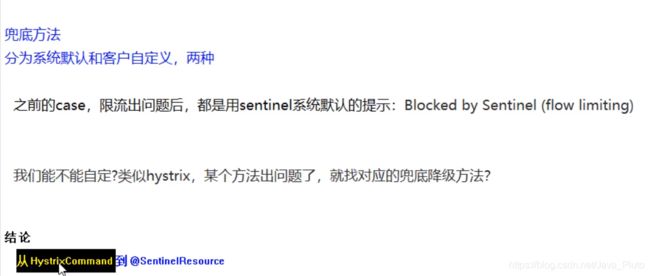
无兜底方法;

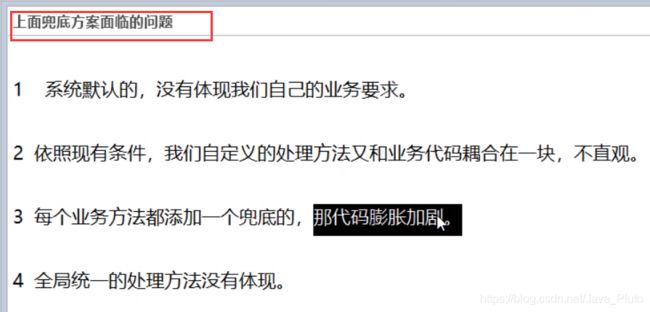
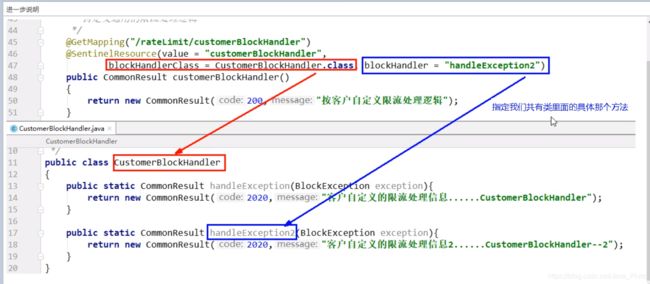
客户自定义限流处理逻辑:
5.服务熔断功能(重要)
1:ribbon系列:

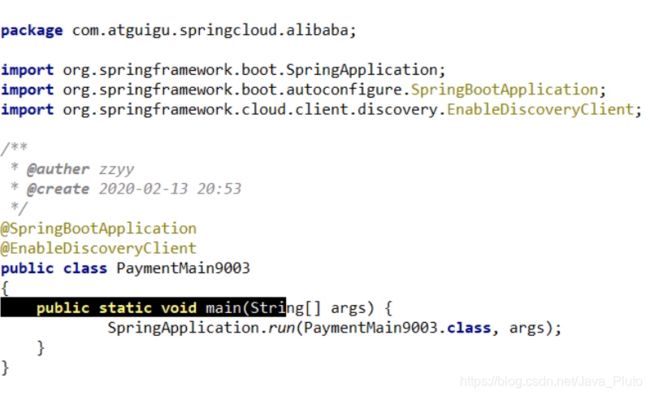

84:
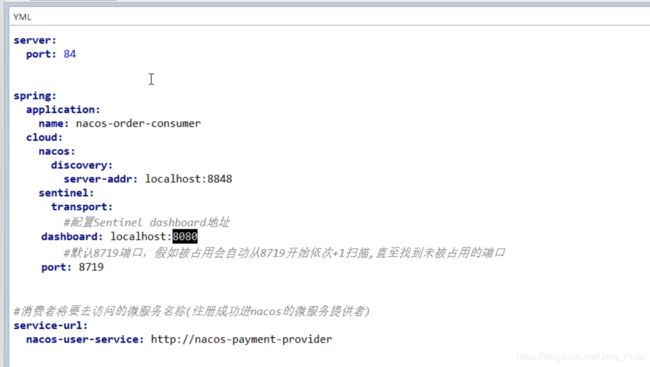
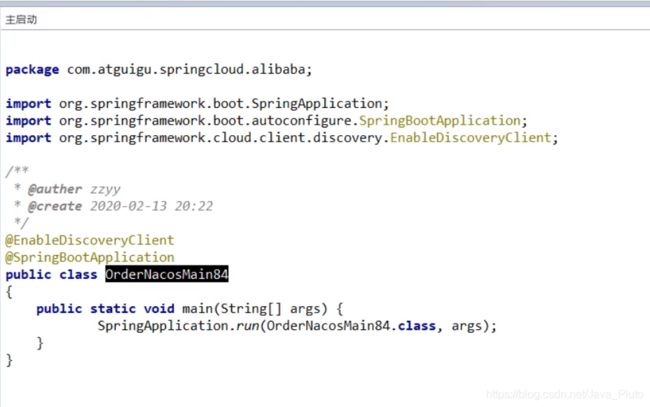


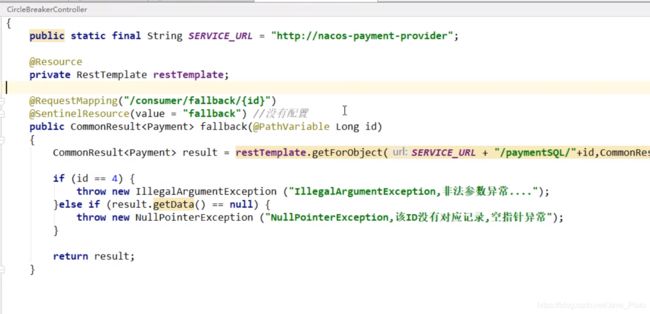
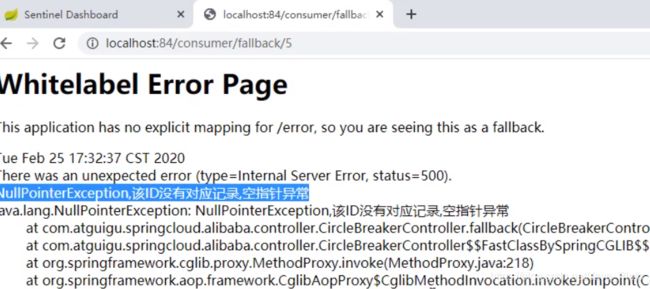

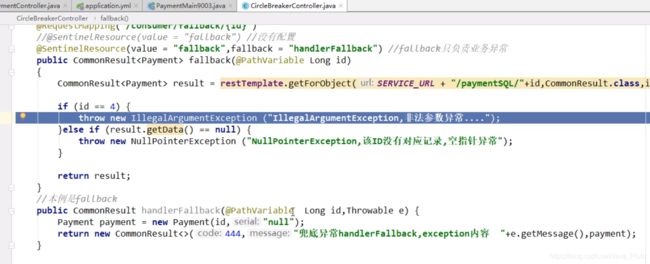

案例2;


效果:

案例3:

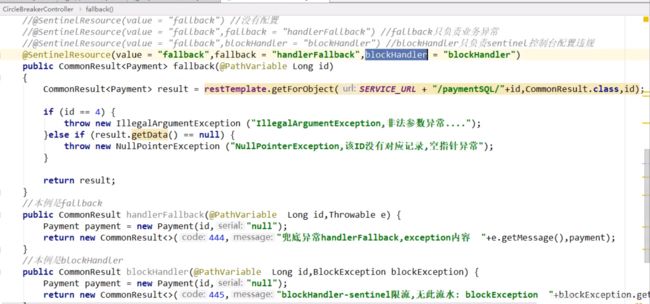

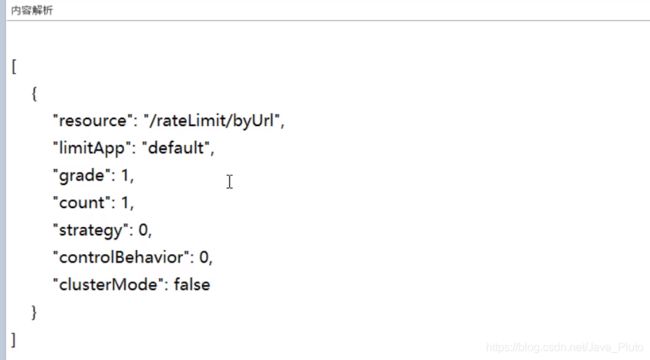
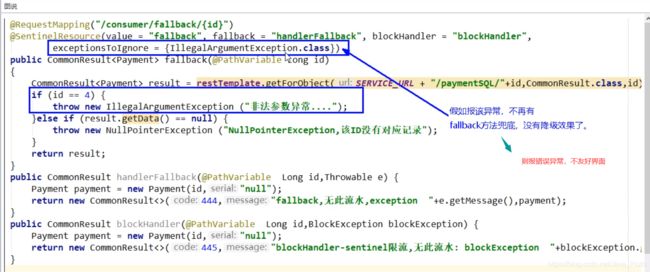
两者都配的结论:在QPS的合理配置内,走fallback,一旦超出合理配置则走bloackHandler
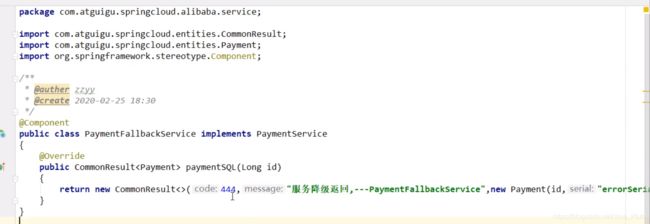
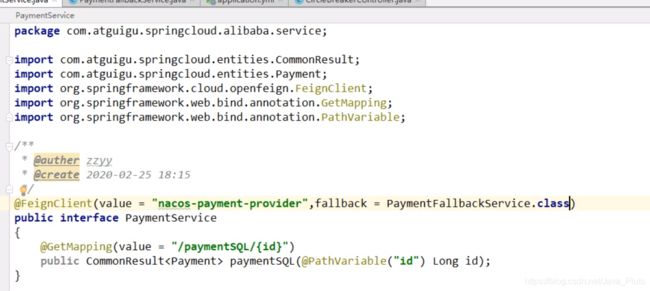
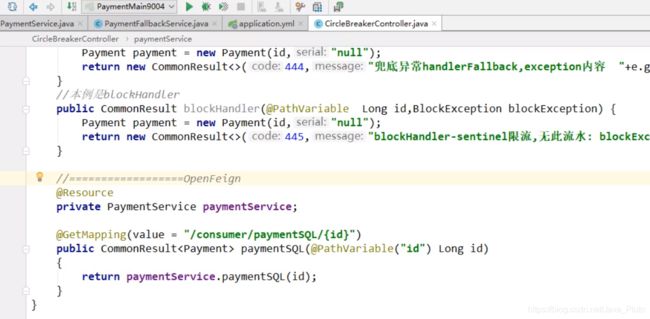
2:feign系类:
<?xml version="1.0" encoding="UTF-8"?>
<project xmlns="http://maven.apache.org/POM/4.0.0"
         xmlns:xsi="http://www.w3.org/2001/XMLSchema-instance"
         xsi:schemaLocation="http://maven.apache.org/POM/4.0.0 http://maven.apache.org/xsd/maven-4.0.0.xsd">
    <parent>
        <artifactId>cloud2020</artifactId>
        <groupId>com.eiletxie.springcloud</groupId>
        <version>1.0-SNAPSHOT</version>
    </parent>
    <modelVersion>4.0.0</modelVersion>

    <artifactId>cloudalibaba-sentinel-service8401</artifactId>

    <dependencies>
        <!-- SpringCloud ailibaba nacos-->
        <dependency>
            <groupId>com.alibaba.cloud</groupId>
            <artifactId>spring-cloud-starter-alibaba-nacos-discovery</artifactId>
        </dependency>
        <!-- SpringCloud ailibaba sentinel-datasource-nacos 持久化需要用到-->
        <dependency>
            <groupId>com.alibaba.csp</groupId>
            <artifactId>sentinel-datasource-nacos</artifactId>
        </dependency>
        <!-- SpringCloud ailibaba sentinel-->
        <dependency>
            <groupId>com.alibaba.cloud</groupId>
            <artifactId>spring-cloud-starter-alibaba-sentinel</artifactId>
        </dependency>
        <dependency><!-- 引用自己定义的api通用包,可以使用Payment支付Entity -->
            <groupId>com.eiletxie.springcloud</groupId>
            <artifactId>cloud-api-commons</artifactId>
            <version>${
     project.version}</version>
        </dependency>
        <dependency>
            <groupId>org.springframework.cloud</groupId>
            <artifactId>spring-cloud-starter-openfeign</artifactId>
        </dependency>
        <dependency>
            <groupId>org.springframework.boot</groupId>
            <artifactId>spring-boot-starter-web</artifactId>
        </dependency>
        <!--监控-->
        <dependency>
            <groupId>org.springframework.boot</groupId>
            <artifactId>spring-boot-starter-actuator</artifactId>
        </dependency>
        <!--热部署-->
        <dependency>
            <groupId>org.springframework.boot</groupId>
            <artifactId>spring-boot-devtools</artifactId>
            <scope>runtime</scope>
            <optional>true</optional>
        </dependency>
        <dependency>
            <groupId>org.projectlombok</groupId>
            <artifactId>lombok</artifactId>
            <optional>true</optional>
        </dependency>
        <dependency>
            <groupId>org.springframework.boot</groupId>
            <artifactId>spring-boot-starter-test</artifactId>
            <scope>test</scope>
        </dependency>
    </dependencies>
</project>
server:
  port: 8401

spring:
  application:
    name: cloudalibaba-sentinal-service
  cloud:
    nacos:
      discovery:
        #Nacos服务注册中心地址
        server-addr: localhost:8848
    sentinel:
      transport:
        #配置Sentin dashboard地址
        dashboard: localhost:8080
        # 默认8719端口,假如被占用了会自动从8719端口+1进行扫描,直到找到未被占用的 端口
        port: 8719
      datasource:
        ds1:
          nacos:
            server-addr: localhost:8848
            dataId: cloudalibaba-sentinel-service
            groupId: DEFAULT_GROUP
            data-type: json
            rule-type: flow

management:
  endpoints:
    web:
      exposure:
        include: '*'

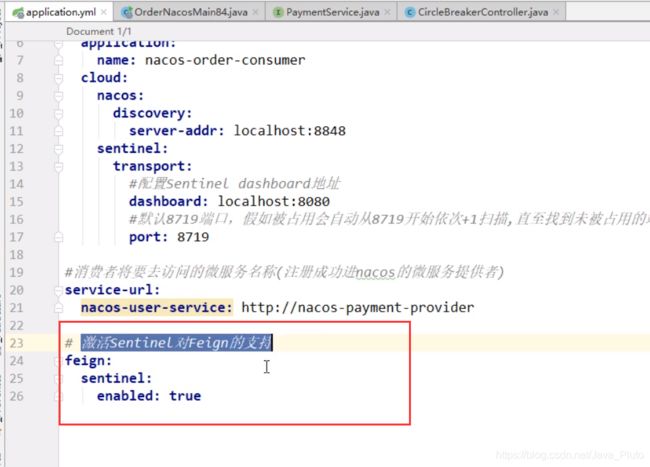
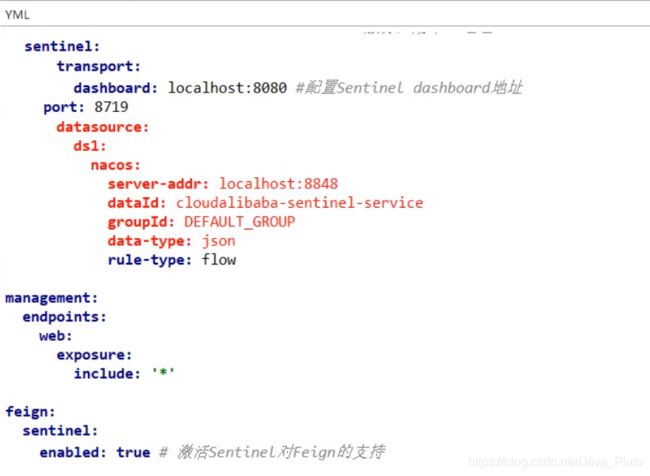
feign:
  sentinel:
    enabled: true #激活Sentinel 对Feign的支持
测试84调用9003,此时故意关闭9003微服务提供者,看84消费侧自动降级,不会被耗死

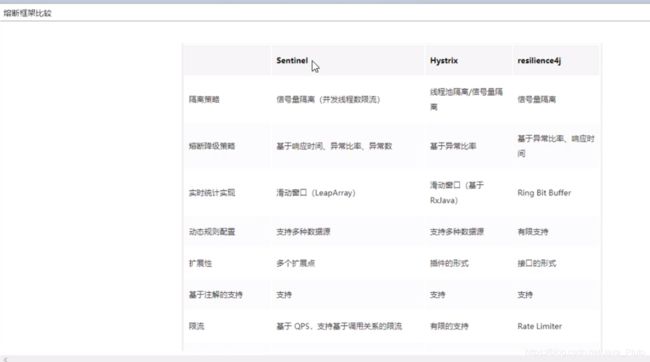
熔断框架的区别:
3.规则持久化;
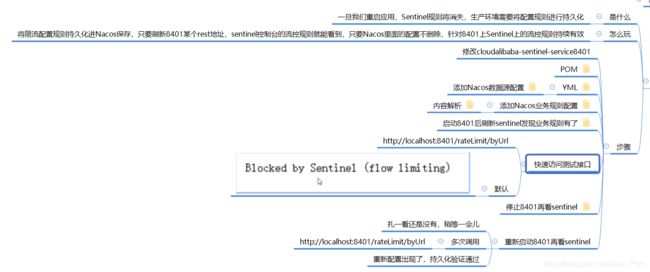
大纲:
修改cloudalibaba-sentinel-service8401
POM:

<?xml version="1.0" encoding="UTF-8"?>
<project xmlns="http://maven.apache.org/POM/4.0.0"
         xmlns:xsi="http://www.w3.org/2001/XMLSchema-instance"
         xsi:schemaLocation="http://maven.apache.org/POM/4.0.0 http://maven.apache.org/xsd/maven-4.0.0.xsd">
    <parent>
        <artifactId>cloud2020</artifactId>
        <groupId>com.eiletxie.springcloud</groupId>
        <version>1.0-SNAPSHOT</version>
    </parent>
    <modelVersion>4.0.0</modelVersion>

    <artifactId>cloudalibaba-sentinel-service8401</artifactId>

    <dependencies>
        <!-- SpringCloud ailibaba nacos-->
        <dependency>
            <groupId>com.alibaba.cloud</groupId>
            <artifactId>spring-cloud-starter-alibaba-nacos-discovery</artifactId>
        </dependency>
        <!-- SpringCloud ailibaba sentinel-datasource-nacos 持久化需要用到-->
        <dependency>
            <groupId>com.alibaba.csp</groupId>
            <artifactId>sentinel-datasource-nacos</artifactId>
        </dependency>
        <!-- SpringCloud ailibaba sentinel-->
        <dependency>
            <groupId>com.alibaba.cloud</groupId>
            <artifactId>spring-cloud-starter-alibaba-sentinel</artifactId>
        </dependency>
        <dependency><!-- 引用自己定义的api通用包,可以使用Payment支付Entity -->
            <groupId>com.eiletxie.springcloud</groupId>
            <artifactId>cloud-api-commons</artifactId>
            <version>${
     project.version}</version>
        </dependency>
        <dependency>
            <groupId>org.springframework.cloud</groupId>
            <artifactId>spring-cloud-starter-openfeign</artifactId>
        </dependency>
        <dependency>
            <groupId>org.springframework.boot</groupId>
            <artifactId>spring-boot-starter-web</artifactId>
        </dependency>
        <!--监控-->
        <dependency>
            <groupId>org.springframework.boot</groupId>
            <artifactId>spring-boot-starter-actuator</artifactId>
        </dependency>
        <!--热部署-->
        <dependency>
            <groupId>org.springframework.boot</groupId>
            <artifactId>spring-boot-devtools</artifactId>
            <scope>runtime</scope>
            <optional>true</optional>
        </dependency>
        <dependency>
            <groupId>org.projectlombok</groupId>
            <artifactId>lombok</artifactId>
            <optional>true</optional>
        </dependency>
        <dependency>
            <groupId>org.springframework.boot</groupId>
            <artifactId>spring-boot-starter-test</artifactId>
            <scope>test</scope>
        </dependency>
    </dependencies>
</project>
server:
  port: 8401

spring:
  application:
    name: cloudalibaba-sentinal-service
  cloud:
    nacos:
      discovery:
        #Nacos服务注册中心地址
        server-addr: localhost:8848
    sentinel:
      transport:
        #配置Sentin dashboard地址
        dashboard: localhost:8080
        # 默认8719端口,假如被占用了会自动从8719端口+1进行扫描,直到找到未被占用的 端口
        port: 8719
      datasource:
        ds1:
          nacos:
            server-addr: localhost:8848
            dataId: cloudalibaba-sentinel-service
            groupId: DEFAULT_GROUP
            data-type: json
            rule-type: flow

management:
  endpoints:
    web:
      exposure:
        include: '*'

feign:
  sentinel:
    enabled: true #激活Sentinel 对Feign的支持
