【3】jupyter notebook【修改主题、字体、字号、代码自动补全、变更工作目录、添加目录插件、解决工具栏隐藏问题、修改默认浏览器、默认打开位置】
相关文章:
【1】Anaconda安装超简洁教程,瞬间学会!
【2】Anaconda下:ipython文件的打开方式,Jupyter Notebook中运行.py文件,快速打开ipython文件的方法!
【3】jupyter notebook修改主题、字体、字号、代码自动补全、变更工作目录、添加目录插件、解决工具栏隐藏问题、修改默认浏览器
【4】jupyter notebook快速入门、以及常用快捷键使用
1.jupyter notebook 修改主题、字体字号等设置
github链接地址:https://codechina.csdn.net/mirrors/dunovank/jupyter-themes?utm_source=csdn_github_accelerator
这个画图比原版的好看多了吧!
安装指令:
#通过anaconda安装
conda install jupyterthemes
#通过pip安装
pip install jupyterthemes
# upgrade to latest version
pip install --upgrade jupyterthemes查看可用主题:
#通过命令jt -l 可查看主题列表,效果如下
C:\Users\dell>jt -l
Available Themes:
   chesterish     #暗色
   grade3		#亮色
   gruvboxd     #暗色
   gruvboxl		#淡棕色
   monokai		#暗色   推荐
   oceans16		#暗色  推荐   个人在使用
   onedork		#暗色  推荐
   solarizedd	#青色
   solarizedl	#淡粉色
效果如下:
文档这里介绍了详细的可用参数:
命令行用法
jt  [-h] [-l] [-t THEME] [-f MONOFONT] [-fs MONOSIZE] [-nf NBFONT]
    [-nfs NBFONTSIZE] [-tf TCFONT] [-tfs TCFONTSIZE] [-dfs DFFONTSIZE]
    [-m MARGINS] [-cursw CURSORWIDTH] [-cursc CURSORCOLOR] [-vim]
    [-cellw CELLWIDTH] [-lineh LINEHEIGHT] [-altp] [-altmd] [-altout]
    [-P] [-T] [-N] [-r] [-dfonts]
后面还有如何使用的样例,比如这样修改oceans16主题的Code(python代码)的字体与字号:
jt -t oceans16 -f fira -fs 13其他可用参数还包括-cellw(占屏比或宽度) -ofs(输出段的字号) -T(显示工具栏)等等,各位可以查阅文档;这是我的设置
jt -t oceans16 -f fira -fs 14 -cellw 95% -ofs 11 -dfs 12 -T# list available themes
# onedork | grade3 | oceans16 | chesterish | monokai | solarizedl | solarizedd
jt -l
# select theme...
jt -t chesterish
# restore default theme
# NOTE: Need to delete browser cache after running jt -r
# If this doesn't work, try starting a new notebook session.
jt -r
# toggle toolbar ON and notebook name ON
jt -t grade3 -T -N
# toggle kernel logo. kernel logo is in same container as name
# toggled with -N. That means that making the kernel logo visible is
# pointless without also making the name visible
jt -t grade3 -N -kl
# set code font to 'Roboto Mono' 12pt
# (see monospace font table below)
jt -t onedork -f roboto -fs 12
# set code font to Fira Mono, 11.5pt
# 3digit font-sizes get converted into float (115-->11.5)
# 2digit font-sizes > 25 get converted into float (85-->8.5)
jt -t solarizedd -f fira -fs 115
# set font/font-size of markdown (text cells) and notebook (interface)
# see sans-serif & serif font tables below
jt -t oceans16 -tf merriserif -tfs 10 -nf ptsans -nfs 13
# adjust cell width (% screen width) and line height
jt -t chesterish -cellw 90% -lineh 170
# or set the cell width in pixels by leaving off the '%' sign
jt -t solarizedl -cellw 860
# fix the container-margins on the intro page (defaults to 'auto')
jt -t monokai -m 200
# adjust cursor width (in px) and make cursor red
# options: b (blue), o (orange), r (red), p (purple), g (green), x (font color)
jt -t oceans16 -cursc r -cursw 5
# choose alternate prompt layout (narrower/no numbers)
jt -t grade3 -altp
# my two go-to styles
# dark
jt -t onedork -fs 95 -altp -tfs 11 -nfs 115 -cellw 88% -T
# light
jt -t grade3 -fs 95 -altp -tfs 11 -nfs 115 -cellw 88% -T2.代码补全的设置方法
使用conda或pip安装jupyter_contrib_nbextensions和jupyter_nbextensions_configurator
conda install jupyter_contrib_nbextensions
conda install jupyter_nbextensions_configurator
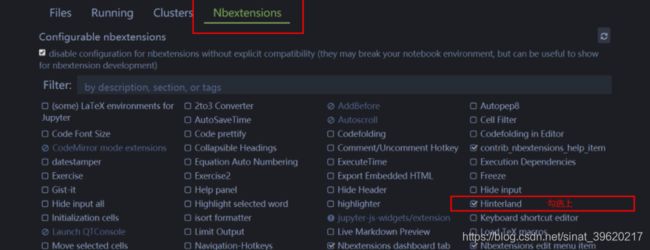
安装完成后重新打开jupyternotebook,在菜单栏可以看到 NBextensions这个选项,在其中勾选上“Hinterland”即可打开自动补全
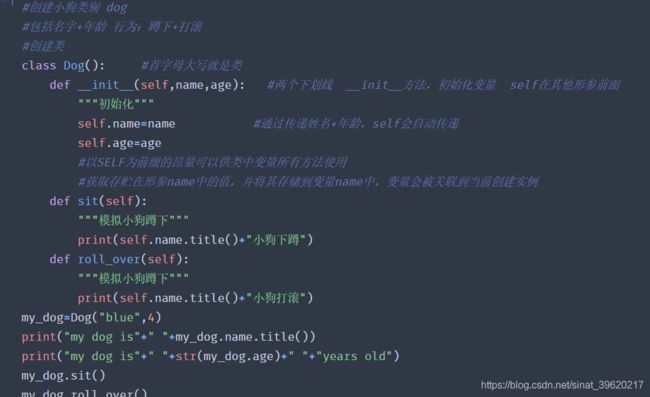
效果如下:
3.修改默认目录
打开cmd,输入命令
jupyter notebook --generate-config在提示路径下,找到jupyter_notebook_config.py文件,打开进行编辑
## The directory to use for notebooks and kernels.
#c.NotebookApp.notebook_dir = ''
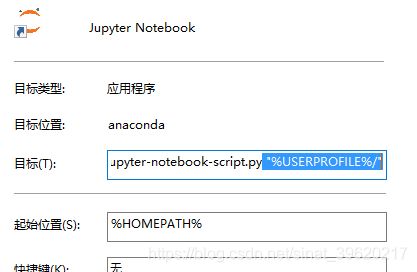
找到jupyter notebook的快捷方式,右键-属性;删除"%USERPROFILE%/"重新启动软件,看到图中,新工作目录已经生效.
4.Jupyter Notebook 添加目录插件
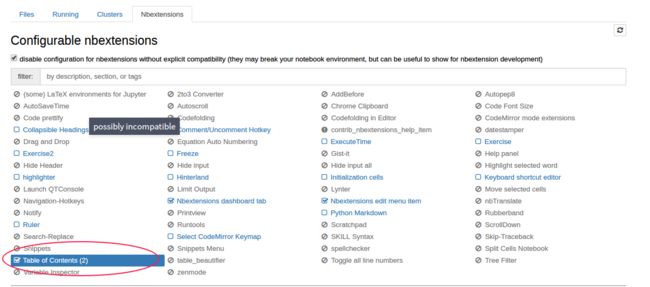
点开 Nbextensions 的选项,并勾选 Table of Contents
效果如下:
5.解决更改主题后工具栏ToolBar隐藏问题
步骤一:命令行设置toolbar可见
C:\Users\Lenovo>jt -t oceans16 -N -T6. Jupyter-notebook 修改默认浏览器和默认打开位置
在cmd里输入
jupyter notebook --generate-config
到提示的路径下找到jupyter_notebook_config.py
搜索' c.NotebookApp.notebook_dir '
## The directory to use for notebooks and kernels.
# c.NotebookApp.notebook_dir = ''

将本行的“#”去掉,并在后面的单引号中添加你想设定的目录
搜索‘ c.NotebookApp.browser ’,在下面增加以下语句:
删除c.NotebookApp.notebook_dir 前面的“#”符号(#表示注释的意思),然后修改为自己创建的目录路径,保存.py文件。不同操作系统的电脑路径不一样,windows是双斜杠(\),linux是反斜杠(/)
import webbrowser
webbrowser.register(
    "Firefox",  #自定义名字
    None,
    webbrowser.GenericBrowser(u"E:\\Program Files\\Firefox\\firefox.exe"))#指定程序所在位置
c.NotebookApp.browser = "Firefox"
重新进入软件!!!
7. 设置快捷方式中的目标与起始位置
找到jupyter notebook的快捷方式,右键-属性
默认目标栏和起始位置中会带有环境变量的参数,删掉掉% %包裹的变量,直接修改成如下图,将下图红框的地方都替换成你自己的“notebook工作文件夹”
这样修改,以后再快捷方式启动的jupyter notebook初始工作目录也是你想设置的路径。

