Requests+BeautifulSoup+xpath的网络爬虫基本用法
文章目录
-
- 1. Requests库的基本用法
-
- 1.1 指定url与封装头
- 1.2 参数列表
- 1.3 发送请求,得到回复
- 1.4 解析响应数据
- 备注:文件的下载
- 2. BeautifulSoup库的基本用法
-
- 2.1 加载对象到BeautifulSoup
- 2.2 寻找标签数据
-
- 2.2.1 .TagName方法
- 2.2.2 soup.find(TagName)方法
- 2.2.2 soup.find_all(TagName)方法
- 2.2.3 soup.select(‘某种选择器’) :star:
-
- 2.2.3.1 标签选择器
- 2.2.3.2 类选择器
- 2.2.3.3 id选择器
- 2.2.3.4 组合查找
- 2.2.3.5 属性查找
- 2.2.3.6 层级查找:star:
- 2.3 提取标签属性or文本内容
-
- 2.3.1 提取属性
- 2.3.2 提取文本
- 3. xpath的基本用法
-
- 3.1 实例化etree对象
-
- 3.1.1 本地文件
- 3.1.2 网络文件
- 3.2 xpath表达式语法
-
- 3.2.1 使用`/`表示搜索层级
-
- 起始的`/`表示根节点
- 后续的`/`表示层级(bs4的`>`)
- `//`表示跨越层级(bs4的` `)
- `./`表示从当前层级往下走
- 3.2.2 定位
-
- 3.2.2.1 属性定位
- 3.2.2.2 索引定位
- 3.2.3 输出
1. Requests库的基本用法
以搜狗搜索为例
1.1 指定url与封装头
- url就是要访问的网页地址
- 封装头是为了在爬虫中添加信息,这样服务器就会认为是浏览器发出的请求,被封杀的概率就会小一些
封装头的查看方法如下

因此这一部分的代码很简单,如下
# 指定url
my_url = 'https://www.sogou.com/web'
# 指定User-Agent封装头
my_headers = {

    'User-Agent':'Mozilla/5.0 (Windows NT 10.0; Win64; x64) AppleWebKit/537.36 (KHTML, like Gecko) Chrome/85.0.4183.102 Safari/537.36'
}
1.2 参数列表
使用搜狗搜索的时候可以发现url的参数是这样的
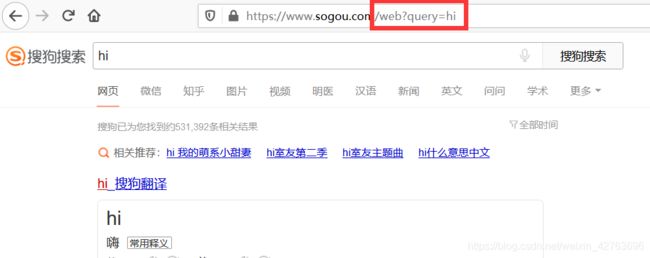
形式是query + 关键字,我们需要把这个格式封装到字典中,代码如下
my_param = {

    'query':'hi'
}
当然,如果没有参数,只想请求一个网页的话,就不需要这一步
1.3 发送请求,得到回复
如果使用get方式发送请求,使用的函数是
requests.get(url=my_url, headers=my_headers, params=my_params)
如果使用post方法发送请求,使用的函数是
requests.post(url=my_url, headers=my_headers, data=my_params)
唯一的差别就在参数的名称那一步,别的几乎完全一致。
在这里,我们用get方法获取页面,并得到返回信息,代码如下
response = requests.get(url=my_url, headers=my_headers, params=my_params)
1.4 解析响应数据
使用response.text获得响应的数据,完整代码和结果如下
import requests
# 封装头
my_headers = {

    'User-Agent':'Mozilla/5.0 (Windows NT 10.0; Win64; x64) AppleWebKit/537.36 (KHTML, like Gecko) Chrome/85.0.4183.102 Safari/537.36'
}

my_url = 'https://www.sogou.com/web'
# 处理url携带的参数:封装到字典中
my_param = {

    'query':'hi'
}
# 对指定的url发起的请求是携带参数的
response = requests.get(url=my_url, params=my_param, headers=my_headers)

page_text = response.text
print(page_text)

备注:文件的下载
参考https://blog.csdn.net/weixin_39285616/article/details/78478042
如果要下载文件的话,就不能用response.text属性了,应该用response.content,区别如下
- text 返回的是unicode 型的数据
- content返回的是bytes,二级制型的数据。
示例代码:从我的csdn中下载图片
import requests
# 获取content
content = requests.get('https://img-blog.csdnimg.cn/20200921160438911.png').content
# 写入文件
with open('20200921160438911.png','wb') as fp:
    fp.write(content)
2. BeautifulSoup库的基本用法
首先要pip install lxml,lxml是BeautifulSoup的一种解析器,可以用来解析HTML代码。
下面使用的网页文件来自于alice.html,完整代码如下
<html>

<body>
    <p>html_doc = """
    p>
    <title>The Dormouse's storytitle>
    <p class="title"><b>The Dormouse's storyb>p>
    <p class="story">Once upon a time there were three little sisters; and their names were
        <a class="sister" href="http://example.com/elsie" id="link1">Elsiea>,
        <a class="sister" href="http://example.com/lacie" id="link2">Laciea> and
        <a class="sister" href="http://example.com/tillie" id="link3">Tilliea>; and they lived at the bottom of a well.p>
    <p class="story">...p>
    """body>

html>
2.1 加载对象到BeautifulSoup
有两种方法加载对象,一种是读取本地文件,另一种加载上述使用requests方法得到的response.text
两种方法分别如下
# 0. 引入库
from bs4 import BeaitifulSoup

# 1. 将本地html的数据加载到对象中
fp = open('alice.html', 'r', encoding='utf-8')
soup = BeautifulSoup(fp,'lxml')# 文件对象 解析器

# 2. 将网上的页面源代码加载到对象中
page_text = response.text
soup = BeautifulSoup(page_text, 'lxml')

# 按照标准缩进格式输出
print(soup.prettify())
2.2 寻找标签数据
标签就是TagName,也就是 , 这些东西,BeautifulSoup提供了很便捷的提取方法,能够使用户快速获得内容。 使用将TagName替换成上述列出的标签,就可以返回找到的第一个标签值,如下图所示 与2.2.1的方法一样,都是返回第一个标签。 返回拥有该标签的全部值。 该方法功能强大,可以花式取得几乎所有的标签。接下来介绍选择器的语法 标签选择器是最简单的一种,他的语法为 类也就是标签中的class属性,类选择器的语法为 id也就是标签中的id属性,类选择器的语法为 组合查找即和单独select标签名,类名,id名进行的原理是一样的,例如查找 p 标签中,id 等于 link1的内容,二者需要用空格分开,实际的使用结果如下 属性也就是标签中的其他附加内容,属性需要用中括号括起来,由于属性和标签属于同一节点,所以中间不能加空格,否则会无法匹配到。使用的实例如下 属性仍然可以加入到2.2.3.4的组合查找,不在同一节点的空格隔开,同一节点的属性不加空格。使用实例如下 这里要介绍一下层级 单层级的查找语法如下,注意 多层级的查找语法如下,只需要标签中间有空格就行 因此,如果直接用 定位到标签后,直接使用 也可以使用 定位到标签后,直接使用两个属性一个方法 相比BeautifulSoup,xpath所需要的依赖更少,只需要 当 定位分为两种,一种是属性定位,一种是索引定位。两种方法结合使用会更加精确。 语法 索引定位就是在之前的选择器中多加入了一个索引,2.2.2.1的代码修改为下列代码 注意,这里的索引下标是从1开始的,而不是从0开始 可以观察到,所有在a标签中的内容都没有打印出来 在使用2.2.1 .TagName方法

2.2.2 soup.find(TagName)方法
soup.find('a')
output >> <a class="sister" href="http://example.com/elsie" id="link1">Elsie</a>
2.2.2 soup.find_all(TagName)方法
soup.find_all('a')
output >> [<a class="sister" href="http://example.com/elsie" id="link1">Elsie</a>,
<a class="sister" href="http://example.com/lacie" id="link2">Lacie</a>,
<a class="sister" href="http://example.com/tillie" id="link3">Tillie</a>]
2.2.3 soup.select(‘某种选择器’) ⭐️
2.2.3.1 标签选择器
标签名,实际使用结果如下soup.select('title')
output >> [<title>The Dormouse's story</title>]
2.2.3.2 类选择器
.类名
实际使用结果如下soup.select('.sister')
output>>[<a class="sister" href="http://example.com/elsie" id="link1">Elsie</a>,
<a class="sister" href="http://example.com/lacie" id="link2">Lacie</a>,
<a class="sister" href="http://example.com/tillie" id="link3">Tillie</a>]
2.2.3.3 id选择器
#id
实际使用结果如下soup.select('#link1')
output >> [<a class="sister" href="http://example.com/elsie" id="link1">Elsie</a>]
2.2.3.4 组合查找
soup.select('p #link1')
output >> [<a class="sister" href="http://example.com/elsie" id="link1">Elsie</a>]
2.2.3.5 属性查找
soup.select('a[href="http://example.com/lacie"]')
output >> [<a class="sister" href="http://example.com/lacie" id="link2">Lacie</a>]
soup.select('body a[href="http://example.com/lacie"]')
output >> [<a class="sister" href="http://example.com/lacie" id="link2">Lacie</a>]
2.2.3.6 层级查找⭐️
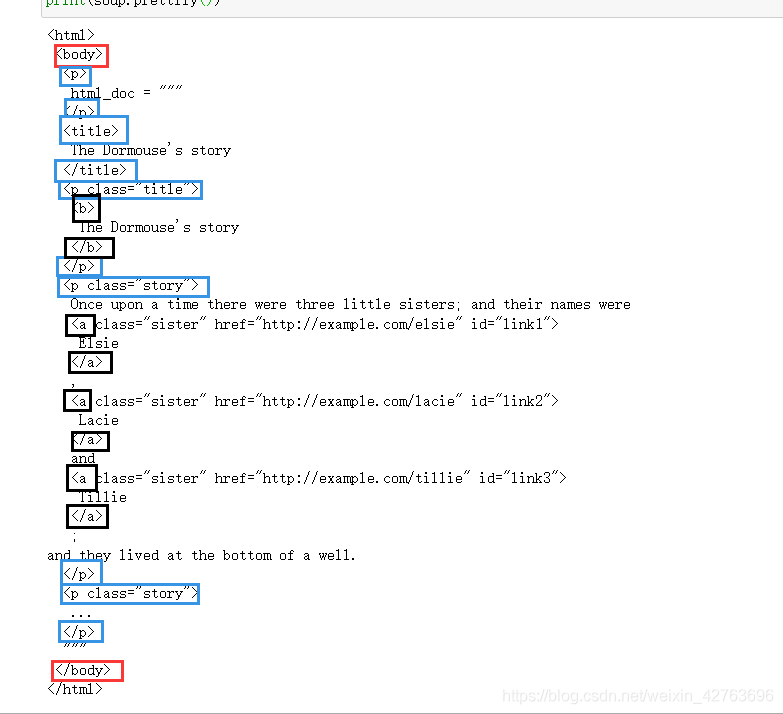
假设红框是第一层级,那么所有并列的蓝框就都是第二层级,也就是相对于红框的单层级;黑框就是第三层级,也就是相对于红框的多层级。层级查找有两种语法,分别对应着单层级查找和多层级查找。>前后一定要有空格# 标签1 > 标签2
soup.select('body > p')
# 标签1 标签2
soup.select('body a')
>查找多层级,是会失败的,如下面的运行结果soup.select('body > a')
output >> []
2.3 提取标签属性or文本内容
2.3.1 提取属性
[Name]就可以获取属性值,使用实例如下soup.select('body a.sister')[0]['href']
output >> 'http://example.com/elsie'
get方法获得属性值for link in soup.find_all('a'):
print(link.get('href'))
output >> http://example.com/elsie
http://example.com/lacie
http://example.com/tillie
2.3.2 提取文本
.text/.string/.get_text(),其中
text/get_text()可以获得一个标签中所有的内容,包括当前标签的+子节点标签的string只获得当前标签的文本内容
使用实例如下soup.select('body')[0].text
output >> 'html_doc = """\nThe Dormouse\'s story\nThe Dormouse\'s story\nOnce upon a time there were three little sisters; and their names were\nElsie,\nLacie and\nTillie;\nand they lived at the bottom of a well.\n...\n"""'
soup.select('body')[0].string
output >> None
3. xpath的基本用法
lxml这个解析器就可。并且xpath也可以在java,c++等多种语言中使用,使得爬虫不再局限于python语言。3.1 实例化etree对象
etree类似bs4中的soup对象。与bs4一样,etree拥有两种实例化方式,一种是本地文件,另一种是网络文件。3.1.1 本地文件
from lxml import etree
# 实例化好了一个etree对象,且将被解析的源码加载到了该对象中
tree = etree.parse('alice.html')
3.1.2 网络文件
import requests
from lxml import etree
headers = {
'User-Agent':'Mozilla/5.0 (Windows NT 10.0; Win64; x64) AppleWebKit/537.36 (KHTML, like Gecko) Chrome/85.0.4183.121 Safari/537.36'
}
url = 'https://bj.58.com/ershoufang/'
response = requests.get(url=url, headers=headers)
# 实例化好了一个etree对象,且将被解析的源码加载到了该对象中
tree = etree.HTML(response.text)
3.2 xpath表达式语法
3.2.1 使用
/表示搜索层级起始的
/表示根节点/放在首位的时候,表示从根节点开始定位。后续的
/表示层级(bs4的>)from lxml import etree
# 实例化好了一个etree对象,且将被解析的源码加载到了该对象中
tree = etree.parse('alice.html')
# 第一个斜杠表示从根节点开始遍历的
# 后续的斜杠表示层级递进
# 返回值为所有符合表达式规则的属性对象,使用text获取文本内容
tree.xpath('/html/body/title')[0].text
//表示跨越层级(bs4的)from lxml import etree
# 实例化好了一个etree对象,且将被解析的源码加载到了该对象中
tree = etree.parse('alice.html')
# 第一个斜杠表示从根节点开始遍历的
tree.xpath('//title')
./表示从当前层级往下走from lxml import etree
# 实例化好了一个etree对象,且将被解析的源码加载到了该对象中
tree = etree.parse('alice.html')
# 第一个斜杠表示从根节点开始遍历的
body = tree.xpath('//body')[0]
# 从body往下走
title = body.xpath('./title')[0]
print(title.text)
# 以下代码直接报错,因为/是从根节点开始的,不是从body开始的
title = body.xpath('/title')[0]
print(title.text)
output >> IndexError: list index out of range
3.2.2 定位
3.2.2.1 属性定位
tag[@attrName="attrValue"]from lxml import etree
# 实例化好了一个etree对象,且将被解析的源码加载到了该对象中
tree = etree.parse('alice.html')
# 使用类名精确定位p标签
tree.xpath('/html/body/p[@class="story"]')
# 得到符合要求的列表
output >> [<Element p at 0x1c442ae1ac8>, <Element p at 0x1c442ae1e88>]
3.2.2.2 索引定位
from lxml import etree
# 实例化好了一个etree对象,且将被解析的源码加载到了该对象中
tree = etree.parse('alice.html')
# 使用下标精准索引某一标签
tree.xpath('/html/body/p[@class="story"][1]')
# 得到符合要求的列表
output >> <Element p at 0x1c442ae1ac8>
3.2.3 输出
/text()输出当前标签的文本内容//text()输出所有子标签的内容from lxml import etree
# 实例化好了一个etree对象,且将被解析的源码加载到了该对象中
tree = etree.parse('alice.html')
# 使用text()打印输出
tree.xpath('/html/body/p[@class="story"]/text()')
# 得到文本内容
output >> ['Once upon a time there were three little sisters; and their names were\n ',
',\n ',
' and\n ',
'; and they lived at the bottom of a well.',
'...']
//text()后,就可以打印出a标签的内容了from lxml import etree
# 实例化好了一个etree对象,且将被解析的源码加载到了该对象中
tree = etree.parse('alice.html')
# 使用text()打印输出
tree.xpath('/html/body/p[@class="story"]//text()')
# 得到全部文本内容
output >> ['Once upon a time there were three little sisters; and their names were\n ',
'Elsie',
',\n ',
'Lacie',
' and\n ',
'Tillie',
'; and they lived at the bottom of a well.',
'...']